Periprosthetic Joint Infection After Shoulder Arthroplasty: Advanced Diagnosis & Management
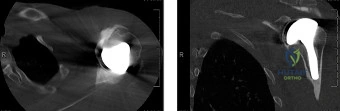
Key Takeaway
Periprosthetic joint infection (PJI) after total shoulder arthroplasty is a devastating complication with varying incidence. It's challenging to diagnose due to subtle symptoms and requires precise understanding of surgical anatomy. Management involves strategies from debridement and implant retention (DAIR) to single or two-stage exchange, tailored to infection acuity and patient factors.
A 72-year-old patient presents with a 4-month history of insidious shoulder pain following a primary total shoulder arthroplasty (TSA) performed 2 years ago. Physical examination reveals a non-tender shoulder with no erythema or sinus tract, but active range of motion is limited by pain. Radiographs appear stable. How do you approach the diagnosis of a suspected periprosthetic joint infection (PJI) in this clinical context, specifically regarding the choice of laboratory investigations and the potential role of Cutibacterium acnes?
Candidate: I would start by ordering inflammatory markers like ESR and CRP. I would perform a joint aspiration under strict aseptic conditions. Given the history, I’d be suspicious of C. acnes, so I would ensure the microbiology lab knows to perform extended incubation for at least 14 days. I might also request an MRI or nuclear medicine scan if the aspiration is inconclusive.
Failing to emphasize the "antibiotic holiday" (at least 2 weeks) prior to aspiration, which is critical for reducing false-negative results. Candidates also often suggest MRI prematurely, forgetting that metal artifact renders MRI of limited utility compared to CT or specialized nuclear medicine in the presence of an implant.
A structured approach is required: 1. Optimization: Ensure an antibiotic holiday for at least 2 weeks. 2. Markers: Serum ESR and CRP (though sensitivity is variable). 3. Aspiration: The gold standard. Must be ultrasound-guided, performed by an experienced clinician, and sent for aerobic/anaerobic cultures, cell count, and differential. 4. Microbiology: Specifically request extended anaerobic incubation (14+ days) for C. acnes. 5. Imaging: CT for bone stock/loosening; if diagnosis remains elusive, consider FDG-PET or combined Tc-99m/In-111 scans to differentiate aseptic loosening from septic failure.
The aspiration confirms an infection. You are planning a two-stage revision. Describe the surgical principles for the first stage of this procedure, and what key intraoperative steps are required to ensure the highest chance of success.
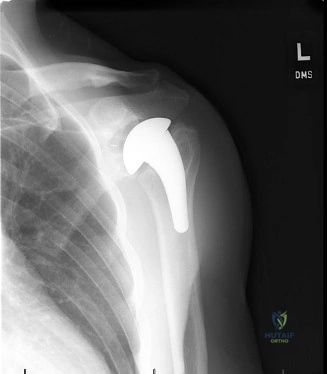
Candidate: I would use a deltopectoral approach. I’d remove the old implants, perform an aggressive debridement of all necrotic tissue and the cement mantle, and send at least 5-6 tissue samples for culture. Then, I would place an antibiotic-loaded cement spacer to maintain joint space and provide local antibiotic delivery, then close the wound.
Ignoring the critical neurovascular structures (axillary nerve, brachial plexus) during the exposure of a scarred joint or forgetting to mention the specific need for 5-6 independent tissue samples to maximize sensitivity and avoid contamination-related false positives.
Focus on three pillars: Exposure, Debridement, and Sampling. 1. Exposure: Maintain safe planes (deltopectoral), aware of scarred anatomy and the axillary nerve. 2. Sampling: Minimum of 5-6 deep tissue specimens from varied sites (synovium, pseudocapsule, bone-implant interface) for aerobic/anaerobic cultures. 3. Debridement: Complete removal of foreign bodies (cement, hardware), meticulous debridement of non-viable tissue, and pulsatile lavage. 4. Spacer: Articulating antibiotic-loaded spacer (high dose/local concentration) to maintain soft tissue tension. 5. Adjuvant: Systemic post-operative antibiotics directed by pre-op/intra-op sensitivities.
Considering the planning for your second stage reimplantation, look at the imaging provided below. How do you assess the glenoid for re-implantation, and what are your options if the bone stock is deficient?
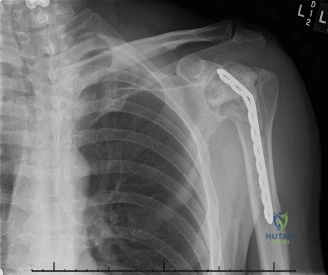
Candidate: I would evaluate the glenoid bone stock using a CT scan to assess the glenoid vault. If there is significant bone loss, I might use bone graft, either autograft or allograft, or consider a custom glenoid baseplate if it's a reverse shoulder.
Failing to mention the transition to a Reverse Total Shoulder Arthroplasty (rTSA) as a salvage strategy for glenoid bone loss and cuff compromise, or suggesting cementless fixation in a compromised bone bed without considering structural augmentation.
Structure the response: 1. Assessment: CT imaging to determine bone loss (e.g., Walch classification). 2. Strategy: If bone loss is mild, standard components may suffice. If moderate, use structural bone grafting or augmented baseplates. 3. Indication for rTSA: In cases of chronic infection leading to rotator cuff insufficiency and glenoid bone loss, a Reverse TSA is often superior as it medializes the center of rotation and relies on the deltoid for function. 4. Last Resort: If the bone bed is unsalvageable or infection risks remain too high, consider a resection (Girdlestone) arthroplasty or arthrodesis.