INTRODUCTION AND BIOMECHANICAL PRINCIPLES
The distal tibiofibular syndesmosis is a critical ligamentous complex responsible for maintaining the integrity of the ankle mortise. It is composed of the anterior inferior tibiofibular ligament (AITFL), the posterior inferior tibiofibular ligament (PITFL), the transverse ligament, and the interosseous ligament. Acute rupture of these structures, often occurring via external rotation forces applied to a dorsiflexed foot, leads to syndesmotic diastasis and profound biomechanical instability.
Even a 1-mm lateral shift of the talus can decrease the tibiotalar contact area by 42%, exponentially increasing peak articular contact pressures and predisposing the patient to rapid-onset post-traumatic osteoarthritis. Therefore, the primary objective of surgical intervention is the precise anatomical reduction of the fibula within the tibial incisura (incisura fibularis) and the maintenance of this reduction until robust ligamentous healing occurs.
Clinical Pearl: Anatomical reduction of the syndesmosis is the single most important prognostic factor in the treatment of syndesmotic injuries. Malreduction, particularly sagittal translation or rotational malalignment of the fibula, is the leading cause of poor subjective and objective postoperative outcomes.
PREOPERATIVE EVALUATION AND IMAGING
Standard radiographic evaluation must include weight-bearing (if tolerated) anteroposterior (AP), lateral, and mortise views of the ankle. Key radiographic parameters indicating syndesmotic injury include:
* Tibiofibular Clear Space: Greater than 5 mm on AP or mortise views.
* Tibiofibular Overlap: Less than 10 mm on the AP view or less than 1 mm on the mortise view.
* Medial Clear Space: Greater than 4 mm, indicating lateral talar shift and likely concomitant deltoid ligament disruption.
In cases of high clinical suspicion with equivocal static radiographs, gravity stress views, external rotation stress views, or intraoperative fluoroscopic stress testing (the "Cotton test" or external rotation stress test) are mandatory. Furthermore, advanced imaging such as MRI or CT is highly recommended to assess for subtle diastasis, rotational malreduction, and concomitant intra-articular chondral lesions.
SURGICAL TECHNIQUE: SYNDESMOSIS REPAIR
Patient Positioning and Anesthesia
The patient is placed in the supine position on a radiolucent operating table. A bump is placed under the ipsilateral hip to internally rotate the leg, bringing the lateral malleolus and fibula into a neutral, easily accessible position. A pneumatic thigh tourniquet is applied to ensure a bloodless surgical field. General or regional anesthesia (spinal or popliteal block) is utilized based on patient comorbidities and anesthesiologist preference.
Surgical Approach and Joint Preparation
- Incision: Make a 5 cm longitudinal incision parallel to the anterior border of the distal fibula. This approach allows direct visualization of the distal tibiofibular joint and the AITFL.
- Dissection: Carry the dissection through the subcutaneous tissues, taking care to identify and protect the superficial peroneal nerve and its branches, which often cross the surgical field anteriorly.
- Debridement: Expose the distal tibiofibular joint. Thoroughly debride the incisura fibularis of any hematoma, interposed periosteum, or avulsed ligamentous debris that could impede anatomical reduction.
Surgical Warning: Suturing or primarily reattaching the ruptured syndesmotic ligaments (AITFL) is generally unnecessary. The primary goal is rigid osseous stabilization; the ligaments will heal via secondary intention if the anatomical relationship is strictly maintained.
Anatomical Reduction
- Manual Reduction: Manually press the fibula into the groove in the tibia (incisura fibularis). This action shifts both the fibula and the talus medially into their normal anatomical positions.
- Clamp Application: Once manually reduced, maintain the syndesmosis in position using a large reduction clamp (e.g., Weber clamp). Place one tine on the lateral ridge of the fibula and the other on the anteromedial aspect of the tibia.
- Vector of Compression: Ensure the clamp is applied in a neutral anatomical axis. The clamp should be angled approximately 20 to 30 degrees anteriorly from the lateral to medial side to match the natural trapezoidal shape of the distal tibia. Over-compression or incorrect clamp vectors can cause iatrogenic sagittal subluxation or internal rotation of the fibula.
Intraoperative Assessment of Reduction
Before drilling, use intraoperative fluoroscopy to meticulously assess the fibular position, the reduction of the syndesmosis, and the symmetry of the ankle mortise.
Check the position of the implant and the reduction of the talus via mortise radiographs in the operating room. Ensure that the talus has been replaced precisely against the medial malleolus. If the medial clear space remains widened, it is highly likely that a soft tissue structure is obstructing reduction. The most common culprits are an inverted deltoid ligament or an interposed posterior tibial tendon.
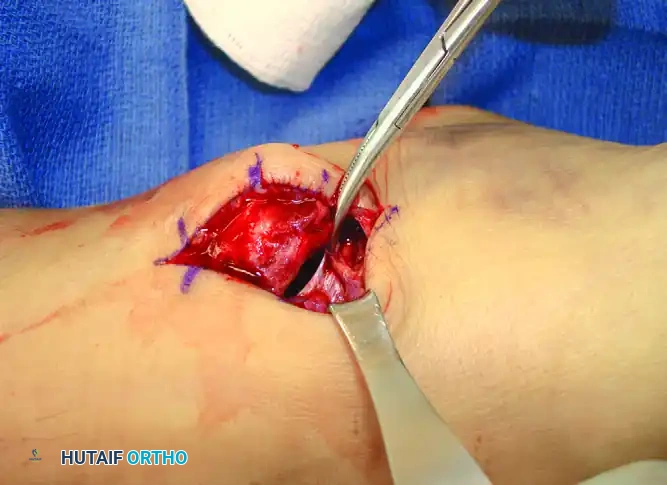
Figure: Deltoid ligament interposed and preventing reduction of the ankle fracture-dislocation. Note the widened medial clear space requiring direct medial exploration to extract the incarcerated ligament.
Trans-Syndesmotic Fixation
Under continuous fluoroscopic visualization, proceed with fixation using either metallic screws or a dynamic suture button construct.
- Trajectory: Direct the drill in a 25% anteromedial direction, beginning on the posterior aspect of the fibula. This trajectory accounts for the posterior position of the fibula relative to the center of the tibia.
- Placement: Drill approximately 2 cm proximal and parallel to the tibial plafond. The fixation can be placed through a vacant hole of a lateral fibular plate (if treating a concomitant fracture) or directly against the fibular cortex with a washer.
- Implant Selection:
- Metallic Screws: Typically, one or two 3.5 mm or 4.5 mm cortical screws are used. If the screw is planned for eventual removal, placement across four cortices (both fibular and both tibial cortices) is highly recommended. This facilitates easier retrieval should the screw break within the interosseous space prior to removal.
- Suture Button Constructs: In athletic patients and those with chronic injuries, a suture button provides semi-rigid, dynamic fixation. This allows for physiological micromotion at the syndesmosis, protects against late loss of reduction, and negates the need for routine hardware removal.
Management of Associated Proximal Fibular Fractures
In cases of Maisonneuve injuries or high Weber C fractures, an associated proximal fibular fracture may be present. Apply a small, lightweight, semitubular plate to fix the fibular fracture. Utilizing standard AO techniques, one of the screws utilized for the plate on a more distal fracture can be strategically used to transfix the distal tibiofibular joint.
CONCOMITANT PATHOLOGIES: LATERAL LIGAMENTS AND CHONDRAL LESIONS
Lateral Ankle Ligament Ruptures
The anterior talofibular ligament (ATFL) is the primary stabilizing ligament of the lateral ankle. While isolated ruptures of the ATFL can often be treated successfully with functional immobilization, combined severe injuries warrant careful consideration.
When at least two of the lateral ligaments (the ATFL and the calcaneofibular ligament [CFL]) are torn in conjunction with syndesmotic or intra-articular pathology, support exists for surgical repair. Several authors have reported superior functional results with primary surgical repair of ruptured lateral ligaments, especially in young, high-demand athletic patients. Studies randomizing patients to functional treatment versus operative repair have demonstrated that the risk of "giving way," recurrent sprains, and residual pain is significantly reduced in the surgically treated cohort.
However, routine primary repair of lateral ankle ligaments remains controversial due to higher associated costs and surgical complication risks. A comprehensive literature evaluation and meta-analysis concluded that conservative treatment of acute lateral ligament tears often results in outcomes similar to surgical treatment in the general population. Therefore, conservative functional therapy—consisting of Rest, Ice, Compression, and Elevation (RICE) immediately after injury, followed by functional bracing and early physical rehabilitation—remains the gold standard for isolated lateral sprains.
Intra-articular Chondral Lesions
Surgeons must maintain a high index of suspicion for intra-articular pathology. Taga et al. identified intra-articular chondral lesions in 89% of acutely injured ankles and in 95% of ankles with chronic instability.
Clinical Pearl: Chondral lesions larger than one-half the thickness of the articular cartilage and more than 5 mm in diameter are strongly associated with persistent postoperative pain. Ligamentous reconstruction alone will not relieve pain if large intra-articular lesions are ignored. The two distinct problems—ligamentous insufficiency and intra-articular osteochondral defects—must be evaluated and treated simultaneously, often necessitating concurrent ankle arthroscopy.
POSTOPERATIVE CARE AND REHABILITATION
The postoperative protocol must balance the need for rigid immobilization to allow ligamentous healing with the desire to prevent debilitating joint stiffness.
- Phase I (0 to 2 Weeks): Immediately postoperatively, a bulky, non-weight-bearing splint is applied from the base of the toes to the tibial tuberosity. The ankle is immobilized in a neutral position (0 degrees of dorsiflexion) to prevent equinus contracture.
- Phase II (2 to 6 Weeks): At the 2-week follow-up, the surgical incisions are inspected, and sutures are removed. A short-leg cast is applied, and the patient remains strictly non-weight-bearing for an additional 4 weeks.
- Phase III (6 to 10 Weeks): At 6 weeks, the cast is transitioned to a removable controlled ankle motion (CAM) walking boot. The patient is instructed to begin active, non-weight-bearing range-of-motion (ROM) exercises to restore dorsiflexion and plantarflexion.
- Phase IV (10 to 12 Weeks): Weight-bearing in the boot is progressively initiated at 10 to 12 weeks.
Hardware Removal Considerations
If metallic trans-syndesmotic screws were utilized, weight-bearing should be strictly limited until the hardware is removed, as physiological mortise widening during weight-bearing dorsiflexion will inevitably cause the rigid screw to loosen or break within the tibiofibular joint.
Screw removal is typically scheduled between 10 to 12 weeks postoperatively. Because the screw head is positioned just beneath the skin (or resting on a plate), removal is usually a brief, straightforward outpatient procedure. Following screw removal, patients can rapidly progress to full weight-bearing and advanced functional rehabilitation, focusing on peroneal strengthening and proprioceptive retraining to prevent chronic functional instability.
