Fulkerson Osteotomy & Tibial Realignment: Surgical Guide
Key Takeaway
The Fulkerson osteotomy is a powerful anteromedialization procedure designed to correct patellofemoral maltracking and unload the lateral patellar facet. By performing an oblique osteotomy of the tibial tubercle, surgeons can simultaneously medialize and anteriorize the extensor mechanism. This guide details the biomechanical principles, precise surgical steps, and fixation techniques for the Fulkerson procedure, alongside protocols for derotational high tibial osteotomies and proximal hip instability considerations.
Introduction to Extensor Mechanism Realignment
Patellofemoral instability and lateral facet arthrosis represent complex biomechanical challenges in orthopaedic surgery. Successful management requires a comprehensive understanding of lower extremity alignment, extensor mechanism tracking, and articular cartilage health. When conservative measures fail, surgical intervention must precisely address the underlying pathoanatomy.
The Fulkerson Osteotomy (anteromedialization of the tibial tubercle) is the gold standard for patients presenting with combined patellofemoral maltracking and lateral facet overload. Unlike the Elmslie-Trillat procedure (which provides pure medialization) or the Maquet procedure (which provides pure anteriorization), the Fulkerson technique utilizes an oblique osteotomy plane to simultaneously medialize and anteriorize the tibial tubercle.
Furthermore, in cases of severe rotational malalignment, a Derotational High Tibial Osteotomy (HTO) may be indicated to correct excessive external tibial torsion. This masterclass details the indications, biomechanics, and step-by-step surgical techniques for these powerful realignment procedures, while also addressing proximal considerations such as hip dysplasia that can contribute to global lower extremity instability.
The Fulkerson Osteotomy (Anteromedialization)
Indications and Patient Selection
The Fulkerson osteotomy is primarily indicated for patients with recurrent patellar instability associated with a laterally translated extensor mechanism, specifically when accompanied by lateral or distal patellar articular degeneration.
Key clinical and radiographic indications include:
* Elevated TT-TG Distance: A Tibial Tubercle-Trochlear Groove (TT-TG) distance greater than 20 mm on axial CT or MRI.
* Lateral Facet Overload: Symptomatic chondromalacia or focal chondral defects isolated to the lateral and/or inferior patellar facets.
* Recurrent Dislocation: Chronic patellar instability that has failed isolated soft tissue stabilization (e.g., Medial Patellofemoral Ligament [MPFL] reconstruction), or where soft tissue procedures alone would be subjected to excessive lateral vector forces.
⚠️ Surgical Warning
The Fulkerson osteotomy is strictly contraindicated in patients with advanced medial compartment or medial patellar facet arthrosis. Medializing the tubercle in these patients will critically overload the already compromised medial articular cartilage, leading to rapid symptom exacerbation.
Biomechanical Principles
The genius of the Fulkerson osteotomy lies in its oblique cut. By angling the osteotomy from anteromedial to posterolateral, the tibial tubercle fragment slides along an inclined plane. As the fragment is displaced medially to correct the Q-angle and normalize the TT-TG distance, it is obligatorily displaced anteriorly.
This anteriorization increases the moment arm of the extensor mechanism, thereby reducing the joint reaction forces across the patellofemoral joint. Specifically, it unloads the lateral and distal aspects of the patella, transferring the load to the relatively preserved proximal and medial cartilage.
Preoperative Planning and Positioning
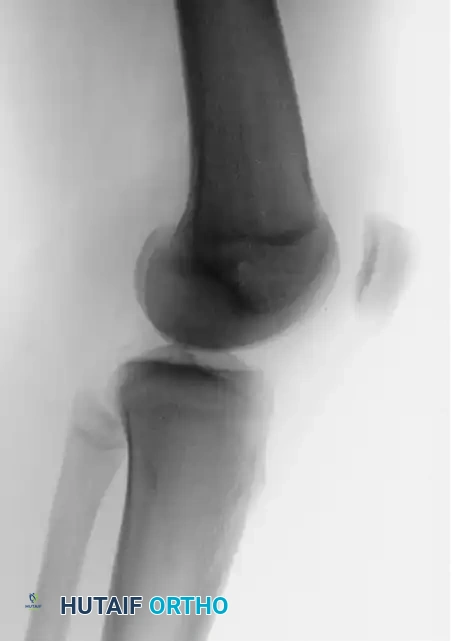
Preoperative imaging must include weight-bearing anteroposterior (AP), lateral, and Merchant (axial) views of the knee, alongside a CT scan to accurately measure the TT-TG distance and assess rotational profiles.
FIGURE 47-18A: Preoperative lateral radiograph demonstrating patellofemoral alignment prior to the Fulkerson procedure.
Patient Positioning:
1. Place the patient supine on a radiolucent operating table.
2. Apply a high thigh tourniquet.
3. Prep and drape the limb to allow free range of motion from 0 to 120 degrees of flexion.
4. A lateral post or sandbag may be used to control hip rotation during the procedure.
Surgical Technique: Step-by-Step
1. Incision and Exposure
* Make a 9-cm lateral parapatellar incision extending from the inferior pole of the patella distally along the lateral border of the patellar tendon and tibial tubercle.
* Dissect through the subcutaneous tissues to expose the extensor mechanism. The exposure is conceptually similar to the Elmslie-Trillat procedure, but the critical difference lies in the trajectory of the subsequent osteotomy.
* Perform a lateral retinacular release if indicated by severe lateral tilt, ensuring preservation of the superior lateral geniculate artery to maintain patellar vascularity.
2. Defining the Osteotomy Plane
* Expose the anterior, lateral, and medial aspects of the tibial tubercle.
* Elevate the anterior compartment musculature off the lateral aspect of the tibia just distal to Gerdy's tubercle to allow for the posterolateral exit of the saw blade.
* Insert a retractor (e.g., a Homan retractor) subperiosteally along the lateral tibia to protect the anterior tibial artery and deep peroneal nerve.
3. Executing the Oblique Cut
* Using a cutting guide or freehand technique, direct the oscillating saw from anteromedial to posterolateral. The angle of the cut (typically 45 to 60 degrees relative to the coronal plane) dictates the ratio of anteriorization to medialization. A steeper angle provides more anteriorization; a shallower angle provides more medialization.
* Extend the cut distally about 6 cm. Ensure the medial tip of the cut is more superficial, tapering smoothly into the anterior tibial crest.
4. Creating the Distal Hinge
* To prevent catastrophic propagation of the osteotomy into the tibial shaft, drill transverse holes to perforate the anterior cortex at the planned distal extent of the osteotomy.
* This allows the distal cortical bone to act as a flexible hinge rather than fracturing unpredictably.
5. Mobilization and Displacement
* Using a broad, flat osteotome, complete the osteotomy deep and just proximal to the insertion of the patellar tendon.
* Carefully pry the tuberosity medially and anteriorly along the oblique osteotomy plane.
* Displace the fragment until the Q-angle is normalized and the patella tracks centrally within the trochlear groove during trial flexion and extension. The TT-TG distance should ideally be reduced to 10–12 mm.
Fixation and Closure
Once optimal tracking is confirmed, temporarily secure the tubercle with two smooth Kirschner wires.
- Fix the osteotomy using two 4.5-mm cortical screws or fully threaded cancellous screws with washers, placed in a lag fashion from anterior to posterior.
- Ensure the screws engage the posterior tibial cortex for maximum pull-out strength.
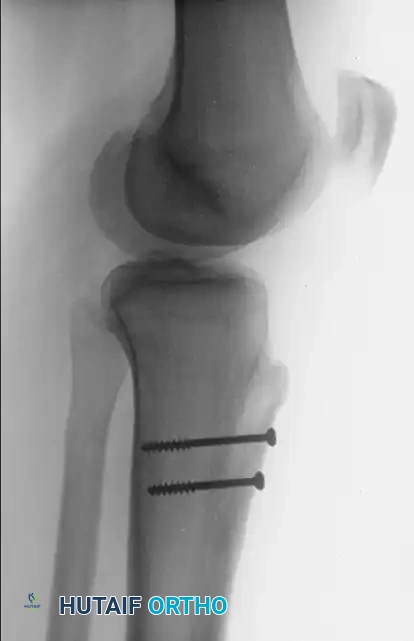
FIGURE 47-18B: Postoperative lateral radiograph demonstrating anteriorization of the tibial tubercle and secure bicortical screw fixation.
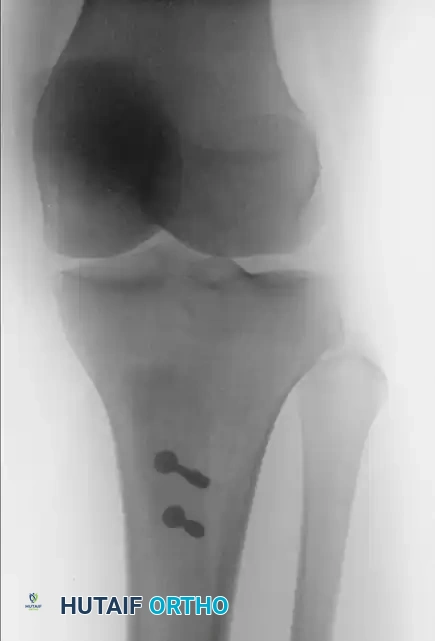
FIGURE 47-18C: Postoperative anteroposterior radiograph showing the medialized position of the tubercle and hardware placement.
- Deflate the tourniquet, achieve meticulous hemostasis, and close the wound in layers. A closed suction drain may be placed deep to the subcutaneous tissue if necessary.
Derotational High Tibial Osteotomy
Indications for Tibial Derotation
While the Fulkerson osteotomy addresses localized extensor mechanism maltracking, some patients present with profound global malalignment, such as excessive external tibial torsion. This is often part of "miserable malalignment syndrome" (increased femoral anteversion combined with compensatory external tibial torsion).
When external tibial torsion exceeds 30–40 degrees and is the primary driver of patellofemoral instability or knee pain, a Derotational High Tibial Osteotomy is indicated.
💡 Clinical Pearl
If a CT axial scan is used to determine the amount of tibial torsion, it is necessary to normalize the value to the thigh-foot angle by adding 15 degrees to the normal thigh-foot angle. The goal of correction is to reduce the thigh-foot angle to a physiologic 5 to 10 degrees of external rotation.
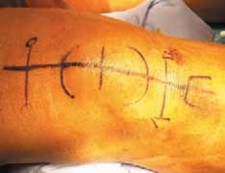
Surgical Technique: Step-by-Step
1. Proximal Tibiofibular Joint Release
* Make a 4-cm vertical inferior-lateral incision midway between the tibial tubercle and the proximal fibular head. Expose the patellar tendon and the proximal tibiofibular joint.
* CRITICAL STEP: Identify the common peroneal nerve at the neck of the proximal fibula. Carefully neurolyse and release the nerve anteriorly along its periarticular course to prevent traction neurapraxia during rotation.
* Expose the anterior tibiofibular joint and resect the articular portion (approximately 3 mm) of the fibular head using a small osteotome.
* Release the capsule of the fibular head so that it moves freely from the tibia. This step is mandatory to allow unhindered rotation of the proximal tibia and to eliminate tension on the peroneal nerve.
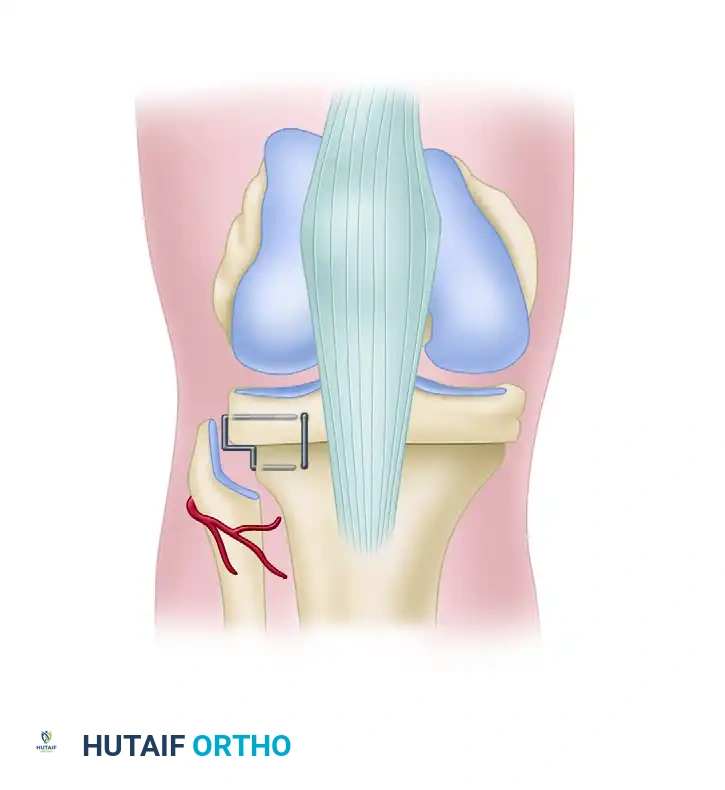
FIGURE 47-19: Derotational high tibial osteotomy. Note the proximal tibia is reduced without posterior or medial subluxation, fixed using step staples, and the peroneal nerve is carefully protected.
2. Guidewire Placement and Osteotomy
* Expose the area posterior to the patellar tendon and identify the superior portion of the tibial tubercle.
* Pass a guidewire from lateral to medial, perpendicular to the tibial shaft and strictly superior to the tibial tubercle. Confirm proper placement with fluoroscopy.
* Pass a second guidewire 2 cm posterior and parallel to the first wire. Verify its position fluoroscopically to ensure the osteotomy will remain extra-articular and proximal to the tubercle.
* Use a thin, oscillating saw blade to cut the lateral and anterior tibial cortices, meticulously protecting the patellar tendon with a retractor.
* Do not use the saw to cut the posterior and medial cortices. Instead, fracture them via a controlled osteoclasis using a wedge osteotome. Twist the osteotome gently to spread the osteotomy site, preserving a periosteal hinge if possible.
Rotational Correction and Fixation
- Before separating and rotating the distal tibia, use electrocautery or a surgical marking pen to draw a perpendicular reference line from superior to inferior, crossing the osteotomy cut.
- Internally rotate the distal tibia a predetermined amount based on preoperative physical examination and CT scanning (usually 10 to 15 mm of translation at the cortex).
- Internal rotation of the tibia should reduce the thigh-foot angle to 5 to 10 degrees. The tibial tubercle should not proceed past the midpoint of the femoral sulcus (targeting a tubercle-sulcus angle of 0 degrees).
- If rotation of the tibial tubercle into a negative tubercle-sulcus angle is necessary (which is occasionally required after a previous failed distal realignment), cut the tubercle, elevate it free from the anterior tibial cortex, and reattach it in the optimized position.
- Fix the osteotomy securely. As shown in Figure 47-19, the proximal tibia can be fixed using two or three step-staples. One staple is placed perpendicular to the other to provide multi-planar stability and prevent loss of rotation. Alternatively, modern locking plates can be utilized for rigid internal fixation.
Proximal Considerations: Hip Dysplasia and Instability
When evaluating a patient for lower extremity malalignment and patellofemoral instability, the surgeon must not develop "tunnel vision" focused solely on the knee. Proximal drivers, particularly hip dysplasia and capsulolabral instability, frequently coexist with or exacerbate distal malalignment syndromes.
Radiographic Evaluation of the Hip
Plain anteroposterior (AP) pelvis and lateral hip radiographs are essential in evaluating acetabular dysplasia and femoroacetabular impingement (FAI).
* Center-Edge (CE) Angle: A CE angle of less than 20 degrees is highly indicative of acetabular dysplasia and bony undercoverage.
* Sharp Angle: An angle greater than 42 degrees further confirms dysplastic morphology.
* Cross-over Sign: Indicates cranial retroversion of the acetabulum, often leading to anterior impingement and posterior instability.
Magnetic Resonance (MR) arthrography is the gold standard for evaluating intra-articular soft tissue pathology. It is highly sensitive for detecting labral tears, chondral delamination, or capsular redundancy that may be related to recurrent micro-instability.
Pathoanatomy and Connective Tissue Disorders
Hip instability can be broadly categorized into three distinct etiologies:
1. Loss of Bony Acetabular Containment: Classic developmental dysplasia of the hip (DDH).
2. Disruption of the Capsulolabral Complex: Often resulting from recurrent trauma or stress at extremes of motion, leading to capsulolabral deficiency.
3. Combined Bony and Soft Tissue Deficiency.
Furthermore, surgeons must maintain a high index of suspicion for systemic hyperlaxity. Connective tissue disorders such as Ehlers-Danlos syndrome, Marfan syndrome, and generalized benign joint hypermobility can result in profound, symptomatic hip and knee instability.
Treatment of these conditions must be meticulously tailored to the specific pathology. While bony containment issues may require periacetabular osteotomies (PAO), capsulolabral deficiencies are increasingly managed via advanced hip arthroscopy techniques. Failure to recognize and address these proximal rotational and stability issues will inevitably compromise the outcomes of distal procedures like the Fulkerson or Derotational HTO.
Postoperative Rehabilitation Protocols
Fulkerson Osteotomy Rehab
- Phase 1 (Weeks 0-4): The patient is placed in a hinged knee brace locked in extension. Weight-bearing is restricted to toe-touch or partial weight-bearing (up to 25%) with crutches to protect the osteotomy. Isometric quadriceps sets and straight leg raises are initiated immediately.
- Phase 2 (Weeks 4-8): Progression to full weight-bearing as tolerated, contingent upon radiographic evidence of early bony consolidation. The brace is gradually unlocked to allow progressive flexion.
- Phase 3 (Weeks 8-12+): Focus shifts to closed-chain kinetic exercises, core strengthening, and normalization of gait. Return to sports is typically delayed until 4 to 6 months postoperatively, requiring >90% limb symmetry index on functional testing.
Derotational HTO Rehab
- Due to the complete transverse nature of the osteotomy (even with a preserved hinge), rehabilitation is more conservative.
- Strict non-weight-bearing or toe-touch weight-bearing is maintained for 6 weeks.
- Frequent neurovascular checks are mandatory in the immediate postoperative period to ensure the common peroneal nerve has not been compromised by postoperative swelling or the rotational correction itself.
- Radiographic union dictates the progression to full weight-bearing, usually achieved between 8 to 12 weeks.
You Might Also Like