Posterior Approach for Distal Humerus Fractures: Anatomy, Biomechanics, & Surgical Principles
Key Takeaway
The posterior approach to the distal humerus is a cornerstone technique for complex fractures, offering unparalleled direct visualization for articular reduction and implant placement. It's crucial for restoring elbow function. Key considerations involve meticulous understanding of surgical anatomy, biomechanics, and diligent neurovascular protection, especially of the ulnar nerve.
Introduction & Epidemiology
Distal humerus fractures (DHFs) represent a significant challenge in orthopedic trauma, accounting for approximately 2-7% of all adult fractures and up to 30% of elbow fractures. These complex injuries typically result from high-energy trauma in younger individuals and low-energy falls onto an outstretched hand in osteoporotic elderly patients. The intricate anatomy of the distal humerus, with its articular surface, osseous columns, and critical neurovascular structures, necessitates meticulous surgical planning and execution to restore elbow function.
The primary goal of surgical management for DHFs is the restoration of a stable, congruent, and mobile elbow joint. This involves achieving anatomical reduction of the articular surface and stable fixation of the osseous columns to allow for early, protected range of motion. The posterior approach to the distal humerus is a cornerstone technique, particularly for complex intra-articular fractures (AO/OTA type C) and comminuted supracondylar fractures (AO/OTA type A and B with significant metaphyseal involvement), offering unparalleled direct visualization of the articular surface and ample space for implant placement. Its extensile nature allows for comprehensive reconstruction, making it the preferred route for many surgeons tackling these demanding injuries.
Surgical Anatomy & Biomechanics
A thorough understanding of the surgical anatomy and biomechanics of the distal humerus is paramount for successful operative management.
Surgical Anatomy
- Distal Humerus Osseous Structure: The distal humerus consists of two main columns: a medial column terminating in the trochlea and medial epicondyle, and a lateral column terminating in the capitellum and lateral epicondyle. These columns provide stability and articulate with the ulna and radius, respectively. The trochlea (medial) articulates with the trochlear notch of the ulna, and the capitellum (lateral) articulates with the radial head. Between these columns lie the olecranon fossa posteriorly and the coronoid and radial fossae anteriorly, which accommodate the olecranon, coronoid, and radial head during elbow flexion and extension.
- Articular Surface: The articular surface is highly congruent, critical for smooth, pain-free motion. The trochlea has a distinct groove, and its alignment dictates ulnar stability and motion. The capitellum is spherical.
-
Neurovascular Structures:
- Ulnar Nerve: Located in the cubital tunnel posteriorly to the medial epicondyle, it is highly susceptible to injury during posterior approaches and fixation. It must be identified, protected, and often transposed during surgery.
- Radial Nerve: Lies in the spiral groove of the humerus proximally, then divides into superficial (sensory) and deep (posterior interosseous nerve, motor) branches near the elbow. While less directly threatened by posterior distal humerus approaches than more proximal humeral exposures, care is needed with plate placement and screw length on the lateral column to avoid injury.
- Median Nerve & Brachial Artery: Located anteriorly to the elbow joint, they are generally protected by the anterior soft tissues during a posterior approach, but vigilance is required, especially with deep dissection or anterior plating.
- Collateral Arteries: The superior ulnar collateral, inferior ulnar collateral, radial collateral, and middle collateral arteries form an anastomotic network around the elbow joint, providing rich blood supply. These may be encountered during extensive dissection.
-
Musculature:
- Triceps Brachii: Forms the bulk of the posterior arm and inserts into the olecranon. Its management (splitting, reflecting, or osteotomy) is a key decision point in the posterior approach.
- Anconeus: A small muscle originating from the lateral epicondyle and inserting into the olecranon and posterior ulna. It often overlies the lateral column and can be part of triceps-sparing approaches.
- Brachialis: Lies anterior to the distal humerus, protecting anterior neurovascular structures.
-
Ligamentous Structures:
- Medial Collateral Ligament (MCL): Primary stabilizer against valgus stress. Composed of anterior, posterior, and transverse bundles.
- Lateral Collateral Ligament (LCL) Complex: Includes the Radial Collateral Ligament (RCL), Lateral Ulnar Collateral Ligament (LUCL), and Annular Ligament. The LUCL is crucial for posterolateral rotatory stability. These are generally undisturbed by a posterior approach but are important for overall elbow stability.
Biomechanics
- Elbow Joint Stability: The elbow derives its stability from a combination of osseous congruence (trochlear notch of ulna with trochlea of humerus), static ligamentous restraints (MCL, LCL complex), and dynamic muscular contributions.
- Column Theory: The distal humerus functions as a stable arch comprising medial and lateral columns converging proximally at the supracondylar region. Between these columns lies the articular segment. Fractures often disrupt one or both columns, as well as the articular surface. Reconstruction requires restoring the integrity of these columns and the articular block to provide mechanical stability.
- Fixation Principles: Stable fixation necessitates capturing sufficient bone stock in both columns with robust plating. Orthogonal plating (medial and posterior/posterolateral plates) and parallel plating (medial and lateral plates) are the two primary biomechanical constructs. Both provide stable fixation, though biomechanical studies suggest similar stiffness, with some preference for orthogonal plating in specific patterns to capture posterior fragments or provide increased bending stiffness. Screw length, direction, and purchase are critical to prevent loosening and achieve adequate stability for early motion.
Indications & Contraindications
Indications for Operative Management
The vast majority of displaced distal humerus fractures, particularly those involving the articular surface, benefit from surgical intervention to restore anatomy and function.
- Displaced Intra-Articular Fractures (AO/OTA Type C): These are the primary indication, including T-type, Y-type, H-type, and highly comminuted patterns. Anatomical reduction and stable internal fixation are crucial.
- Displaced Supracondylar Fractures with Articular Extension (AO/OTA Type B): Unicondylar or bicondylar fractures that involve the articular surface but primarily affect the metaphysis.
- Open Fractures: Require urgent debridement and stabilization.
- Fracture-Dislocations of the Elbow: Especially with associated coronoid or radial head fractures.
- Floating Elbow: Concurrent ipsilateral forearm fracture.
- Failure of Non-Operative Management: Progressive displacement or nonunion in previously managed non-operatively fractures.
- Polytrauma Patients: Early definitive stabilization is often preferred to facilitate patient mobility and overall management.
Indications for Non-Operative Management
Non-operative treatment is reserved for select cases due to the high risk of stiffness and malunion with conservative approaches for displaced fractures.
- Non-displaced or Minimally Displaced Extra-Articular Fractures (AO/OTA Type A): Especially in elderly or low-demand patients.
- Non-displaced or Minimally Displaced Intra-Articular Fractures (rare): In elderly, frail, low-demand patients with significant comorbidities where surgical risks outweigh potential benefits, or in cases where stable fixation is unachievable due to severe osteopenia.
- Palliative Care: In patients with very limited life expectancy or severe medical contraindications to surgery.
Contraindications
-
Absolute Contraindications:
- Active local infection in the surgical field.
- Severe, irrecoverable soft tissue compromise precluding safe wound closure.
- Patient unwilling or medically unfit to undergo anesthesia and surgery.
-
Relative Contraindications:
- Severe underlying medical comorbidities that significantly increase surgical risk (e.g., uncontrolled cardiac disease, severe coagulopathy).
- Extremely poor bone quality (severe osteopenia) preventing stable implant purchase, though often these patients still benefit from operative stabilization if possible.
- Patient non-compliance with post-operative rehabilitation protocols.
Table of Indications
| Factor | Operative Management | Non-Operative Management |
|---|---|---|
| Fracture Type | Displaced intra-articular (AO/OTA Type B, C) | Non-displaced extra-articular (AO/OTA Type A) |
| Open fractures | Minimally displaced intra-articular (select cases) | |
| Displacement | Any significant displacement or articular incongruity | Non-displaced or minimally displaced (<2mm) |
| Patient Factors | Healthy, active patients | Frail, elderly, low-demand, severe comorbidities |
| Polytrauma patients (for early stabilization) | Severe medical contraindications to surgery/anesthesia | |
| Soft Tissue Status | Acceptable soft tissue envelope | Severe soft tissue compromise (absolute contraindication) |
| Associated Injuries | Fracture-dislocations, floating elbow | Isolated fracture, otherwise stable elbow joint |
| Expected Outcome | Restoration of anatomical alignment and joint function | Risk of stiffness, malunion, poor function |
Pre-Operative Planning & Patient Positioning
Meticulous pre-operative planning and appropriate patient positioning are critical for successful outcomes.
Pre-Operative Planning
-
Clinical Assessment:
- Detailed history of injury mechanism and patient comorbidities.
- Thorough neurovascular examination: Document baseline motor and sensory function of median, ulnar, and radial nerves. Assess brachial and radial pulses.
- Soft tissue assessment: Evaluate for open wounds, abrasions, blistering, and swelling. Delay surgery if soft tissues are compromised, unless it is an open fracture requiring urgent debridement.
-
Radiographic Evaluation:
- Standard Radiographs: AP, true lateral, and oblique views of the elbow. These provide initial assessment of fracture pattern and displacement.
- Computed Tomography (CT) Scan: Essential for nearly all complex DHFs. Axial, sagittal, and coronal reconstructions, along with 3D reconstructions, are invaluable for understanding fracture morphology, articular involvement, degree of comminution, and fragment orientation. This guides implant selection and surgical strategy.
- Arteriography/Doppler Ultrasound: Indicated if vascular injury is suspected (e.g., absent pulses, expanding hematoma).
-
Surgical Approach Selection:
- The posterior approach is preferred for most complex DHFs due to its extensile exposure.
- Consider variations: olecranon osteotomy for maximum articular visualization versus triceps-sparing approaches for less comminuted patterns or specific surgical preferences.
-
Implant Selection & Templating:
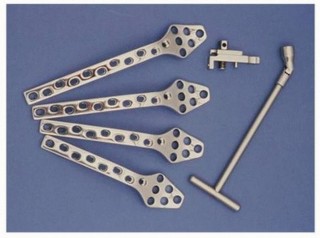
- Identify necessary implants: usually two pre-contoured locking plates (e.g., 2.7mm/3.5mm LCP systems), typically one medial and one posterior/posterolateral.
- Consider orthogonal (medial and posterior/posterolateral) versus parallel (medial and lateral) plating strategies. Most surgeons prefer orthogonal for DHF.
- Temple plates on contralateral radiographs or 3D CT reconstructions to estimate plate length, screw trajectories, and optimize construct design. Ensure adequate screw purchase in both columns and across fracture lines.
- Plan for interfragmentary lag screws to compress articular fragments.
- Have various screw lengths and types (locking, non-locking, cortical, cancellous) readily available.
- Consider bone graft (autograft or allograft) in cases of significant metaphyseal comminution or bone loss.
-
Anesthesia & Tourniquet:
- General anesthesia is standard. Regional blocks (e.g., interscalene or supraclavicular) can provide excellent post-operative analgesia.
- A pneumatic tourniquet is applied high on the arm, well-padded, to ensure a bloodless field, which is critical for identifying subtle fracture lines and neurovascular structures.
Patient Positioning
The choice of patient position significantly impacts surgical access and ergonomics.
-
Lateral Decubitus Position:
- The patient is placed in the lateral decubitus position, with the affected arm draped free and supported on a sterile arm holder or bolster across the chest.
- Advantages: Allows for a full range of elbow motion during the procedure, good access to both medial and lateral columns, comfortable for the surgeon. Gravity-assisted elbow flexion can facilitate exposure.
- Disadvantages: Requires careful positioning to prevent pressure injuries, and securing the arm can be cumbersome.
-
Prone Position:
- The patient is placed prone, with the affected arm flexed at 90 degrees and supported on an arm board.
- Advantages: Excellent access to the entire posterior aspect of the distal humerus. Allows for simultaneous harvesting of an iliac crest bone graft if needed. Offers stable positioning.
- Disadvantages: Less convenient for checking elbow range of motion intraoperatively. May require additional staff to assist with draping and arm positioning. Potential for respiratory compromise in some patients.
-
Supine Position (Arm Across Chest):
- Less commonly used for extensile posterior approaches, but can be an option for more limited exposures or when other positions are contraindicated. The arm is brought across the chest onto a support.
- Advantages: Easy patient setup.
- Disadvantages: Limited working space, especially for the lateral column.
General Positioning Principles:
* Ensure all bony prominences are adequately padded to prevent nerve palsies or pressure sores.
* Secure the patient to the operating table to prevent movement.
* Drape the limb circumferentially to allow complete freedom of movement and visualization during the procedure, extending from the shoulder to the hand.
Detailed Surgical Approach / Technique
The posterior approach provides the most direct and extensile access to the posterior aspect of the distal humerus, facilitating anatomical reduction and robust fixation of complex fractures. The primary decision revolves around the management of the triceps.
Incision & Superficial Dissection
- Incision: A straight posterior midline incision is made, centered over the olecranon, extending proximally for approximately 10-15 cm and distally to the mid-ulna. This allows for extensile exposure and facilitates potential ulnar nerve transposition.
- Subcutaneous Dissection: Full-thickness skin flaps are carefully raised medially and laterally to expose the deep fascia.
-
Ulnar Nerve Identification and Protection:
This is the most critical initial step.
- The ulnar nerve is identified proximal to the cubital tunnel, typically lying anterior to the medial head of the triceps.
- Trace the nerve distally through the cubital tunnel (between the medial epicondyle and olecranon).
- Perform an extensive neurolysis of the ulnar nerve from its entry into the cubital tunnel proximally to where it passes beneath the flexor carpi ulnaris distally.
- Mobilize the nerve and gently retract it anteriorly, often secured with a vessel loop.
- While not always strictly necessary in every case, anterior transposition of the ulnar nerve is generally recommended during open reduction internal fixation (ORIF) of DHFs via a posterior approach. This protects the nerve from direct injury during drilling, plating, and screw insertion, and prevents post-operative compression from hardware or scar tissue.
Triceps Management (Key Surgical Decision)
The method of handling the triceps directly influences the degree of exposure and potential complications.
-
Olecranon Osteotomy:
- Indications: Gold standard for complex intra-articular fractures (AO/OTA C-type) requiring maximal visualization and direct access to the articular surface.
-
Technique:
- Mark the osteotomy site. A chevron osteotomy (apex pointing proximally) or a transverse osteotomy approximately 3-4 cm distal to the tip of the olecranon is preferred. The chevron offers greater rotational stability for re-fixation.
- Drill two K-wires across the osteotomy site proximally into the olecranon, angling slightly distal, to facilitate accurate re-fixation.
- Using an oscillating saw, perform the osteotomy, protecting the underlying joint capsule.
- Reflect the olecranon and triceps proximally, exposing the entire articular surface of the distal humerus.
- Advantages: Unrivaled exposure of the articular surface and both medial and lateral columns. Allows direct visualization of the fracture pattern and facilitates anatomical reduction.
- Disadvantages: Adds a second fracture to manage, potential for nonunion, symptomatic hardware, or pain at the osteotomy site.
-
Triceps-Sparing Approaches:
- Indications: Suitable for extra-articular (AO/OTA A-type) or less comminuted intra-articular fractures where full articular exposure is not mandatory.
-
Types:
- Triceps Split (Campbell): A longitudinal incision is made directly through the triceps tendon and muscle belly. Provides reasonable exposure but can be limited distally by the olecranon. Risk of triceps weakness or dehiscence.
- Paratricipital (Bryan-Morrey): The triceps is reflected off the lateral intermuscular septum. An incision is made between the long and medial heads of the triceps. Provides good access to the posterior and lateral columns. Less disruption to the triceps origin compared to a formal reflection.
- Triceps Snip/Anconeus Approach: The anconeus muscle is detached from the olecranon and reflected laterally along with a portion of the triceps. Offers good posterolateral exposure.
- Triceps Reflecta (Kocher): The triceps is elevated subperiosteally from the olecranon and reflected proximally as a sleeve. This is a more extensile triceps-sparing approach, providing good access to both columns.
- Advantages: Avoids an olecranon osteotomy, potentially reducing complications related to osteotomy nonunion or hardware.
- Disadvantages: More limited exposure, especially for highly comminuted articular fractures, which can compromise anatomical reduction.
Fracture Exposure & Debridement
- After gaining exposure (via osteotomy or triceps-sparing approach), the hematoma is evacuated.
- Loose osteochondral fragments that are non-viable or cannot be anatomically reduced are removed. Care is taken to preserve all viable bone.
- The fracture fragments are meticulously cleaned of soft tissue interposition.
Reduction & Provisional Fixation
-
Articular Reduction (Crucial First Step):
- The primary focus is to reconstruct the articular block. Start with the largest, most stable articular fragments (often the trochlea or capitellum).
- Use small clamps, K-wires, or reduction forceps to achieve anatomical reduction of the articular surface.
- Verify reduction visually and with a small probe.
- Provisionally fix articular fragments with small K-wires. Ensure K-wires are placed in a manner that does not interfere with future plate/screw placement.
-
Column Reconstruction:
- Once the articular block is reconstructed, it is reduced to the proximal humeral shaft.
- The medial and lateral columns are reduced to restore their length, rotation, and alignment relative to the humeral shaft.
- Use external landmarks (epicondyles) and intra-articular visual cues to ensure correct rotational and varus/valgus alignment.
- Provisional fixation with K-wires or large reduction forceps.
Definitive Fixation
The goal is to achieve stable bicondylar fixation, typically using two pre-contoured locking plates.
-
Plate Application (Orthogonal Plating Strategy):
- Medial Column Plate: A medially contoured plate (e.g., 3.5mm LCP distal humerus plate) is applied to the medial column. It should extend distally to capture the medial epicondyle and provide adequate fixation to the trochlea. Proximal screws are placed into the humeral shaft.
- Posterior/Posterolateral Column Plate: A posterior or posterolateral plate (e.g., 2.7mm/3.5mm LCP distal humerus plate) is applied along the posterior aspect of the lateral column, often extending slightly posterolaterally. This plate crosses the olecranon fossa. Distal screws engage the capitellum and lateral epicondyle.
- Screw Trajectories: The key is to direct screws from each plate to avoid collision and to maximize bone purchase, ideally interlocking each column distally. Screws from the medial plate are directed laterally, and screws from the posterior/posterolateral plate are directed medially. Bicortical purchase is desirable where anatomically safe.
- Interfragmentary Compression: Lag screws should be used across fracture lines where possible, prior to or in conjunction with plate application, to achieve anatomical compression of articular and metaphyseal fragments.
- Parallel Plating Strategy: An alternative is to apply a medial plate and a lateral plate, often less common for posterior approaches as the posterior plate provides greater strength and captures posterior fragments effectively.
- Check Fixation: After applying plates and screws, confirm stability by stressing the elbow through a full range of motion. Ensure no implant impingement or loosening. Check for screw prominence, especially on the articular surface.
- Fluoroscopy: Intraoperative fluoroscopy (AP, lateral, and oblique views) is used throughout reduction and fixation to confirm anatomical alignment, articular congruity, and appropriate implant placement.
- Bone Grafting: If significant comminution or bone loss is present, especially in the metaphyseal region, cancellous bone graft (autograft or allograft) should be packed into the defect to promote healing and provide structural support.
Olecranon Re-fixation (if osteotomy performed)
- The olecranon osteotomy is re-approximated using the pre-drilled K-wire technique or reduction forceps.
- Tension Band Wiring: Two parallel K-wires are driven across the osteotomy, then bent proximally. A figure-of-eight stainless steel wire is passed around the K-wire ends and through a drill hole in the ulnar shaft, then tightened to compress the osteotomy.
- Plate and Screws: Alternatively, a small olecranon plate (e.g., 2.7mm LCP) can be used to fix the osteotomy, providing rigid fixation. This is often preferred, especially in osteoporotic bone.
- Ensure the articular surface of the olecranon is perfectly smooth after re-fixation.
Wound Closure
- Ulnar Nerve Transposition: The ulnar nerve is typically transposed anteriorly and secured in a subcutaneous pocket or beneath the flexor-pronator mass to prevent subluxation and compression.
- Layered Closure: The triceps mechanism (if reflected) or osteotomy is repaired. The deep fascia is closed. Subcutaneous tissues are approximated, and the skin is closed with sutures or staples.
- Drain: A suction drain (e.g., Hemovac) is often placed subcutaneously to prevent hematoma formation, which can contribute to stiffness and infection. It is removed when drainage is minimal.
- Sterile Dressing & Splint: A sterile dressing is applied, and the elbow is immobilized in a posterior splint at approximately 90 degrees of flexion with the forearm in neutral rotation.
Complications & Management
Distal humerus fractures and their surgical management are associated with a notable complication rate, underscoring the complexity of these injuries.
Table of Common Complications, Incidence, and Salvage Strategies
| Complication | Incidence | Key Contributing Factors | Salvage Strategies |
|---|---|---|---|
| Ulnar Neuropathy | 10-25% | Direct injury, traction, compression, HO, hardware irritation | Observation (mild/transient), neurolysis, anterior transposition, hardware removal |
| Elbow Stiffness/Contracture | 20-50% | HO, capsular scarring, inadequate rehab, prolonged immobilization | Aggressive physical therapy, static/dynamic splinting, manipulation under anesthesia (MUA), capsular release, hardware removal |
| Nonunion/Malunion | 5-15% | Inadequate reduction, unstable fixation, infection, poor bone quality, premature weight-bearing | Revision ORIF with robust fixation, structural bone grafting (autograft/allograft), osteotomy for malunion |
| Infection | 2-10% | Open fracture, extensive soft tissue dissection, poor wound care, hematoma | Superficial: Oral antibiotics, local wound care. Deep: Surgical debridement, IV antibiotics, implant retention (if stable) or staged removal/reimplantation. |
| Heterotopic Ossification (HO) | 10-30% (clinical) up to 90% (radiographic) | High-energy trauma, prolonged immobility, head injury, burns | Prophylaxis (NSAIDs, radiation), surgical excision after maturation (usually 6-12 months post-injury) |
| Post-Traumatic Arthritis | 10-20% (long-term) | Articular incongruity, retained fragments, poor cartilage quality | Arthroscopy, joint débridement, interposition arthroplasty, total elbow arthroplasty (TEA), elbow fusion (rare) |
| Hardware Prominence/Pain | 10-20% | Subcutaneous location, prominent screw heads/plate edges | Hardware removal after fracture union (typically 12-18 months post-op) |
| Olecranon Osteotomy Complications | 10-20% (nonunion, hardware pain) | Inadequate fixation, osteopenia, infection, poor healing | Revision fixation, hardware removal (if united), re-osteotomy with bone graft |
| Radial Nerve Injury | <5% (with posterior approach) | Direct injury from retractors/screws, excessive traction | Observation, EMG/NCS, exploration/neurolysis, tendon transfers (for permanent deficit) |
Management Considerations for Specific Complications
- Ulnar Neuropathy: Most often presents as paresthesia or weakness in the ulnar nerve distribution. Many cases are transient neurapraxias. If symptoms persist beyond 3-6 months, worsen, or present as a new deficit, EMG/NCS studies are warranted. Surgical exploration, neurolysis, and re-transposition may be indicated.
- Stiffness: A common and challenging complication. Early, aggressive, but protected rehabilitation is the best prevention. If stiffness develops, a stepwise approach is taken: intensive physical therapy, static progressive or dynamic splinting, and if conservative measures fail, manipulation under anesthesia (MUA) or open capsular release (often combined with hardware removal). HO prophylaxis (NSAIDs or radiation) is crucial, especially in high-risk patients.
- Nonunion/Malunion: Nonunion is typically managed with revision ORIF, often involving exchange to a more robust construct, bone grafting, and potentially biologics. Malunion may require corrective osteotomy if functional deficit is significant, or in severe cases, conversion to total elbow arthroplasty.
- Infection: Early recognition and aggressive management are paramount. For acute deep infections with stable fixation, irrigation, debridement, and culture-directed antibiotics may suffice. For chronic infections or unstable fixation, hardware removal, extensive debridement, and staged reconstruction are often necessary.
Post-Operative Rehabilitation Protocols
Post-operative rehabilitation is as critical as surgical execution for achieving optimal functional outcomes. The protocol must be tailored to the individual patient, fracture stability, bone quality, and surgeon preference, balancing the need for early motion with protection of the healing fracture.
General Principles
- Stable Fixation Dictates Protocol: The primary determinant of the rehabilitation timeline is the stability of the surgical fixation. Robust, bicortical fixation allows for earlier and more aggressive motion.
- Early, Controlled Motion: The overarching goal is to prevent stiffness and heterotopic ossification by initiating controlled active and passive range of motion (ROM) as soon as safely possible.
- Pain Management: Adequate pain control is essential to facilitate patient participation in therapy.
- Communication: Close communication between the surgeon, physical therapist, and patient is vital for successful rehabilitation.
Phases of Rehabilitation
Phase 1: Immediate Post-Operative / Early Protection (Weeks 0-3)
- Goal: Protect surgical repair, manage pain and swelling, initiate gentle, protected motion.
-
Immobilization:
- Initially, a posterior splint in approximately 90 degrees of flexion with the forearm in neutral rotation is often applied in the operating room. This protects the repair from unwanted stresses while swelling resolves.
- The splint may be removed for hygiene and gentle exercises, or a hinged elbow brace may be used for controlled motion.
-
Motion:
- Passive Range of Motion (PROM): Gentle, gravity-assisted flexion and extension within a pain-free arc, typically starting the first post-operative day if fixation is stable. Avoid forceful manipulation.
- Active-Assisted Range of Motion (AAROM): Patient uses the unaffected arm to assist the injured arm.
- Active Range of Motion (AROM): Gentle active flexion/extension, pronation/supination within comfort limits.
- Limits: Initially, the range might be restricted (e.g., 30-100 degrees) to avoid excessive stress, particularly on olecranon osteotomy sites. The range is gradually expanded.
-
Exercises:
- Gentle wrist and hand ROM exercises to prevent stiffness in these joints.
- Shoulder shrugs and pendulum exercises to maintain shoulder mobility.
- Weight-Bearing: Strictly non-weight-bearing through the upper extremity.
- Precautions: Avoid lifting, pushing, pulling. Avoid carrying objects. Protect the ulnar nerve.
- Wound Care: Monitor incision for signs of infection.
Phase 2: Progressive Mobilization / Early Strengthening (Weeks 3-6/8)
- Goal: Gradually increase ROM, initiate isometric strengthening.
-
Motion:
- Continue to progressively increase AROM and PROM, striving for a functional arc of motion (typically 30-130 degrees of flexion/extension, 50 degrees pronation/supination).
- Use of static progressive or dynamic splinting may be introduced if significant motion deficits persist.
-
Strengthening:
- Begin gentle isometric exercises for elbow flexors, extensors, pronators, and supinators.
- Progress to very light resistance exercises with elastic bands or light weights.
- Weight-Bearing: Still no significant weight-bearing or heavy lifting. Light functional activities only.
- Precautions: Continue to protect the extremity from sudden or forceful movements. Avoid activities that cause pain.
Phase 3: Advanced Strengthening & Functional Return (Weeks 8-12+)
- Goal: Maximize strength, endurance, and functional use; prepare for return to activity.
- Motion: Continue ROM exercises as needed to maintain gains.
-
Strengthening:
- Progress to isotonic strengthening exercises using weights or resistance bands.
- Focus on eccentric and concentric contractions.
- Gradually increase resistance and repetitions.
- Incorporate proprioceptive and neuromuscular control exercises.
- Weight-Bearing: Gradual increase in weight-bearing capacity. May begin light functional lifting.
-
Return to Activity:
- Sports-specific or work-specific training is initiated.
- Gradual return to light duty work by 3-4 months, progressing to full duties by 6-9 months, depending on the fracture complexity and patient's occupation.
- Return to contact sports typically not before 6-9 months, after full strength and motion are achieved and radiographic union is confirmed.
Important Considerations:
- Olecranon Osteotomy: If an olecranon osteotomy was performed, a slightly more cautious approach to elbow extension may be adopted initially to protect the healing osteotomy site, especially if fixation is less robust (e.g., tension band wiring).
- Hardware Removal: If hardware is prominent or symptomatic, removal may be considered after complete fracture union (typically 12-18 months post-operatively), after which rehabilitation may need to be modified.
- Heterotopic Ossification Prophylaxis: NSAIDs (e.g., Indomethacin) or low-dose radiation may be used in high-risk patients to prevent HO, which can severely limit ROM.
Summary of Key Literature / Guidelines
The management of distal humerus fractures has evolved considerably, with extensive literature guiding contemporary practice. The principles of anatomical reduction and stable internal fixation, allowing for early motion, remain central.
- AO Principles: The Arbeitsgemeinschaft für Osteosynthesefragen (AO Foundation) principles are foundational, emphasizing reduction of articular fragments, reconstruction of the osseous columns, and stable fixation to enable early functional rehabilitation.
-
Orthogonal vs. Parallel Plating:
- Biomechanically, both orthogonal (medial and posterior/posterolateral) and parallel (medial and lateral) plating constructs provide sufficient stability.
- Several studies, including cadaveric biomechanical analyses and clinical series, suggest that orthogonal plating may offer superior stiffness, particularly in torsion and bending , especially when the posterior plate is positioned to capture fragments of the lateral column and bridge the olecranon fossa effectively.
- A common clinical practice is to utilize a medial plate for the medial column and a posterior/posterolateral plate for the lateral column, with interlocking screws within the distal fragments. The "omega" configuration, where screws from the posterior plate are directed medially and screws from the medial plate are directed laterally, maximizes interfragmentary purchase.
- The choice between orthogonal and parallel plating often depends on the specific fracture pattern, surgeon preference, and available implants. Both approaches aim for maximal screw purchase and stable bicortical fixation.
-
Olecranon Osteotomy vs. Triceps Sparing:
- The debate regarding the optimal triceps management continues. Olecranon osteotomy remains the gold standard for complex intra-articular fractures (AO/OTA type C) , as it provides the most extensive and direct visualization of the articular surface, which is crucial for anatomical reduction. While historically associated with higher complication rates (e.g., nonunion of the osteotomy, symptomatic hardware), modern fixation techniques (e.g., plate fixation of the osteotomy) have improved outcomes.
- Triceps-sparing approaches (e.g., Bryan-Morrey, Kocher, triceps snip) are gaining favor for less comminuted fractures or in situations where full articular exposure is not strictly necessary. They theoretically reduce osteotomy-related morbidity. However, they can limit exposure, potentially compromising the quality of reduction for highly comminuted fractures.
- The decision is largely dictated by fracture complexity and the need for optimal articular visualization.
- Ulnar Nerve Management: Prophylactic anterior transposition of the ulnar nerve during posterior approaches for DHF ORIF is widely recommended. Studies have shown a significant reduction in post-operative ulnar neuropathy rates with routine transposition compared to in situ decompression or no specific management. While not universally adopted, it remains a common and prudent practice given the high incidence of nerve irritation or injury.
- Rehabilitation: Evidence consistently supports early, protected range of motion protocols to prevent post-traumatic stiffness. Prolonged immobilization is detrimental. The specific timing and aggressiveness of therapy should be guided by the stability of fixation and individualized patient factors.
- Outcomes: Modern ORIF techniques for DHF yield good to excellent functional outcomes in 70-90% of patients, with improvements in pain, range of motion, and activities of daily living. However, residual stiffness (loss of full extension or flexion) is common, and a significant minority may develop post-traumatic arthritis, necessitating further intervention.
- Future Directions: Advances in implant technology (e.g., 3D custom plates), surgical navigation, and improved biological adjuncts for bone healing continue to refine the management of these challenging injuries. Long-term studies focusing on the impact of specific plating strategies and triceps management techniques on functional outcomes are ongoing.
In conclusion, mastering the posterior approach to the distal humerus requires a deep understanding of elbow anatomy, meticulous pre-operative planning, precise surgical execution, and diligent post-operative rehabilitation. Adherence to established surgical principles and an awareness of potential complications are paramount for optimizing patient outcomes following these complex fractures.
You Might Also Like