Biceps Tendon Release and Tenodesis: Comprehensive Surgical Techniques
Key Takeaway
Pathology of the long head of the biceps tendon is a frequent source of anterior shoulder pain. Surgical management primarily involves either a simple arthroscopic tenotomy or a tenodesis procedure. This comprehensive guide details the biomechanical rationale, patient selection criteria, and step-by-step surgical techniques for both arthroscopic biceps release and tenodesis, including fixation methods and postoperative rehabilitation protocols.
INTRODUCTION AND BIOMECHANICAL RATIONALE
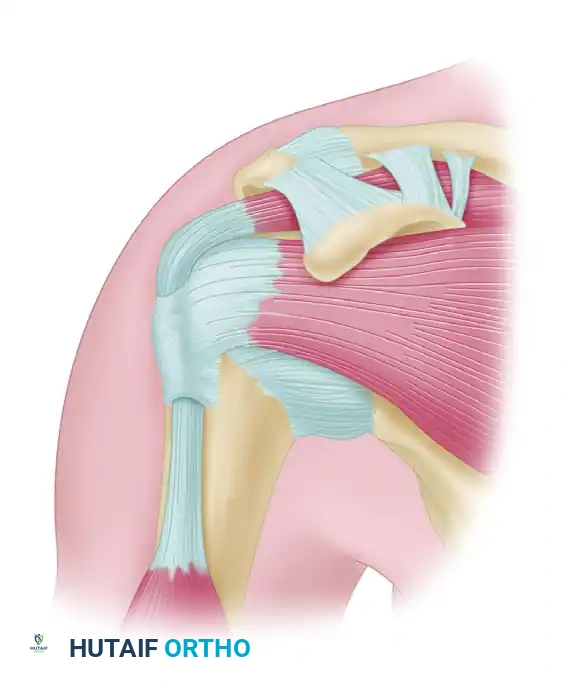
Pathology involving the long head of the biceps (LHB) tendon is a ubiquitous source of anterior shoulder pain, often presenting concomitantly with rotator cuff tears, superior labrum anterior-posterior (SLAP) lesions, and impingement syndromes. The LHB originates from the supraglenoid tubercle and the superior labrum, traversing intra-articularly before exiting the joint through the bicipital groove. It is stabilized by the biceps reflection pulley—a complex capsuloligamentous structure comprising the superior glenohumeral ligament (SGHL), the coracohumeral ligament (CHL), and the subscapularis tendon.
When conservative management for LHB tendinopathy, partial tearing, or instability fails, surgical intervention is warranted. The two primary surgical modalities are biceps tenotomy (release) and biceps tenodesis. The decision between these two procedures remains one of the most debated topics in shoulder surgery, heavily influenced by patient age, functional demands, cosmetic concerns, and the surgeon's experience.
Clinical Pearl: The LHB is a known pain generator due to its rich sympathetic innervation network, particularly within its proximal intra-articular segment. Complete removal of this segment from the joint space—whether via tenotomy or tenodesis—is the critical step in achieving pain relief.
INDICATIONS AND PATIENT SELECTION
Biceps Tenotomy (Release)
Biceps tenotomy is a highly effective, technically straightforward procedure that provides excellent pain relief with a low complication profile.
* Ideal Candidates: Older patients (typically >60 years), individuals with lower functional demands, obese patients (where a cosmetic deformity is less visible), and patients non-compliant with complex postoperative rehabilitation.
* Advantages: Shorter operative time, no risk of implant-related complications, immediate postoperative mobilization, and rapid pain relief.
* Disadvantages: Risk of the "Popeye" deformity (distal migration of the biceps muscle belly), potential for subjective cramping in the biceps muscle during resisted elbow flexion, and a theoretical mild decrease in supination endurance.
Biceps Tenodesis
Biceps tenodesis involves releasing the LHB from its glenoid origin and anchoring it to the humerus, thereby maintaining the resting length and tension of the biceps muscle.
* Ideal Candidates: Younger, active patients (<55 years), manual laborers, athletes, and patients highly concerned about cosmetic appearance.
* Advantages: Prevents the "Popeye" deformity, maintains optimal length-tension relationship of the biceps muscle, and minimizes the risk of postoperative muscle cramping.
* Disadvantages: Technically more demanding, requires implants (anchors or screws), necessitates a stricter and longer rehabilitation protocol, and carries a risk of fixation failure or persistent bicipital groove pain (if fixed proximally).
PREOPERATIVE SETUP AND POSITIONING
Proper patient positioning is critical for optimal visualization and fluid management during arthroscopic shoulder procedures.
- Anesthesia: General anesthesia is typically utilized, often supplemented with an interscalene regional nerve block to minimize intraoperative anesthetic requirements and provide robust postoperative analgesia.
- Positioning: The patient may be placed in either the lateral decubitus or the "beach chair" position, depending on surgeon preference.
- Beach Chair Position: Place the patient with the backrest elevated to approximately 45 to 60 degrees. The operative arm is placed in a specialized arm positioner, allowing for 30 to 60 degrees of forward flexion and 30 degrees of abduction. This position provides an excellent anatomical orientation and allows for easy conversion to a mini-open approach if necessary.
- Lateral Decubitus Position: The patient is placed on their non-operative side with the torso tilted 20 to 30 degrees posteriorly. The operative arm is suspended with 10 to 15 pounds of longitudinal traction in 45 degrees of abduction and 20 degrees of forward flexion.
Surgical Warning: When utilizing the beach chair position, meticulous attention must be paid to cerebral perfusion pressure. Ensure the head and neck are maintained in a neutral position to prevent hyperextension or rotation, which can compromise the vertebral or carotid arteries.
SURGICAL TECHNIQUE: ARTHROSCOPIC BICEPS TENDON RELEASE (TENOTOMY)
The goal of a simple tenotomy is to release the tendon from its superior labral attachment while minimizing the risk of a severe distal retraction (the "Popeye" deformity).
Step-by-Step Procedure (Romeo et al. Technique)
- Diagnostic Arthroscopy: Establish standard posterior and anterior viewing and working portals. Perform a comprehensive diagnostic sweep of the glenohumeral joint, meticulously evaluating the LHB for fraying, erythema, partial tearing, or instability (subluxation out of the bicipital groove).
- Tendon Mobilization: Use an arthroscopic probe to pull the extra-articular portion of the LHB into the joint. Often, a hypertrophic, hourglass-shaped tendon is identified, which cannot smoothly glide through the bicipital groove.
- Targeted Release: Introduce an arthroscopic electrocautery device (e.g., radiofrequency wand) or arthroscopic scissors through the anterior portal.
- The "Hang-Up" Technique: Release the biceps tendon precisely at its glenoid attachment (the superior labrum). Crucially, do not resect the hypertrophic proximal stump. By allowing the thickened, pathological tip of the biceps to remain, it will "hang up" and auto-tenodese within the bicipital sling (transverse humeral ligament) as it retracts. This mechanical block significantly mitigates the risk of a severe "Popeye" deformity.
- Stump Management: Use an arthroscopic shaver to carefully débride any remaining attached stump on the superior labrum to prevent mechanical catching or clicking within the joint.
Postoperative Care for Tenotomy
- Immobilization: Patients are provided a standard shoulder sling to wear for 3 to 5 days purely for comfort.
- Mobilization: Immediate, full active and passive range of motion (ROM) of the shoulder, elbow, and wrist is encouraged as tolerated.
- Restrictions: To allow the tendon to scar into the bicipital groove, no resisted elbow flexion or active supination is allowed for 1 month.
SURGICAL TECHNIQUE: BICEPS TENODESIS
When tenodesis is indicated, the surgeon must choose between an arthroscopic or a mini-open approach, as well as select the appropriate fixation construct.
Biomechanics of Fixation Constructs
Tenodesis can be performed utilizing a variety of implants, most commonly a bioabsorbable biotenodesis interference screw or two 5-mm screw-in suture anchors.
* Cyclic Loading: Biomechanical studies demonstrate that the resistance to cyclic loading (simulating physiological postoperative rehabilitation) is comparable between interference screws and dual suture anchor constructs.
* Ultimate Pull-Out Strength: The ultimate pull-out strength of a biotenodesis interference screw is biomechanically superior to suture anchors. However, both constructs exceed the physiological loads experienced during standard postoperative rehabilitation.
* Clinical Outcomes: Whether performed arthroscopically (suprapectoral) or through a mini-open approach (subpectoral), long-term clinical results are comparable. The technique should be chosen based on the specific pathoanatomy and the skills and experience of the operating surgeon.
Arthroscopic Biceps Tenodesis (Sekiya et al. Technique)
This percutaneous, intra-articular suturing technique allows for secure capture of the LHB prior to tenotomy, preventing inadvertent loss of the tendon down the bicipital groove.
- Portal Placement and Preparation: With the patient in the beach chair or lateral decubitus position, establish standard anterior and posterior portals. Clear the rotator interval to visualize the LHB entering the bicipital groove.
- First Spinal Needle Placement: Insert an 18-gauge spinal needle from the anterior aspect of the shoulder, directing it into the bicipital groove. Pass the needle through the transverse humeral ligament, the lateral aspect of the internal capsule, and directly pierce the center of the biceps tendon under direct arthroscopic visualization.
- First Suture Shuttle: Thread a No. 1 PDS suture (Ethicon, Cornelia, GA) through the spinal needle. Retrieve the intra-articular end of the PDS through the anterior working portal using an arthroscopic grasper.
- Second Spinal Needle Placement: Insert a second 18-gauge spinal needle through the transverse humeral ligament from the anterior shoulder, piercing the biceps tendon approximately 5 to 10 mm adjacent to the first puncture site.
- Second Suture Shuttle: Thread a second No. 1 PDS suture through this second spinal needle, and similarly pull the intra-articular end out of the anterior portal.
- Mattress Suture Creation: You now have two PDS sutures passing from the anterior skin, through the tendon, and out the anterior cannula. These will act as shuttle relays for a high-strength No. 2 braided, nonabsorbable polyester suture (e.g., SURGIDAC; U.S. Surgical, Norwalk, CT).
- Tie the No. 2 SURGIDAC suture to the extra-articular (skin side) strand of the first PDS.
- Pull the intra-articular end of the first PDS (exiting the anterior cannula). This shuttles the SURGIDAC from the anterior skin puncture, through the biceps tendon, and out the anterior cannula.
- Next, tie the end of the SURGIDAC (now exiting the anterior cannula) to the intra-articular end of the second PDS.
- Pull the extra-articular (skin side) end of the second PDS. This shuttles the SURGIDAC back down the anterior cannula, through the biceps tendon, and out the anterior skin puncture.
- Tendon Release and Fixation: This elegant shuttling process creates a secure, locking mattress suture through the LHB. The tendon is then released from its superior labral origin. The humerus is prepared (via reaming or anchor placement), and the captured tendon is fixed into the bicipital groove using the surgeon's preferred implant (interference screw or anchors).
Pitfall: Failure to maintain tension on the shuttle sutures during the Sekiya technique can lead to suture tangling within the subdeltoid space. Always manage sutures meticulously, utilizing distinct colored sutures if possible to avoid confusion.
Mini-Open Subpectoral Biceps Tenodesis
For patients with pathology extending distally into the bicipital groove, a subpectoral approach removes the tendon from the groove entirely, eliminating it as a source of persistent pain.
- Arthroscopic Release: The LHB is released arthroscopically at the superior labrum and allowed to retract distally.
- Incision and Dissection: A 3-cm longitudinal incision is made centered over the inferior border of the pectoralis major tendon in the axillary fold.
- Tendon Retrieval: The fascia is incised, and the pectoralis major is retracted superiorly and laterally. The LHB is identified within the bicipital groove, grasped, and delivered into the wound.
- Preparation and Fixation: The diseased proximal portion of the tendon is excised. A whipstitch is placed in the distal stump. A unicortical socket is reamed at the base of the bicipital groove (typically 7 to 8 mm in diameter). The tendon is then docked into the socket and secured with a bioabsorbable interference screw, ensuring the elbow is extended and the forearm supinated to establish appropriate resting tension.
POSTOPERATIVE REHABILITATION FOR TENODESIS
Unlike a simple tenotomy, a tenodesis requires a structured rehabilitation protocol to protect the biological healing of the tendon-to-bone interface.
- Phase I (Weeks 0-4): Protection. The patient is immobilized in a sling. Passive range of motion (PROM) for shoulder elevation and external rotation is initiated. Strict avoidance of active elbow flexion and active forearm supination is mandatory to prevent pull-out of the fixation construct.
- Phase II (Weeks 4-8): Active Motion. The sling is discontinued. Active-assisted and active range of motion (AROM) of the shoulder and elbow are initiated. Gentle isometric strengthening may begin late in this phase.
- Phase III (Weeks 8-12): Strengthening. Progressive resistive exercises for the rotator cuff, scapular stabilizers, and biceps/triceps are introduced.
- Phase IV (Months 3-6): Return to Play. Advanced plyometrics and sport-specific or work-specific functional training. Full unrestricted activity is typically permitted between 4 and 6 months postoperatively, contingent upon the restoration of symmetric strength and dynamic shoulder stability.
COMPLICATIONS AND MANAGEMENT
While both procedures are highly successful, complications can occur:
* Cosmetic Deformity: The "Popeye" sign is the most common complication of tenotomy. If highly distressing to the patient, a delayed open subpectoral tenodesis can be attempted, though muscle scarring and retraction make this technically challenging.
* Cramping: Biceps cramping is more common following tenotomy. It is usually self-limiting and responds well to conservative modalities, including massage and progressive stretching.
* Fixation Failure: Failure of a tenodesis construct typically occurs within the first 6 weeks due to non-compliance with lifting restrictions. It presents with sudden pain, an audible "pop," and the appearance of a Popeye deformity. Management is generally non-operative, effectively converting the failed tenodesis into a functional tenotomy.
* Persistent Pain: Pain following tenodesis may result from inadequate resection of the diseased tendon, unrecognized concomitant shoulder pathology, or bicipital groove tenosynovitis (if a suprapectoral fixation was utilized). Diagnostic ultrasound or MRI may be required to evaluate the integrity of the construct and the surrounding soft tissues.
===
You Might Also Like