Holstein–Lewis Fracture: Comprehensive Clinical Management & Radial Nerve Injury
Key Takeaway
A Holstein–Lewis fracture is a specific spiral or oblique fracture of the distal one-third of the humerus, uniquely characterized by its high association (10-20% incidence) with radial nerve injury. The nerve is vulnerable as it pierces the lateral intermuscular septum, often entrapped by displaced fracture fragments, necessitating careful neurovascular assessment and tailored management.
Introduction & Epidemiology
The Holstein–Lewis fracture is a specific spiral or oblique fracture of the distal one-third of the humerus, typically involving the supracondylar region, characterized by its high association with radial nerve injury. First described by Holstein and Lewis in 1963, this fracture pattern uniquely predisposes the radial nerve to entrapment or direct laceration by the sharp, displaced proximal fracture fragment. The incidence of radial nerve palsy in Holstein–Lewis fractures ranges from 10% to 20%, significantly higher than that observed in other humeral shaft fractures.
The typical mechanism of injury involves direct trauma or a low-energy torsional force to the arm, often leading to a relatively stable fracture pattern initially. However, the inherent instability and displacement of the fracture fragments, particularly the distal fragment’s anteromedial migration, can cause the radial nerve to become impinged as it exits the spiral groove and pierces the lateral intermuscular septum.
Early and accurate diagnosis, meticulous neurovascular assessment, and a clear understanding of the surgical anatomy are paramount for effective management. While many Holstein–Lewis fractures can be managed non-operatively, the presence of a complete radial nerve palsy, especially one that develops or worsens after reduction, often necessitates surgical exploration. The primary goal of treatment is stable anatomical reduction of the fracture, restoration of limb function, and expeditious recovery of radial nerve function.
Surgical Anatomy & Biomechanics
A thorough understanding of the regional anatomy is critical for managing Holstein–Lewis fractures and associated radial nerve injuries.
Distal Humeral Anatomy
The distal one-third of the humerus transitions from a cylindrical shaft proximally to a flattened, triangular shape distally. Key landmarks include the medial and lateral supracondylar ridges, which terminate at the medial and lateral epicondyles, respectively. The olecranon fossa posteriorly and the coronoid and radial fossae anteriorly accommodate the ulna and radius during elbow flexion/extension. The articular surface comprises the trochlea (medially, articulating with the ulna) and the capitellum (laterally, articulating with the radial head). Holstein–Lewis fractures occur proximal to the epicondyles, often extending into the supracondylar ridges, but typically sparing the articular surface. The fracture line is characteristically spiral or oblique, rendering the distal fragment susceptible to rotational and angular displacement.
Radial Nerve Course and Vulnerability
The radial nerve (C5-T1) is the most frequently injured nerve in humeral shaft fractures due to its intimate relationship with the humerus.
1.
Spiral Groove:
After originating from the posterior cord of the brachial plexus, the radial nerve courses posteromedially to the humerus, entering the spiral groove (radial groove) along with the profunda brachii artery. Here, it lies in direct contact with the bone, making it susceptible to injury from direct trauma or fracture displacement in the mid-shaft region.
2.
Lateral Intermuscular Septum:
In the distal one-third of the humerus, typically 10-14 cm proximal to the lateral epicondyle, the radial nerve pierces the lateral intermuscular septum to move from the posterior compartment to the anterior compartment of the arm. It then descends between the brachialis and brachioradialis muscles, anterior to the lateral epicondyle.
3.
Vulnerability in Holstein–Lewis Fractures:
In Holstein–Lewis fractures, the nerve is particularly vulnerable at the point where it pierces the lateral intermuscular septum and more distally, where it runs intimately with the periosteum of the distal humerus before branching. The sharp, often medially displaced, proximal fracture fragment can entrap, stretch, or transect the radial nerve as it passes from posterior to anterior. Furthermore, subsequent fracture displacement, particularly after initial injury or during closed reduction maneuvers, can exacerbate this entrapment or cause secondary injury.
Vascular Supply
The major arterial supply to the distal humerus primarily comes from the profunda brachii artery, which accompanies the radial nerve in the spiral groove, and branches from the brachial artery. While direct vascular injury in Holstein–Lewis fractures is less common than nerve injury, it warrants careful assessment due to the proximity of the brachial artery in the anterior compartment.
Biomechanics
The biomechanics of Holstein–Lewis fractures often involve a combination of bending and torsional forces. The oblique or spiral nature of the fracture makes it inherently unstable to rotational loads, and the smooth, often comminuted, fracture surfaces can make stable reduction challenging. The fracture pattern typically involves a distal fragment that can migrate anteromedially, further endangering the radial nerve.
Indications & Contraindications
Management of Holstein–Lewis fractures can be either non-operative or operative, largely dictated by fracture characteristics, soft tissue integrity, patient comorbidities, and critically, the status of the radial nerve.
Indications for Operative vs. Non-Operative Management
| Indication Category | Non-Operative Management | Operative Management (Open Reduction and Internal Fixation - ORIF) |
|---|---|---|
| Fracture Characteristics | - Minimally displaced, stable closed fractures. | - Open fractures (Gustilo-Anderson Classification Type I-III). |
| - Transverse or short oblique fractures without significant displacement. | - Significant fracture displacement or angulation (e.g., >20 degrees angulation, >15 mm shortening, >30 degrees rotational deformity) that is irreducible or unstable after closed reduction. | |
| - Suitable for closed reduction and cast/brace immobilization. | - Intra-articular extension (though less common in classic Holstein-Lewis). | |
| - Polytrauma patients requiring early mobilization and weight-bearing. | ||
| Radial Nerve Status | - Absence of radial nerve palsy. | - Complete radial nerve palsy (motor and sensory deficit) present at initial presentation or developing post-reduction. |
| - Incomplete radial nerve palsy (neuropraxia) with signs of spontaneous recovery. | - Palsy that worsens or develops following closed reduction attempts. | |
| - Neuropraxia that shows consistent signs of improvement on serial examination. | - Complete radial nerve palsy not showing signs of recovery after 6-12 weeks (secondary exploration indicated). | |
| Vascular Status | - Intact vascular supply. | - Associated vascular injury requiring repair. |
| Soft Tissue | - Closed injury with minimal soft tissue swelling/compromise. | - Significant soft tissue compromise (e.g., impending skin necrosis over a sharp fragment). |
| Patient Factors | - Medically unfit for surgery. | - Patient preference for definitive fixation and early rehabilitation (if appropriate). |
| - Non-compliant patient for post-operative rehabilitation (relative). | - Pathological fractures. |
Contraindications
- Absolute Contraindications: Active systemic infection or local infection at the surgical site (unless treated).
- Relative Contraindications: Severe comorbidities precluding safe anesthesia and surgery, severe osteopenia preventing stable implant fixation, severe soft tissue compromise (e.g., extensive degloving, devitalized tissue) that may compromise wound healing and increase infection risk. In such cases, external fixation may be considered as a temporary or definitive measure.
Pre-Operative Planning & Patient Positioning
Meticulous pre-operative planning is critical to optimize outcomes, particularly given the high risk of radial nerve involvement.
Pre-Operative Planning
-
Detailed Clinical Assessment:
- History: Mechanism of injury, hand dominance, occupation, pre-existing neurological deficits, medical comorbidities, medications.
- Neurovascular Exam: A thorough and reproducible assessment of radial nerve function (motor: wrist extension, thumb extension, finger extension; sensory: dorsal first web space) is paramount. Any deficits must be documented precisely. Assessment of brachial and radial pulses, capillary refill, and skin color/temperature is also mandatory.
-
Imaging Studies:
- Plain Radiographs: AP and lateral views of the humerus, including the shoulder and elbow joints, are standard. These define the fracture pattern, displacement, and comminution.
- Computed Tomography (CT) Scan: While not always required for simple Holstein–Lewis fractures, a CT with 3D reconstructions can be invaluable for complex oblique or spiral patterns, significant comminution, or suspected intra-articular extension. It aids in understanding fragment orientation and planning reduction maneuvers.
- Nerve Conduction Studies (NCS) / Electromyography (EMG): Not typically emergent. These are generally reserved for assessing nerve recovery in cases of persistent palsy where the initial decision was observation, or to establish a baseline if nerve function is equivocal and conservative management is considered.
-
Implant Selection and Templating:
- Pre-operative templating using radiographs or CT images helps select appropriate plate length and screw types. Dual plating (orthogonal or parallel) is often preferred for enhanced stability in the distal humerus. Common options include locking compression plates (LCPs) tailored for distal humerus anatomy.
- Medical Optimization: Ensure the patient is medically optimized for surgery. Address any coagulopathies or other medical issues.
- Informed Consent: Detailed discussion with the patient regarding the fracture, surgical plan, potential complications (especially persistent or new radial nerve palsy, non-union, infection, stiffness), and expected rehabilitation.
Patient Positioning
- Lateral Decubitus Position: This is a common and often preferred position for posterior approaches to the humerus. The affected arm is draped freely over a bolster or arm support, allowing full circumduction and access to the posterior aspect. The non-operative arm is supported comfortably.
- Supine Position with Arm Across Chest: The patient is supine, and the affected arm is carefully draped across the chest, sometimes supported by an outrigger or a sterile table extension. This position can also allow for a posterior approach but may offer less direct access for some reduction maneuvers.
- Supine Position with Hand Table: For anterolateral approaches, the patient is supine with the arm supported on a sterile hand table, allowing for flexion and extension of the elbow.
- Tourniquet: A pneumatic tourniquet on the proximal arm is routinely used to minimize blood loss and improve surgical visualization, particularly when identifying delicate neurovascular structures. The tourniquet time should be carefully monitored.
Detailed Surgical Approach / Technique
The primary surgical goal is anatomical reduction and stable internal fixation of the Holstein–Lewis fracture, coupled with identification and management of the radial nerve. The choice of surgical approach largely depends on surgeon preference, fracture pattern, and the need for comprehensive radial nerve exploration.
Choice of Approach
-
Posterior Approach (Triceps-Sparing or Triceps-Splitting):
- This is often the preferred approach for Holstein–Lewis fractures, particularly when radial nerve exploration is anticipated or required. It provides excellent direct visualization of the fracture site and the radial nerve as it exits the spiral groove.
- Incision: A posterior midline incision is made, typically 15-20 cm long, centered over the fracture site, extending proximally and distally to allow adequate exposure.
-
Dissection:
- The deep fascia is incised longitudinally. The ulnar nerve is identified and protected on the medial side of the triceps.
- Triceps Sparing: A common technique involves raising a medial or lateral flap of triceps from the humerus. The triceps can be reflected either medially or laterally to expose the posterior aspect of the humerus.
- Triceps Splitting: If necessary for wider exposure, the triceps muscle can be split longitudinally in the midline.
- Radial Nerve Identification: This is the most crucial step. The radial nerve must be identified proximally in the spiral groove, tracking it distally as it pierces the lateral intermuscular septum. It typically lies between the medial and lateral heads of the triceps initially. As it exits the spiral groove, it runs on the anterior aspect of the humerus, deep to the brachioradialis and brachialis, approximately 10-14 cm proximal to the lateral epicondyle. Careful blunt dissection is used, often starting proximally where the nerve is less likely to be involved in the fracture hematoma, and following it distally to the fracture site.
- Nerve Exploration: Once identified, the radial nerve is carefully inspected for entrapment, contusion, stretching, or transection. Any impingement by fracture fragments or scar tissue is meticulously released. If the nerve is intact but contused, it is protected with vessel loops or rubber drains throughout the procedure. If transected, the ends are tagged with non-absorbable sutures for potential primary repair or delayed grafting. If a complete palsy is present and no obvious transection, the nerve is thoroughly decompressed and protected.

* Fracture Exposure: After protecting the radial nerve, the fracture fragments are fully exposed. Hematoma is evacuated.
-
Anterolateral Approach (Henry Approach):
- This approach can be used, particularly for more distal diaphyseal or metaphyseal fractures without extensive posterior comminution, and when direct radial nerve exploration is not the primary indication (e.g., known neuropraxia not requiring immediate exploration).
- Incision: An anterolateral longitudinal incision, typically between the brachialis and brachioradialis.
- Internervous Plane: The interval between the brachioradialis (supplied by radial nerve) and brachialis (supplied by musculocutaneous nerve, with a small radial nerve contribution). The radial nerve itself, after piercing the lateral intermuscular septum, lies deep to the brachioradialis. It should be identified and protected.
- Exposure: The interval is developed, retracting the brachioradialis and radial nerve laterally, and the brachialis medially. This exposes the anterior and lateral aspects of the distal humerus.
Reduction and Fixation
-
Reduction:
- Once the fracture is exposed and the radial nerve is managed, careful reduction of the fragments is performed.
- Initial reduction aims to restore length and alignment, often using gentle traction, manipulation, and direct reduction clamps (e.g., Weber clamps, Verbrugge clamps).
- Provisional fixation is achieved with K-wires or small bone clamps. Rotational alignment is crucial and can be assessed by comparing the epicondylar axis or referencing the bicipital groove.
- The spiral or oblique nature often allows for lag screw fixation across the fracture line prior to plating, enhancing interfragmentary compression.
-
Internal Fixation:
-
Dual Plating:
For distal humeral diaphyseal or metaphyseal fractures, dual plating is generally preferred for enhanced stability.
- Orthogonal Plating: A common technique involves a posterior plate (e.g., 3.5mm LCP, reconstruction plate) positioned along the posterior column of the humerus, and a second plate (e.g., 3.5mm LCP, dynamic compression plate) placed laterally. The plates are oriented approximately 90 degrees to each other. This construct provides excellent biomechanical stability against bending and torsional forces.
- Parallel Plating: Two parallel plates (e.g., two 3.5mm LCPs) placed on the posterior aspect of the distal humerus, straddling the olecranon fossa (if sufficiently distal), or on posterolateral and posteromedial aspects. This configuration is more common for complex articular/supracondylar fractures but can be adapted.
- Screw Fixation: At least 6-8 cortices of purchase are typically desired on either side of the fracture, implying 3-4 bicortical screws per fragment. Locking screws are used in metaphyseal bone or in comminuted areas to improve stability. Standard cortical screws are used for diaphyseal fixation.
- Ensure the plates do not impinge on the radial nerve or other neurovascular structures. The plates should be contoured to fit the complex anatomy of the distal humerus.
-
Dual Plating:
For distal humeral diaphyseal or metaphyseal fractures, dual plating is generally preferred for enhanced stability.
-
Final Assessment:
- Confirm fracture reduction and stability clinically and radiographically (intraoperative fluoroscopy).
- Recheck radial nerve function if possible before closure (e.g., by direct stimulation or careful observation of muscle twitch if under light anesthesia).
- Ensure hemostasis.
- Irrigate the wound thoroughly with saline.
- Close the wound in layers. A drain may be considered if significant dead space or hematoma is anticipated.
Complications & Management
Complications associated with Holstein–Lewis fractures and their surgical management can significantly impact patient outcomes. Careful recognition and prompt management are crucial.
Common Complications, Incidence, and Salvage Strategies
| Complication | Incidence | Salvage Strategy / Management |
|---|---|---|
| Radial Nerve Palsy (Persistent/New) | 10-20% (initial) | Initial: Most neuropraxias recover spontaneously within 3-6 months. Observe, protect the nerve, monitor with serial clinical exams. If complete palsy at presentation: Immediate surgical exploration with ORIF is often recommended if nerve is entrapped or lacerated by fragments. If palsy develops post-reduction: Immediate exploration. If palsy persists >3-6 months post-injury: Consider secondary surgical exploration (neurolysis, repair, or grafting). Chronic palsy (>1 year): Tendon transfers (e.g., pronator teres to ECRB, FCR to EDC, palmaris longus to EPL) for functional restoration. |
| Non-Union | 5-15% | Causes: Inadequate fixation, poor biological environment, infection, severe comminution, smoking. Management: Revision ORIF with robust fixation (dual plating), debridement of fibrous tissue, interposition bone grafting (autograft or allograft), potentially electrical stimulation. |
| Malunion | 5-10% | Causes: Inaccurate reduction, premature weight-bearing, failure of fixation. Management: If symptomatic (pain, limited ROM, cosmetic deformity), corrective osteotomy and revision internal fixation. Minor malunion may be observed. |
| Infection | 1-5% | Prophylaxis: Preoperative antibiotics, meticulous aseptic technique. Management: Surgical debridement, thorough irrigation, cultures, appropriate intravenous antibiotic therapy. May require staged treatment with removal of hardware and re-fixation. |
| Elbow Stiffness/Arthrofibrosis | Common, variable | Prophylaxis: Early, protected range of motion (ROM) exercises post-op. Management: Intensive physical therapy, dynamic splinting. If severe and recalcitrant, surgical arthrolysis (open or arthroscopic) to release adhesions and excise heterotopic ossification. |
| Hardware Failure | 2-5% | Causes: Inadequate fixation, premature weight-bearing, poor bone quality, non-union. Management: Revision surgery with removal of failed hardware, re-reduction, and more robust fixation (often with bone grafting if non-union is present). |
| Heterotopic Ossification (HO) | Variable | Prophylaxis: NSAIDs (e.g., Indomethacin) for 3-6 weeks post-op, or low-dose radiation in high-risk patients. Management: If symptomatic and mature (typically 6-12 months post-onset), surgical excision with postoperative prophylaxis. |
| Complex Regional Pain Syndrome (CRPS) | <1% | Management: Early recognition, multidisciplinary approach including pain management specialists, physical therapy, pharmacological agents (gabapentinoids, tricyclics), stellate ganglion blocks. |
| Vascular Injury | Rare (<1%) | Management: Prompt surgical exploration, vascular repair (direct repair, interposition graft) by a vascular surgeon, often requiring revascularization before definitive fracture fixation. |
Post-Operative Rehabilitation Protocols
A structured and progressive post-operative rehabilitation program is essential to optimize functional recovery, restore range of motion, and prevent stiffness while protecting the fracture fixation and allowing for radial nerve recovery. The protocol must be individualized based on fracture stability, fixation quality, and radial nerve status.
General Principles
- Pain Management: Adequate pain control is critical to allow for early motion.
- Edema Control: Elevation, compression.
- Early Mobilization: The goal is to initiate protected motion as early as possible to prevent elbow stiffness, a common complication of distal humeral fractures.
- Protection: The limb must be protected from unprotected weight-bearing or sudden forceful movements until union is established.
- Radial Nerve Monitoring: Meticulous monitoring of radial nerve function (motor and sensory) is crucial, with documentation at each visit.
Phased Rehabilitation Protocol
Phase 1: Immediate Post-Operative (0-2 Weeks)
*
Immobilization:
* Posterior splint or removable elbow brace in 90 degrees of flexion with forearm in neutral rotation. This is typically used for comfort and protection for the first 1-2 weeks.
* If fixation is highly stable, a sling alone may be sufficient to support the arm.
*
Radial Nerve:
Continue monitoring. If the nerve was explored and found to be intact but contused, protect the limb. If primary nerve repair was performed, the arm might be immobilized for longer (e.g., 3-4 weeks) to protect the repair site.
*
Exercises:
*
Hand and Wrist:
Active and passive range of motion (ROM) exercises for the wrist, hand, and fingers to prevent stiffness and maintain circulation.
*
Shoulder:
Pendulum exercises, active-assisted shoulder flexion, extension, abduction, and rotation (within pain limits) to prevent shoulder stiffness.
*
Elbow:
Gentle active-assisted ROM (AAROM) and passive ROM (PROM) of the elbow, typically 30-90 degrees of flexion/extension, initiated as soon as pain allows and dictated by surgical stability.
No active biceps/triceps contractions against resistance.
*
Weight-Bearing:
Non-weight-bearing (NWB) for the operative extremity.
*
Wound Care:
Maintain clean, dry surgical dressing. Suture removal around 10-14 days.
Phase 2: Early Mobilization & Strengthening (2-6 Weeks)
*
Immobilization:
Transition to a removable elbow brace for protection as needed, especially during sleep or high-risk activities.
*
Radial Nerve:
Continue monitoring. If recovery is not evident, consider EMG/NCS at 6 weeks for baseline and follow-up. Continue passive stretching to prevent contractures in muscles innervated by the radial nerve if paralysis persists.
*
Exercises:
*
Elbow:
Progress AAROM and PROM towards full flexion and extension (0-140 degrees), as tolerated. Start gentle active ROM (AROM) exercises for the elbow.
*
Forearm:
Gentle supination and pronation AROM.
*
Isometric Exercises:
Gentle isometric contractions of the biceps, triceps, and forearm muscles, avoiding resistance that may stress the fracture site.
*
Weight-Bearing:
Still NWB, protect the limb from sudden loads.
*
Therapist Role:
Close supervision by a physical therapist is crucial to guide progression and ensure proper technique.
Phase 3: Progressive Strengthening (6-12 Weeks)
*
Fracture Healing:
Radiographic signs of callus formation and early union should be evident.
*
Radial Nerve:
If radial nerve recovery is progressing, continue exercises. If no recovery, discuss secondary exploration or tendon transfers.
*
Exercises:
*
Elbow:
Continue to maximize elbow ROM.
*
Progressive Resistance Exercises (PREs):
Gradually introduce light resistance exercises for the elbow flexors, extensors, forearm supinators, and pronators. Start with light weights or resistance bands.
*
Grip Strengthening:
Initiate grip strengthening exercises.
*
Weight-Bearing:
Gradual progression to light functional activities, with careful avoidance of heavy lifting or repetitive strenuous tasks.
*
Functional Training:
Begin incorporating exercises that mimic daily activities.
Phase 4: Advanced Strengthening & Return to Activity (12+ Weeks)
*
Fracture Healing:
Clinical and radiographic evidence of solid union.
*
Radial Nerve:
If recovery is complete, continue strengthening. If partial recovery, continue therapy and consider bracing/splinting for function. If no recovery, further discussions regarding reconstructive options.
*
Exercises:
*
Advanced PREs:
Progress to moderate to heavy resistance exercises for all upper extremity muscle groups.
*
Sport-Specific or Work-Specific Training:
Tailor exercises to patient's occupational or recreational demands.
*
Proprioceptive Training:
Exercises to improve joint position sense and stability.
*
Return to Activity:
Gradual return to full activities, including sports or heavy labor, typically between 4-6 months, once full strength, ROM, and stability are achieved. Close monitoring for any pain or instability.
Summary of Key Literature / Guidelines
The management of Holstein–Lewis fractures, particularly concerning the radial nerve, remains a topic of ongoing clinical debate and research. Current literature and consensus guidelines emphasize a systematic approach.
Radial Nerve Palsy Management
- Incidence: The initial series by Holstein and Lewis reported a 22% incidence of radial nerve palsy. Subsequent studies have shown varied rates, often in the 10-20% range.
- Mechanism of Injury: The nerve is most commonly stretched or contused, with a lower incidence of complete transection. Entrapment of the nerve between fracture fragments is a hallmark of this injury.
-
Immediate vs. Delayed Exploration:
- Primary Palsy (Palsy at Presentation): If a complete radial nerve palsy is present at initial presentation, especially in the context of a displaced Holstein–Lewis fracture, many surgeons advocate for immediate surgical exploration concurrently with ORIF . The rationale is that the nerve is likely entrapped or damaged by the fracture fragments and requires release. Studies have shown higher rates of nerve recovery following immediate exploration compared to delayed.
- Secondary Palsy (Palsy After Reduction or Post-Op): If a radial nerve palsy develops or worsens after attempts at closed reduction, or post-operatively, immediate surgical exploration is mandatory . This suggests iatrogenic injury or worsening entrapment.
- Observational Management: In cases of incomplete palsy (neuropraxia) or stable complete palsy without signs of entrapment (e.g., in less displaced fractures, though rare in Holstein-Lewis), conservative management with observation and serial neurological exams for 3-6 months may be considered. However, given the high risk of entrapment, this is less commonly recommended for classic Holstein–Lewis patterns.
- Recovery Rates: The majority of radial nerve palsies associated with humeral shaft fractures, if managed appropriately, show signs of recovery within 3-6 months. Functional recovery can take up to 12-18 months.
Fracture Fixation Principles
- ORIF vs. Non-Operative: While some stable Holstein–Lewis fractures can be managed non-operatively with functional bracing, the trend for displaced fractures, especially those with nerve involvement, is towards ORIF to ensure anatomical reduction, early nerve exploration, and stable fixation for accelerated rehabilitation.
-
Plating Techniques:
- Dual Plating: Contemporary literature strongly supports the use of dual plating (e.g., orthogonal or parallel plate constructs) for displaced distal humeral shaft fractures, including Holstein–Lewis patterns. This provides superior biomechanical stability compared to single plating, especially against torsional and bending forces, which are critical for the oblique/spiral nature of these fractures.
- Lag Screws: The use of lag screws across the oblique or spiral fracture line, prior to plate application, is highly recommended to achieve interfragmentary compression and increase construct stiffness.
- Locking Plates: Locking compression plates (LCPs) are advantageous, particularly in the metaphyseal bone of the distal humerus or in osteoporotic bone, as they provide angular stability independent of bone-plate contact.
Outcomes and Prognosis
- Functional Outcomes: Most patients achieve good to excellent functional outcomes following appropriate surgical management, with high rates of fracture union.
- Complications: Non-union, malunion, infection, and elbow stiffness remain potential complications, necessitating careful surgical technique and adherence to rehabilitation protocols.
- Return to Activity: Most patients can return to work and recreational activities within 4-6 months, depending on the demands of their activity and the extent of nerve recovery.
Future Directions
Ongoing research focuses on refining surgical approaches for minimizing soft tissue disruption, optimizing implant designs for increased stability in challenging fracture patterns, and developing more precise diagnostic tools for early nerve injury assessment. The role of biologics in accelerating fracture healing and nerve recovery also remains an active area of investigation.
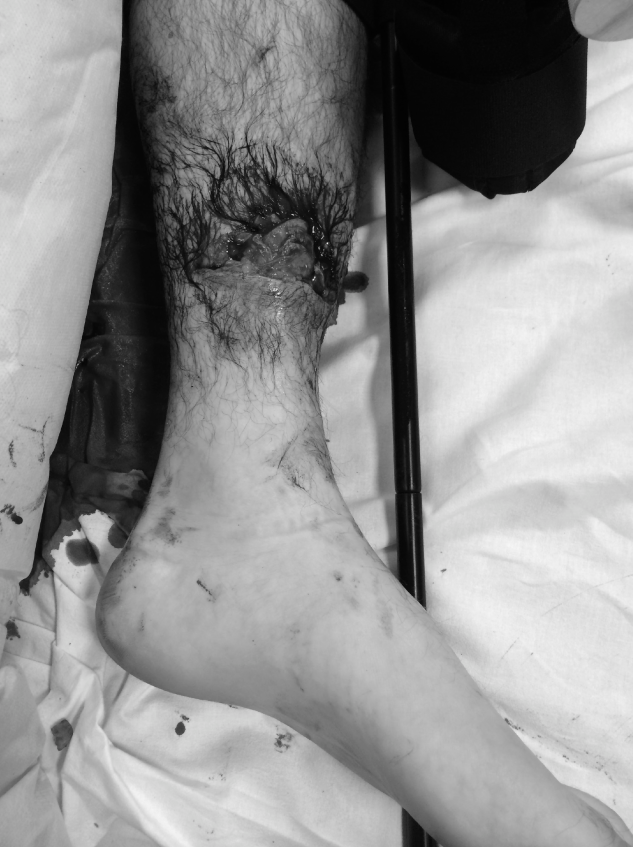
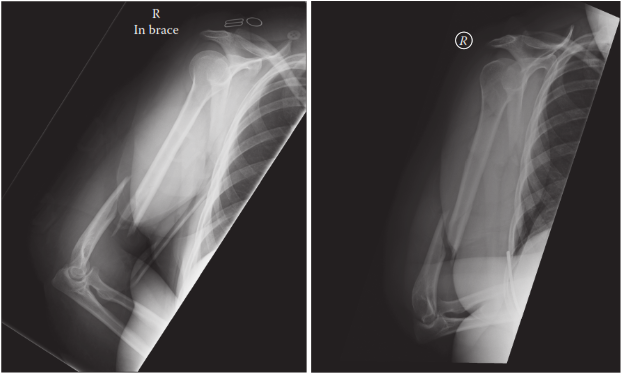
Clinical & Radiographic Imaging
You Might Also Like