Truncated Cone Arthrodesis of the First Metatarsophalangeal Joint: A Comprehensive Surgical Guide
Key Takeaway
The truncated cone arthrodesis of the first metatarsophalangeal joint, popularized by Johnson and Alexander, is a highly reliable technique for end-stage hallux rigidus and severe deformities. By utilizing specialized conical reamers, this method maximizes cancellous bone contact and allows precise multiplanar positioning. This guide details the biomechanical principles, meticulous surgical approach, rigid internal fixation strategies, and tailored postoperative rehabilitation protocols necessary to achieve optimal fusion rates and functional outcomes.
Introduction to First Metatarsophalangeal Joint Arthrodesis
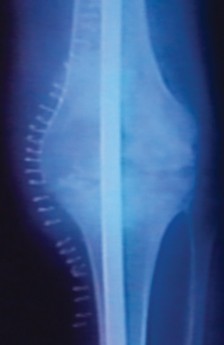
Arthrodesis of the first metatarsophalangeal (MTP) joint remains the gold standard surgical intervention for a variety of end-stage pathologies affecting the first ray. Originally described and popularized by Johnson and Alexander, the Truncated Cone Arthrodesis (often referred to as the "cup-and-cone" or "peg-and-hole" technique) revolutionized the approach to first MTP joint fusion.
Unlike flat-cut arthrodesis techniques, which inherently shorten the first ray and limit the ability to fine-tune alignment post-resection, the truncated cone technique utilizes specialized hemispherical or conical reamers. This geometric configuration provides intrinsic stability, maximizes the surface area of bleeding cancellous bone for osteogenesis, and allows for infinite multiplanar adjustments (dorsiflexion, valgus, and rotation) prior to definitive fixation.
This comprehensive guide delineates the precise surgical technique, anatomical considerations, biomechanical principles, and postoperative management required to execute the Johnson and Alexander truncated cone arthrodesis successfully.
Indications and Contraindications
Primary Indications
The truncated cone arthrodesis is highly versatile and is indicated for:
* End-Stage Hallux Rigidus: Coughlin and Shurnas Grade 3 and 4, where joint salvage procedures (e.g., cheilectomy) are no longer viable.
* Severe Hallux Valgus: Particularly in the presence of degenerative joint disease, severe intermetatarsal angles, or in patients with underlying hypermobility of the first ray.
* Inflammatory Arthropathies: Rheumatoid arthritis, gouty arthropathy, or psoriatic arthritis resulting in joint destruction.
* Neuromuscular Deformities: Conditions such as Charcot-Marie-Tooth disease or cerebral palsy where dynamic muscle imbalances necessitate rigid stabilization.
* Salvage Procedures: Failed previous surgeries, including failed Keller resection arthroplasties, failed hemiarthroplasties, or failed total joint replacements (often requiring structural interposition grafting).
Contraindications
- Active local or systemic infection.
- Severe peripheral arterial disease compromising healing potential.
- Inadequate soft tissue envelope over the medial eminence.
- Active Charcot neuroarthropathy (relative contraindication; requires specialized extended fixation).
Biomechanics and Preoperative Planning
The success of a first MTP arthrodesis is entirely dependent on achieving the correct three-dimensional alignment. Malunion is the most common cause of patient dissatisfaction, leading to transfer metatarsalgia, interphalangeal joint arthritis, or shoe-wear difficulties.
The Optimal Alignment Triad
- Sagittal Plane (Dorsiflexion): The hallux must be positioned in 25 to 30 degrees of dorsiflexion relative to the inclination angle of the first metatarsal. Clinically, this translates to approximately 10 to 15 degrees of dorsiflexion relative to the floor. This allows the patient to achieve a normal toe-off during the terminal stance phase of the gait cycle and accommodates a standard shoe heel height.
- Coronal Plane (Valgus): The hallux should be placed in 10 to 15 degrees of valgus to parallel the lesser toes and prevent impingement against the second toe.
- Axial Plane (Rotation): The hallux must be in neutral rotation. Pronation of the hallux is poorly tolerated and leads to painful callosities along the medial border of the interphalangeal joint.
💡 Clinical Pearl: The "Simulated Weight-Bearing" Test
Intraoperatively, alignment should always be verified by simulating weight-bearing. Place a flat rigid board (e.g., a sterile clipboard or the lid of an instrument tray) against the plantar aspect of the foot, loading the metatarsal heads. The pulp of the hallux should rest lightly on the board, allowing a few millimeters of clearance to prevent excessive pressure during toe-off.
Surgical Anatomy and Neurovascular Considerations
A thorough understanding of the medial neurovascular and tendinous structures is critical to prevent iatrogenic injury during the surgical approach.
- Superficial Peroneal Nerve (Dorsal Branch): Courses dorsomedially over the first MTP joint. In the presence of a large medial eminence (bunion), this nerve is frequently displaced dorsally and is highly vulnerable to transection or tethering if dorsal flaps are raised carelessly.
- Medial Plantar Nerve (Proper Branch): Courses plantomedially. It provides sensation to the medial aspect of the hallux and must be protected during plantar retraction.
- Flexor Hallucis Longus (FHL): Located directly plantar to the metatarsal head and sesamoid complex. Aggressive plantar dissection or over-penetration of the reamer can lacerate the FHL tendon, leading to devastating functional deficits.
Patient Positioning and Anesthesia
- Anesthesia: The procedure can be performed under regional anesthesia (popliteal block or ankle block) combined with intravenous sedation, or under general anesthesia, depending on patient preference and comorbidities.
- Positioning: The patient is placed supine on the operating table. A bump may be placed under the ipsilateral hip to correct natural external rotation of the leg, bringing the foot into a neutral, upward-facing position.
- Tourniquet: A calf or thigh tourniquet is typically utilized to maintain a bloodless surgical field, inflated to standard pressures (e.g., 250 mm Hg) after exsanguination.
Step-by-Step Surgical Technique
1. Incision and Soft Tissue Dissection
Make a longitudinal medial midline incision over the first MTP joint. The incision should be carefully placed in the internervous plane between the dorsal branch of the superficial peroneal nerve and the plantar proper branch of the medial plantar nerve.
Begin the incision distally over the proximal half of the proximal phalanx, extending it proximally over the medial eminence and continuing along the distal shaft of the first metatarsal.
⚠️ Surgical Warning: Flap Management
Do not raise extensive subcutaneous flaps until the periosteum and bone are reached. However, it is highly recommended to raise a small, controlled dorsal flap at the level where the medial eminence enters the metatarsal shaft. The superficial peroneal nerve is exceptionally vulnerable here, as the protruding bunion displaces the nerve dorsally. Freeing this nerve prevents it from being tethered, retracted excessively, or inadvertently transected during the capsulotomy.
2. Joint Exposure and Debridement
By sharp dissection, perform a longitudinal capsulotomy. Elevate the capsule and periosteum dorsally and plantarly as full-thickness flaps to expose the metatarsal head and the base of the proximal phalanx.
Denude the base of the proximal phalanx and the metatarsal head of all remaining soft tissue attachments. Use a McGlamry elevator or a curved osteotome to release the plantar plate and sesamoid apparatus from the metatarsal head, being meticulously careful to preserve the underlying Flexor Hallucis Longus (FHL) tendon. The base of the proximal phalanx must be completely mobilized so it can be viewed end-on.
3. Joint Preparation: The Phalangeal Side
The goal is to create a concave, bleeding cancellous surface at the base of the proximal phalanx.
- Place a threaded guidewire exactly in the center of the articular surface of the base of the proximal phalanx.
- Drill the guidewire axially into the subchondral bone of the head of the proximal phalanx.
- Utilize a conical reamer (e.g., Marin Reamer System; Wrangler Instruments, Sialkot, Pakistan). Pass the reamer over the guidewire and ream the proximal phalanx until the subchondral bone is completely removed and a healthy, bleeding cancellous "cup" is formed. Avoid over-reaming, which can compromise the cortical integrity of the phalanx.
4. Joint Preparation: The Metatarsal Side
The metatarsal head must be shaped into a corresponding truncated cone. The trajectory of the guide pin here dictates the final sagittal and coronal alignment of the arthrodesis.
- Expose the metatarsal head fully.
- Insert a guide pin into the center of the metatarsal head. Crucial Step: This guide pin must be placed at the exact appropriate angle in reference to the dorsal aspect of the first metatarsal.
- Use a sterile angle guide to ensure the pin is directed to achieve 25 to 30 degrees of dorsiflexion relative to the inclination angle of the first metatarsal, and approximately 10 to 15 degrees of valgus.
- Once the guide pin is properly positioned, place the truncated cone reamer system (e.g., Biomet, Inc., Warsaw, IN) over the guide pin.
- Ream the metatarsal head to produce a truncated cone configuration. The reaming should strip the remaining cartilage and sclerotic subchondral bone, exposing optimal cancellous bone for maximum contact.
💡 Clinical Pearl: Reamer Sizing
Always match the size of the metatarsal reamer to the phalangeal reamer. If the bone is particularly sclerotic, fenestrate the prepared surfaces with a 2.0 mm drill bit or a K-wire to stimulate marrow bleeding and enhance osteogenesis.
5. Trial Reduction and Temporary Fixation
Impact the two prepared surfaces together. The truncated cone configuration should provide immediate intrinsic stability.
Assess the alignment using the simulated weight-bearing test (as described in the Biomechanics section). Check for 25-30° dorsiflexion, 10-15° valgus, and neutral rotation.
Once optimal alignment is confirmed, secure the joint temporarily using one or two 0.062-inch or 0.045-inch Kirschner wires (K-wires) driven obliquely across the joint.
6. Definitive Internal Fixation
The classic Johnson and Alexander technique relies on robust screw fixation utilizing a lag technique.
- Plan the trajectory for a fully threaded 4-mm cancellous screw. The optimal trajectory is from the medial base of the proximal phalanx, directed proximally and laterally into the metatarsal head and shaft.
- Lag Technique: Because a fully threaded screw is used, a lag technique must be employed to achieve compression. Over-ream (glide hole) the phalangeal side of the arthrodesis with a drill bit matching the outer diameter of the screw threads (e.g., 4.0 mm). Drill the metatarsal side (thread hole) with the core diameter drill bit (e.g., 2.5 mm).
- Countersinking: Carefully countersink the medial cortex of the proximal phalanx.
- Pitfall Warning: The cortical bridge on the medial aspect of the proximal phalanx is thin. Over-countersinking or excessive torque can fracture this bridge, resulting in catastrophic loss of fixation.
- Insert the 4-mm fully threaded cancellous screw and achieve rigid compression across the arthrodesis site.
- Osteoporotic Bone Considerations: In patients with poor bone stock or severe osteoporosis, a single screw may not provide adequate rotational stability. In such cases, place a second crossed screw (directed from the dorsal metatarsal neck distally into the plantar proximal phalanx) to create a rigid construct.
Note: While the classic text emphasizes crossed screws, modern variations frequently supplement a single interfragmentary lag screw with a dorsal neutralization plate to enhance biomechanical stability, particularly in non-compliant patients.
7. Closure
Thoroughly irrigate the wound to remove bone debris. Reapproximate the capsule over the medial aspect of the joint using absorbable sutures (e.g., 2-0 Vicryl) to cover the hardware. Close the subcutaneous tissue and skin in a standard layered fashion. Apply a sterile, bulky compressive dressing.
Management of Complex Cases: Bone Loss and Interposition Grafting
In revision scenarios—such as marked bone loss following a failed total joint replacement, failed silastic implant, or aggressive Keller hemiarthroplasty—the standard truncated cone technique must be modified. Direct apposition of the remaining bone would result in severe shortening of the first ray, leading to intractable transfer metatarsalgia to the lesser metatarsal heads.
In these instances, an interposition structural bone graft (autograft from the iliac crest or structural allograft) is required.
1. The remaining host bone ends are squared off rather than conically reamed.
2. The structural graft is contoured to fit the defect and restore the anatomic length of the first ray.
3. Fixation typically requires a dorsal bridging plate in addition to axial K-wires or screws, as the graft introduces two interfaces that must heal.
Postoperative Care and Rehabilitation Protocol
Postoperative management is dictated by the rigidity of the intraoperative fixation and the presence or absence of bone grafting.
Standard Protocol (Primary Arthrodesis with Rigid Fixation)
- Immediate Post-op: The patient is placed in a rigid postoperative shoe or a controlled ankle motion (CAM) boot.
- Weight-Bearing: The patient is permitted to walk flat-footed, bearing weight to tolerance. Strict instructions must be given not to actively load or push off the hallux.
- Follow-up (2 Weeks): The initial bulky dressing is removed, and sutures are evaluated. The arthrodesis site is manually tested for clinical stability. Radiographs are obtained to verify hardware position.
- Weeks 2 to 6: If fixation remains rigid, the patient continues in the postoperative shoe.
- Contingency (Non-Rigid Fixation): If manual testing at 2 weeks reveals micro-motion or if the patient is non-compliant, the protocol is immediately escalated. The patient is placed in a short-leg walking cast for an additional 4 to 6 weeks to ensure immobilization.
- Return to Footwear: Transition to wide-toe-box, stiff-soled shoes typically occurs between 6 to 8 weeks once radiographic consolidation is evident.
Complex Protocol (Interposition Grafting / Revision)
The incorporation of a structural graft significantly alters the healing timeline.
* Weeks 0 to 12: Strict Non-Weight-Bearing (NWB). The patient is immobilized in a short-leg cast or rigid CAM boot. Weight-bearing forces across a structural graft before incorporation will lead to graft collapse and hardware failure.
* Months 3+: Once radiographic evidence of graft incorporation at both the proximal and distal interfaces is observed, the patient is transitioned to a walking cast or weight-bearing boot.
* Gradual Weaning: Transition to standard footwear is delayed until the arthrodesis is completely solid, often taking 4 to 6 months.
Complications and Pitfalls
While highly successful, first MTP arthrodesis carries specific risks that the surgeon must anticipate:
- Malunion: The most unforgiving complication. Excessive plantarflexion leads to severe hallux pressure and interphalangeal joint arthritis. Excessive dorsiflexion causes shoe-wear impingement. Excessive valgus causes impingement on the second toe. Revision osteotomy is required for symptomatic malunions.
- Nonunion: Occurs in 5-10% of cases. Risk factors include smoking, diabetes, inadequate bone preparation (failure to reach bleeding cancellous bone), and non-compliance with weight-bearing restrictions. Asymptomatic nonunions (fibrous unions) may be observed; symptomatic nonunions require revision with bone grafting and augmented fixation.
- Hardware Prominence: The medial cortex of the proximal phalanx has minimal soft tissue coverage. A poorly countersunk screw head will cause painful bursa formation and shoe irritation, necessitating hardware removal after fusion is complete.
- Nerve Entrapment/Injury: Injury to the dorsal branch of the superficial peroneal nerve results in painful neuromas or numbness over the dorsomedial hallux. Meticulous flap management, as described in the surgical technique, is the primary preventative measure.
- Interphalangeal Joint Degeneration: Fusing the MTP joint transfers ambulatory stress to the interphalangeal joint. Over time, compensatory hypermobility can lead to degenerative arthritis, though this is rarely severe enough to require surgical intervention if the MTP joint was fused in the correct alignment.
You Might Also Like