Osteochondral Autograft and Allograft Transplantation of the Talus: A Master Surgical Guide
Key Takeaway
Osteochondral Autograft Transplantation (OATS) is a definitive surgical intervention for full-thickness osteochondral lesions of the talus. This procedure involves harvesting cylindrical osteochondral plugs from a non-weight-bearing donor site, typically the ipsilateral knee, and transplanting them into a prepared recipient defect on the talar dome. It restores the articular surface with hyaline cartilage, providing superior biomechanical durability compared to marrow-stimulating techniques for lesions exceeding 1.5 square centimeters.
INTRODUCTION TO OSTEOCHONDRAL TRANSPLANTATION OF THE TALUS
Osteochondral lesions of the talus (OLTs), historically referred to as osteochondritis dissecans (OCD) or transchondral fractures, present a significant reconstructive challenge in foot and ankle surgery. While primary marrow-stimulating techniques (e.g., microfracture, drilling) are often successful for smaller lesions (<1.5 cm²), they inherently replace the defect with mechanically inferior fibrocartilage (Type I collagen). For larger, cystic, or recalcitrant lesions, the restoration of native hyaline cartilage (Type II collagen) is paramount to preventing early-onset tibiotalar osteoarthritis.
Osteochondral Autograft Transplantation (OATS), pioneered and popularized by Hangody et al., addresses this by transferring viable, structurally intact osteochondral cylinders from a lesser-weight-bearing donor site to the talar defect. This technique provides immediate structural support, restores the articular contour, and introduces viable chondrocytes within their native extracellular matrix.
Indications and Patient Selection
The primary indications for OATS include:
* Symptomatic full-thickness osteochondral lesions of the talus measuring greater than 1.5 cm² to 2.0 cm² in diameter.
* Lesions associated with deep subchondral cystic changes where marrow stimulation would fail due to lack of subchondral support.
* Failed prior bone marrow stimulation procedures (revision surgery).
* Acute, displaced osteochondral fractures that are not amenable to primary internal fixation.
Clinical Pearl: Patient age and BMI are critical factors. The ideal candidate is a younger, active patient (typically under 50 years of age) with a normal BMI and a well-aligned hindfoot. Concomitant ankle instability or malalignment (e.g., varus hindfoot) must be corrected simultaneously to prevent asymmetric loading and premature graft failure.
BIOMECHANICS AND GRAFT RATIONALE
The biomechanical environment of the ankle joint is unique. The talus supports the highest load per square centimeter of any articular surface in the human body, yet its cartilage is significantly thinner (1.0 to 1.5 mm) than that of the knee (2.0 to 3.0 mm). Furthermore, talar cartilage possesses a higher compressive modulus.
When harvesting autograft from the ipsilateral knee (typically the periphery of the medial or lateral femoral condyle, or the lateral trochlea), the surgeon must account for this mismatch in cartilage thickness and radius of curvature. The subchondral bone of the graft must be seated flush with the surrounding talar subchondral bone, even if this leaves the thicker knee cartilage slightly proud. Over time, the transplanted cartilage undergoes a degree of remodeling and mechanical adaptation.
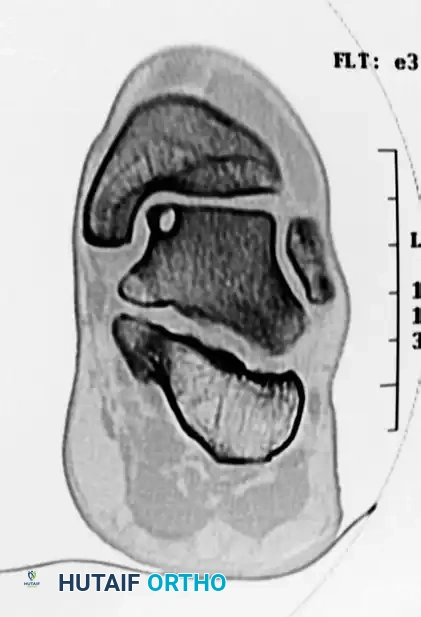
PREOPERATIVE PLANNING AND IMAGING
Thorough preoperative imaging is mandatory to define the lesion's morphology, depth, and precise anatomical location.
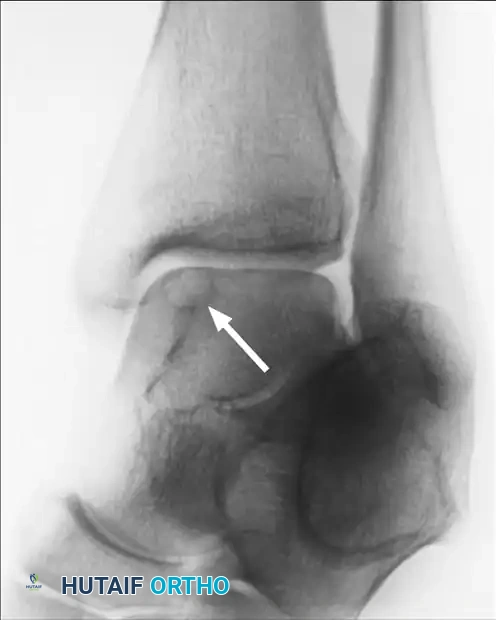
- Weight-Bearing Radiographs: Standard anteroposterior (AP), lateral, and mortise views evaluate overall joint space, alignment, and the presence of osteophytes.
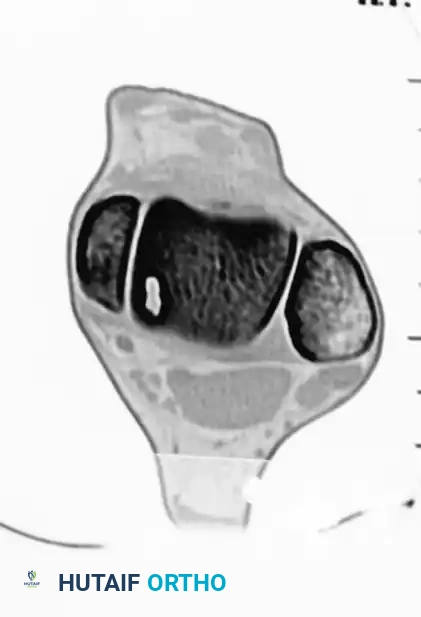
- Computed Tomography (CT): CT is the gold standard for evaluating the osseous architecture, identifying subchondral cysts, and determining the exact dimensions of the bony defect.
- Magnetic Resonance Imaging (MRI): MRI is essential for assessing the integrity of the overlying articular cartilage, identifying bone marrow edema, and evaluating concomitant soft tissue injuries (e.g., lateral ligamentous complex tears).
PATIENT POSITIONING AND ANESTHESIA
The procedure is performed under general anesthesia or regional anesthesia (spinal/epidural) with a regional popliteal block for postoperative pain control.
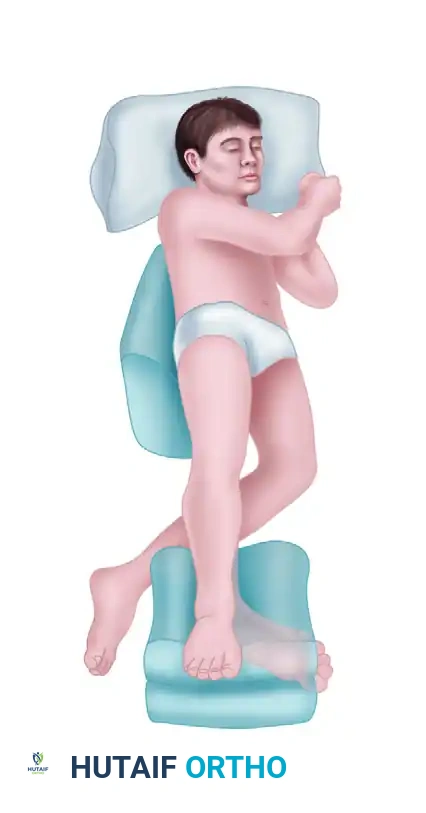
- Place the patient in the supine position on a standard radiolucent operating table.
- Place a bump under the ipsilateral hip to internally rotate the leg, bringing the foot into a neutral, upward-facing position.
- Ensure the knee and ankle can be brought into full extension and flexion.
- Apply a well-padded pneumatic tourniquet to the proximal thigh.
- Prepare and drape the affected lower extremity circumferentially from the toes to the proximal thigh, allowing access to both the ankle (recipient site) and the knee (donor site).
Surgical Warning: The use of invasive skeletal ankle distractors is strongly discouraged due to the risk of pin-site complications, neurovascular injury, and articular damage. Non-invasive strap distractors can also exert excessive force across the joint; therefore, manual plantarflexion and precise portal placement are preferred for visualization.
DIAGNOSTIC ARTHROSCOPY AND LESION PREPARATION
Arthroscopy of the ankle is technically demanding due to the highly congruent, tight joint space. A well-executed arthrotomy is always superior to a poorly visualized arthroscopic procedure. However, arthroscopy is routinely utilized as the initial step to delineate the chondral lesion, remove loose bodies, and treat concomitant intra-articular pathology.
Portal Placement
We follow the principles of standard ankle arthroscopy using a 4.0-mm or 4.5-mm arthroscope with 30-degree and 70-degree viewing angles.
- Anteromedial Portal: Begin by distending the joint with 15 to 20 mL of sterile saline using a large-bore needle inserted just medial to the tibialis anterior tendon. Incise the skin only, and use a blunt hemostat to spread the soft tissues, avoiding the saphenous vein and nerve.
- Anterolateral Portal: Transilluminate the skin from the anteromedial portal to identify and avoid the superficial peroneal nerve branches. Establish the anterolateral portal just lateral to the peroneus tertius tendon.
Arthroscopic Debridement
A significant amount of reactive synovium is typically present in the anterior compartment. Utilize a motorized shaver to perform a partial synovectomy, improving visualization of the talar dome.
Identify the osteochondral lesion. Using arthroscopic curettes and elevators, excise the unstable osteochondral fragment and debride the crater down to a stable, vertical rim of healthy cartilage.
The base of the crater is abraded to bleeding subchondral bone. Multiple holes can be drilled into the crater to promote vascularization. This can be achieved via transmalleolar drilling (using a Kirschner wire through a single hole in the malleolus while plantarflexing and dorsiflexing the ankle) or via a percutaneous approach using meniscal repair instrumentation.
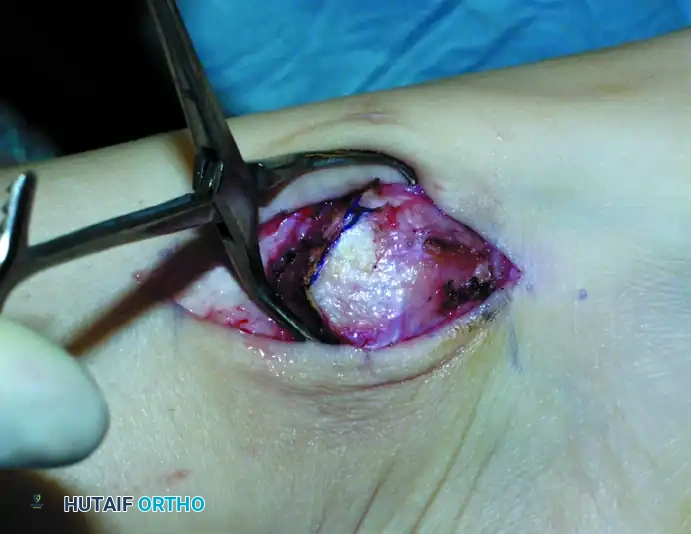
SURGICAL APPROACHES FOR OATS
Because the OATS harvester must be introduced perfectly perpendicular to the talar dome, arthroscopic delivery is rarely feasible for lesions located in the central or posterior aspects of the talus. Open arthrotomy with or without malleolar osteotomy is required.
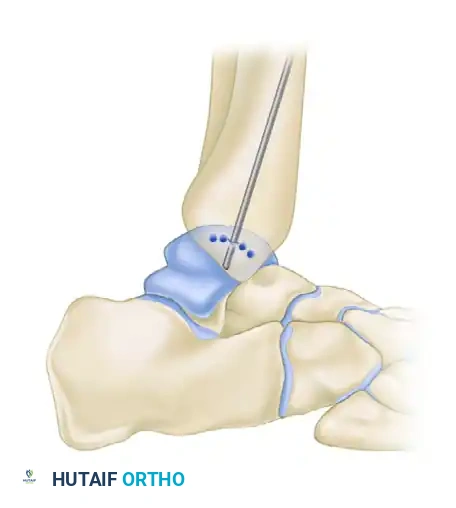
1. Medial Malleolar Osteotomy (For Medial Lesions)
Medial lesions are typically located centrally or posteriorly on the medial talar dome. A medial malleolar osteotomy provides unparalleled perpendicular access.
- Make a longitudinal incision over the medial malleolus.
- Expose the medial malleolus, protecting the posterior tibial tendon and neurovascular bundle posteriorly.
- Pre-drill two holes for 4.0-mm partially threaded cancellous screws to ensure perfect anatomic reduction during closure.
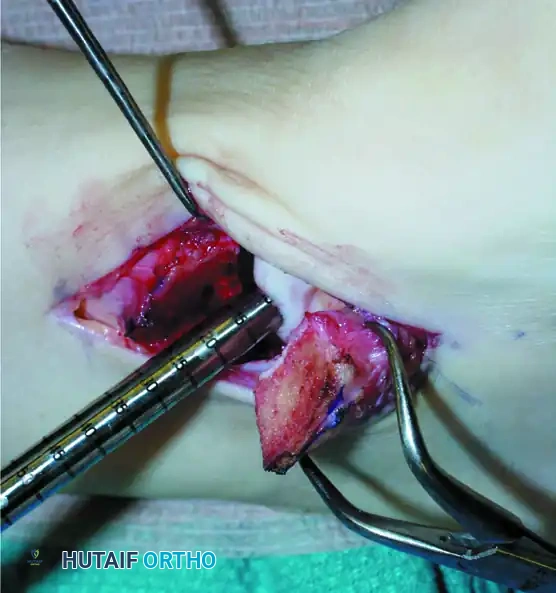
- Perform a chevron-type or step-cut osteotomy using an oscillating saw, completing the final articular cut with an osteotome to preserve the cartilage.
- Reflect the medial malleolus inferiorly on its deltoid ligament hinge.
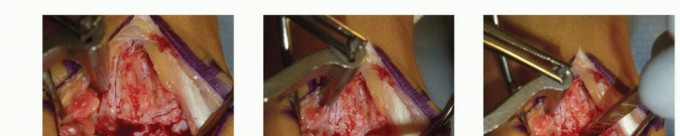
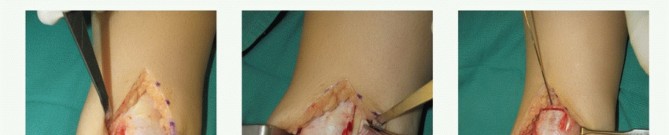
2. Anterolateral Approach (For Lateral Lesions)
Lateral lesions are generally located more anteriorly and can often be accessed without an osteotomy.
* Approach lateral lesions through an anterior sagittal incision.
* Perform an anterolateral arthrotomy. Extreme plantarflexion of the ankle usually brings the lateral lesion into view.
* Note: Rarely, a lateral malleolar osteotomy or fibular window is required to access far posterolateral lesions.
THE OATS PROCEDURE: STEP-BY-STEP
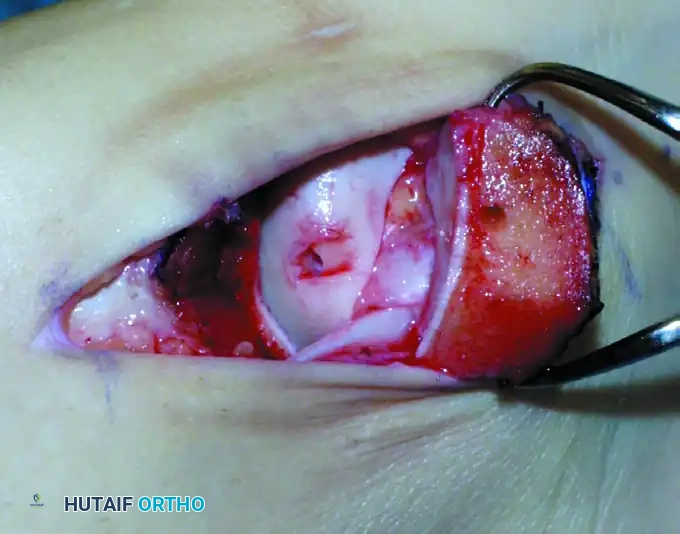
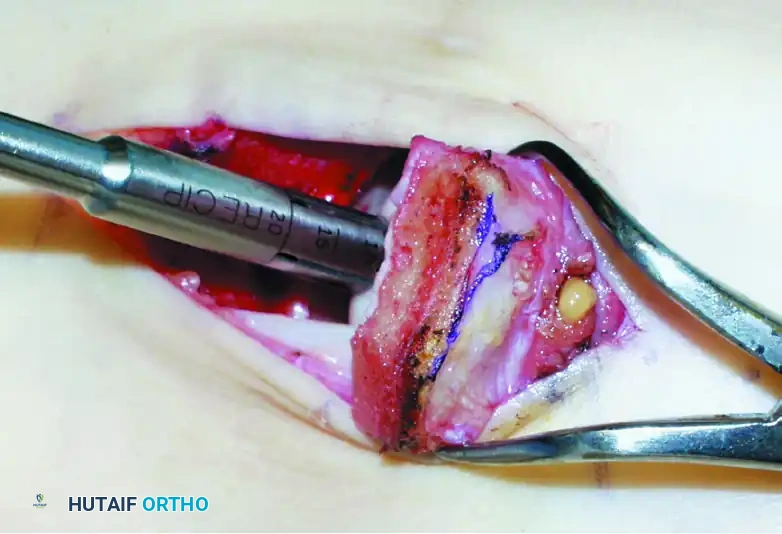
Step 1: Recipient Site Preparation
Once the lesion is fully exposed, utilize a commercially available recipient sizer to determine the exact diameter of the defect. Harvesters are typically available in sizes ranging from 5 to 11 mm (larger sizes are available for massive defects, though multiple overlapping plugs—the "snowman" technique—may be used).
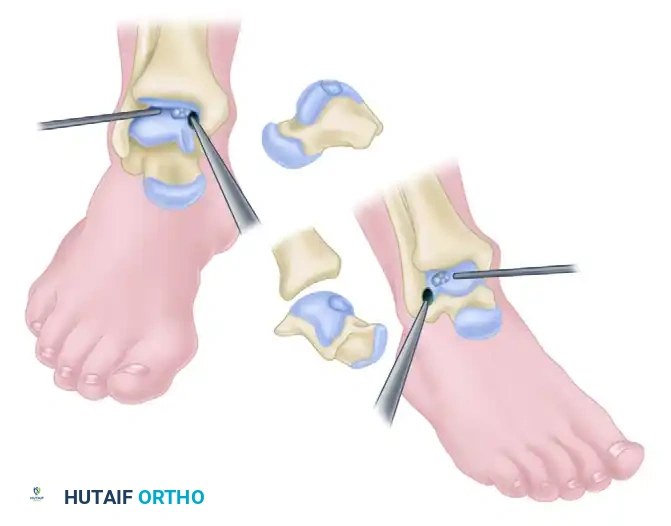
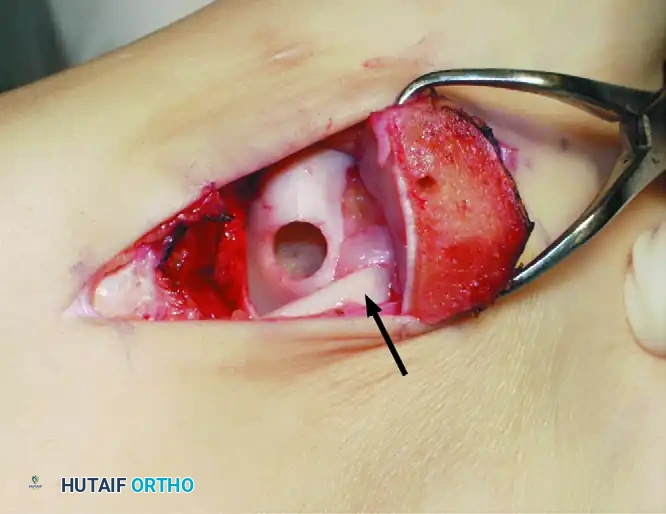
Place the recipient harvester strictly perpendicular to the articular surface for dome lesions, or at a 45-degree angle for talar shoulder lesions.
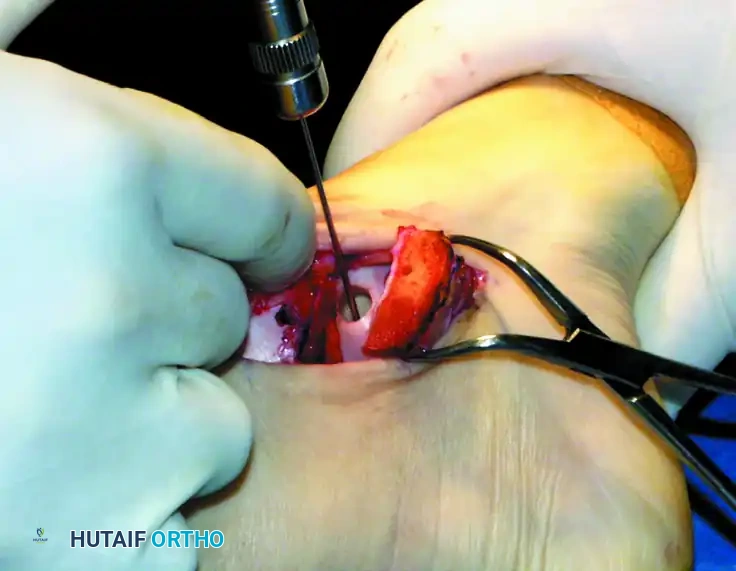
Impact the tubular chisel to extract the recipient core to a precise depth of 10 mm. Remove the core, leaving a perfectly cylindrical defect. Drill multiple small holes into the subchondral bone at the base of the recipient hole to stimulate marrow bleeding and enhance graft integration.
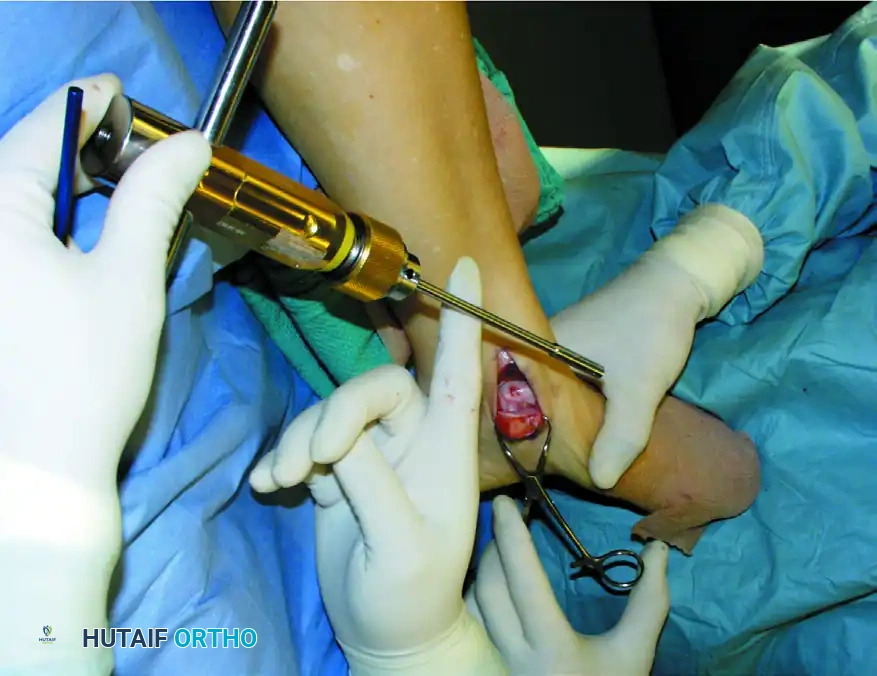
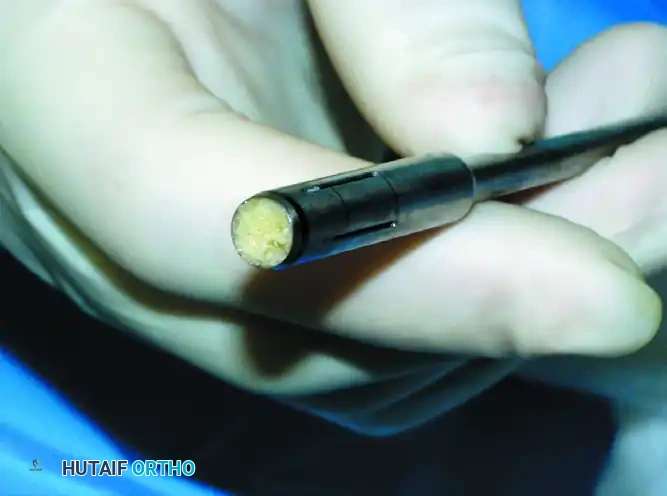
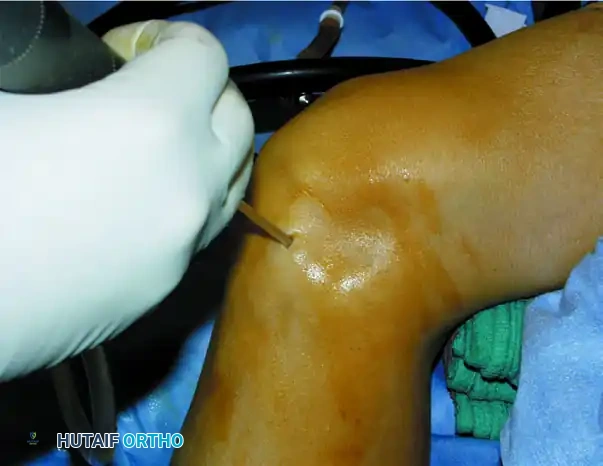
Step 2: Donor Graft Harvesting
Attention is turned to the ipsilateral knee. The graft is harvested either arthroscopically or through a small mini-arthrotomy.
* Donor Sites: The periphery of the medial femoral condyle, the lateral femoral condyle (proximal to the sulcus terminalis), or the lateral trochlea (specifically for talar shoulder lesions to match the contour).
Use the specially designed donor harvester corresponding to the exact diameter of the recipient hole (5 to 11 mm). Drive the harvester perpendicularly into the donor site to a depth of 10 to 12 mm.
Surgical Pearl: The donor graft should be harvested 1 to 2 mm deeper than the recipient hole (e.g., 12 mm donor depth for a 10 mm recipient hole). This ensures that the subchondral bone of the graft bottoms out in the recipient socket, providing structural stability while allowing the cartilage cap to sit flush.
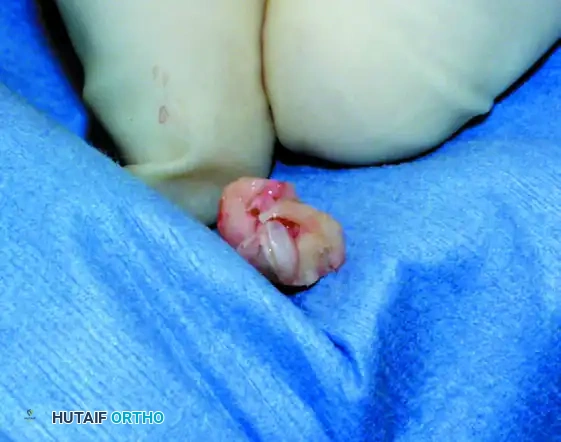
Extract the donor plug. Inspect the cylindrical graft within the harvester to ensure the cartilage cap is intact and the bone cylinder is structurally sound.
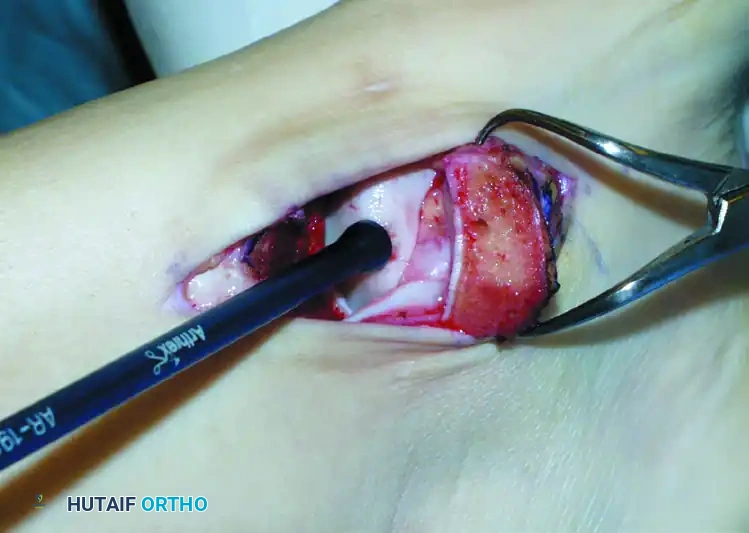
Step 3: Graft Insertion and Seating
Bring the donor harvester containing the graft to the ankle. Align the harvester perfectly with the recipient socket.
Insert the cylindrical graft carefully into the recipient hole using the specially designed extruder or collared pin through the back of the donor harvester.
CRITICAL PITFALL: Do not remove the OATS harvester from the recipient site before the completion of full graft extrusion. Furthermore, do not allow the harvester to deviate from the insertion angle during extrusion. Either of these technical errors will place sheer stress on the graft and cause a catastrophic fracture of the donor core.
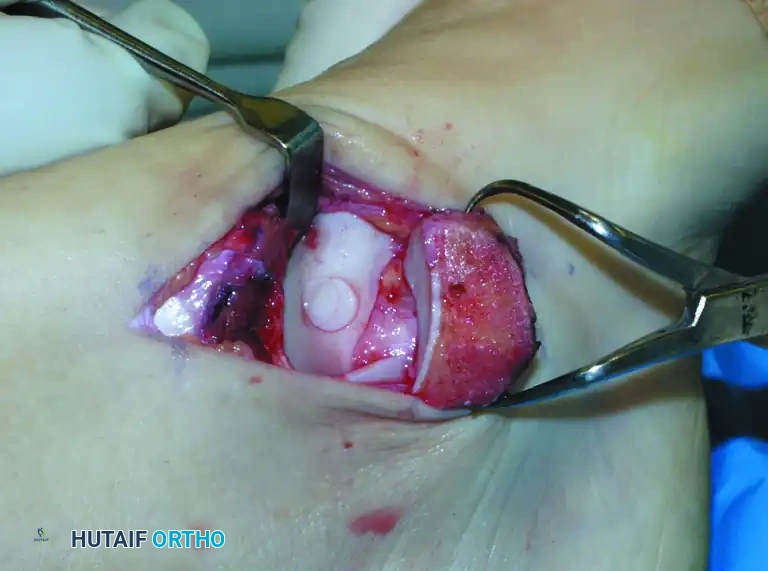
Once the graft is extruded into the socket, use the oversized sizer-tamp to gently tap the core until it is perfectly flush with the surrounding native cartilage. A proud graft will cause "kissing lesions" on the tibial plafond, while a sunken graft will fail to bear load, leading to fibrocartilage infill and cyst formation.
Test the range of motion of the ankle under direct visualization to ensure that the graft is well seated, secure, and does not impinge during articulation.
CLOSURE AND FIXATION
Thoroughly irrigate the joint to remove any osseous debris.
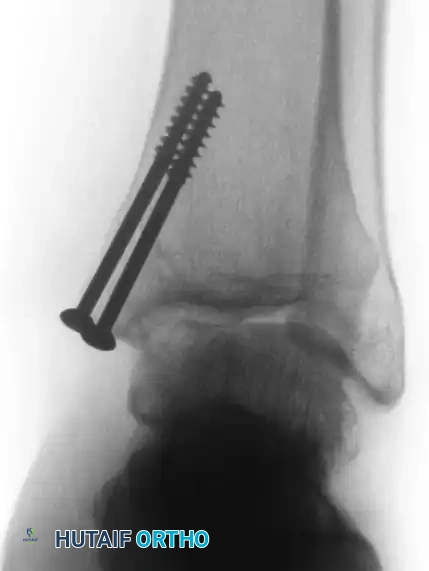
If a medial malleolar osteotomy was performed, reduce the malleolus anatomically using the pre-drilled holes. Secure the osteotomy with two 4.0-mm partially threaded cancellous screws.
Close the arthrotomy capsule, retinaculum, subcutaneous tissue, and skin in a standard layered fashion. Place an intra-articular drain in the knee donor site to prevent hemarthrosis. Apply a sterile compressive dressing to the ankle, followed by a rigid posterior splint with stirrups to lock the ankle in neutral dorsiflexion.
POSTOPERATIVE CARE AND REHABILITATION PROTOCOL
The postoperative rehabilitation protocol is designed to protect the graft during the critical phase of bony incorporation while preventing joint stiffness.
- Weeks 0 to 2: The patient is kept strictly non-weight-bearing (NWB). The limb is elevated to minimize edema.
- Week 2: The patient is seen in the clinic. Sutures are removed. A short-leg, non-weight-bearing fiberglass cast is applied.
- Weeks 4 to 6: The cast is removed, and the patient is transitioned to a removable controlled ankle motion (CAM) boot. The patient remains strictly non-weight-bearing. Active and active-assisted range-of-motion (ROM) exercises of the ankle are initiated out of the boot to nourish the cartilage and prevent arthrofibrosis.
- Weeks 6 to 8: Pool therapy (hydrotherapy) and stationary biking with low resistance can be instituted. The buoyancy of the water allows for safe, unloaded joint articulation.
- Week 10: The patient completes the 10-week non-weight-bearing phase. Progressive weight-bearing is initiated in the CAM boot, transitioning to regular footwear as tolerated over the subsequent 2 to 4 weeks.
- Months 4 to 6: Return to high-impact sports and cutting activities is generally permitted once radiographic union of the osteotomy is confirmed, the graft is incorporated, and the patient has regained full strength and proprioception.
OUTCOMES AND EVIDENCE-BASED LITERATURE
The clinical outcomes of OATS for talar lesions are highly favorable when patient selection and surgical technique are optimized. Hangody et al. reported excellent long-term survivorship of the grafts, with significant improvements in pain, swelling, stiffness, and overall activity levels.
While donor site morbidity at the knee is a recognized complication (occurring in approximately 5-10% of patients, presenting as mild retropatellar pain), the functional gains at the ankle typically far outweigh these risks. For massive lesions where autograft harvest would cause unacceptable knee morbidity, fresh osteochondral allograft transplantation remains a viable, albeit biologically slower-incorporating, alternative. Ultimately, OATS remains a powerful, joint-preserving procedure in the armamentarium of the reconstructive foot and ankle surgeon.
You Might Also Like