Open Reduction and Internal Fixation of Proximal Humeral Fractures: A Comprehensive Surgical Masterclass
Key Takeaway
Open reduction and internal fixation (ORIF) of proximal humeral fractures requires meticulous surgical technique, anatomic reduction of the tuberosities, and stable fixation to prevent varus collapse. This comprehensive guide details patient positioning, the deltopectoral approach, advanced reduction strategies using traction sutures, and biomechanically optimized locking plate application to ensure optimal functional outcomes in complex three- and four-part fracture patterns.
INTRODUCTION AND BIOMECHANICAL PRINCIPLES
Proximal humeral fractures represent approximately 5% of all fractures, with a bimodal distribution affecting high-energy trauma patients in younger demographics and low-energy falls in the osteoporotic elderly population. The primary goal of Open Reduction and Internal Fixation (ORIF) is to restore the anatomic relationship of the articular surface, reconstruct the tuberosities to re-establish rotator cuff biomechanics, and provide stable fixation that permits early range of motion.
The advent of anatomically contoured, fixed-angle locking plates has revolutionized the management of these fractures, particularly in osteoporotic bone. However, successful outcomes are heavily reliant on meticulous surgical technique, preservation of the fragile vascular supply (specifically the anterior and posterior humeral circumflex arteries), and rigid restoration of the medial calcar hinge to prevent catastrophic varus collapse.
Clinical Pearl: The functional outcome of proximal humeral fracture fixation is dictated by the anatomic healing of the tuberosities. Malreduction or secondary displacement of the greater tuberosity by as little as 5 mm can lead to severe subacromial impingement and profound kinematic dysfunction.
PREOPERATIVE PLANNING AND IMAGING
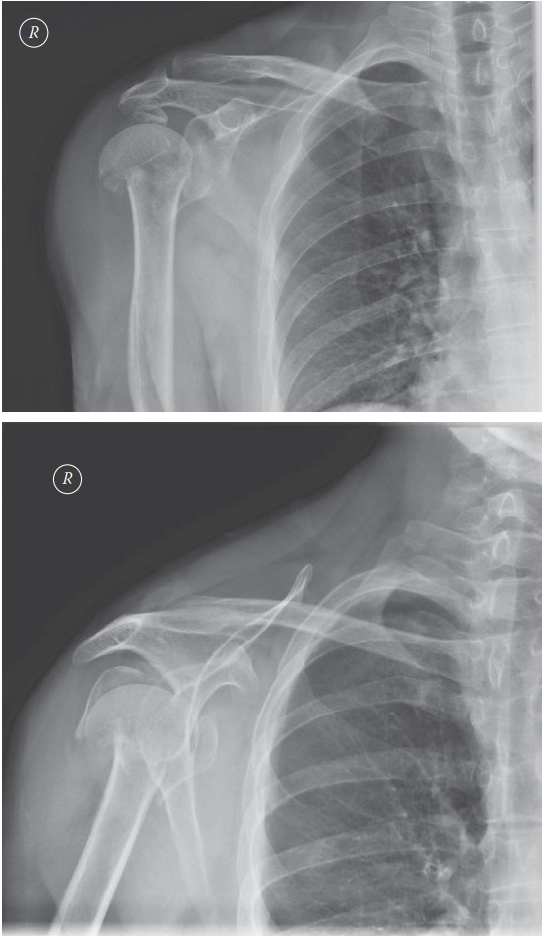
Thorough preoperative evaluation is mandatory. Standard trauma series radiographs (true anteroposterior [Grashey], scapular Y, and axillary lateral views) are required to assess fracture displacement, angulation, and glenohumeral dislocation.
For complex three-part and four-part fractures, a non-contrast Computed Tomography (CT) scan with 3D reconstructions is highly recommended. CT imaging allows the surgeon to accurately assess:
* The degree of articular surface involvement and head-split components.
* The size, comminution, and displacement of the greater and lesser tuberosities.
* The integrity of the medial calcar (inferomedial cortex), which dictates the biomechanical stability of the construct.
PATIENT POSITIONING AND SETUP
Optimal patient positioning is critical for both surgical access and unhindered fluoroscopic imaging.
- The Modified Beach Chair Position: Position the patient on a radiolucent table. Utilize a beanbag "bump" or specialized shoulder positioner to hold the shoulder and thorax 30 to 40 degrees off the table. This semi-upright position reduces venous pressure, minimizing intraoperative bleeding, and utilizes gravity to assist in longitudinal traction.
- Fluoroscopy Setup: Place the C-arm on the opposite side of the table from the surgeon. The monitor should be positioned at the foot of the bed in the surgeon's direct line of sight.
- Rolling the C-arm unit back allows for an adequate anteroposterior (AP) view of the glenohumeral joint.
- Rolling the unit forward (or rotating the arc) allows for an adequate lateral/scapular Y view of the shoulder and humerus.
- Draping: The arm must be draped free to allow for full manipulation, traction, and rotation during the reduction maneuvers.
SURGICAL APPROACHES
The Deltopectoral Approach (Primary Approach)
The deltopectoral approach is the workhorse for proximal humeral fracture ORIF, offering excellent exposure of the anterior humerus, lesser tuberosity, and joint space without denervating the deltoid.
- Incision: Make a linear incision starting from the coracoid process, extending distally and laterally toward the deltoid insertion.
- Internervous Plane: Identify the cephalic vein, which marks the interval between the deltoid (axillary nerve) and the pectoralis major (medial and lateral pectoral nerves). Retract the vein laterally with the deltoid to preserve its venous drainage, or medially with the pectoralis if lateral branches are too tethering.
- Deep Exposure: Retract the conjoined tendon medially. Release the upper 1 to 2 cm of the pectoralis major insertion if necessary to visualize the surgical neck and proximal shaft.
- Deltoid Release: Release the anterior portion of the deltoid slightly from its clavicular origin only if extreme proximal exposure is required, though this is rarely necessary and should be minimized to prevent postoperative deltoid dysfunction.
Alternative: The Anterolateral Deltoid-Splitting Approach
For specific fracture patterns (e.g., isolated greater tuberosity fractures, valgus-impacted fractures) or when utilizing an intramedullary nail or specific lateral plating systems, an anterolateral deltoid-splitting approach may be utilized.
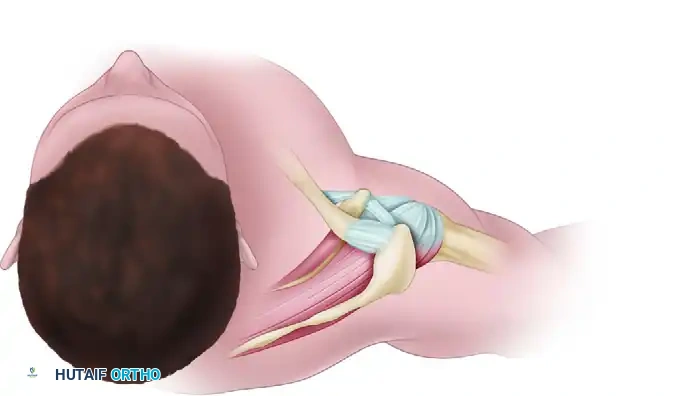
Figure A: Diagrammatic representation of the anterolateral approach. A diagonal incision from the anterolateral corner of the acromion splits the deltoid in line with its fibers in the raphe between the anterior and middle thirds.
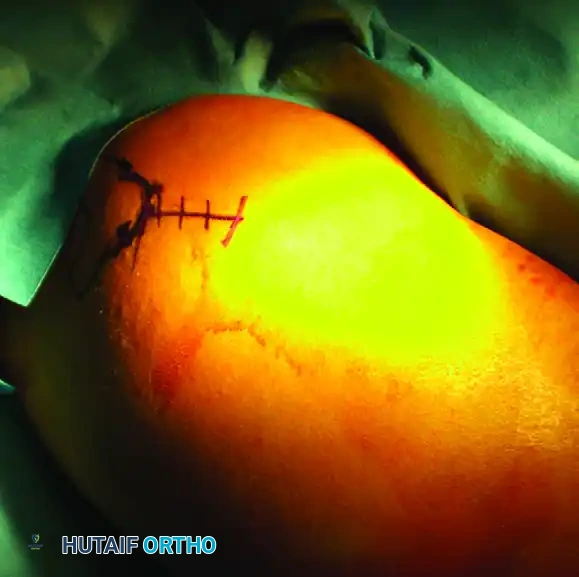
Figure B: Clinical photograph demonstrating the precise location of the anterolateral incision marked on the skin, centered over the greater tuberosity.
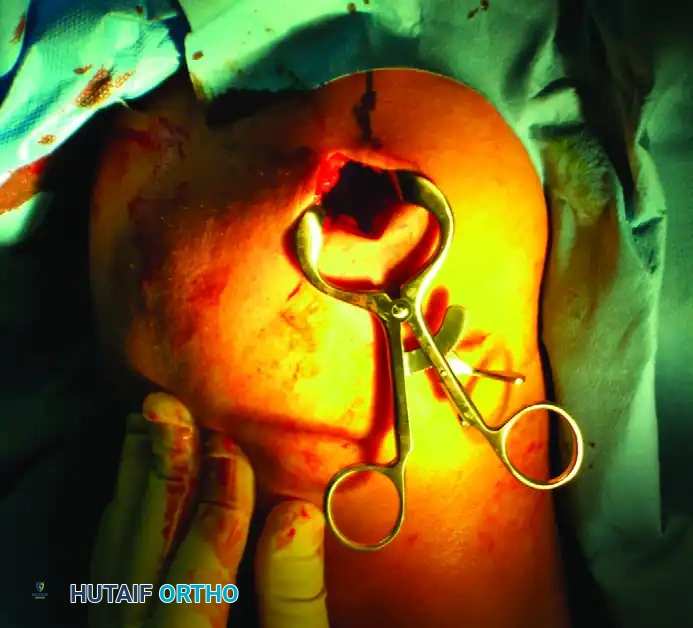
Figure C: Establishment of the surgical portal. Deep retractors are placed to expose the lateral aspect of the proximal humerus while carefully protecting the axillary nerve, which crosses the field approximately 5 to 7 cm distal to the lateral acromial edge.
Surgical Warning: When utilizing the anterolateral deltoid-splitting approach, the axillary nerve is at significant risk. Never split the deltoid further than 5 cm distal to the acromion without identifying and protecting the nerve.
FRACTURE REDUCTION TECHNIQUES
Achieving an anatomic reduction before plate application is the most critical phase of the operation. Do not rely on the locking plate to reduce the fracture.
Mobilization and Joystick Techniques
- Head Segment Control: If the articular segment is rotated or angulated, use a 2.5 mm or 3.0 mm threaded Schanz pin as a "joystick." Insert the pin into the posterior or lateral aspect of the humeral head to derotate and elevate the head into a reduced position.
- Provisional Fixation: Once the head is reduced to the shaft, provisionally fix it with heavy Kirschner wires (K-wires). Confirm the reduction with AP and lateral fluoroscopy.
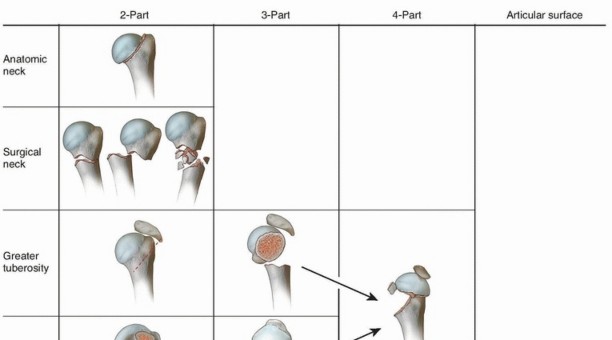
Management of the Tuberosities (Three- and Four-Part Fractures)
- Traction Sutures: For three-part or four-part fractures, place heavy, non-absorbable sutures (e.g., #2 or #5 FiberWire) into the rotator cuff tendons at their insertion sites.
- Place sutures through the supraspinatus and infraspinatus to control the greater tuberosity.
- Place sutures through the subscapularis to control the lesser tuberosity.
- These sutures act as powerful traction handles to pull the displaced tuberosities out of the subacromial space or joint, aiding in reduction. Later, these same sutures will be incorporated into the plate for definitive fixation.
- Observation or palpation through the rotator interval may aid in the reduction of the lesser tuberosity to the humeral head. Often, there is a small segment of articular surface attached to the lesser tuberosity that serves as a key to anatomic reduction.
Pitfall: If medial comminution is present, meticulously check fluoroscopy to ensure that a varus malreduction has not occurred. A varus neck-shaft angle drastically increases the shear forces on the hardware, leading to a high rate of screw cutout and construct failure.
INTERNAL FIXATION AND PLATE APPLICATION
Plate Positioning
- Height: Place the anatomically contoured locking plate onto the lateral aspect of the greater tuberosity. The superior edge of the plate must sit 5 to 8 mm distal to the superior tip of the greater tuberosity.
- Warning: A plate placed too far proximally will cause subacromial impingement during shoulder abduction.
- Anteroposterior Position: Position the plate 2 to 4 mm posterior to the bicipital groove (biceps tendon).
- Warning: A plate placed too close to the biceps tendon risks iatrogenic damage to the ascending branch of the anterior humeral circumflex artery, which runs in the bicipital groove and provides critical blood supply to the humeral head.
- Provisional Fixation: Provisionally fix the plate in place with K-wires through the designated pin holes. Confirm correct plate position with orthogonal fluoroscopy.
Screw Insertion Sequence
- Proximal Fixation: Place two locking screws through the proximal plate holes into the humeral head segment. Confirm subchondral placement (within 5 mm of the articular cartilage) using fluoroscopy. This is easier to visualize with the fluoroscopy unit on the opposite side of the table from the surgeon.
- Shaft Fixation: Insert one or two non-locking cortical screws into the humeral shaft. This allows the plate to be drawn down to the bone.
- Correcting Medial Comminution: For fractures with medial comminution, fix the plate to the proximal head segment first with locking screws, and then reduce the shaft segment to the plate. This technique helps avoid varus malposition.
- Calcar Screws: Insert screw(s) into the inferomedial humeral head (calcar region). These inferomedial screws act as a mechanical buttress, providing crucial stability for fractures with medial comminution and preventing varus collapse.
- Final Fixation: When accurate reduction is confirmed, insert the remaining proximal locking screws and distal shaft screws under direct fluoroscopic guidance.
Tuberosity Integration
- Reduce the tuberosities to the articular surface and to each other.
- Pass the previously placed heavy rotator cuff sutures through the suture holes in the proximal aspect of the locking plate.
- Tie these sutures securely. Incorporating the rotator cuff sutures into the plate creates a tension-band effect, neutralizing the deforming forces of the rotator cuff and providing immense added stability to the construct.
RADIOGRAPHIC CONFIRMATION AND CLOSURE
Before closure, conduct a rigorous fluoroscopic examination:
* Anteroposterior View: Assess the neck-shaft angle (target is ~130 degrees). Ensure the plate is not too high. Verify that no proximal screws are penetrating the superior articular surface.
* Axillary/Lateral View: Confirm the reduction of the tuberosities and ensure no screws are penetrating the anterior or posterior glenohumeral joint space.
* Live Fluoroscopy: Take the shoulder through a gentle range of motion under live fluoroscopy to confirm construct stability and rule out intra-articular screw penetration (the "screw cutout" check).
Thoroughly irrigate the wound. Close the deltopectoral interval loosely. Repair the subcutaneous tissues and close the skin with a subcuticular suture or staples. A closed suction drain may be placed deep to the deltopectoral fascia depending on the surgeon's preference and intraoperative hemostasis.
POSTOPERATIVE CARE AND REHABILITATION
The success of proximal humeral ORIF is heavily dependent on a structured, phased postoperative rehabilitation program. The goal is to prevent adhesive capsulitis while protecting the tuberosity repair.
- Phase I (Weeks 0-4): The patient is placed in a shoulder immobilizer or sling. An early rehabilitation program is begun immediately with passive and active-assisted range-of-motion (ROM) exercises. This includes pendulum exercises, passive forward elevation, and external rotation limited to 30 degrees to protect the lesser tuberosity and subscapularis repair.
- Phase II (Weeks 4-8): As radiographic evidence of early callus formation appears, the sling is discontinued. The patient progresses to active ROM exercises. Scapulothoracic stabilization exercises are initiated.
- Phase III (Weeks 8-12+): Once clinical and radiographic union is achieved, isotonic strengthening of the rotator cuff and deltoid begins. Full return to heavy lifting or high-impact activities is typically restricted until 4 to 6 months postoperatively.
COMPLICATIONS AND MANAGEMENT
Despite meticulous technique, complications can occur:
1. Varus Collapse and Screw Cutout: The most common mechanical failure. Prevented by anatomic reduction, restoration of the medial hinge, and the use of inferomedial calcar screws.
2. Avascular Necrosis (AVN): Risk increases with the complexity of the fracture (four-part fractures, disrupted medial hinge, short calcar segment). If symptomatic AVN develops late, conversion to a reverse total shoulder arthroplasty (RTSA) may be required.
3. Adhesive Capsulitis: Postoperative stiffness is common. Emphasize early, controlled passive motion and manage patient expectations regarding the prolonged timeline (up to 1 year) for maximal functional recovery.
You Might Also Like