Endoscopic Carpal Tunnel Release: Single-Incision Agee Technique
Key Takeaway
Endoscopic carpal tunnel release (ECTR) via a single-incision approach offers reliable median nerve decompression with minimized palmar morbidity. The Agee technique utilizes a proximal incision, specialized blade assembly, and precise trajectory aligned with the ring finger to divide the transverse carpal ligament from within. By releasing the distal half first, surgeons prevent palmar fat herniation from obscuring the endoscopic view, ensuring a safe, complete release and accelerated postoperative rehabilitation.
Introduction to Endoscopic Carpal Tunnel Release
Carpal tunnel syndrome (CTS) remains the most prevalent compressive neuropathy of the upper extremity. While open carpal tunnel release (OCTR) has historically been the gold standard, Endoscopic Carpal Tunnel Release (ECTR) has emerged as a highly effective, minimally invasive alternative. By dividing the transverse carpal ligament (TCL) from within the carpal vault, ECTR preserves the overlying palmar skin, subcutaneous tissue, and palmar fascia. This preservation significantly reduces postoperative pillar pain, minimizes scar tenderness, and accelerates the patient's return to activities of daily living and occupational duties.
The single-incision technique, pioneered by Agee, utilizes a proximal portal to introduce a specialized blade assembly. This approach demands a rigorous understanding of carpal anatomy, precise spatial awareness, and strict adherence to sequential surgical steps to avoid iatrogenic injury to the median nerve, ulnar nerve, or superficial palmar arch.
Clinical Anatomy and Biomechanics
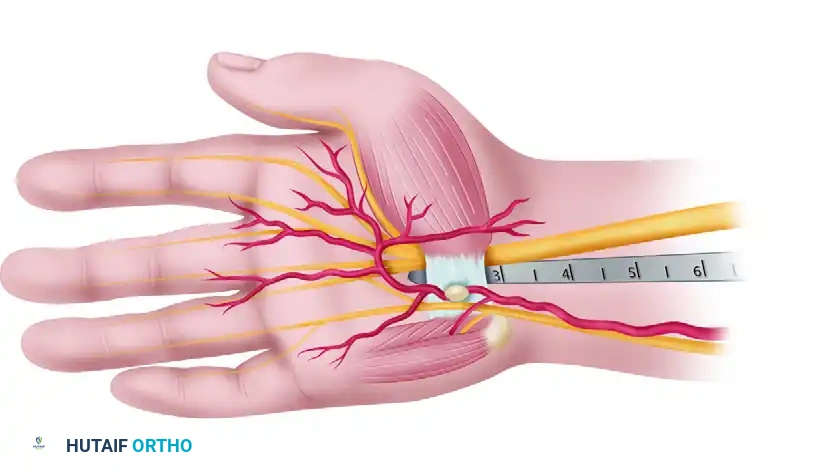
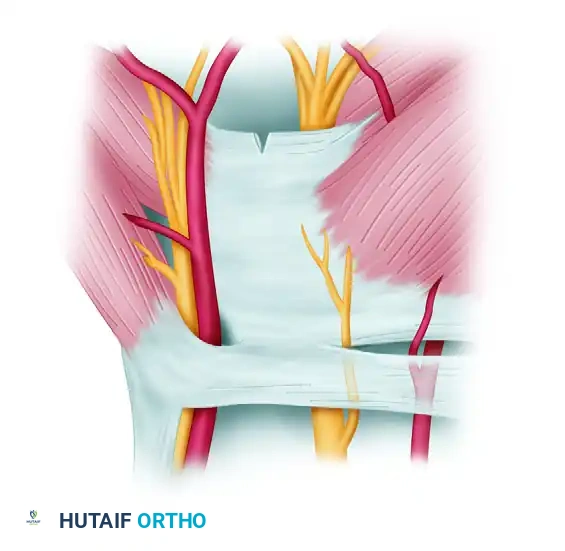
A profound understanding of the carpal tunnel's three-dimensional anatomy is non-negotiable for safe endoscopic release. The carpal tunnel is an osteofibrous canal bounded dorsally by the concave carpal arch and volarly by the TCL. It contains nine flexor tendons (four flexor digitorum superficialis, four flexor digitorum profundus, and the flexor pollicis longus) and the median nerve.
The Endoscopic "Safe Zone"
The critical concept in ECTR is operating within the anatomical "safe zone."
Surgical Pearl: The Safe Zone Triangle
The safe zone for blade elevation is a triangular area defined by:
1. The ulnar half of the distal edge of the transverse carpal ligament.
2. The ulnar border of the median nerve (specifically, its common digital branch to the long/ring web space).
3. The superficial palmar arch distally.
Operating strictly within this ulnar trajectory prevents injury to the median nerve and its recurrent motor branch, which typically arborizes radially.
Preoperative Planning and Operating Room Setup
Optimal ergonomics and visualization are paramount in endoscopic surgery.
- Monitor Placement: Ascertain that the operating room setup is satisfactory. Ensure there is an unobstructed, direct line of sight between the surgeon, the patient’s hand, and the television monitor. The monitor should be positioned directly across from the surgeon to prevent neck strain and ensure hand-eye coordination.
- Anesthesia: Use general or regional anesthesia.
> Surgical Warning: Although the procedure can be done safely using local anesthesia (such as WALANT), the localized increase in tissue fluid from the anesthetic infiltration can severely compromise endoscopic viewing by altering tissue planes and clouding the lens. - Hemostasis: Exsanguinate the limb with an elastic wrap, and inflate a pneumatic tourniquet applied over adequate padding. Leave the arm exposed distal to the tourniquet to allow for unhindered manipulation of the wrist and hand.
Surgical Technique: Single-Incision (Agee) Approach
1. Incision and Superficial Dissection
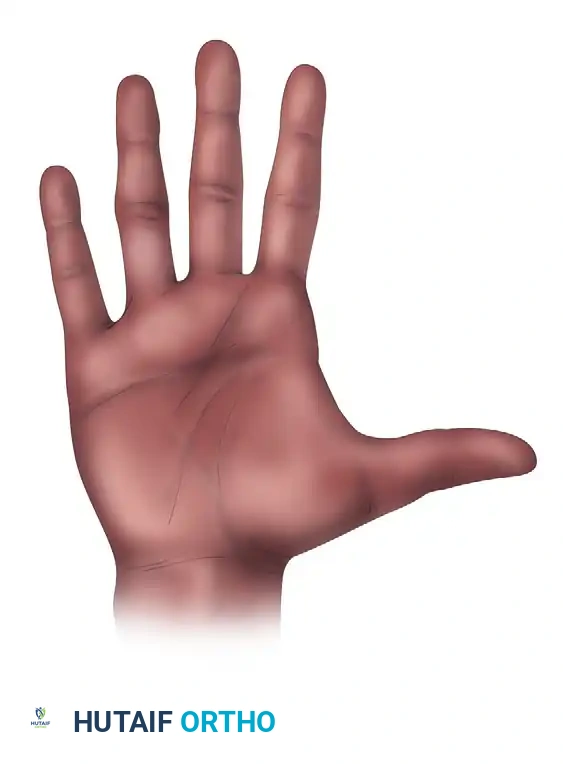
In a patient with two or more wrist flexion creases, identify the most proximal crease. Make a transverse incision in this crease, positioned precisely between the tendons of the flexor carpi radialis (FCR) and the flexor carpi ulnaris (FCU).
Use longitudinal blunt dissection to carefully spread the subcutaneous tissues. This longitudinal spreading is critical to protect the palmar cutaneous branch of the median nerve (PCBMN) and medial antebrachial cutaneous nerve branches. Continue dissection until the antebrachial (forearm) fascia is clearly exposed.
2. Fascial Flap Preparation and Synovial Clearance
Incise and elevate a U-shaped, distally based flap of the forearm fascia.
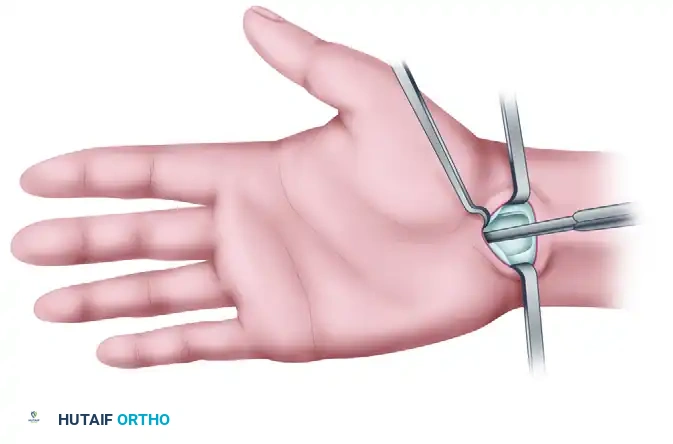
Retract this fascial flap palmarward. This maneuver facilitates the introduction of instruments and aids in the dissection of the synovium from the deep surface of the TCL, effectively creating a "mouthlike" opening at the proximal entrance of the carpal tunnel.
Before introducing the endoscope, use a specialized synovium elevator to scrape the tenosynovium from the deep surface of the TCL. Failure to adequately clear this synovium will result in a "snowstorm" effect on the monitor, obscuring the ligamentous fibers.
3. Endoscopic Trajectory and Insertion
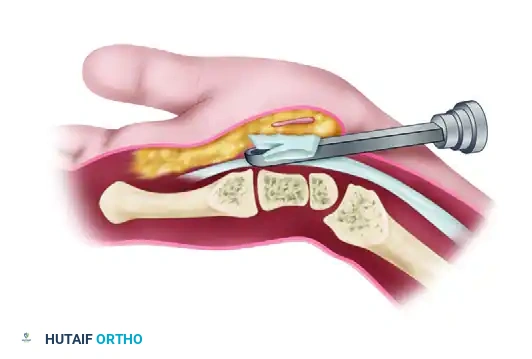
Extend the patient's wrist slightly over a rolled towel. Insert the endoscopic blade assembly into the carpal tunnel.
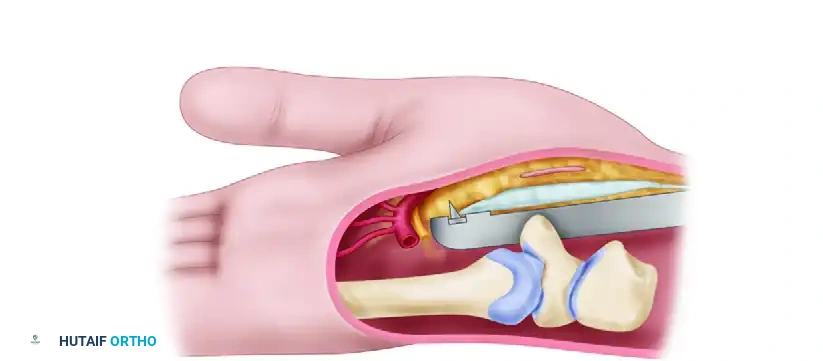
Critical Trajectory Rule: When using the tunneling tools and the endoscopic blade assembly, keep them aligned with the ring finger, hug the hook of the hamate, and keep the tools snugly apposed to the deep surface of the transverse carpal ligament. This maintains a safe path between the median and ulnar nerves.
Press the viewing window snugly against the deep surface of the TCL. While advancing the blade assembly distally, maintain alignment with the ring finger and hug the hook of the hamate, staying strictly to the ulnar side. Make several proximal-to-distal passes to define the distal edge of the TCL and the fat overlying it.
4. Division of the Transverse Carpal Ligament
Define the distal edge of the TCL by utilizing three distinct methods of verification:
1. Video Picture: Direct visualization of the distal ligamentous edge.
2. Ballottement: Palpating the instrument tip through the palmar skin.
3. Transillumination: Observing the light from the endoscope shining through the palmar skin.
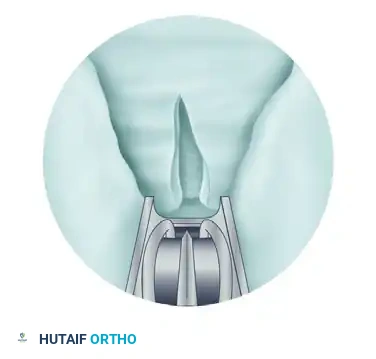
Correctly position the blade assembly, and touch the distal end of the ligament with the partially elevated blade to judge its entry point for ligament division. Elevate the blade and withdraw the device proximally, incising the ligament.
Pitfall Avoidance: The Two-Stage Release
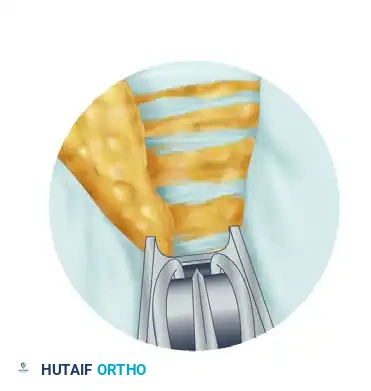
Fat from the proximal palm may compromise endoscopic viewing by protruding through the divided proximal half of the ligament, leaving an oil layer on the lens. Avoid this by first releasing only the distal one-half to two-thirds of the ligament.
Using the unobstructed path for reinsertion of the instrument, accurately complete the distal ligament division with excellent visualization. Once the distal portion is confirmed released, complete the proximal ligament division with a final proximal pass of the elevated blade.
5. Verification of Complete Decompression
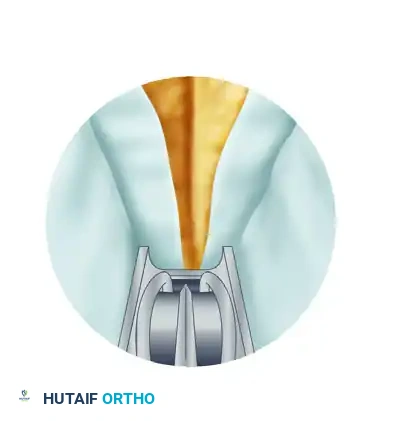
Assess the completeness of the ligament division using specific endoscopic observations. Through the endoscope, note that a partially divided ligament separates on the deep surface, creating a V-shaped defect.
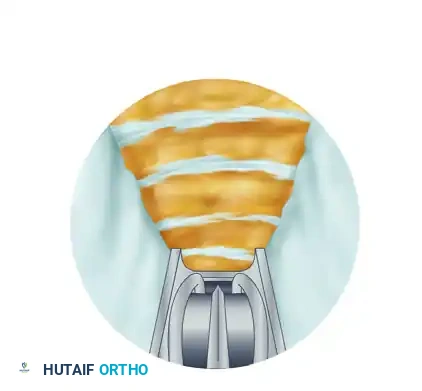
Make subsequent cuts viewing the trapezoidal defect created by complete division as the two halves of the ligament spring apart.
Through this defect, observe the longitudinal palmar fascia fibers intermingled with fat and muscle. Force these structures to protrude into the tunnel by pressing firmly on the palmar skin. Confirm complete division by rotating the blade assembly approximately 20 degrees in both radial and ulnar directions, noting that the cut edges of the ligament abruptly "flop" into the window, obstructing the view.
Palpate the palmar skin over the blade assembly window, observing independent motion between the divided TCL and the more superficial palmar fascia, fat, and muscle.
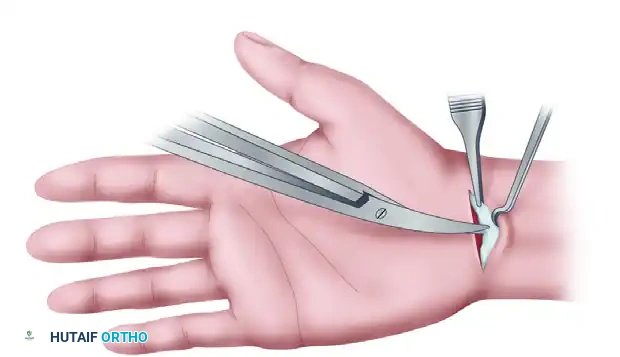
6. Proximal Fascial Release and Closure
Ensure complete median nerve decompression by releasing the proximal forearm fascia. This is performed under direct vision using tenotomy scissors inserted into the proximal incision.
Use small right-angle retractors to view the fascia directly, ensuring no inadvertent nerve or tendon injury occurs during this proximal release.
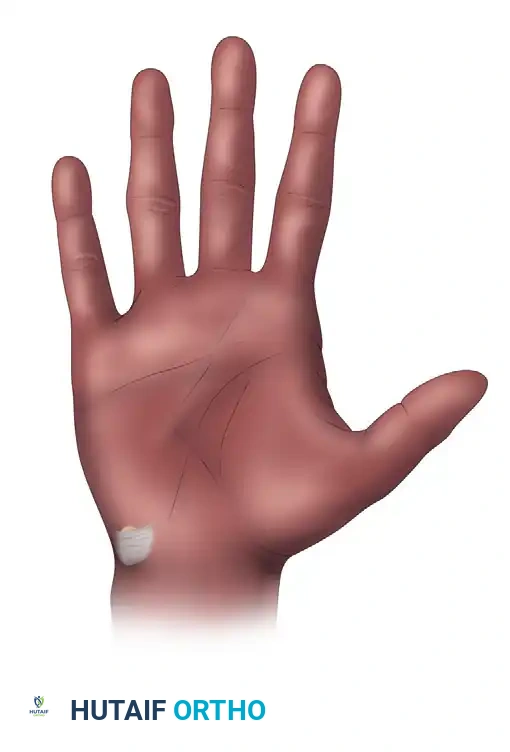
Irrigate the wound copiously. Close the skin incision with subcuticular or simple interrupted non-absorbable sutures. Apply a nonadhering dressing.
Alternative Approach: Two-Portal (Chow) Technique
While the Agee single-incision technique is highly favored, the Chow two-portal technique remains a viable alternative, utilizing both a proximal entry portal and a distal exit portal to establish a working trocar through the carpal tunnel.
Portal Placement:
The proximal entry portal is established similarly to the single-incision technique, proximal to the wrist crease.
A distal exit portal is established in the palm, carefully mapped relative to the superficial palmar arch and the cardinal line.
Trocar Insertion:
A slotted trocar is passed from proximal to distal, exiting through the palmar portal. The endoscope is introduced, and the transverse fibers of the carpal ligament are identified through the slot in the trocar walls.

Ligament Division:
The release is performed in two stages using specialized knives. First, a probe knife is introduced to cut from distal to proximal, releasing the distal edge of the carpal ligament.
Subsequently, a triangle knife is utilized to complete the cut in the midsection and proximal portion of the carpal ligament.
Both techniques require meticulous attention to detail, but the single-incision Agee technique eliminates the palmar incision entirely, further reducing the risk of palmar scar tenderness.
Postoperative Care and Rehabilitation
The postoperative protocol is designed to balance soft tissue healing with the prevention of tendon adhesions.
- Immobilization: Apply a well-padded volar splint. In highly selected, compliant patients, the wrist may be left unsplinted to encourage immediate motion, though a short period of splinting (3-5 days) is often preferred to manage initial edema.
- Suture Removal: The splint and sutures may be removed early or at 10 to 14 days postoperatively.
- Early Mobilization: Active finger motion (tendon gliding exercises) is allowed and strongly encouraged early in the postoperative period to prevent flexor tendon adhesions.
- Activity Restrictions: Forceful pulling, heavy lifting, and activities requiring forceful grip with wrist flexion are strictly discouraged for 4 to 6 weeks. This restriction is critical to allow maturation of soft tissue healing and prevent bowstringing of the flexor tendons through the released TCL.
- Return to Work: Progression to light activities of daily living is allowed at 2 to 3 weeks. More strenuous, heavy manual labor activities are gradually added over the subsequent 4 to 6 weeks based on clinical progress and resolution of pillar pain.
Complications and Pitfalls
While ECTR boasts excellent outcomes, the learning curve is steep. Complications, though rare, can be devastating.
* Incomplete Release: The most common complication of ECTR. It usually occurs at the most distal aspect of the TCL or proximally at the antebrachial fascia. Rigorous endoscopic verification (the V-shaped to trapezoidal defect transition) is mandatory.
* Nerve Injury: Laceration of the median nerve, its recurrent motor branch, or the ulnar nerve can occur if the trajectory deviates from the ring finger/hook of hamate axis.
* Vascular Injury: The superficial palmar arch is at risk if the blade is advanced too far distally. Transillumination and ballottement are critical safeguards against this catastrophic complication.
By adhering strictly to the anatomical safe zones and employing a methodical, step-wise approach, the orthopedic surgeon can achieve consistent, excellent outcomes with endoscopic carpal tunnel release.
You Might Also Like
