Advanced Management of Adherent Flexor Tendons, Tenodesis, and Extensor Tendon Injuries
Key Takeaway
The management of complex hand tendon injuries requires a profound understanding of biomechanics and anatomy. This guide details the Howard technique for freeing adherent flexor tendons using Silastic sheeting, the precise execution of distal interphalangeal joint tenodesis for profundus salvage, and the critical evaluation of extensor tendon variations. Mastery of these techniques ensures optimal functional restoration, preventing debilitating deformities such as mallet finger and boutonnière deformity following central slip disruption.
INTRODUCTION TO COMPLEX TENDON RECONSTRUCTION
The restoration of digital kinematics following severe tendon trauma or prolonged immobilization remains one of the most formidable challenges in hand surgery. The delicate balance between the flexor and extensor mechanisms dictates the functional capacity of the hand. When primary repair or grafting is precluded by severe scarring, segmental loss, or delayed presentation, the orthopaedic surgeon must employ advanced salvage techniques. This comprehensive masterclass details the surgical protocols for freeing adherent flexor tendons (tenolysis), performing distal interphalangeal (DIP) joint tenodesis, and navigating the complex anatomical variations and clinical presentations of extensor tendon injuries.
FREEING OF ADHERENT TENDONS (TENOLYSIS)
Tendon adhesions are a ubiquitous complication following flexor tendon repair, crush injuries, or prolonged digital immobilization. Adhesions tether the tendon to the surrounding fibro-osseous canal, obliterating the gliding mechanism and severely restricting active range of motion (ROM), despite preserved passive ROM.
The Howard technique for freeing adherent tendons utilizes a mechanical barrier—specifically a Silastic (silicone elastomer) sheet—to prevent the recurrence of adhesions between the tendon and the raw osseous surface during the critical early phases of healing.
Indications and Preoperative Planning
Tenolysis is indicated when a patient exhibits a significant discrepancy between active and passive ROM that has plateaued despite a minimum of 3 to 6 months of rigorous, supervised hand therapy. The soft tissue envelope must be supple, and the joints must be passively mobile.
⚠️ SURGICAL WARNING:
Tenolysis should never be performed in the presence of severe joint contractures, inadequate soft tissue coverage, or active infection. The patient must be highly motivated and psychologically prepared for the demanding postoperative rehabilitation protocol, which begins immediately after surgery.
Surgical Technique: The Howard Procedure
1. Incision and Exposure
* Utilize regional anesthesia (e.g., axillary block) or wide-awake local anesthesia no tourniquet (WALANT). WALANT is highly advantageous as it allows intraoperative assessment of active tendon gliding.
* Make a longitudinal midlateral incision parallel to the lateral margin of the involved metacarpal or phalanx. This approach avoids the volar tactile surface and prevents the formation of a volar flexion contracture scar. Ensure the incision is placed well away from any previous surgical scars to minimize the risk of skin necrosis.
2. Tendon Mobilization
* Carefully elevate the skin flaps, protecting the neurovascular bundles.
* Identify the adherent flexor tendon. Using sharp dissection, meticulously free the tendon from the surrounding scar tissue and the underlying bone.
* Perform a circumferential tenolysis. The tendon must be completely liberated until full passive excursion translates into full digital flexion and extension.
3. Osseous Preparation
* Once the tendon is mobilized, inspect the underlying bone. Adhesions often form where the periosteum has been stripped or the bone has been fractured.
* Smooth the raw, irregular bony surface using a fine rasp or a small osteotome. A smooth osseous bed is critical to minimize mechanical friction against the tendon.
4. Silastic Sheet Interposition
* To prevent re-adherence, size a sterile, medical-grade Silastic sheet to cover the exposed, roughened bone.
* Place the Silastic sheet over the bone, ensuring it acts as a smooth, synthetic gliding floor for the tendon.
* Anchor the sheet securely by placing non-absorbable sutures (e.g., 4-0 Prolene) at its four corners, suturing it to the adjacent periosteum or deep retinacular structures. Ensure the knots are buried and do not impinge on the tendon.
5. Closure and Hemostasis
* Deflate the tourniquet (if used) and achieve meticulous hemostasis to prevent postoperative hematoma, which serves as a scaffold for new adhesions.
* Close the skin with non-absorbable sutures.
Postoperative Protocol
- Immobilize the digit in a bulky, compressive dressing with a dorsal blocking splint for exactly 5 days to allow initial soft tissue sealing and reduction of edema.
- On postoperative day 5, initiate aggressive, supervised active and active-assisted voluntary motion.
- Improvement in active ROM is progressive and can be expected to improve for up to 1 year postoperatively, provided the patient adheres strictly to the rehabilitation regimen.
TENODESIS OF THE DISTAL INTERPHALANGEAL JOINT
Tenodesis is a highly effective salvage procedure utilized when the flexor digitorum profundus (FDP) has been irreparably damaged, flexor tendon grafting is contraindicated or impossible (e.g., due to a destroyed Zone II fibro-osseous canal), and the patient requires a stable, partially flexed fingertip for functional pinch.
This procedure is particularly valuable for the index finger, where a stable DIP joint in slight flexion is essential for a strong tip-to-tip or pulp-to-pulp pinch with the thumb. It is also indicated for manual laborers who require a stable digit to hook around tools. The operation is contingent upon the presence of a distal FDP stump long enough to be anchored to the middle phalanx.
Biomechanics and Positioning
The optimal position for DIP joint tenodesis varies by digit and patient occupation. Generally, the index finger is fixed at 20 to 30 degrees of flexion, the long finger at 30 to 40 degrees, and the ring and small fingers at progressively greater flexion (up to 45-50 degrees) to facilitate a harmonious power grip.
💡 CLINICAL PEARL:
Always assess the patient's contralateral hand and occupational requirements before selecting the angle of tenodesis. A K-wire can be temporarily placed intraoperatively to allow the patient (if under WALANT) to simulate their required pinch grip before final fixation.
Surgical Technique
1. Approach and Tendon Identification
* Make a midlateral incision or a volar oblique (Bruner) incision over the middle and distal phalanges.
* Elevate the flaps and identify the distal stump of the FDP tendon. Assess its length and integrity.
2. Determining Tendon Length
* Flex the DIP joint to the predetermined functional angle (e.g., 30 degrees for the index finger).
* Apply proximal traction to the FDP stump and lay it over the middle phalanx to determine the exact length of tendon required to maintain this posture.
3. Tendon Preparation
* Insert a Bunnell-type pull-out wire suture (using a 3-0 or 4-0 monofilament wire or heavy non-absorbable synthetic suture) into the proximal end of the FDP stump.
* Excise any redundant, frayed, or necrotic tendon proximal to the suture to ensure a healthy tendon end for osseous integration.
4. Joint Stabilization
* With the DIP joint held in the desired degree of flexion, drive a 0.045-inch Kirschner wire (K-wire) obliquely across the joint to provide rigid temporary stabilization.
* Cut the K-wire flush beneath the skin to prevent pin-tract infections during the healing phase.
5. Osseous Preparation and Tendon Insertion
* Identify the intended site of tenodesis on the volar aspect of the middle phalanx.
* Using a dental chisel or fine rongeur, aggressively roughen the volar cortex to expose bleeding cancellous bone.
* Drill two small holes through the middle phalanx from the anterior (volar) cortex to the posterior (dorsal) cortex.
* On the palmar cortex, connect these two drill holes using a small curet or burr to create a cortical window. This window will receive the tendon stump, promoting robust bone-to-tendon healing (Sharpey's fibers integration).
6. Fixation
* Pass the two ends of the pull-out wire through the drill holes to the dorsal aspect of the middle phalanx.
* Draw the FDP stump firmly into the cortical window.
* Tie the wire over a sterile button on the dorsal skin to secure the tenodesis.
Postoperative Protocol
- The digit is protected in a splint. The pull-out wire and button are typically removed at 4 to 6 weeks once clinical healing is evident.
- The buried K-wire is usually left in place for 6 to 8 weeks, or until radiographic evidence of stable tenodesis or joint arthrodesis is observed, after which it may be removed under local anesthesia.
EXTENSOR TENDON ANATOMY AND VARIATIONS
A profound understanding of the extensor mechanism is mandatory for the accurate diagnosis and surgical repair of dorsal hand injuries. The extensor tendons are divided into six distinct dorsal compartments at the level of the extensor retinaculum.
Anatomical Variations
Anatomical variations in the extensor compartments are the rule rather than the exception. Failure to recognize these variations can lead to incomplete surgical repairs or failed decompression syndromes.
- First Dorsal Compartment: Contains the abductor pollicis longus (APL) and extensor pollicis brevis (EPB). Septation within this compartment occurs in 20% to 60% of specimens. Furthermore, the APL may possess multiple tendinous slips in 56% to 98% of dissections.
- Clinical Implication: During a surgical release for De Quervain's tenosynovitis, failure to identify a sub-compartment or an accessory APL slip is the leading cause of persistent postoperative pain.
- Extensor Indicis Proprius (EIP): May present as a double tendon.
- Extensor Digitorum Communis (EDC):
- Long Finger: May have a double or triple EDC slip.
- Ring Finger: May have a single or triple EDC slip.
- Small Finger: The EDC to the small finger is frequently absent or single.
- Extensor Digiti Minimi (EDQ): Often presents as a double tendon with double insertions.
Juncturae Tendinum
The juncturae tendinum are intertendinous connections located in Zone VI (over the metacarpals) that link the EDC tendons. They are classified into three major types based on their morphology:
1. Type 1: Thin, filamentous connections.
2. Type 2: Thicker, more substantial oblique bands.
3. Type 3: Y-shaped or polymorphic, highly robust connections.
⚠️ SURGICAL WARNING:
The juncturae tendinum play a critical role in force transmission. If an EDC tendon is completely lacerated proximal to a robust junctura (Type 2 or 3), the patient may still be able to actively extend the metacarpophalangeal (MCP) joint of the injured digit because the adjacent intact tendon pulls the distal stump via the junctura. This anatomical quirk frequently leads to missed diagnoses in the emergency department.
CLINICAL EXAMINATION OF EXTENSOR TENDON INJURIES
Extensor tendon injuries are classified into anatomical zones (I through VIII). The clinical presentation varies drastically depending on the zone of injury and the specific components of the extensor expansion involved.
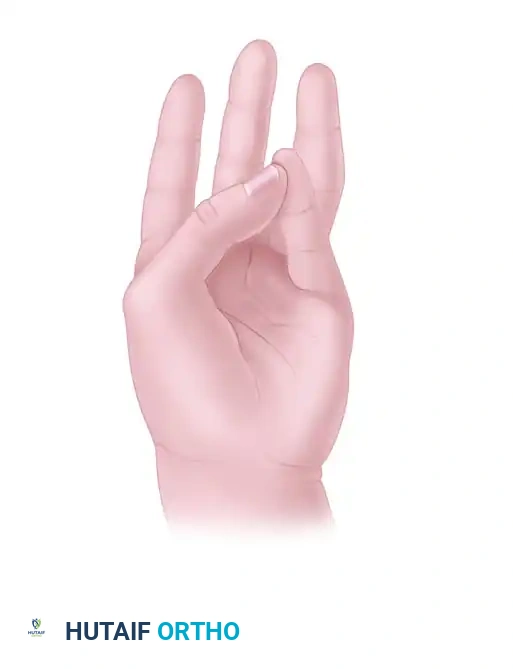
Zone I and II Injuries: The Mallet Finger
An extensor tendon is presumed to be divided between the proximal interphalangeal (PIP) and distal interphalangeal (DIP) joints when active extension of the DIP joint is lost.
- Pathomechanics: Disruption of the terminal extensor tendon at or near its insertion into the distal phalanx.
- Clinical Presentation: Initially, a gross mallet finger deformity (a flexed posture of the DIP joint) may be absent. This occurs because the surrounding joint capsule and collateral ligaments have not yet been stretched by the unopposed, powerful pull of the flexor digitorum profundus. Over days to weeks, as the secondary restraints attenuate, the classic drooping of the fingertip becomes clinically obvious.
Zone III and IV Injuries: Central Slip Disruption
Division of the central slip of the extensor tendon over the PIP joint (Zone III) or the proximal phalanx (Zone IV) is a highly deceptive injury.
- Pathomechanics: The central slip is responsible for initiating PIP joint extension. When it is severed, the lateral bands, which normally lie dorsal to the axis of rotation of the PIP joint, lose their dorsal tethering.
- Clinical Presentation: Immediately following the injury, loss of PIP joint extension may not be apparent. The patient can often still extend the PIP joint via the intact lateral bands. However, over time, the lateral bands subluxate anteriorly (volarly) past the axis of rotation of the PIP joint. Once they fall volar to the axis, they become flexors of the PIP joint and hyperextensors of the DIP joint, resulting in the classic, debilitating Boutonnière deformity.
- Diagnostic Pitfall: Because the MCP and DIP joints may be actively extended, and PIP extension may initially be weakly preserved, this lesion is easily overlooked during the initial examination.
- Elson's Test: To accurately diagnose a central slip injury before the deformity develops, perform Elson's test. Bend the PIP joint 90 degrees over the edge of a table and ask the patient to extend the middle phalanx against resistance. If the central slip is intact, the DIP joint will remain floppy. If the central slip is ruptured, the effort is transmitted entirely through the lateral bands, causing the DIP joint to become rigidly extended.
Complete Extensor Expansion Division
When the entire extensor expansion, including both the central slip and the lateral bands, is divided at the level of the PIP joint, active extension of all joints distal to the wound is immediately lost. However, such a catastrophic lesion is relatively uncommon. The extensor expansion covers the convex, bony surface of the proximal interphalangeal joint; therefore, the injuring object (e.g., a knife or saw) is usually blocked by the underlying bone before a complete, circumferential division of the expansion can occur.
CONCLUSION
The surgical management of tendon pathology in the hand demands meticulous technique, profound anatomical knowledge, and a deep respect for biomechanics. Whether executing a delicate tenolysis using Silastic sheeting, performing a robust DIP joint tenodesis for functional salvage, or navigating the deceptive clinical presentations of extensor tendon lacerations, the orthopaedic surgeon must remain vigilant. Recognizing anatomical variations such as multiple APL slips and understanding the masking effect of the juncturae tendinum are paramount to avoiding surgical failures and ensuring optimal functional recovery for the patient.
You Might Also Like