Total Hip Arthroplasty: Preparation, Approaches, and Surgical Techniques
Key Takeaway
Total hip arthroplasty requires meticulous preoperative templating, precise patient positioning, and a thorough understanding of surgical anatomy. The choice of surgical approach—whether anterolateral, direct lateral, or posterolateral—dictates the exposure and postoperative stability. This guide provides an evidence-based, step-by-step masterclass on the posterolateral approach, emphasizing biomechanical restoration, soft-tissue preservation, and optimal component positioning to ensure long-term survivorship and functional recovery in orthopedic patients.
PREOPERATIVE PLANNING AND TEMPLATING
The foundation of a successful Total Hip Arthroplasty (THA) is laid long before the first incision. Meticulous preoperative templating is mandatory to anticipate the optimal size of the components, restore the anatomic center of rotation, equalize leg lengths, and re-establish femoral offset. Failure to accurately template can lead to intraoperative compromises, resulting in altered biomechanics, instability, or accelerated polyethylene wear.
Clinical Pearl: Always template both the affected and the contralateral normal hip. The contralateral hip often provides a more accurate representation of the patient’s native center of rotation and offset, especially in cases of severe degenerative dysplasia or protrusio acetabuli.
Radiographic Assessment
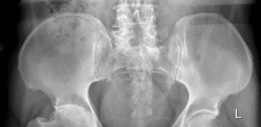
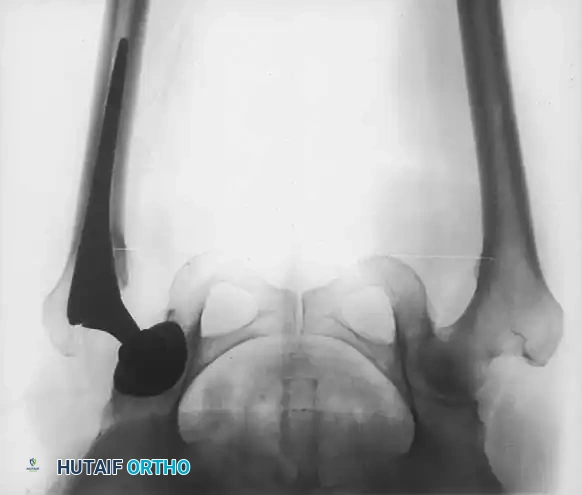
Standard preoperative radiographs must include an anteroposterior (AP) view of the pelvis centered over the pubic symphysis (with the hips internally rotated 15 degrees to profile the femoral neck) and a lateral view of the affected hip.
Step-by-Step Templating Process:
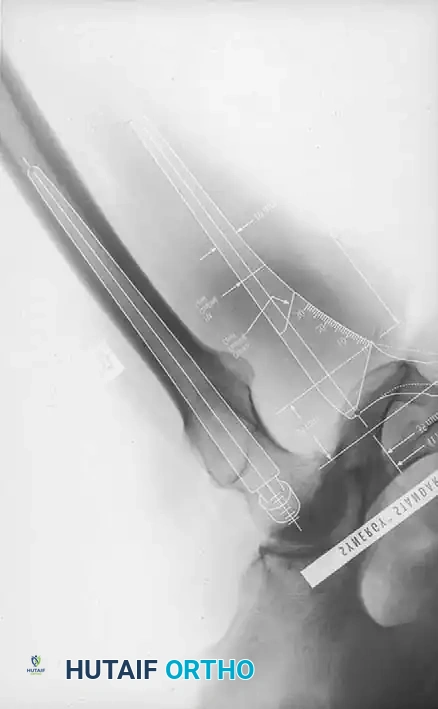
1. Determine Leg Length Discrepancy: A horizontal reference line is drawn across the bottom of the radiographic teardrops or the ischial tuberosities. The difference in the perpendicular distance from this line to a reproducible landmark on the proximal femur (usually the lesser trochanter) approximates the amount of limb shortening.
2. Acetabular Templating: The acetabular template is positioned at a 40- to 45-degree angle of inclination. It should correspond closely to the subchondral bone plate, ensuring adequate lateral coverage and medialization to the true floor (ilioischial line). The new center of rotation is marked.
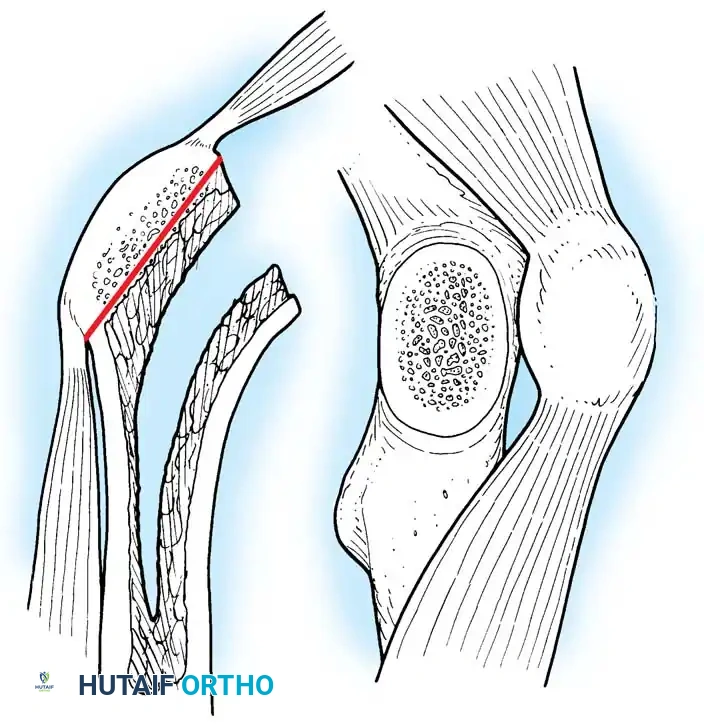
3. Femoral Templating: The femoral template that most closely matches the proximal and distal size and contour of the femoral metaphysis and diaphysis is selected.
4. Neck Length and Offset: The neck length and offset are estimated to restore the abductor moment arm. The anticipated level of the femoral neck resection is marked relative to the lesser trochanter.
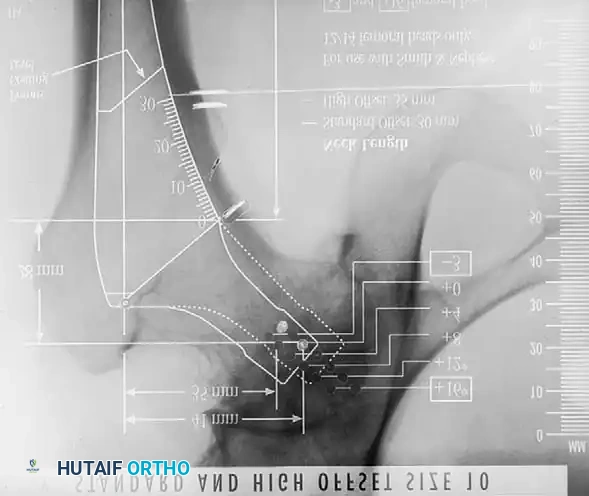
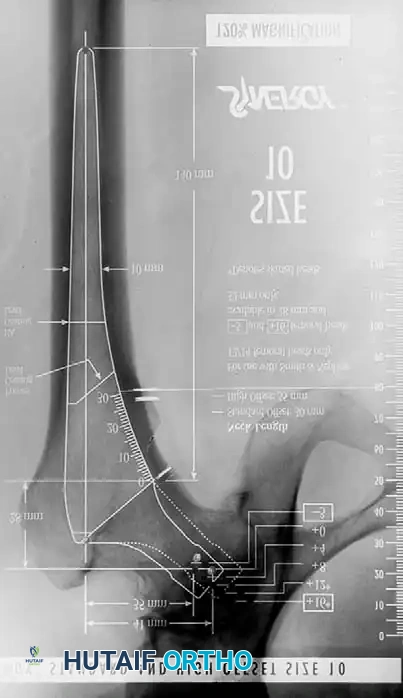
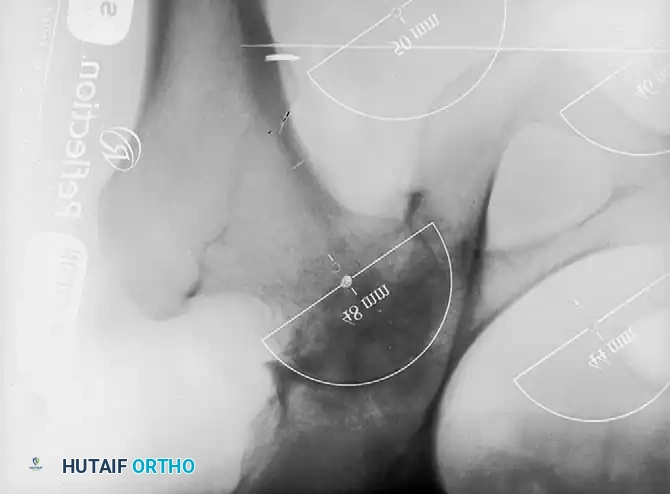
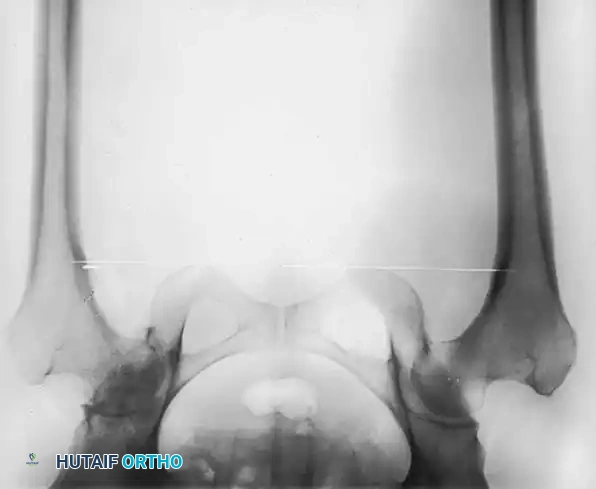
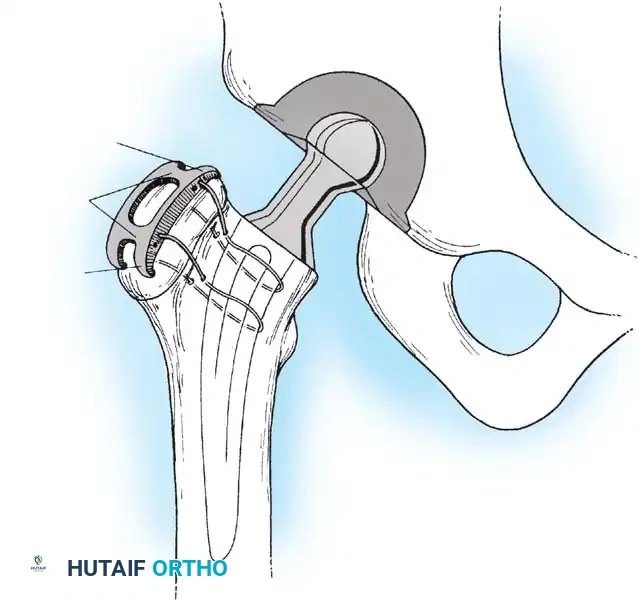
Fig. 7-40 Templating of radiographs for preoperative planning. A, Line drawn across the bottom of the pelvis to assess limb shortening. B, Acetabular template placed to mark the new center of rotation. C, Femoral template matching the metaphysis. D, Neck length and offset estimation.
Advanced templating systems, such as the Synergy system, allow for precise calculation of standard versus high-offset stems to fine-tune soft-tissue tension.
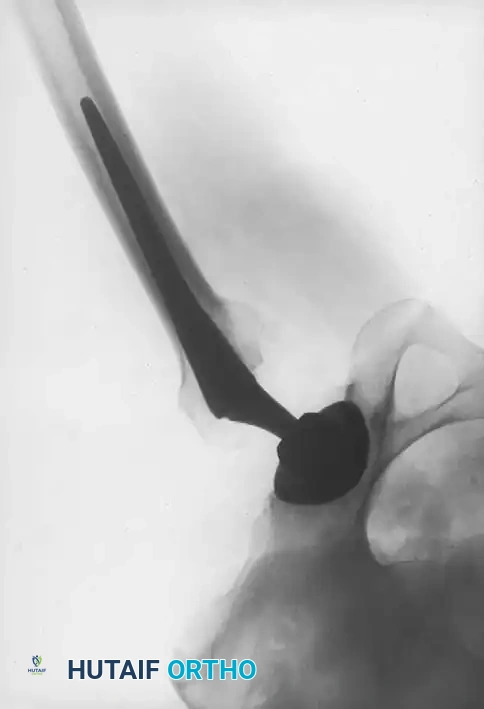
Intraoperative and postoperative radiographs should confirm that the completed arthroplasty corresponds to the preoperative plan, with implants properly sized and leg length/offset correctly restored.
PREPARATION, POSITIONING, AND DRAPING
Proper patient positioning is critical. An operating table that tilts easily is highly recommended, especially when the patient is placed in the lateral decubitus position. If the patient is not anchored securely, the pelvis may roll during the procedure, making the proper determination of acetabular component version and inclination exceedingly difficult.
Positioning Devices and Padding
A variety of pelvic positioning devices (peg boards, clamp positioners) are commercially available.
* Placement: Positioning devices must be placed securely against the pubic symphysis anteriorly and the sacrum posteriorly. They must not impede the motion of the hip intraoperatively, or assessing stability and impingement will be compromised.
* Vascular Precautions: Anterior supports should be placed against the anterior superior iliac spines (ASIS) or pubic symphysis so that no pressure is applied over the femoral triangles. Compression here can result in catastrophic limb ischemia or femoral nerve neuropathy.
* Alternative Methods: Suction-deflated beanbags can be used, though dedicated rigid hip positioning devices are generally more secure for heavy or obese patients.
* Nerve Protection: All bony prominences and the dependent peroneal nerve (at the fibular head) must be meticulously padded, especially if a lengthy primary or revision procedure is expected.
If the patient is to be operated on in the supine position (e.g., for an anterior approach), a small pad is placed beneath the buttock of the affected hip. This is especially helpful in obese patients, as it allows loose adipose tissue to drop away from the incision site, facilitating exposure.
Draping Protocol
Strict aseptic technique is paramount.
1. The adhesive edges of a U-shaped plastic drape are applied to the skin to seal off the perineal and gluteal areas.
2. The hip and entire limb are prepared with a suitable bactericidal solution (e.g., Chlorhexidine-alcohol).
3. The foot is preferably covered with an impervious stockinette.
4. Final drapes must be of an impervious material to allow abundant pulsatile irrigation without fear of strike-through contamination.
Surgical Warning: If anterior dislocation of the hip is anticipated while the patient is in the lateral position, utilize a draping system that incorporates a sterile pocket suspended across the anterior side of the operating table. This allows the leg to be placed safely in the bag while the femur is being prepared, preventing contamination.
SURGICAL APPROACHES TO THE HIP
Many variations have evolved in the surgical approaches used for THA. The choice of a specific surgical approach is largely a matter of the surgeon's personal preference, training, and the specific anatomical challenges of the patient. Virtually all modern total hip femoral and acetabular components can be properly implanted through numerous approaches, provided adequate exposure is obtained.
1. Anterolateral Approaches
- Charnley Technique: Originally utilized the anterolateral approach with the patient supine, requiring a routine osteotomy of the greater trochanter and anterior dislocation. This is less commonly used today due to complications related to trochanteric nonunion and wire breakage.
- Amstutz & Müller Variations: Amstutz advocated the anterolateral approach with trochanteric osteotomy but in the lateral position. Müller’s technique releases only the anterior part of the abductor mechanism without a formal osteotomy.
2. Direct Lateral Approaches
- Hardinge Approach: Performed supine or lateral. A muscle-splitting incision through the gluteus medius and minimus allows anterior dislocation and affords excellent acetabular exposure.
- Drawback: Residual abductor weakness and a postoperative Trendelenburg limp can occur due to avulsion of the repaired anterior abductors or direct iatrogenic injury to the superior gluteal nerve (if the split extends >5 cm proximal to the greater trochanter).
- Dall Variation: Involves removal of the anterior portion of the abductors with an attached thin wafer of bone from the anterior edge of the greater trochanter. Bony reattachment yields superior abductor function compared to soft-tissue repair alone.
- Head Modification: The vastus lateralis is reflected anteriorly in continuity with the anterior cuff of the abductors. This provides massive exposure of the proximal femur, making it highly appropriate for complex revision surgery.
3. Posterolateral Approach
The posterolateral approach, with posterior dislocation of the hip, requires the lateral decubitus position. It does not require routine osteotomy of the greater trochanter, thereby preserving the abductor mechanism entirely.
* Advantage: Excellent femoral exposure and preservation of abductor strength.
* Drawback: Historically associated with a higher postoperative dislocation rate compared to anterior/lateral approaches. However, modern enhanced posterior soft-tissue repair techniques (repairing the capsule and short external rotators back to the greater trochanter) have reduced this risk to levels comparable with other approaches.
THE POSTEROLATERAL APPROACH: STEP-BY-STEP TECHNIQUE
The posterolateral approach is a modification of the classic posterior approaches described by Gibson and Moore. It can be extended proximally (via trochanteric osteotomy) or distally (along the femoral shaft) for revision scenarios.
🔪 Surgical Technique: Soft Tissue Dissection
- Incision: With the patient firmly anchored in the straight lateral position, make a slightly curved incision centered over the greater trochanter. Begin proximally at a point level with the ASIS along a line parallel to the posterior edge of the greater trochanter. Extend distally to the center of the trochanter and along the femoral shaft for approximately 10 cm.
- Note: Adequate proximal extension is required for straight-line reaming of the femoral canal; distal extension is needed for unhindered acetabular preparation.
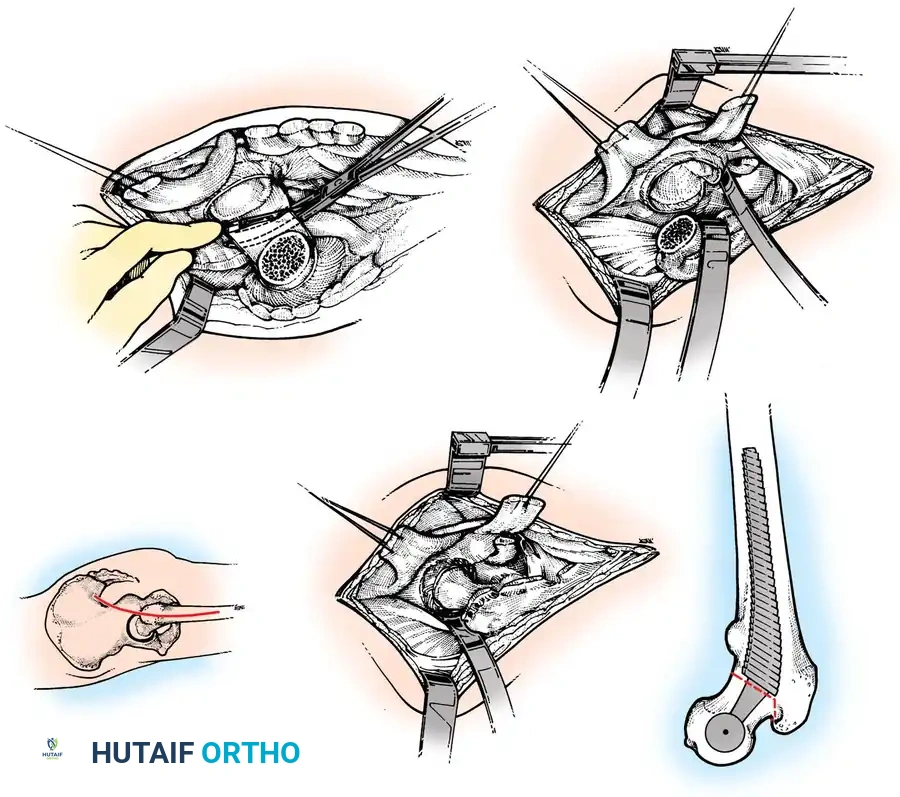
Fig. 7-41 A, Skin incision for posterolateral approach. B, Deep dissection. C, Neck cut. D, Anterior capsule division. E, Femoral retraction.
- Superficial Dissection: Divide the subcutaneous tissues in a single plane down to the fascia lata and the thin fascia covering the gluteus maximus. Dissect the subcutaneous tissues from the fascial plane for ~1 cm anteriorly and posteriorly to facilitate closure.
- Fascial Incision: Divide the fascia lata in line with the skin wound over the center of the greater trochanter. Bluntly split the gluteus maximus proximally in the direction of its fibers. Coagulate any crossing vessels.
- Deep Exposure: Extend the fascial incision distally to expose the tendinous insertion of the gluteus maximus on the posterior femur (the gluteus maximus sling). If the femur is tight and resists internal rotation, release the proximal portion of this insertion.
- Protecting the Field: Suture moist towels or laparotomy sponges to the fascial edges to exclude the skin, prevent tissue desiccation, and collect bone/cement debris.
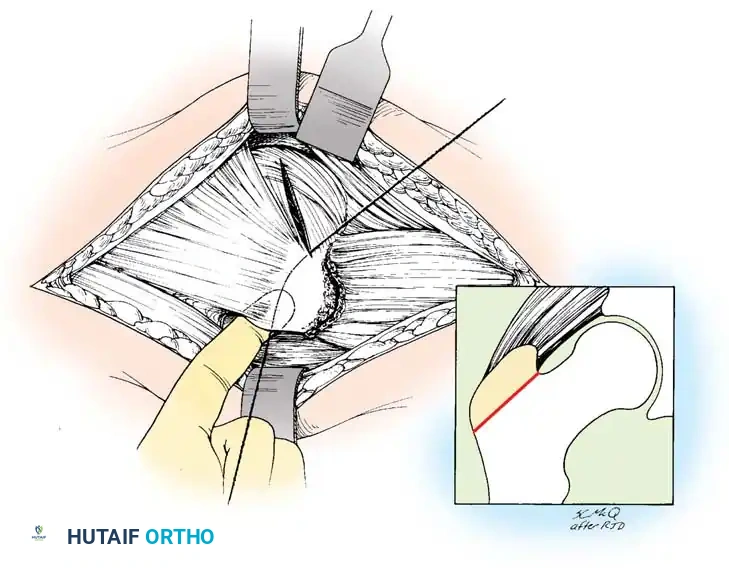
🔪 Surgical Technique: Capsulotomy and Dislocation
- External Rotators: Internally rotate the hip to place the short external rotators under tension. Identify the piriformis, superior gemellus, obturator internus, inferior gemellus, and quadratus femoris.
- Release: Place tag sutures in the conjoined tendon of the short external rotators and the piriformis. Transect them close to their insertion on the greater trochanter and reflect them posteriorly to protect the sciatic nerve.
- Capsulotomy: Perform a T-shaped or H-shaped capsulotomy. Retain the capsular flaps for later robust posterior repair.
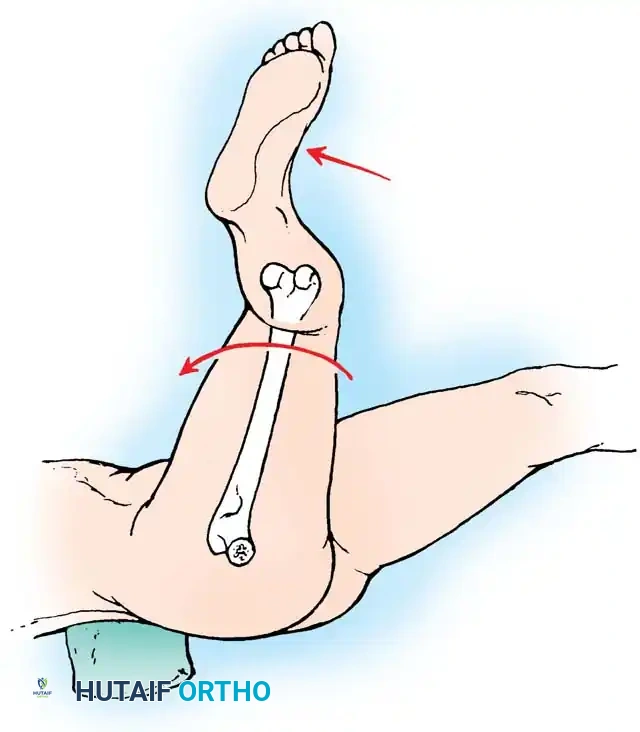
- Dislocation: Gently dislocate the hip posteriorly by flexing, adducting, and internally rotating the leg.
- Warning: Do not use excessive force. If dislocation is difficult, ensure all posterior capsular structures are released, or perform the femoral neck osteotomy in situ.
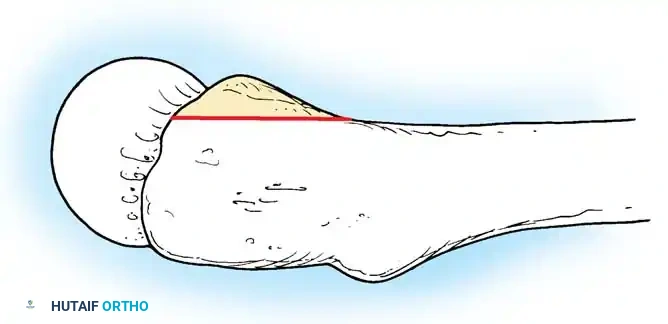
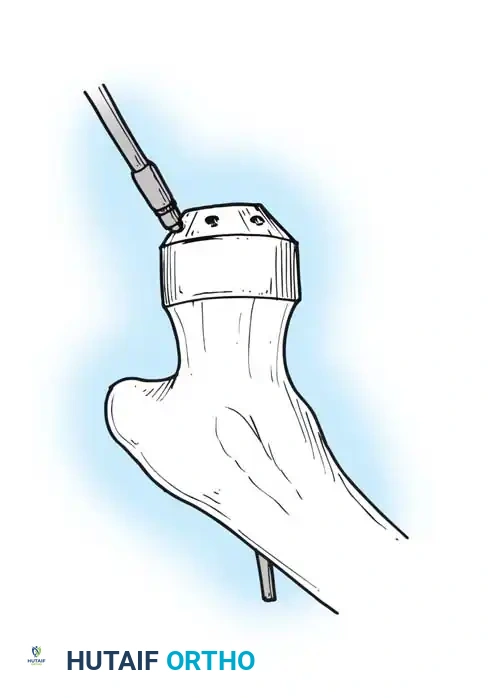
🔪 Surgical Technique: Femoral Neck Osteotomy
Using the preoperative template as a guide, measure the distance from the lesser trochanter to the planned resection level. Use a reciprocating or oscillating saw to resect the femoral neck at the appropriate angle (usually 45 degrees).
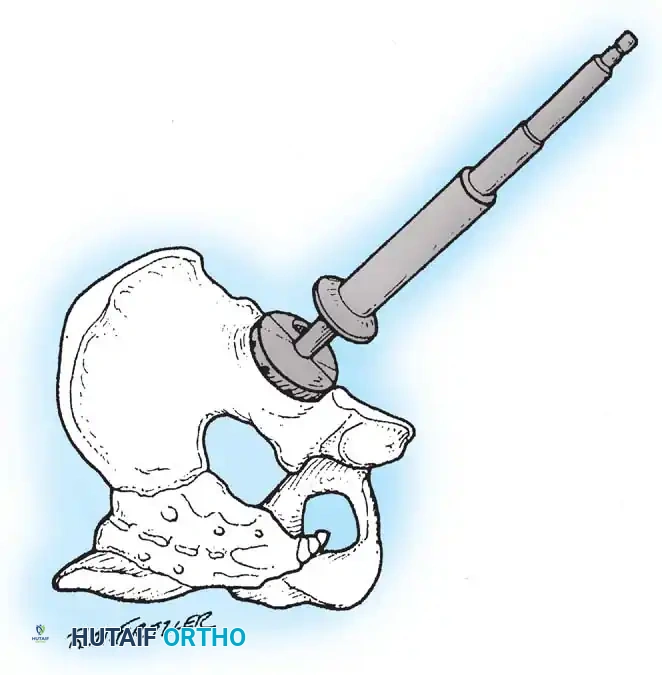
ACETABULAR PREPARATION AND IMPLANTATION
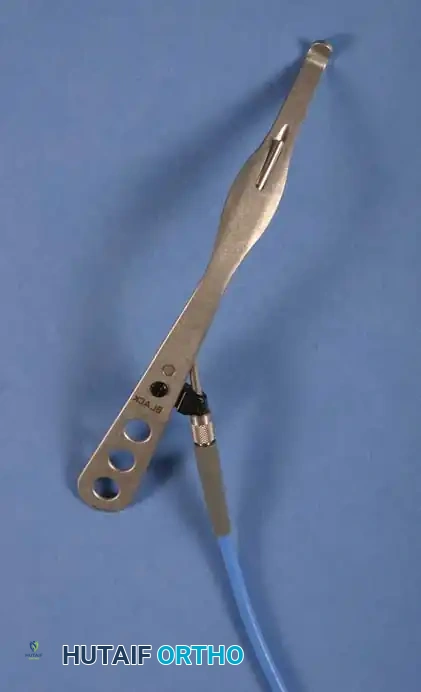
Excellent visualization of the acetabulum is mandatory. Place a Hohmann retractor anteriorly over the anterior column, a blunt retractor inferiorly beneath the transverse acetabular ligament, and a posterior retractor to retract the femur anteriorly.
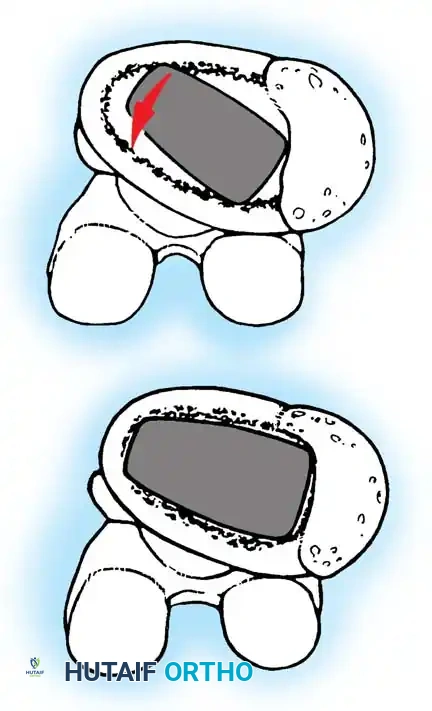
- Soft Tissue Clearance: Excise the labrum and clear the pulvinar from the cotyloid fossa. Identify the true medial wall and the transverse acetabular ligament, which serves as a key landmark for version.
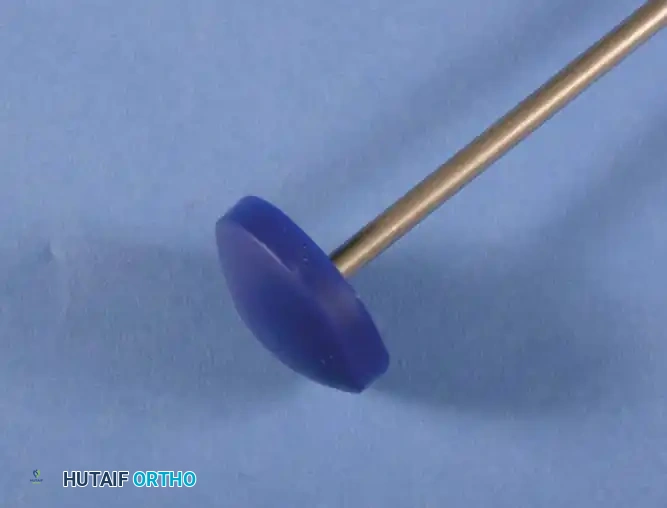
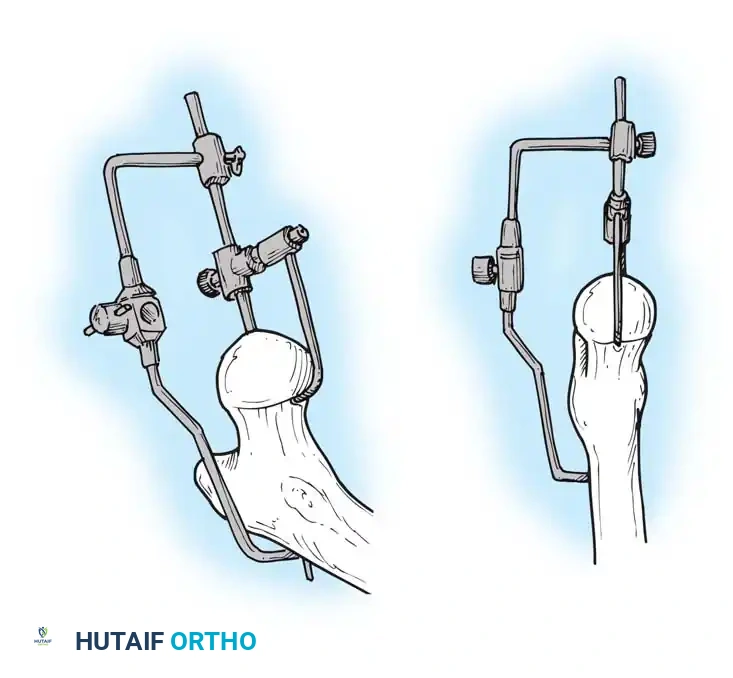
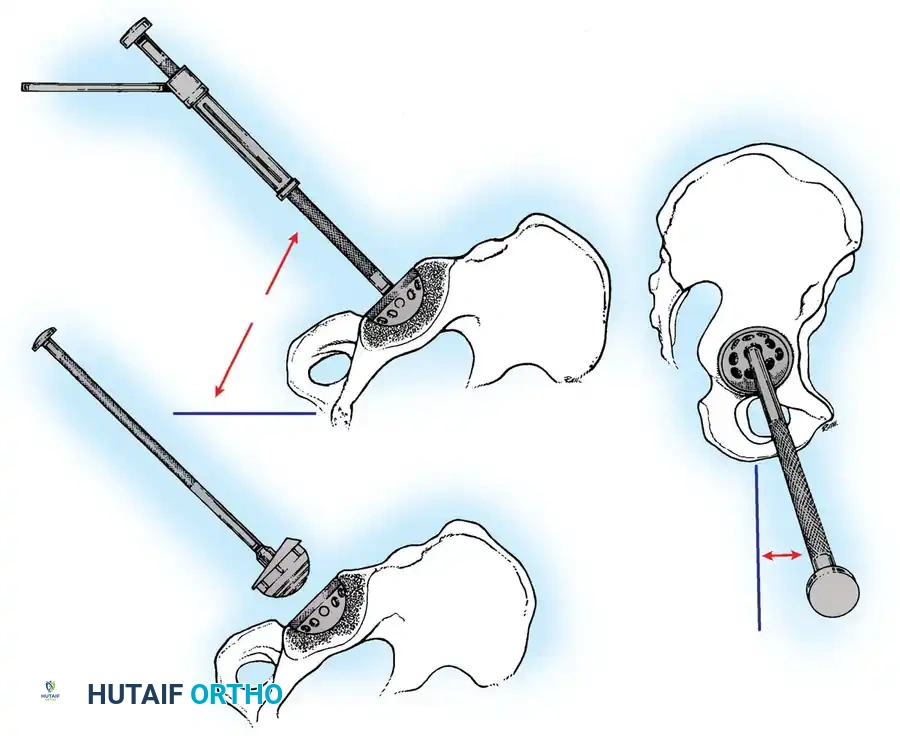
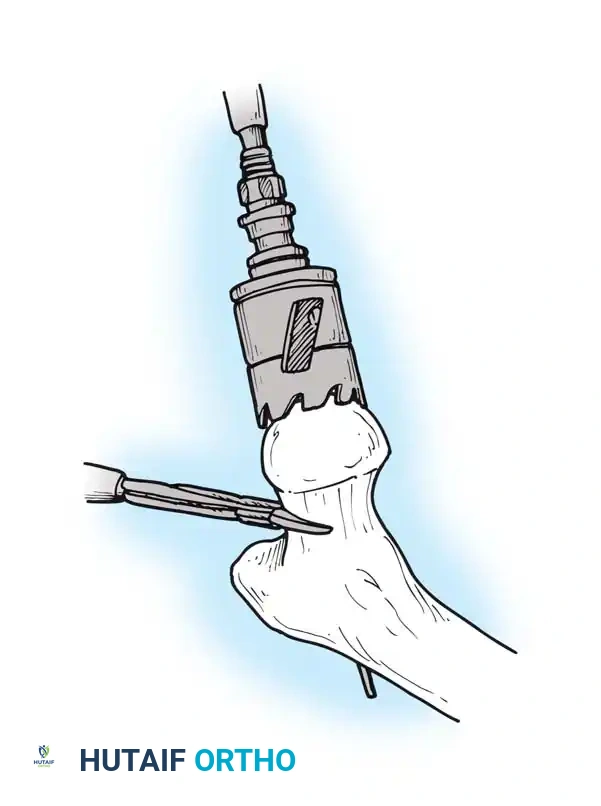
- Reaming: Begin with a small hemispherical reamer directed medially to deepen the acetabulum to the true floor. Once medialized, sequentially increase reamer size, directing them in the planned final component position (typically 40-45 degrees of abduction and 15-20 degrees of anteversion).
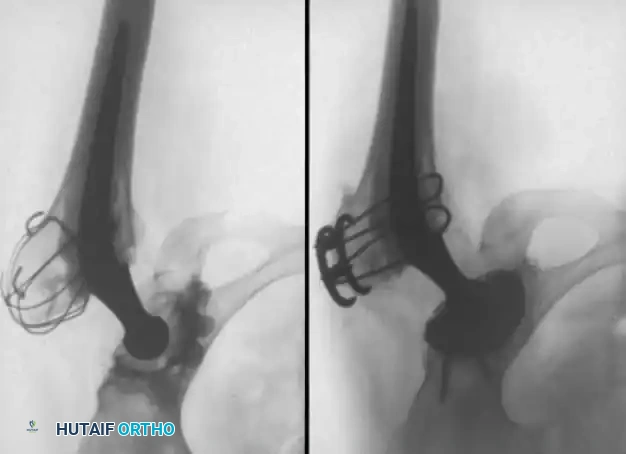
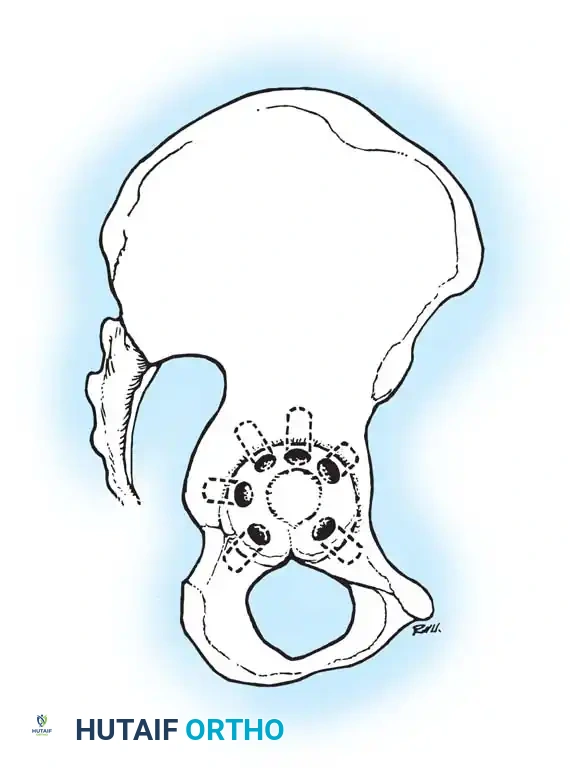
- Component Insertion: Impact the trial shell to confirm stability and coverage. Once confirmed, impact the final porous-coated (uncemented) acetabular shell. Ensure a rigid press-fit. Supplemental screws may be used in the safe zone (posterosuperior quadrant) if initial stability is questionable.
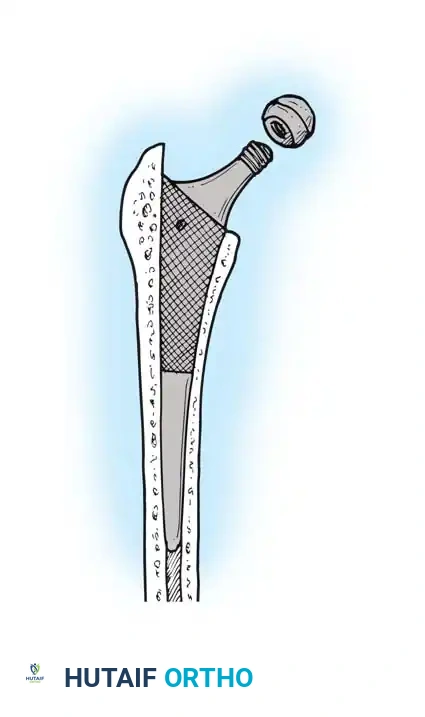
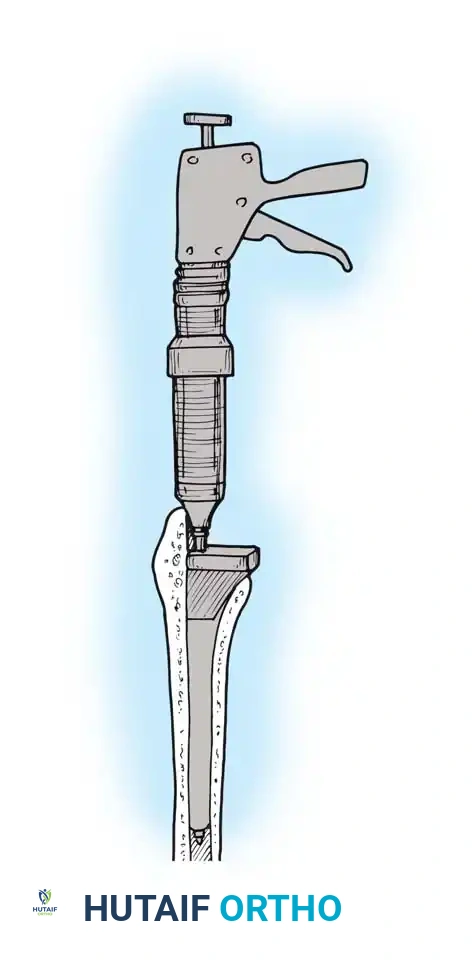
FEMORAL PREPARATION AND IMPLANTATION
Deliver the proximal femur into the wound by extending, adducting, and internally rotating the leg. Place a retractor under the calcar to elevate the femur.
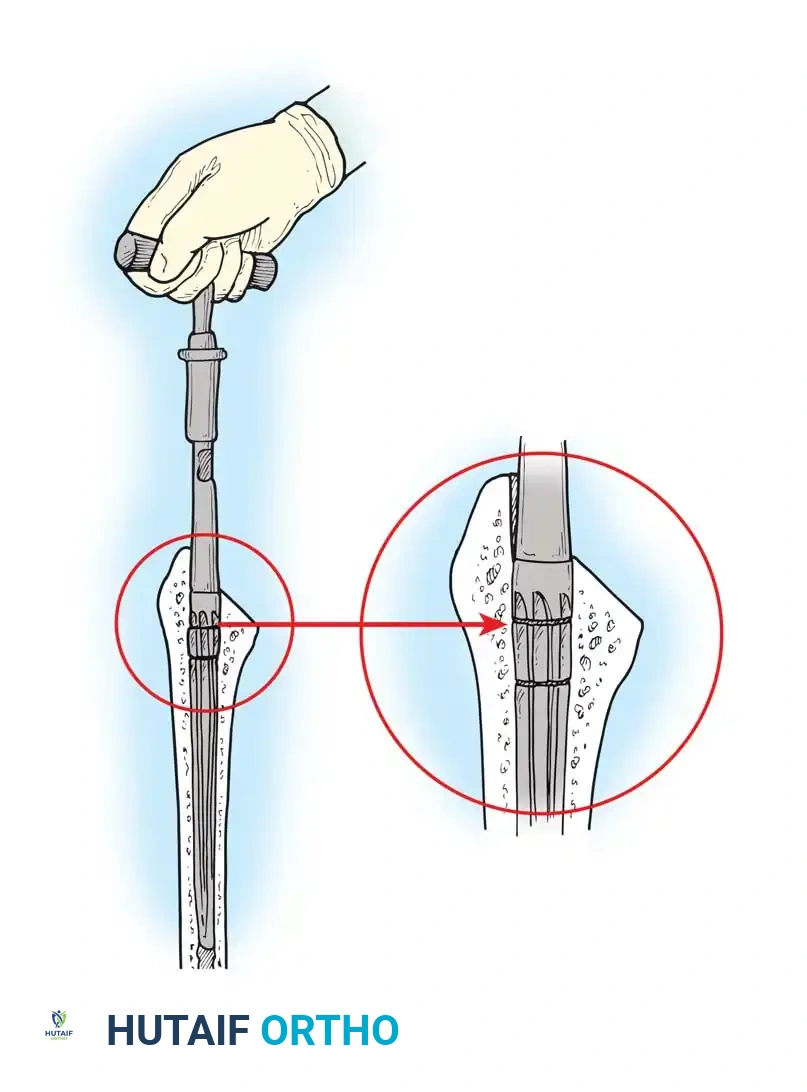
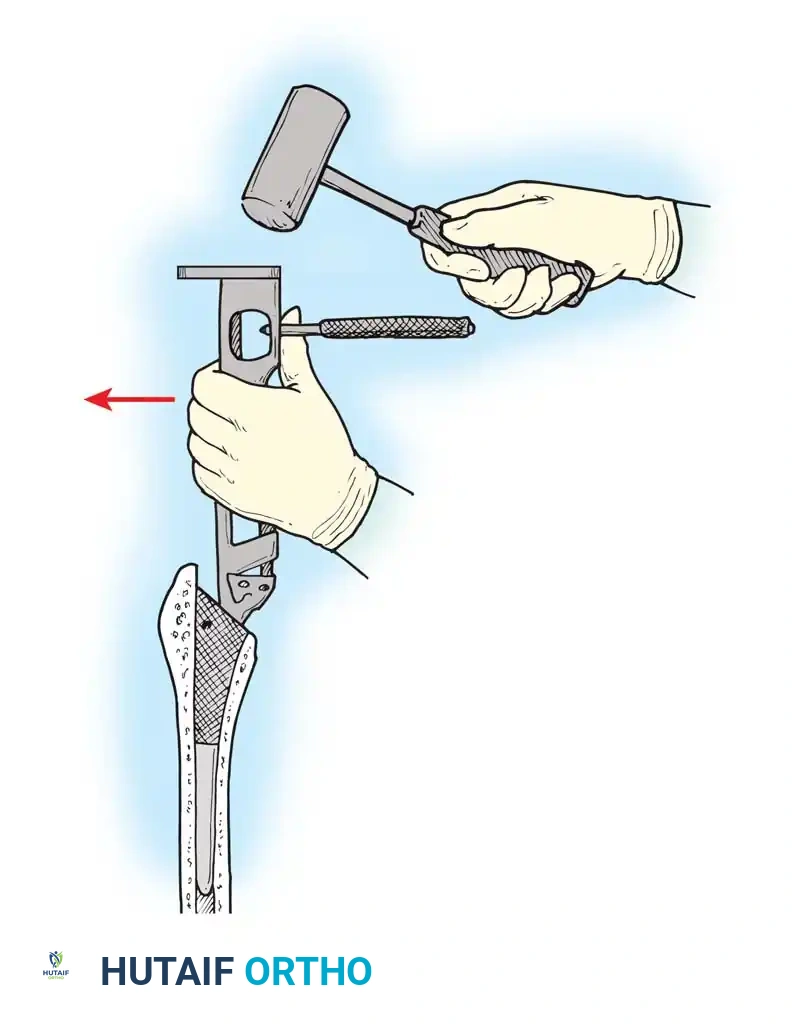
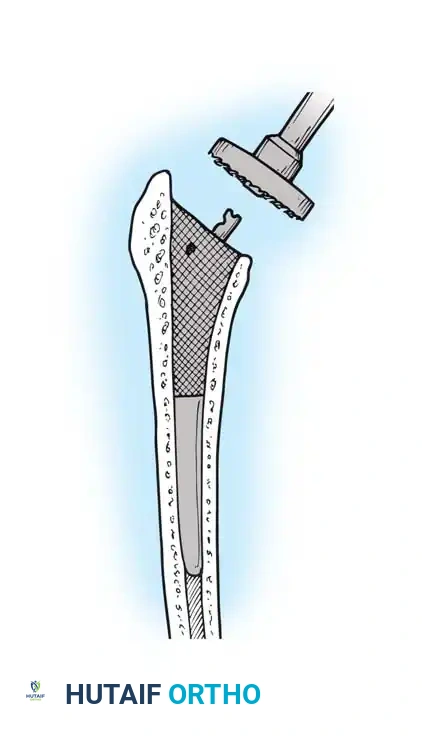
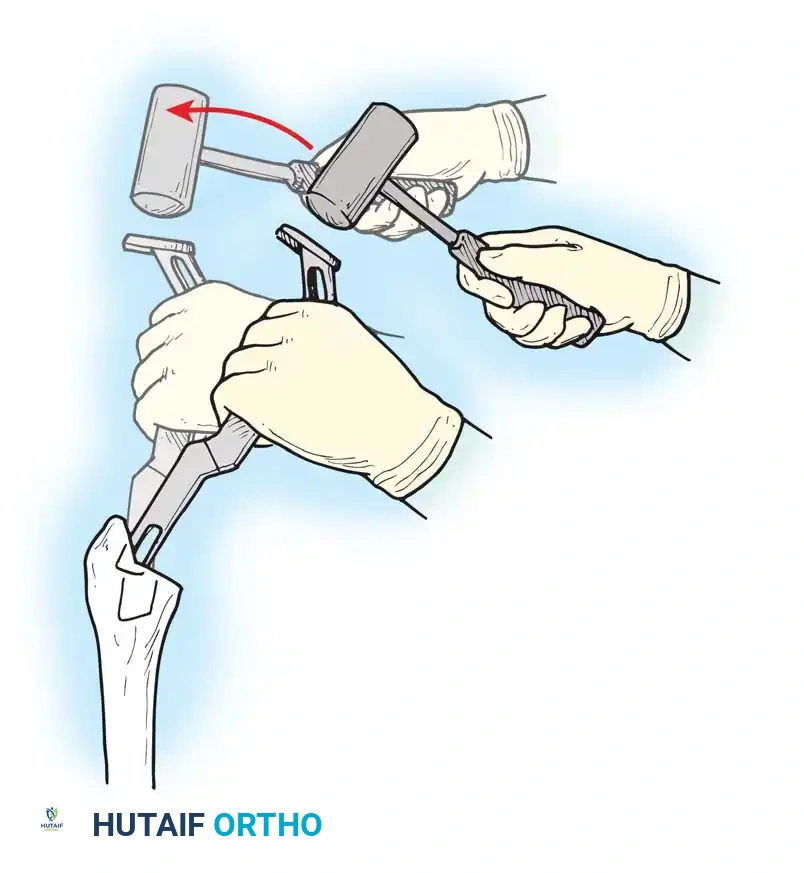
- Canal Preparation: Use a box osteotome to remove the lateral cortical bone of the femoral neck, ensuring straight-line access to the diaphysis. Use a canal finder or T-handled awl to open the medullary canal.
- Broaching: Sequentially broach the femur, starting with the smallest size. Ensure the broach is in neutral alignment (avoiding varus). Advance the broaches until rotational stability is achieved and the broach fills the metaphyseal envelope.


You Might Also Like