Modified Chevron Distal Metatarsal Osteotomy Guide
Key Takeaway
The modified chevron distal metatarsal osteotomy is a powerful surgical technique for correcting moderate to severe hallux valgus deformities. By placing the osteotomy apex more proximally within the metatarsal head, surgeons achieve greater lateral translation of the capital fragment. This comprehensive guide details the biomechanical principles, precise surgical steps, internal fixation strategies, and postoperative protocols necessary to optimize patient outcomes and minimize complications.
Introduction to the Modified Chevron Osteotomy
The modified chevron distal metatarsal osteotomy represents a critical evolution in the surgical management of hallux valgus. Originally described as a V-shaped osteotomy in the distal metatarsal head, the classic chevron procedure is highly effective for mild deformities. However, its utility is limited in moderate to severe cases due to restricted potential for lateral translation.
The modified chevron osteotomy addresses this limitation through a more proximal placement of the apex of the osteotomy within the metatarsal head. By shifting the apex proximally toward the metaphyseal-diaphyseal junction, the surgeon increases the surface area of the osteotomy cuts. This allows for a greater degree of lateral translation of the capital fragment without compromising bone-to-bone contact.
While this modification significantly expands the corrective power of the procedure, it introduces potential biomechanical challenges, specifically the risk of osteotomy instability and insufficient metaphyseal bony contact if the cuts are not executed with absolute precision. Consequently, rigid internal fixation is mandatory.
![]()
Indications and Patient Selection
The modified chevron osteotomy is indicated for patients presenting with symptomatic hallux valgus that has failed conservative management (e.g., shoe wear modification, orthotics). Because of the proximal apex modification, this technique can address more severe deformities than the traditional chevron osteotomy.
Primary Indications:
* Hallux valgus angle (HVA) up to 35 degrees.
* First to second intermetatarsal angle (IMA) up to 15 degrees.
* Painful medial eminence (bunion) interfering with footwear.
* A congruent or mildly subluxated first metatarsophalangeal (MTP) joint.
Adjunctive Procedures:
As an alternative or adjunct, the valgus appearance of the hallux can be further corrected by an additional few degrees utilizing a proximal phalanx osteotomy (the Akin procedure).
Surgical Warning: A phalangeal osteotomy augments cosmetic correction only if the MTP joint has been rendered congruent in the corrected position. Furthermore, performing a basal osteotomy of the proximal phalanx adjacent to the distal metatarsal osteotomy may cause more severe limitation of motion of the first MTP joint than a single osteotomy. The patient must be explicitly informed of this possibility during the informed consent process.
Surgical Anatomy and Neurovascular Considerations
A profound understanding of the neurovascular anatomy surrounding the first ray is paramount to preventing devastating complications, such as avascular necrosis (AVN) of the metatarsal head or painful neuromas.
- Neurologic Structures: The dorsal sensory branches of the superficial peroneal nerve and the medial plantar nerve must be identified and protected during the initial exposure.
- Vascular Supply: The primary blood supply to the first metatarsal head arises from the first dorsal metatarsal artery and the plantar capsular arterial network. The modified chevron osteotomy relies heavily on preserving the lateral soft tissue attachments to the capital fragment. Stripping the lateral capsule or aggressive lateral release can disrupt this fragile blood supply, leading to AVN.
![]()
Step-by-Step Surgical Technique
1. Incision and Soft Tissue Dissection
The procedure begins with meticulous soft tissue handling to ensure optimal wound healing and minimize scarring.
- Make a medial midline longitudinal incision centered over the first MTP joint.
- Carefully deepen the incision through the subcutaneous tissue, strictly protecting the dorsal veins and the dorsal and plantar sensory nerves supplying the medial aspect of the hallux.
- Retract the soft tissues gently using small Ragnell or Senn retractors to expose the underlying joint capsule.
![]()
2. Capsulotomy and Joint Exposure
An inverted L-shaped capsulotomy is preferred as it provides excellent exposure while preserving the critical plantar-medial blood supply to the metatarsal head.
- Once the capsule is exposed, make a longitudinal incision along the dorsomedial aspect of the first metatarsal shaft.
- Begin the second (transverse/coronal) limb of the capsulotomy 1 to 2 mm proximal to the base of the proximal phalanx. This cut should be in a coronal plane, at right angles to the first limb of the capsulotomy.
- Extend this coronal incision plantarward, stopping 1 to 2 mm proximal to the junction with the tibial sesamoid.
- Raise the capsular flap beginning medially and plantarward. Sharply dissect it from the inside out, peeling it off the most prominent part of the medial eminence until its dorsal aspect is reached.
- Maintain the scalpel blade close to the bone, curving over the medial eminence as the contour demands. Take a full-thickness piece of capsule from the medial eminence and reflect it proximally along the metatarsal shaft for 3 to 4 cm.
![]()
![]()
3. Preparation for the Osteotomy
Proper visualization of the plantar aspect of the metatarsal is crucial to avoid inadvertently cutting into the sesamoid apparatus.
- Ensure that the plantar aspect of the metatarsal head, specifically where it meets the diaphyseal shaft, is adequately exposed. This allows the plantar osteotomy cut to be made under direct vision.
- Perform a conservative resection of the medial eminence (exostectomy) using an oscillating saw. Preserve the sagittal groove to maintain the functional articulation of the tibial sesamoid.
![]()
4. Execution of the Modified Chevron Osteotomy
The geometry of the osteotomy dictates the stability and the potential for translation. Precision is non-negotiable.
- Marking the Apex: Using a 0.062-inch Kirschner wire (K-wire), start 1.0 to 1.5 cm proximal to the subchondral bone in the exact center of the first metatarsal head. Drill a hole from medial to lateral to mark the apex of the intended osteotomy.
![]()
![]()
- The Dorsal Cut: Mark the limbs of the osteotomy with a sharp osteotome or a sterile marking pen. Begin the osteotomy with the dorsal cut using a fine-toothed oscillating saw.
- Surgical Pearl: Avoid pushing the saw blade in and out of the bone. Instead, slowly glide the blade across the head-neck fragment with gentle back-and-forth movements. This prevents thermal necrosis and ensures a smooth, planar cut.
- When there is no further resistance to the blade laterally, extract it and return to the centering apex hole. Ensure the dorsal and lateral aspects of the cortical bone have been completely incised.
![]()
- The Plantar Cut: Begin the plantar limb of the osteotomy at an angle of approximately 60 degrees from the original dorsal osteotomy (or 30 degrees from the longitudinal midline).
- Make this cut slowly and deliberately at right angles to the bone.
- The blade should exit plantarward 2 to 3 mm proximal to where the articular surface of the metatarsal head meets the shaft.
- Utilize a small, right-angle retractor to pull the capsule plantarward, protecting the sesamoids and increasing exposure.
![]()
5. Translation and Impaction
- If the osteotomy cuts have been made appropriately and parallel, the capital fragment will displace laterally with minimal pressure.
- If resistance is met, do not force the translation. Re-evaluate the cuts; either they are not parallel, or the plantar/dorsal cortices have not been fully penetrated laterally. If necessary, reposition the saw blade into the depths of the cut before activating the saw to complete the osteotomy.
- Once freed, shift the capital fragment laterally by 4 to 5 mm.
- Impact the head fragment onto the shaft by applying gentle, direct axial pressure to the hallux. This locks the cancellous bone surfaces together, providing intrinsic stability.
![]()
![]()
6. Internal Fixation
Because the modified chevron utilizes a more proximal apex, the metaphyseal contact area is altered, making internal fixation absolutely mandatory to prevent dorsal malunion or displacement.
- While holding the capital fragment straight and securely on the metatarsal shaft, insert one or two 0.062-inch K-wires obliquely across the osteotomy site.
- Begin inserting the first wire dorsomedially. Start far enough proximally in the shaft to leave sufficient cortical bone between the pin and the cancellous portion of the distal-medial shaft (this anticipates the subsequent resection of the overhanging bone ridge).
- Direct the wire distally and laterally so that it securely engages the lateral aspect of the capital fragment.
- If utilizing a second wire for rotational control, insert it into the metatarsal head at a point 3 to 4 mm plantar and parallel to the first wire.
![]()
![]()
![]()
7. Joint Inspection and Overhang Resection
- Test the osteotomy for rigid stability. Gently open the MTP joint by pushing the toe laterally.
- Examine the entire articular surface of the metatarsal head with a small Freer elevator to locate any protruding K-wire points.
- Clinical Pearl: The entrance of the wire into subchondral bone and its exit through the cartilage can usually be felt while drilling. Withdrawing the wire about 2 mm usually places it in the proper subchondral position.
- Circumduct the hallux on the first metatarsal head. If any catching or crepitus occurs, reinspect the joint immediately for wire penetration. If there is any doubt, obtain intraoperative fluoroscopic radiographs.
- Once fixation is confirmed, incise the overhanging segment of bone on the medial side of the proximal fragment. Use a rongeur and a rasp to smooth it flush with the translated capital fragment.
![]()
![]()
![]()
8. Capsulorrhaphy and Soft Tissue Balancing
The capsular closure is not merely an anatomic approximation; it is a dynamic soft-tissue balancing step critical to the long-term success of the procedure.
- Place the hallux on the metatarsal head in a congruous position. Determine congruency by flexing, extending, abducting, adducting, and rotating the hallux while observing the foot from the dorsal aspect.
- While an assistant holds the toe reduced, begin closing the capsular incision. Close the proximal part first with two or three interrupted 2-0 or 3-0 absorbable sutures.
- Dorsally, pass the needle through the periosteum and deep fascia, over the metatarsal shaft, and through the accessory extensor hallucis longus tendon.
- Plantarward, anchor the repair to the deep investing fascia over the abductor hallucis and its tendinous edge. Anchoring the capsular repair proximally before beginning the distal repair is vital. Close the plantar-medial corner with one or two interrupted sutures.
The Pants-Over-Vest Closure:
* The most important sutures hold the hallux congruously on the metatarsal head using a pants-over-vest technique.
* Enter the transverse limb of the capsular incision 2 to 3 mm plantar to the apex from the outside in.
* Turn the needle 180 degrees and reenter the corner of the capsule from the outside in.
* Reverse the needle 180 degrees and reenter from the inside out, still on the proximal capsule.
* Place the final pass through the distal capsule on the dorsal side of the apex. Pull the capsule into the corner in a pants-over-vest manner and tie the suture.
* During closure, observe the dorsal aspect of the foot while an assistant slightly externally rotates the foot to judge proper hallux alignment.
![]()
![]()
Surgical Pitfall: To obtain more correction, you may carefully imbricate the transverse limb. However, do not attempt to correct hallux valgus interphalangeus by pulling the hallux into a varus position at the MTP joint with overly tight imbricating sutures. This will inevitably lead to iatrogenic hallux varus.
- The hallux should rest in neutral to 5 degrees of valgus at the completion of the capsulorrhaphy. If varus is present, remove capsular sutures one at a time until the position normalizes.
- Secure hemostasis, close the subcutaneous tissue and skin in layers, and apply a compressive forefoot dressing with the hallux taped securely in the corrected position.
![]()
Postoperative Rehabilitation Protocol
Strict adherence to the postoperative protocol ensures osteotomy union and prevents loss of correction.
- 0 to 4 Weeks: The initial surgical dressing and sutures are left intact and removed at 19 to 23 days postoperatively. A toe spacer is placed between the first and second toes to hold the hallux in the proper alignment. The patient is permitted to ambulate in a rigid, wooden-soled postoperative shoe, bearing weight primarily on the heel and lateral border of the foot.
- Note: A short-leg walking cast for 4 weeks is an alternative but is generally reserved for non-compliant patients or adolescents.
- 4 to 8 Weeks: The patient transitions to a deep, wide-toe-box jogging shoe. The toe spacer must be worn continuously during this period to support the soft tissue healing in the corrected position.
- 3 to 4 Months: By the third or fourth month, clinical and radiographic union is typically achieved, and the patient may transition to reasonably attractive, standard footwear, though this varies based on individual swelling and comfort.
- Hardware Removal: The K-wires can be removed in the clinic at 3 months if they cause soft tissue irritation or symptoms. If the patient is entirely asymptomatic, the buried
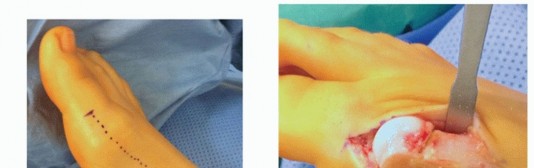
Associated Surgical & Radiographic Imaging
![]()
![]()
You Might Also Like