

Approach to the Medial Side of the Ankle
The medial approach exposes the medial side of the ankle joint.
3 Its uses include the following:
1. Arthrodesis of the ankle
2. Excision or fixation of osteochondral fragments from the medial side of the talus
3. Removal of loose bodies from the ankle joint
Position of the Patient
Place the patient supine on the operating table. Exsanguinate the limb
either by elevating it for 5 minutes or by applying a soft rubber bandage firmly; then inflate a tourniquet. The natural external rotation of the leg exposes the medial malleolus. The pelvis ordinarily does not have to be tilted to improve the exposure (see Fig. 12-5).
Landmark and Incision
Landmark
The medial malleolus is the palpable distal end of the tibia.
Incision
12-13).
Internervous Plane
The approach uses no internervous plane. Nevertheless, the surgery is safe because the tibia is subcutaneous and all dissection stays on bone.

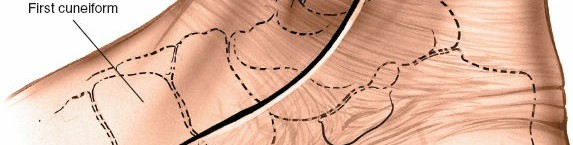
Figure 12-13 Make a 10-cm longitudinal incision on the medial aspect of the ankle joint, with its center over the tip of the medial malleolus. Distally, curve the incision forward onto the medial side of the middle part of the foot.
Superficial Surgical Dissection
Mobilize the skin flaps, taking care not to damage the long saphenous vein and the saphenous nerve, which run together along the anterior border of the medial malleolus (Fig. 12-14).
Deep Surgical Dissection
To uncover the point at which the medial malleolus joins the shaft of the tibia, make a small longitudinal incision in the anterior part of the joint capsule.
Divide the flexor retinaculum and identify the tendon of the tibialis posterior muscle, which runs immediately behind the medial malleolus, grooving the bone (see Fig. 12-14). Retract the tendon posteriorly to expose the posterior surface of the malleolus (Fig.12-15A).
Score the bone longitudinally to ensure correct alignment of the malleolus during closure. Then, drill and tap the medial malleolus so that it can be reattached (see Fig. 12-15B).
Using an osteotome or oscillating saw, cut through the medial malleolus obliquely from top to bottom; cut laterally at its junction with the shaft of the tibia, checking the position of the cut through the incision in the anterior joint capsule (see Fig. 12-15).
12-16 12-17). Eversion is limited because of the intact fibula.
Dang
The saphenous nerve and the long saphenous vein should be preserved as a unit, largely to prevent damage to the saphenous nerve and subsequent neuroma formation.
The tendon of the tibialis posterior muscle 12-14 12-15A). The tendons of the flexor hallucis longus and flexor digitorum longus muscle, together with the posterior neurovascular bundle, lie more posteriorly and laterally. They are in no danger as long as the osteotomy is performed carefully (see Figs. 12-55 and 12-57).
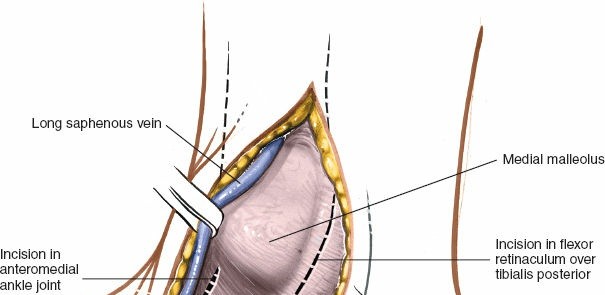
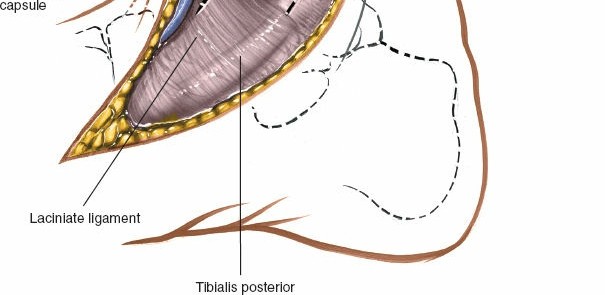
Figure 12-14 Carefully retract the skin flaps to protect the long saphenous vein and the accompanying saphenous nerve. Incise the flexor retinaculum, and make a small incision into the anterior joint capsule.
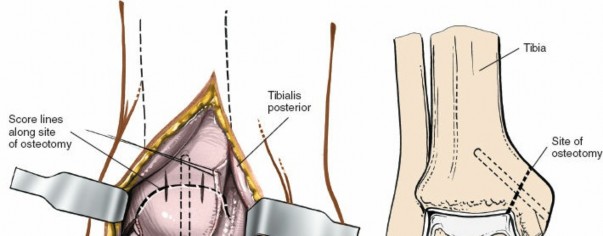
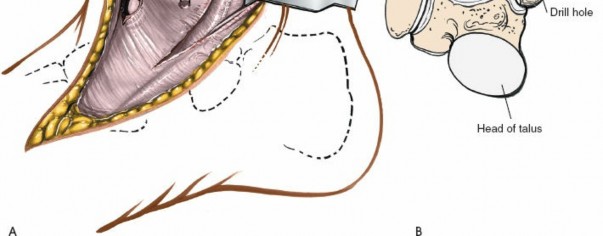
Figure 12-15 A: Retract the tibialis tendon posteriorly. Drill and tap the medial malleolus, and score the potential osteotomy site for future alignment. B: The line of the osteotomy and the score marks for the reattachment of the medial malleolus.
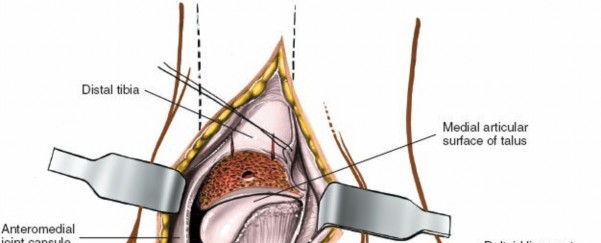
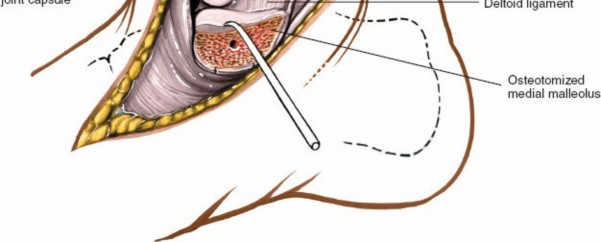
Figure 12-16 Retract the osteotomized medial malleolus downward.
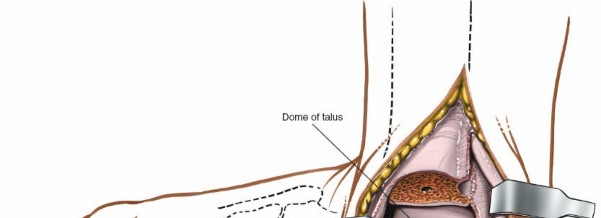


Figure 12-17 Forcefully evert the foot to bring the dome of the talus and the anterior surface of the tibia into view.
Special Surgical Points
In cases of fracture, the interdigitation of the broken ends of bone prevents rotation between the two fragments when a screw is inserted and tightened. No such interdigitation exists in an osteotomy. Therefore, two K-wires should be used in addition to a screw to prevent rotation when the screw is tightened. After the osteotomy has been stabilized with the screw, the two K-wires can be removed. Tension band fixation also may be used. In any case, align the bones correctly by aligning the score marks made on the bone before the osteotomy.
How to Enlarge the Approach
The approach usually is not enlarged either distally or proximally.
Posteromedial Approach to the Ankle
The posteromedial approach to the ankle joint is routinely used for exploring the soft tissues that run around the back of the medial malleolus. This approach is used for the release of soft tissue around the medial malleolus in the treatment of clubfoot.
4
The approach can also be used to allow access to the posterior malleolus of the ankle joint, but gives limited exposure of the fracture site and is technically demanding. For this reason, reduction and fixation of posterior malleolar fractures is usually achieved by indirect techniques.
Position of the Patient
12-18). Alternatively, place the patient in the lateral position with the affected leg nearest the table. Flex the knee of the opposite limb to get its ankle out of the way.
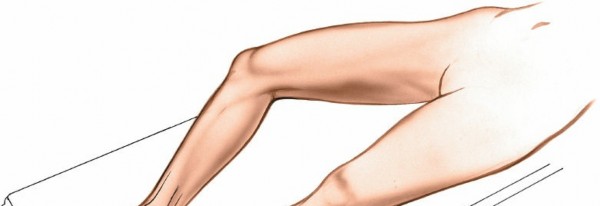
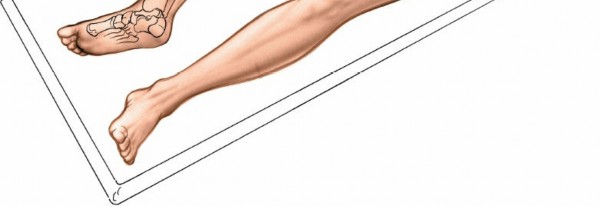
Figure 12-18 Place the patient supine on the operating table with the knee and the hip flexed to expose the medial structures of the ankle.
Exsanguinate the limb by elevating it for 3 to 5 minutes or applying a soft rubber bandage; then inflate a tourniquet.
Landmarks and Incision
Landmarks
The
medial malleolus
is the bulbous, distal, subcutaneous end of the tibia.
Palpate the
Achilles tendon
just above the calcaneus.
Incision
Fig. 12-19).
Superficial Surgical Dissection
12-20 and 12-21).
Deep Surgical Dissection
There are three different ways to approach the back of the ankle joint.
Fig. 12-21).
12-2212-23).
Second, identify the flexor hallucis longus and continue the dissection anteriorly toward the back of the medial malleolus. Preserve the neurovascular bundle by mobilizing it gently and retracting it and the flexor hallucis longus laterally to develop a plane between the bundle and the tendon of the flexor digitorum longus. This approach brings one onto the posterior aspect of the ankle joint rather more medially than does the first approach.
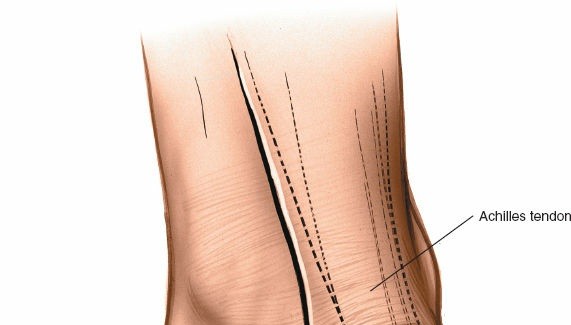
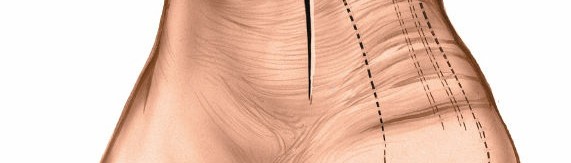
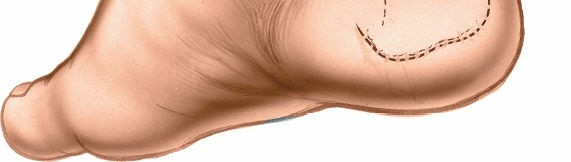
Figure 12-19 Make an 8- to 10-cm longitudinal incision roughly between the medial malleolus and the Achilles tendon.
Third, when all the tendons that run around the back of the medial malleolus (the tibialis posterior, flexor digitorum longus, and flexor hallucis longus) must be lengthened, the back of the ankle can be approached directly, because the posterior coverings of the tendons must be divided during the lengthening procedure.
For all three methods, complete the approach by incising the joint capsule either longitudinally or transversely.
Dang
The posterior tibial artery and the tibial nerve (the posterior neurovascular bundle) are vulnerable during the approach. Take care not to apply forceful retraction to the nerve, as this may lead to a neurapraxia. Note that the tibial nerve is surprisingly large in young children and that the tendon of the flexor digitorum longus muscle is extremely small. Take care to identify positively all structures in the area before dividing any muscle tendons (see Figs. 12-54 and 12-55).
How to Enlarge the Approach
Extensile Measures
Extend the incision distally by curving it across the medial border of the ankle, ending over the talonavicular joint. This extension exposes both the talonavicular joint and the master knot of Henry. As is true for all long, curved incisions around the ankle, skin necrosis can result if the skin flaps are not cut thickly or if forcible retraction is applied.
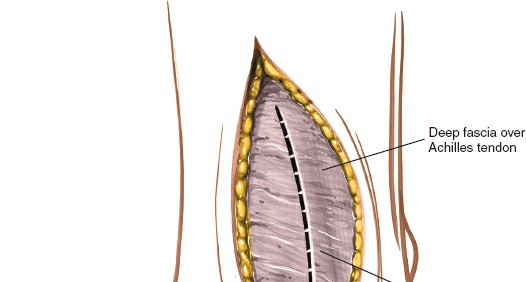
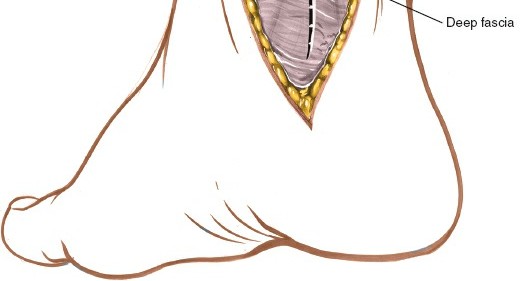
Figure 12-20 Incise the deep fascia in line with the skin incision.
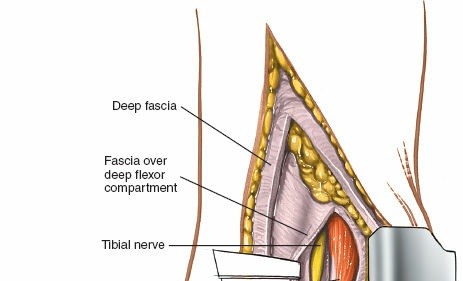
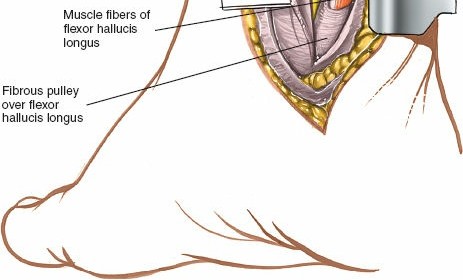
Figure 12-21 Retract the Achilles tendon and the retrotendinous fat laterally, exposing the fascia of the deeper flexor compartment. Open the compartment, and identify the muscle fibers of the flexor hallucis longus.

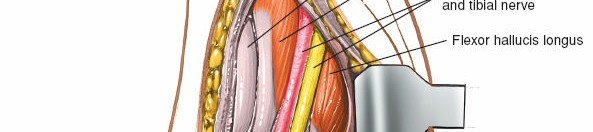

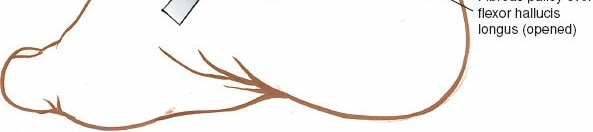
Figure 12-22 Identify the posterior tibial artery and tibial nerve. Then, incise the fibro-osseous tunnel over the flexor hallucis longus tendon and the other medial tendons so that the structures can be mobilized and retracted medially.
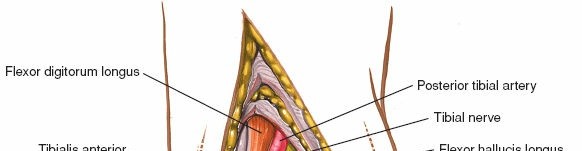
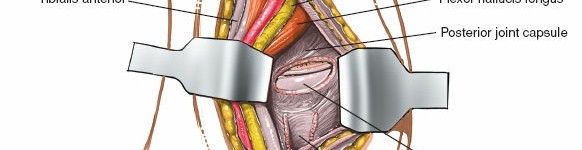
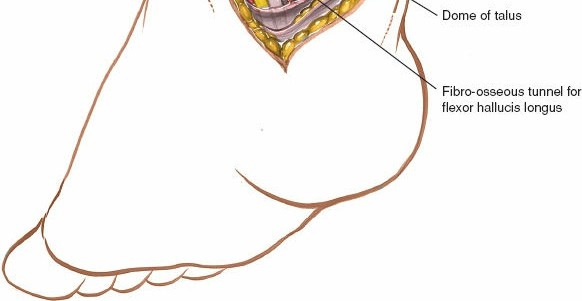
Figure 12-23 Retract the posterior structures medially, exposing the posterior portion of the ankle joint.
Detailed Chapters & Topics
Dive deeper into specialized chapters regarding approach-to-the-medial-side-of-the-ankle