Midlateral Finger Incision: Comprehensive Surgical Technique and Applied Anatomy
Key Takeaway
The midlateral finger incision is a fundamental orthopedic approach designed to expose the flexor tendon sheath while preventing volar scar contractures. By elevating a volar flap that includes the neurovascular bundle, surgeons gain extensile access to the phalanges and flexor apparatus. This guide details the precise anatomical landmarks, step-by-step dissection techniques, and critical neurovascular preservation strategies required for successful digital and palmar surgery.
Introduction to Digital Surgical Approaches
The selection of an appropriate surgical incision in the hand and digits is a foundational skill in operative orthopaedics. The primary objective of any digital incision is to provide extensile, atraumatic exposure of the underlying osseous, tendinous, and neurovascular structures while strictly avoiding the creation of functionally limiting scar contractures. Because the volar skin of the digits undergoes significant excursion during flexion and extension, incisions that cross the transverse flexion creases at a right angle inevitably lead to hypertrophic scarring and severe flexion contractures.
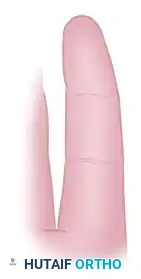
The midlateral finger incision is a classic, highly versatile approach that circumvents the volar flexion creases entirely. By placing the incision along the neutral axis of the digit—where skin tension remains relatively constant during motion—the surgeon can achieve unparalleled exposure of the flexor tendon sheath, phalanges, and neurovascular bundles without compromising postoperative digital kinematics.
Clinical Pearl: While the volar zigzag (Bruner) incision has gained immense popularity for routine flexor tendon repairs due to its direct volar access, the midlateral approach remains indispensable for complex reconstructions, tenolyses, and scenarios requiring extensive mobilization of the neurovascular bundles or coverage of volar soft-tissue defects.
Applied Surgical Anatomy and Biomechanics
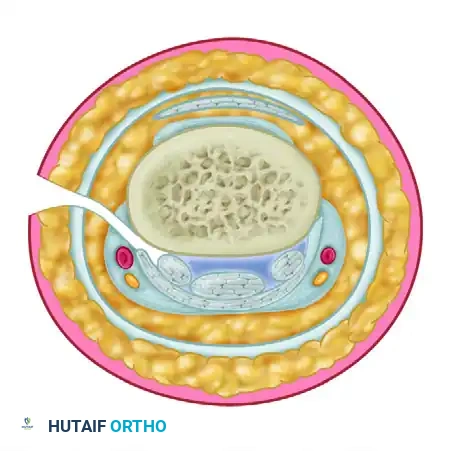
A profound understanding of digital cross-sectional anatomy is mandatory before executing a midlateral approach. The digit is not a simple cylinder; it is a complex, compartmentalized structure governed by precise fascial septa.
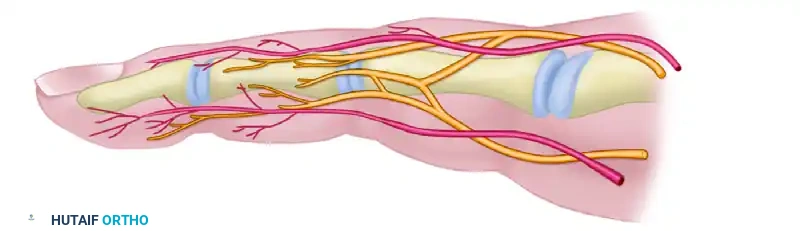
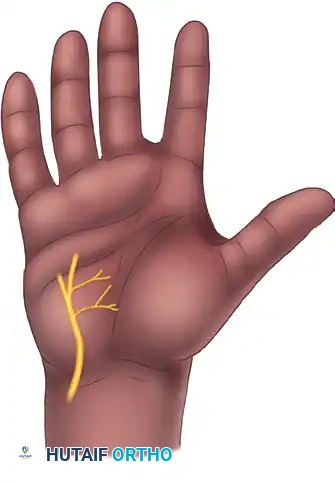
The Neurovascular Bundle
The proper palmar digital arteries and nerves travel along the anterolateral aspect of the digit. They are enveloped in a delicate fascial sheath and are stabilized by two primary sets of cutaneous ligaments:
* Cleland’s Ligaments: These robust, fibrous bands pass dorsal to the neurovascular bundle, originating from the phalanges and inserting into the dermis. They remain taut during digital flexion and extension, stabilizing the skin.
* Grayson’s Ligaments: These thinner, more delicate structures pass volar to the neurovascular bundle, originating from the fibrous flexor sheath and inserting into the volar skin.
During a standard midlateral approach, Grayson's ligaments must be sharply divided to allow the neurovascular bundle to be mobilized volarward with the anterior skin flap, while Cleland's ligaments are often preserved or selectively released depending on the required depth of exposure.
Dorsal Sensory Branches
The proper digital nerves give off critical dorsal branches that supply sensation to the dorsal skin and nail bed.
* Preservation Imperative: The dorsal branches on the radial sides of the index and middle fingers, and the ulnar side of the little finger, are particularly vital for pinch kinematics and spatial awareness. The midlateral incision must be carefully planned to avoid transecting these branches.
The Flexor Tendon Sheath
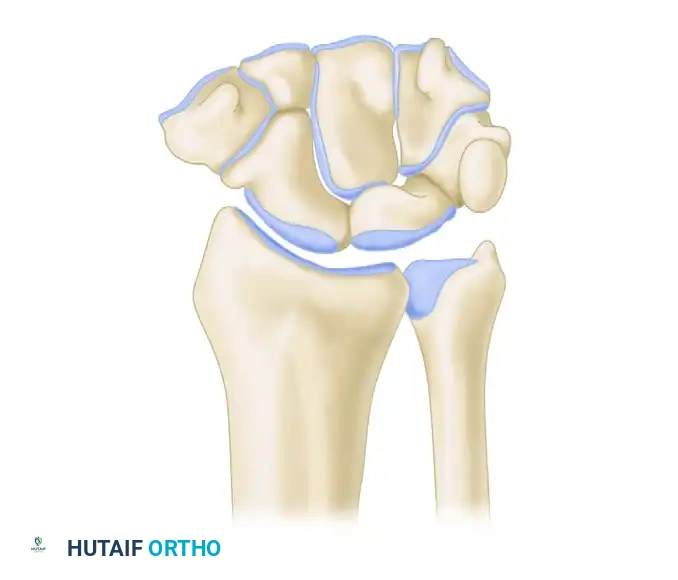
The flexor apparatus is housed within a synovial sheath reinforced by a complex retinacular system of annular (A1-A5) and cruciate (C1-C3) pulleys. The midlateral approach provides tangential access to this sheath, allowing the surgeon to incise the sheath laterally (often between the A2 and A4 pulleys) to expose the flexor digitorum superficialis (FDS) and flexor digitorum profundus (FDP) tendons without destabilizing the anterior pulley mechanics.
Indications and Contraindications
Indications
- Complex flexor tendon repairs and extensive tenolysis.
- Excision of volar or laterally based digital tumors (e.g., giant cell tumors of the tendon sheath).
- Infections of the flexor tendon sheath (suppurative flexor tenosynovitis) requiring extensive irrigation and debridement.
- Digital nerve or artery microvascular repair.
- Phalangeal fracture open reduction and internal fixation (ORIF) requiring simultaneous access to the flexor apparatus.
- Cases where the volar skin is severely traumatized, contracted, or compromised, precluding a standard Bruner incision.
Contraindications
- Simple trigger finger release (a localized transverse or oblique palmar incision is preferred).
- Isolated dorsal pathology (extensor tendon injuries or dorsal phalangeal fractures are better served by dorsal longitudinal or H-incisions).
- Pre-existing lateral skin compromise or previous extensive lateral scarring that would jeopardize flap viability.
Preoperative Preparation and Positioning
- Anesthesia: Regional block (axillary or supraclavicular brachial plexus block) is preferred to provide profound analgesia and sympathetic blockade, which aids in vasodilation for potential microvascular work. Wide-awake local anesthesia no tourniquet (WALANT) is increasingly utilized for tenolysis to allow intraoperative active motion testing.
- Positioning: The patient is positioned supine with the operative arm extended on a radiolucent hand table.
- Tourniquet: A well-padded pneumatic upper arm tourniquet is applied. Exsanguination with an Esmarch bandage is performed prior to inflation (typically 250 mm Hg) to ensure a bloodless surgical field, which is critical for identifying delicate digital nerves.
- Magnification: Surgical loupes (minimum 2.5x to 3.5x magnification) are mandatory for safe dissection of the neurovascular structures.
Surgical Technique: The Midlateral Finger Incision
1. Incision Planning and Marking
The success of the midlateral approach relies entirely on precise preoperative marking. The incision must remain dorsal to the volar flexion creases to prevent postoperative contracture.
- Identify the proximal digital flexion crease, the proximal interphalangeal (PIP) joint crease, and the distal interphalangeal (DIP) joint crease.
- Begin the incision on the midlateral aspect of the finger at the level of the proximal finger crease.
- Carry the incision distally to the PIP joint, ensuring the line passes just dorsal to the lateral extent of the flexor skin crease.
- Continue distally along the middle phalanx, passing dorsal to the distal flexor skin crease.
- Proceed toward the lateral edge of the fingernail.
Surgical Warning: Because the volar flexor skin creases extend slightly over halfway around the circumference of the finger, the true "midlateral" line is actually slightly posterolateral. Failing to place the incision dorsal enough will result in the scar migrating volarward during healing, leading to a flexion contracture.
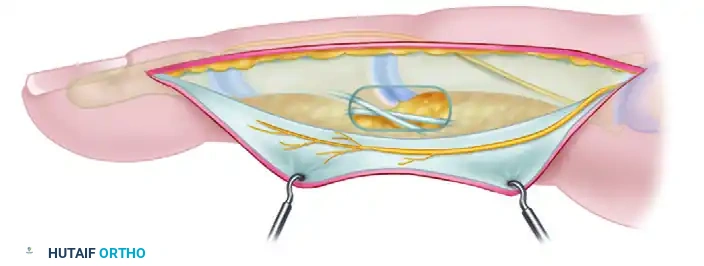
2. Flap Elevation and Superficial Dissection
Once the skin is incised, the dissection proceeds into the subcutaneous tissues. The goal is to create two distinct flaps: a small dorsal flap and a larger, thicker volar flap.
- Dorsal Flap: Develop the dorsal skin flap only slightly (1-2 mm). This minimal elevation is performed strictly to facilitate easier suture placement during wound closure. Extensive dorsal undermining risks devascularizing the dorsal skin and injuring the dorsal sensory nerve branches.
- Volar Flap: Develop the volar flap by dissecting into the subcutaneous fat over the proximal and middle phalanges.
- PIP Joint Precaution: The subcutaneous fat is naturally scanty over the lateral aspect of the PIP joint. Exercise extreme caution in this zone to avoid inadvertently entering the joint capsule or incising the collateral ligaments.
3. Deep Dissection and Neurovascular Management
The defining characteristic of the classic midlateral approach is the mobilization of the neurovascular bundle with the volar skin flap.
- Immediately after incising the subcutaneous fat, direct the dissection volarward, aiming deep (dorsal) to the neurovascular bundle.
- Identify Grayson's ligaments (volar to the bundle) and carefully divide them.
- Elevate the neurovascular bundle continuously with the volar flap. This maneuver protects the artery and nerve within the soft tissue of the flap and provides unobstructed access to the underlying flexor tendon sheath.
- Once the bundle is retracted volarward, the fibrous flexor sheath is exposed.
- Sheath Management: The sheath can now be incised laterally to expose the FDS and FDP tendons. If bilateral exposure is required, the opposite neurovascular bundle can also be identified and protected from this approach due to its anterolateral anatomical position.
4. Distal Extension into the Pulp
If pathology extends into the distal phalanx (e.g., distal FDP avulsion or pulp infection), the incision can be extended.
* Make the same midlateral skin incision, passing just distal to the distal flexor skin crease.
* Carry the incision obliquely into the volar pulp of the finger.
* As the volar skin flap is developed through the subcutaneous fat, carefully isolate the neurovascular bundle. It is most easily identified at the mid-portion of the middle phalanx before it arborizes into the pulp.
* Dissect the fat from the volar surface of the bundle to expose the distal flexor tendon sheath and the FDP insertion.
Alternative Digital Approaches
The Superficial Midlateral Approach
A second variation of the midlateral incision involves developing the skin flap superficial to the neurovascular bundle, leaving the artery and nerve resting against the flexor sheath.
* Drawback: When used on a contracted skin surface, this superficial flap tends to straighten out postoperatively, resulting in a linear scar that crosses the axis of motion, leading to contracture.
* Solution: If a superficial approach is necessary, multiple Z-plasty incisions are far more satisfactory than a straight longitudinal line. Regardless of the flap thickness, the neurovascular bundles must be meticulously protected.
The Volar Zigzag (Bruner) Incision
The popular volar zigzag finger incision is an excellent alternative for routine flexor tendon surgery.
* Advantage: It does not require mobilizing either neurovascular bundle and provides direct, en-face exposure of the volar surface of the flexor tendon sheath.
* Design: The apices of the zigzag flaps must end at the midlateral line at the level of the flexion creases to prevent scar contracture.
Thumb Incisions
The principles of the midlateral incision apply equally to the thumb, though anatomical differences dictate specific modifications.
- Accessibility: The radial side of the thumb is generally more accessible and is the preferred side for a midlateral approach.
- Proximal Extension: A radial midlateral incision can be extended proximally by curving its proximal end at the mid-metacarpal area, creating a large flap on the palmar surface of the thenar eminence. This extensile approach is excellent for flexor pollicis longus (FPL) tendon grafting, as it exposes the entire flexor surface of the thumb without requiring a separate palmar incision.
- Nerve Protection: When operating on the radial aspect of the thumb, the surgeon must identify and protect the dorsal branch of the superficial radial nerve, which provides critical sensation to the radial dorsum of the thumb.
- Joint Precautions: Similar to the fingers, subcutaneous fat is extremely scanty on the lateral aspects of the thumb interphalangeal (IP) joint. The surgeon must be careful not to inadvertently open the volar plate or joint capsule when seeking the flexor tendon sheath.
- Trigger Thumb: When making a transverse incision for a trigger thumb release at the level of the metacarpophalangeal (MCP) joint, remember that the two proper digital nerves of the thumb are located on either side of the flexor tendon. They are highly vulnerable in this location and must be visually identified and protected before the A1 pulley is released.
Palmar Incisions and Extensions
When digital pathology extends proximally into the hand, the midlateral incision must be seamlessly transitioned into a palmar incision. The design of palmar incisions is dictated by the complex neurovascular anatomy of the palm and the orientation of the palmar fascia.
General Principles of Palmar Incisions
- Distal Palm: Incisions in the distal palm are generally transverse, paralleling the distal palmar crease. In this region, the structures lying between the metacarpal heads (the neurovascular bundles and lumbrical muscles) are not protected by the thick central palmar fascia and are highly vulnerable to superficial dissection.
- Proximal Palm: Incisions in the proximal palm tend to be more longitudinal, with the distal end curving radially to parallel the closest major skin crease (e.g., the thenar crease).
- Wrist Extension: When an incision must be extended proximal to the wrist (e.g., for extensive tenosynovectomy or carpal tunnel extension), it must never cross the transverse flexor wrist creases at a right angle. It should cross obliquely or incorporate a Z-plasty to prevent severe wrist flexion contractures.
Deep Dissection in the Palm
An incision of any desired length can be made across the palm, provided that the underlying digital nerves, vascular arches, and motor branches are protected.
* After the skin and underlying subcutaneous fat have been incised, the fat is dissected from the underlying palmar fascia and elevated with the skin flaps.
* Perforating Vessels: It is desirable, although technically tedious, to preserve the small vessels perforating the palmar fascia if wide undermining of the skin flaps is necessary to ensure flap viability.
* Once the skin flaps are retracted, the palmar fascia can be incised longitudinally or excised entirely (as in Dupuytren's fasciectomy) for ample exposure.
* Deep to the fascia, the flexor tendons and the parallel neurovascular bundles are visualized. The superficial volar vascular arch must be identified and protected when deeper exposure (e.g., to the metacarpals or deep palmar space) is required.
Critical Neurological Landmarks in the Palm
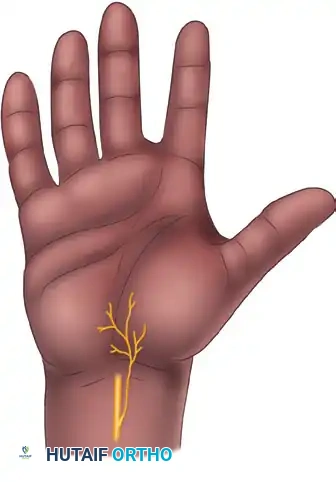
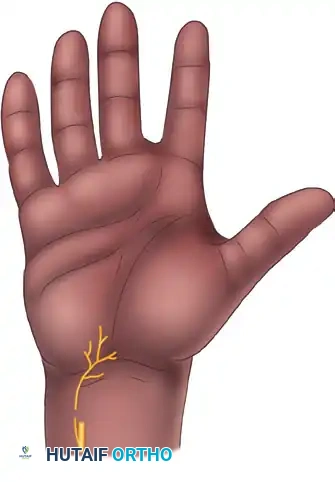
1. The Recurrent Motor Branch of the Median Nerve:
The most critical structure in the thenar area is the recurrent motor branch of the median nerve, which supplies the thenar intrinsic muscles (abductor pollicis brevis, opponens pollicis, and the superficial head of the flexor pollicis brevis). Incisions paralleling the thenar crease must be made with extreme caution. If the exact location of the motor branch is in doubt, it should be formally exposed and protected before proceeding with deep dissection.
2. Palmar Cutaneous Nerves:
Care must be taken to avoid injury to the palmar cutaneous branches of the median and ulnar nerves, which provide sensation to the proximal palm. Injury to these nerves can result in debilitating, painful neuromas.
Anatomical studies have definitively shown that there is no single longitudinal incision in the proximal palm that can completely avoid all variations of the palmar cutaneous branches.

- Palmar Cutaneous Branch of the Median Nerve: Present in 100% of specimens, typically arising 5 cm proximal to the wrist crease and traveling between the palmaris longus and flexor carpi radialis before arborizing in the central palm.
- Palmar Cutaneous Branch of the Ulnar Nerve: Present in approximately 16% of specimens.
- Nerve of Henle: A sympathetic and sensory branch accompanying the ulnar artery, present in 40% of specimens.
- Transverse Palmar Cutaneous Branches of the Ulnar Nerve: Present in 96% of specimens, crossing the proximal palm transversely.
Surgeons must utilize blunt dissection techniques in the subcutaneous tissues of the proximal palm and wrist to identify and gently retract these cutaneous branches.
Postoperative Protocol and Rehabilitation
The success of a midlateral incision is heavily dependent on meticulous closure and appropriate postoperative rehabilitation.
Wound Closure
- Tourniquet deflation and meticulous hemostasis using bipolar electrocautery are mandatory prior to closure to prevent postoperative hematoma, which can lead to fibrosis and stiffness.
- The skin is typically closed with interrupted non-absorbable sutures (e.g., 4-0 or 5-0 nylon). The minimal dorsal flap elevation performed earlier greatly facilitates the passage of the needle through the dorsal skin edge.
- Avoid excessive tension on the skin edges to prevent necrosis.
Splinting and Mobilization
- A bulky, non-compressive soft dressing is applied.
- Depending on the underlying procedure (e.g., flexor tendon repair), a dorsal blocking splint may be applied with the wrist in 20-30 degrees of flexion, MCP joints in 70 degrees of flexion, and IP joints in neutral extension.
- Early Active Motion: Because the midlateral incision does not cross the flexion creases, it is highly amenable to early active motion protocols. Under the guidance of a certified hand therapist, controlled mobilization prevents tendon adhesions and promotes functional glide without placing undue stress on the healing surgical wound.
- Sutures are typically removed at 10 to 14 days postoperatively, once the incision is fully epithelialized. Scar massage and silicone sheeting can be initiated thereafter to optimize the cosmetic and functional outcome of the midlateral scar.
You Might Also Like