Masterclass in Orthopaedic Surgical Techniques & Approaches
Key Takeaway
Mastering foundational orthopaedic surgical techniques is paramount for optimizing patient outcomes and minimizing perioperative complications. This comprehensive guide details evidence-based protocols for tourniquet application, intraoperative fluoroscopy, and precise patient positioning. By adhering to strict biomechanical principles and safety guidelines, orthopaedic surgeons can effectively mitigate risks such as post-tourniquet syndrome, radiation exposure, and positioning-related neuropathies, ensuring the highest standards of surgical excellence and patient care.
Foundations of Operative Orthopaedics
The mastery of orthopaedic surgery extends far beyond the precise execution of osteotomies or the deployment of internal fixation devices. It is fundamentally rooted in the meticulous preparation of the surgical environment, the strategic utilization of intraoperative adjuncts, and the uncompromising adherence to patient safety protocols. This masterclass delineates the critical surgical techniques that form the bedrock of operative orthopaedics, specifically focusing on the biomechanics of tourniquet application, the optimization of intraoperative imaging, the nuances of patient positioning, and the foundational principles of soft tissue and bone handling.
The Science and Application of Tourniquets
Operations on the extremities are profoundly facilitated by the use of a tourniquet, which provides a bloodless surgical field, enhances anatomical visualization, and expedites the procedure. However, the tourniquet is a potentially dangerous instrument that demands profound physiological understanding and meticulous care.
Types of Tourniquets
While various tourniquets exist, the pneumatic tourniquet remains the gold standard due to its safety profile and titratable pressure.
* Pneumatic Tourniquets: Equipped with a hand pump or automated regulated pressure system, these are the safest option. They must be routinely calibrated against a mercury manometer to prevent catastrophic gauge inaccuracies.
* Esmarch Tourniquets: Primarily utilized in the middle and upper thirds of the thigh where pneumatic cuffs may be too bulky. They are applied in overlapping layers.
* Martin Sheet Rubber Bandage: Safely utilized for short procedures on the foot or ankle.
* Digital Tourniquets: For digital surgery, a stretched Penrose drain secured with a hemostat is vastly superior to a rolled glove finger, which carries a high risk of being inadvertently left beneath a postoperative dressing, leading to digital necrosis.
Biomechanics of Tourniquet Application
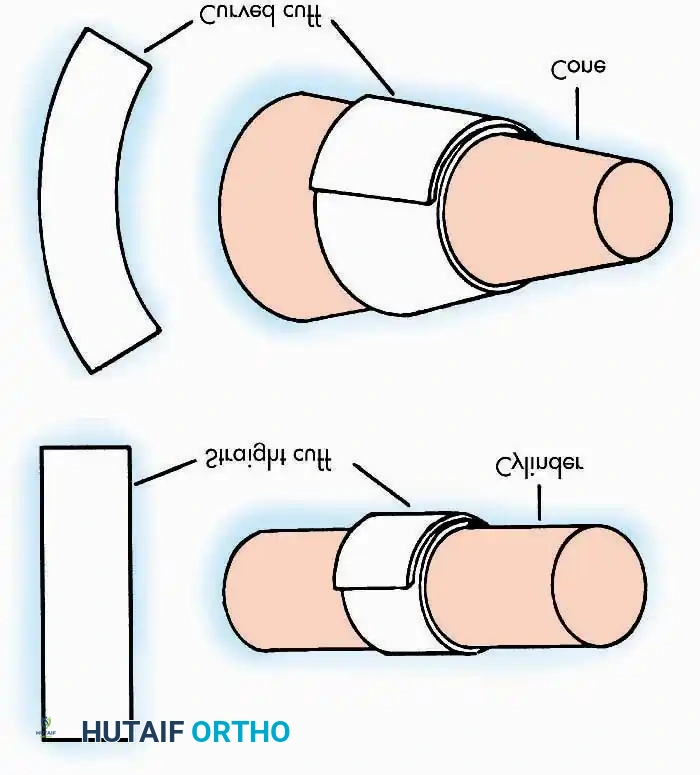
The efficacy of a tourniquet is dictated by the relationship between cuff design, limb morphology, and applied pressure. Pedowitz et al. demonstrated that curved tourniquets applied to conical extremities require significantly lower arterial occlusion pressures compared to straight (rectangular) tourniquets.
Clinical Pearl: Avoid using straight tourniquets on conical thighs, particularly in obese or highly muscular patients. The mismatch in geometry leads to uneven pressure distribution, requiring dangerously high inflation pressures to achieve hemostasis, thereby increasing the risk of neurapraxia and skin sloughing.
The Krackow Maneuver: In obese patients, achieving a stable tourniquet position is challenging. The Krackow maneuver involves an assistant manually grasping the soft tissue distal to the tourniquet site and pulling it distally while the padding and cuff are applied. Upon release, the bulky subcutaneous tissue retracts proximally, acting as a mechanical buttress that prevents the tourniquet from slipping distally during inflation.
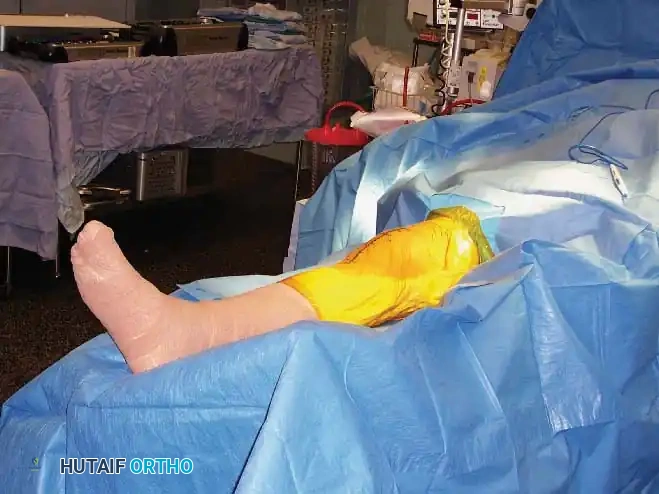
Exsanguination and Inflation Protocols
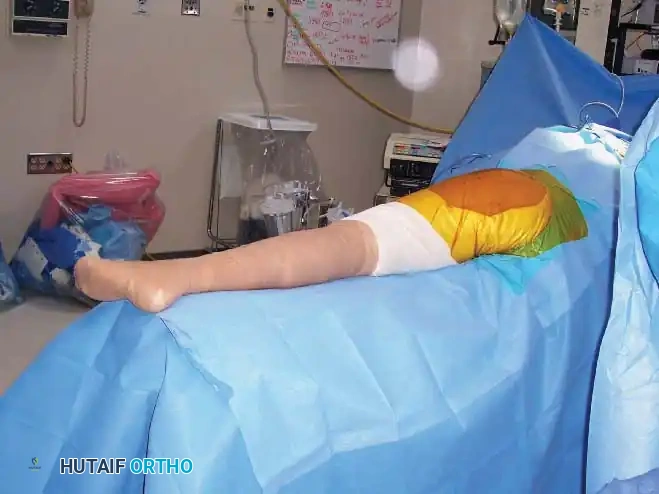
Prior to inflation, the limb must be exsanguinated to prevent venous engorgement. This is achieved by elevating the extremity for 2 minutes or by applying a sterile Esmarch or cotton elastic bandage from the digits proximally to within 2.5 to 5 cm of the tourniquet.
Surgical Warning: If an Esmarch bandage is applied flush against the tourniquet, the cuff will inevitably slip distally upon inflation. Always leave a small gap. Furthermore, the tourniquet must be inflated rapidly to occlude arterial inflow before superficial veins fill.
Limb Occlusion Pressure (LOP) and Time Limits
Historically, arbitrary high pressures were utilized. Contemporary evidence-based practice dictates the use of Limb Occlusion Pressure (LOP). Using a Doppler stethoscope or automated LOP apparatus, the pressure required to obliterate the peripheral pulse is identified. A safety margin is then added:
* +40 mm Hg for LOP < 130 mm Hg
* +60 mm Hg for LOP 131–190 mm Hg
* +80 mm Hg for LOP > 190 mm Hg
Ischemic Time Limits: In a healthy adult, the tourniquet should not remain inflated for more than 2 hours. Prolonged ischemia leads to Post-Tourniquet Syndrome, characterized by edema, pallor, joint stiffness, motor weakness, and subjective numbness. Sapega et al. documented that 2 to 3 hours of ischemia induces interstitial edema, increased capillary permeability, and microvascular congestion. If surgery exceeds 2 hours, the procedure should be expedited rather than employing the outdated practice of deflating for 10 minutes, as tissues require at least 40 minutes of reperfusion to normalize.
Intraoperative Radiography and Fluoroscopy
Orthopaedic surgery relies heavily on real-time intraoperative imaging to assess fracture reduction, implant trajectory, and joint congruency. The integration of portable radiographs and C-arm image intensifiers requires strict adherence to aseptic technique and radiation safety.
Aseptic Technique for Imaging
When unsterile radiograph cassettes are introduced into the sterile field, they must be isolated. The cassette is placed inside a sterile double pillowcase or a specialized sterile plastic bag, folded to maintain exterior sterility, and covered with a large sterile towel.
For continuous fluoroscopy, the C-arm must be meticulously draped.
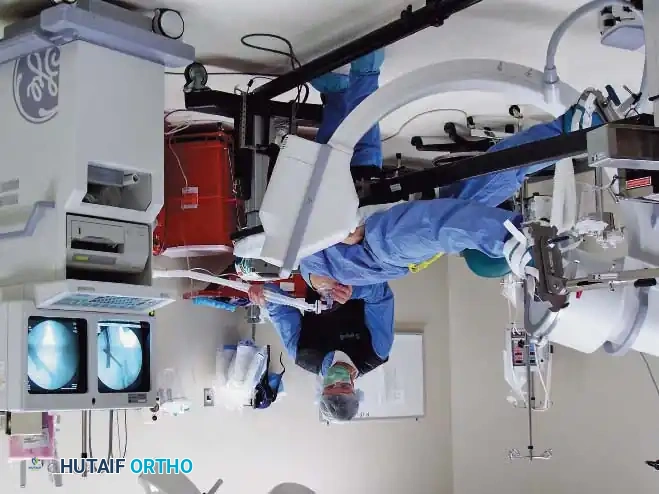

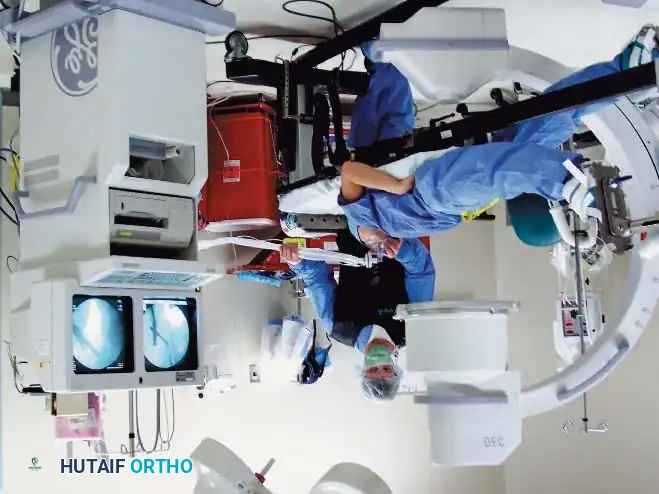
The draping process must allow for free rotation of the C-arm from anteroposterior (AP) to lateral planes without compromising the sterile field. The surgeon and scrub nurse must coordinate the movement of the machine, ensuring the unsterile base never breaches the sterile boundaries.
Radiation Safety (ALARA Principle)
All operating room personnel must adhere to the ALARA (As Low As Reasonably Achievable) principle.
* Shielding: Lead-lined aprons (minimum 0.35 mm lead equivalence), thyroid shields, and lead-impregnated glasses are mandatory.
* Distance: Radiation exposure follows the inverse square law. Stepping just one meter away from the radiation source drastically reduces scatter exposure.
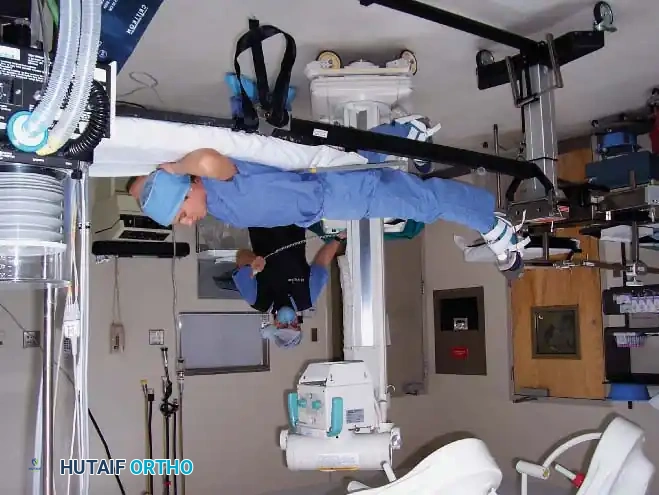
* Positioning: The radiation source (x-ray tube) should ideally be positioned under the operating table, with the image intensifier above the patient. This configuration significantly reduces scatter radiation to the surgeon's hands and torso.
Patient Positioning: Biomechanics and Nerve Protection
Patient positioning is a critical phase of the operation. Before the patient is anesthetized, the surgeon must verify and mark the surgical site to prevent "wrong-site" surgery. The chosen position must afford maximal surgical access while protecting the patient's airway, neurovascular structures, and integument.
Supine Positioning
In the supine position, the sacrum, heels, and occiput must be well padded to prevent decubitus ulcers. The arms should be abducted no more than 90 degrees to prevent traction injuries to the brachial plexus.
Pitfall: The ulnar nerve is highly susceptible to compression at the cubital tunnel if the arm is hyperflexed or rests against the hard edge of the armboard. Ensure the forearm is supinated or in neutral to offload the ulnar nerve.
Prone Positioning
Prone positioning requires meticulous attention to respiratory mechanics and ocular pressure.
* Chest Rolls: Firm chest rolls extending from the clavicles to the iliac crests are essential to allow free abdominal excursion during ventilation and to decrease inferior vena cava compression, which minimizes epidural venous bleeding during spine surgery.
* Head Positioning: The head must be supported in a neutral position using a specialized foam face block or Mayfield tongs, ensuring absolutely no pressure is placed on the globes of the eyes to prevent ischemic optic neuropathy.
Lateral Decubitus Positioning
When the patient is placed on their side, an axillary roll must be placed just caudal to the dependent axilla—not directly in it—to protect the dependent brachial plexus and allow adequate chest excursion.
The common peroneal nerve is particularly vulnerable as it wraps around the fibular neck of the dependent leg. Copious padding must be placed between the knees and under the lateral aspect of the dependent fibula.
Principles of Soft Tissue and Tendon Fixation
Orthopaedic reconstruction frequently necessitates the secure fixation of tendons, ligaments, or fascia to bone. The biomechanical integrity of this repair dictates the success of early postoperative rehabilitation.
Suture Techniques
High-tensile, non-absorbable sutures are the standard for tendon repair. The configuration of the suture dictates its pull-out strength.
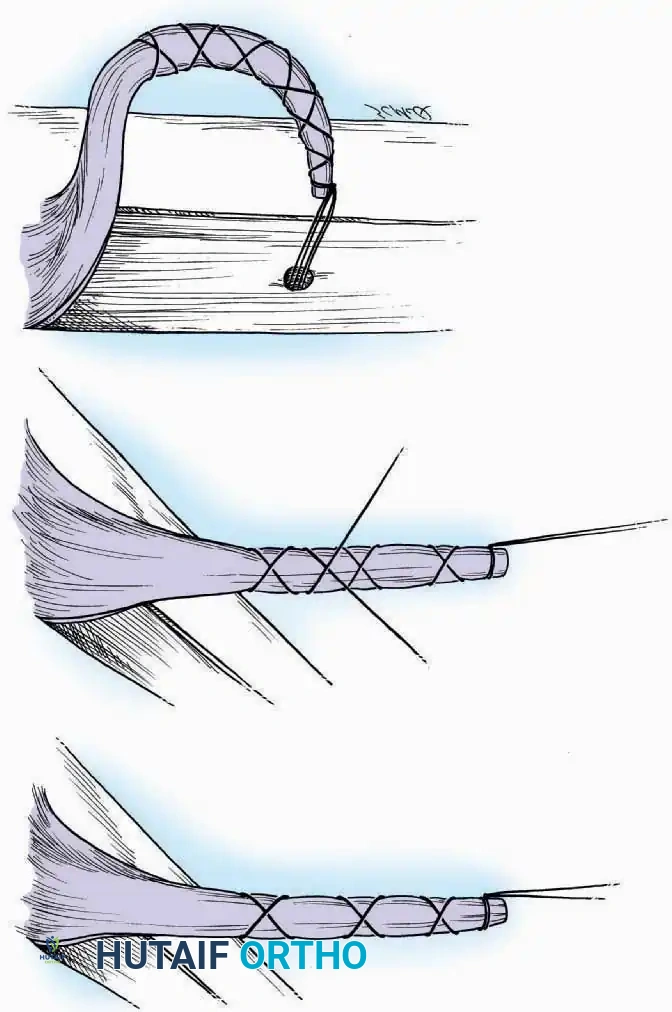
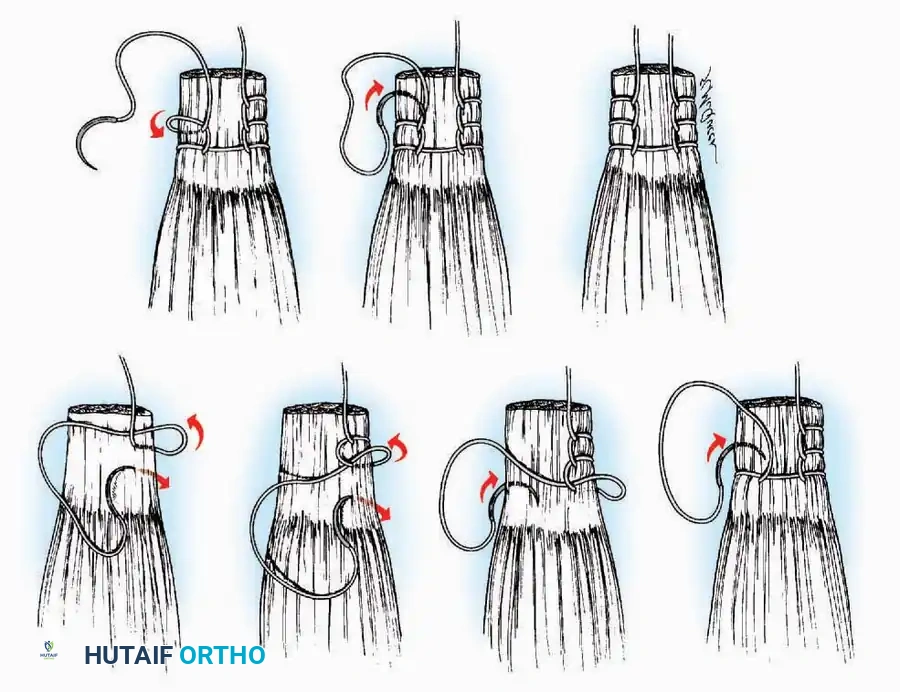
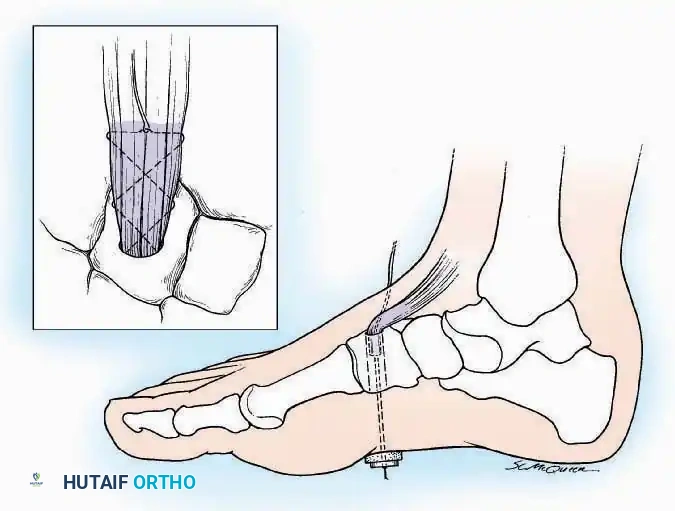
- Krackow Suture: A continuous locking suture that provides exceptional grip on the longitudinal fibers of a tendon. It is the gold standard for Achilles tendon repairs and ligamentous reconstructions.
- Bunnell and Kessler Core Sutures: Utilized primarily in flexor tendon repairs of the hand, these techniques bury the knot within the tendon interface to allow smooth gliding through synovial sheaths.
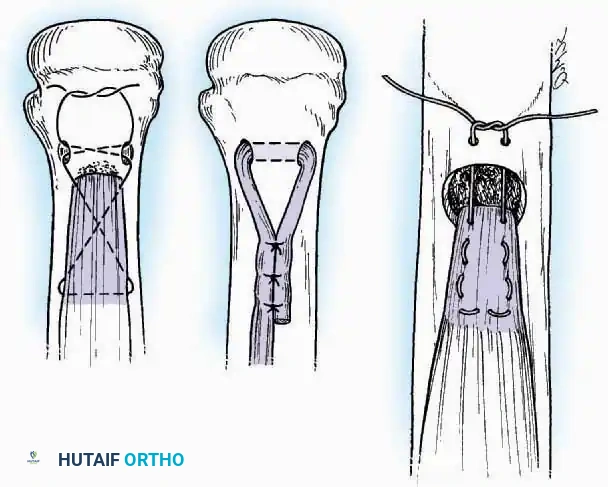
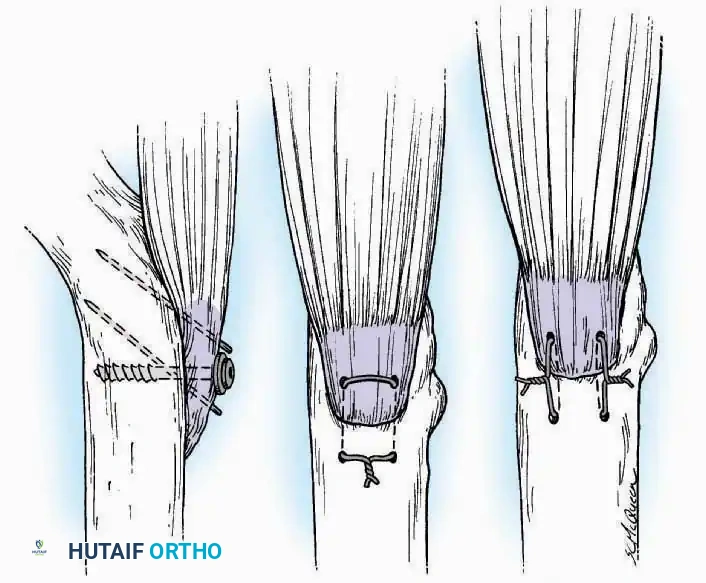
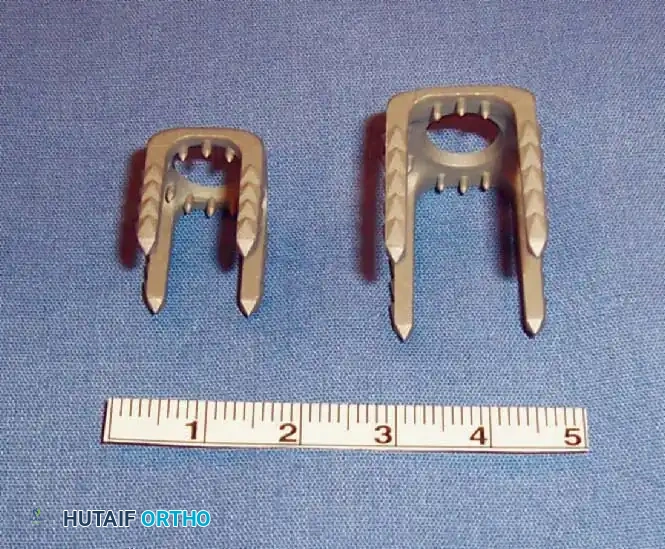
Staple and Anchor Fixation
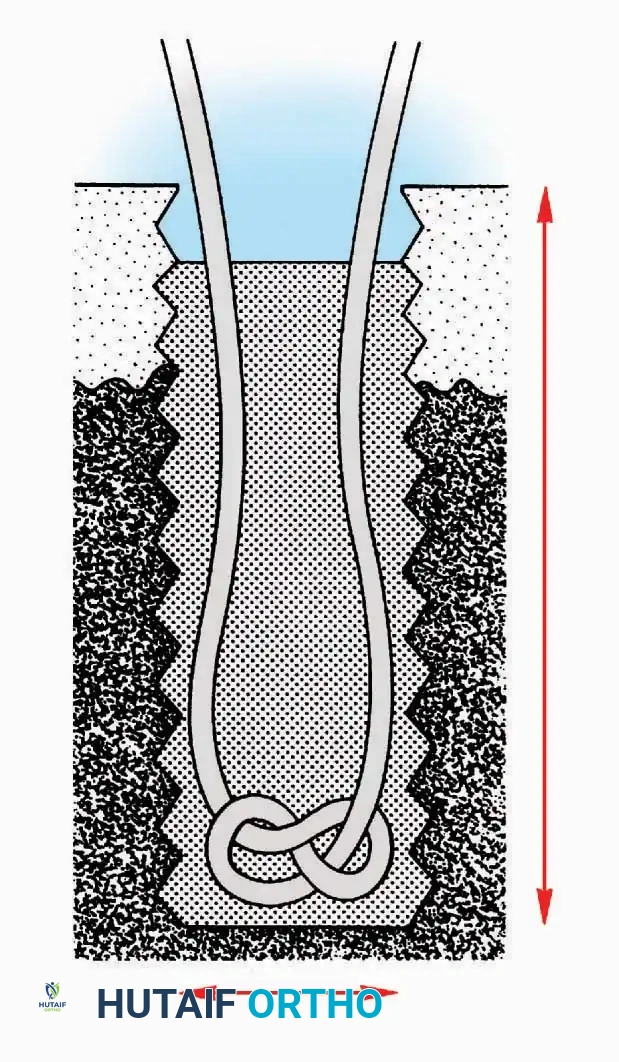
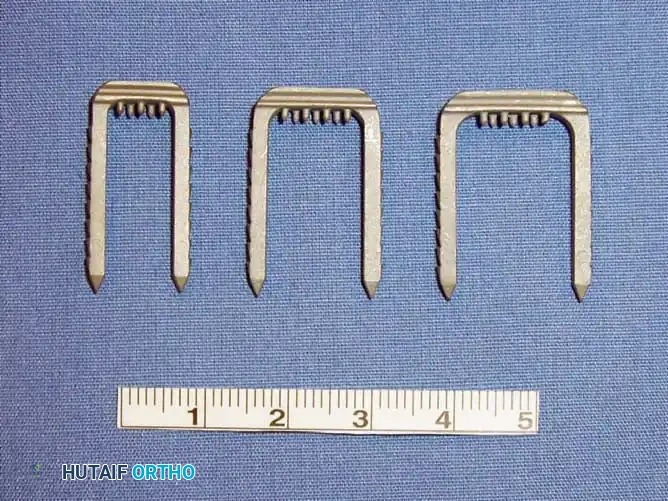
When fixing soft tissue directly to cortical bone, barbed staples or suture anchors are employed.
The bone surface must be decorticated to expose bleeding cancellous bone, promoting osteointegration of the tendon. Staples must be driven perpendicular to the bone surface, ensuring the tines do not breach the far cortex or impinge upon adjacent articular surfaces.
Bone Grafting Techniques
Bone grafting is a cornerstone of orthopaedic surgery, utilized to bridge non-unions, fill cavitary defects, and promote arthrodesis. The success of a graft relies on three biological properties: osteogenesis (living cells), osteoinduction (growth factors like BMPs), and osteoconduction (a structural scaffold).
Autogenous Bone Grafting
Autograft remains the gold standard as it possesses all three biological properties.
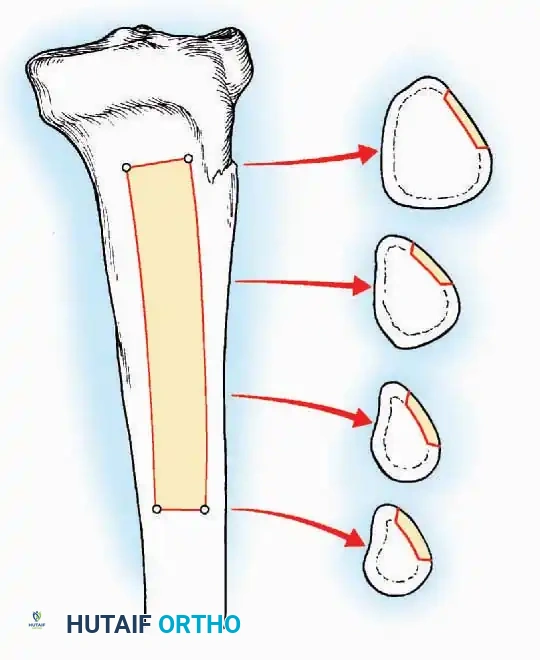
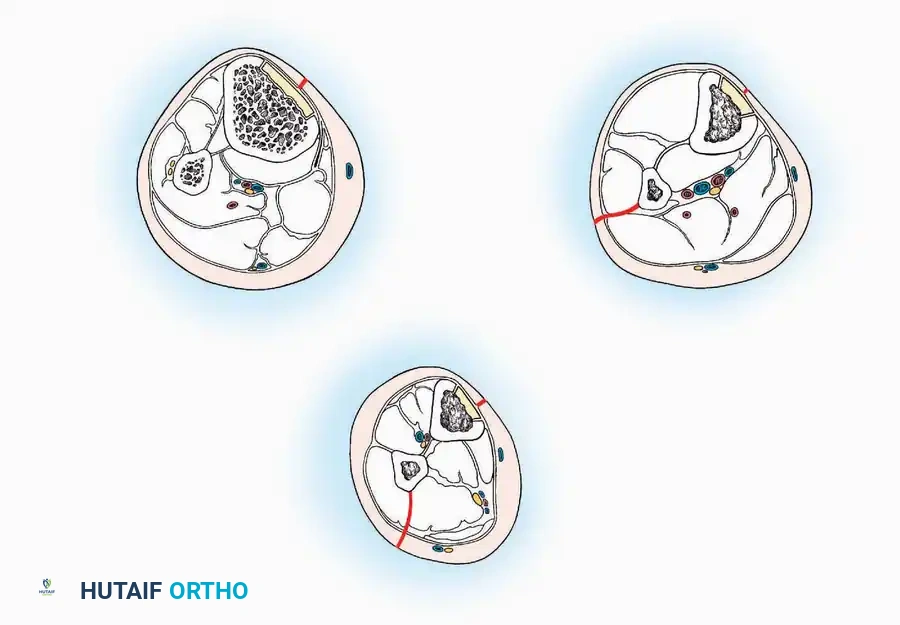
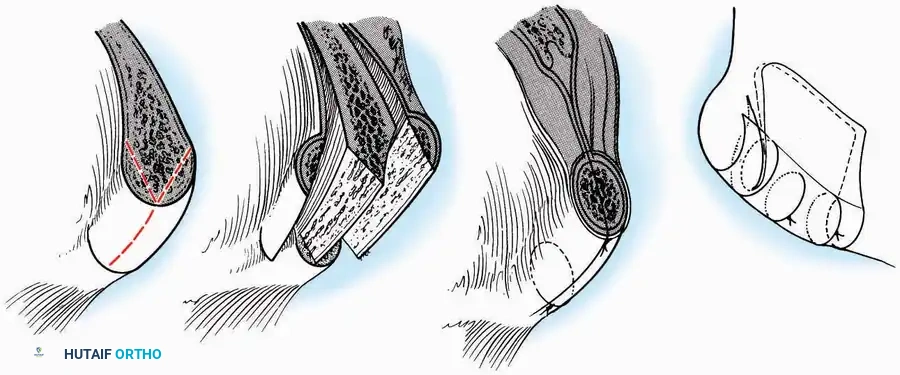
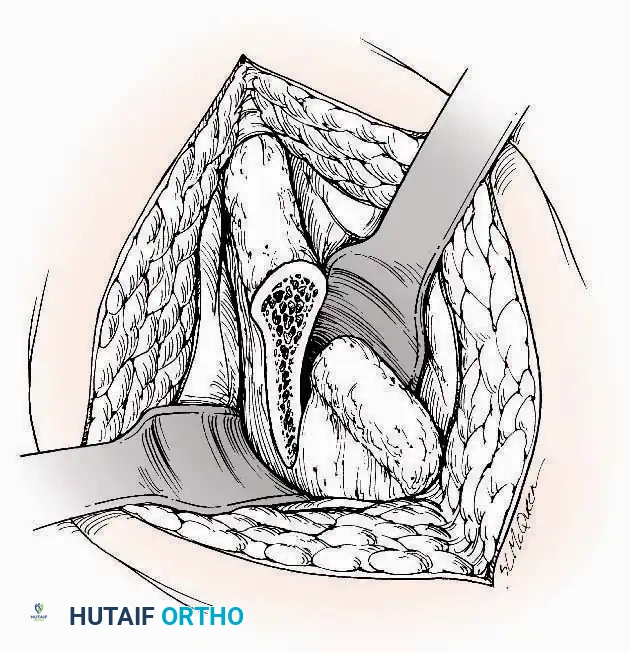
Tibial Bone Grafting:
The proximal or distal tibia can serve as a donor site for cancellous bone.

A cortical window is created, and curettes are used to harvest the underlying cancellous matrix. Care must be taken to avoid compromising the structural integrity of the tibial plateau or the ankle mortise.
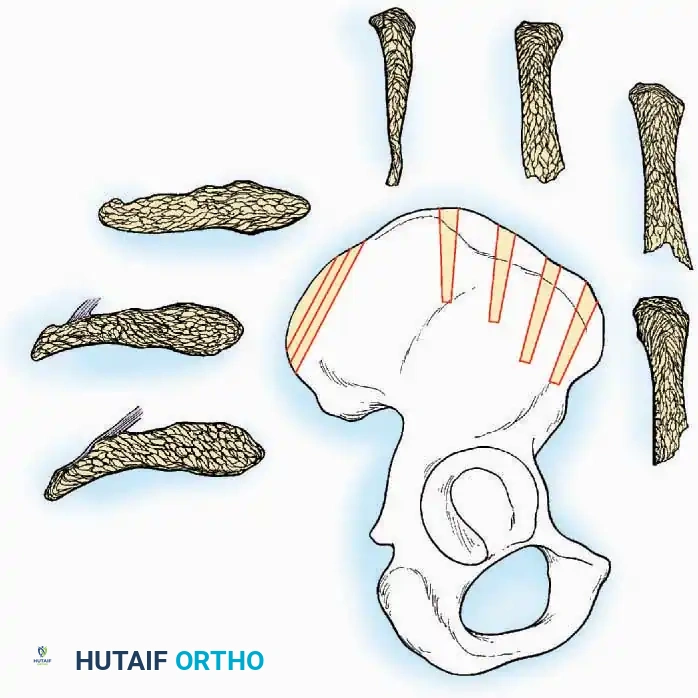
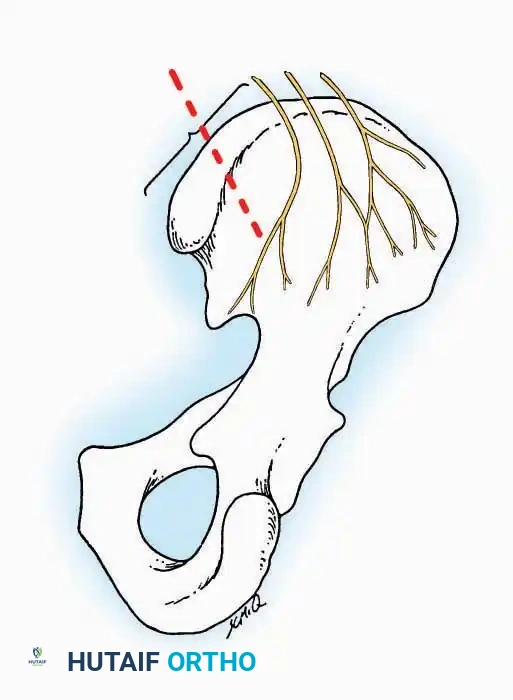
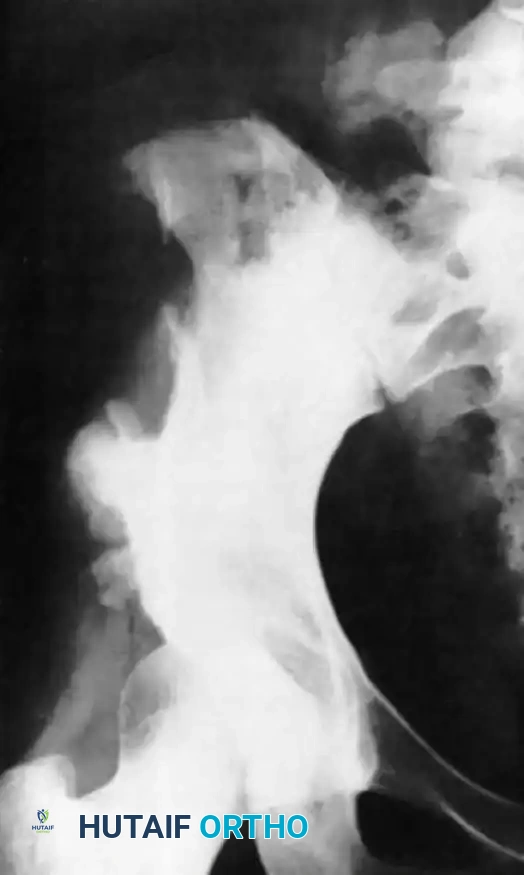
Iliac Crest Bone Grafting (ICBG):
The anterior and posterior iliac crests provide abundant cortico-cancellous bone.
Surgical Warning: When harvesting from the anterior iliac crest, stay at least 2 cm posterior to the Anterior Superior Iliac Spine (ASIS) to prevent avulsion fractures and protect the Lateral Femoral Cutaneous Nerve (LFCN). When harvesting posteriorly, limit the dissection to within 8 cm of the Posterior Superior Iliac Spine (PSIS) to avoid injury to the superior cluneal nerves and the sacroiliac joint.
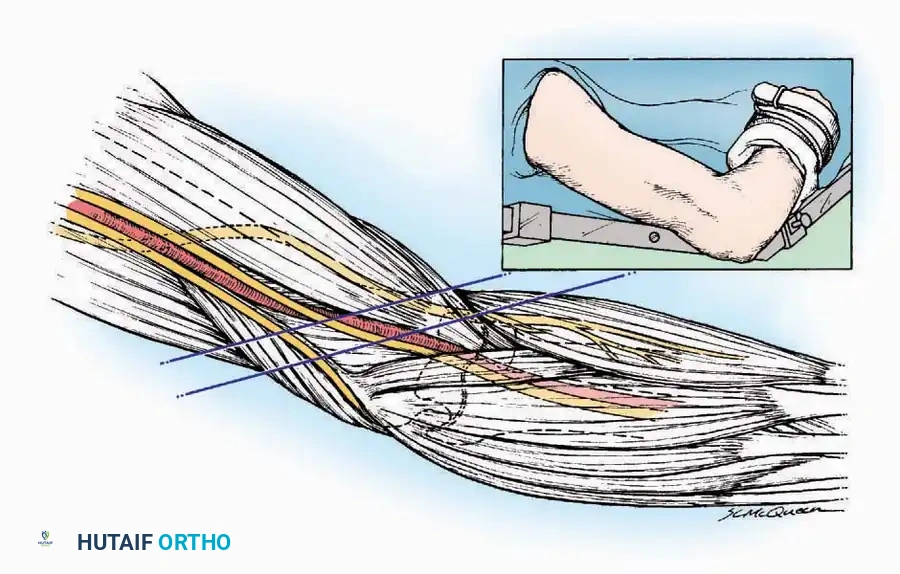
Surgical Approaches and Anatomic Dissection
The fundamental philosophy of any orthopaedic approach is to reach the target pathology via the most direct route while inflicting minimal collateral damage to the surrounding soft tissue envelope. This is achieved by exploiting internervous planes—the boundaries between muscles supplied by different peripheral nerves.
By dissecting between these planes, the surgeon ensures that neither muscle is denervated. For example, the anterior approach to the hip (Smith-Petersen) utilizes the internervous plane between the sartorius (femoral nerve) and the tensor fasciae latae (superior gluteal nerve).
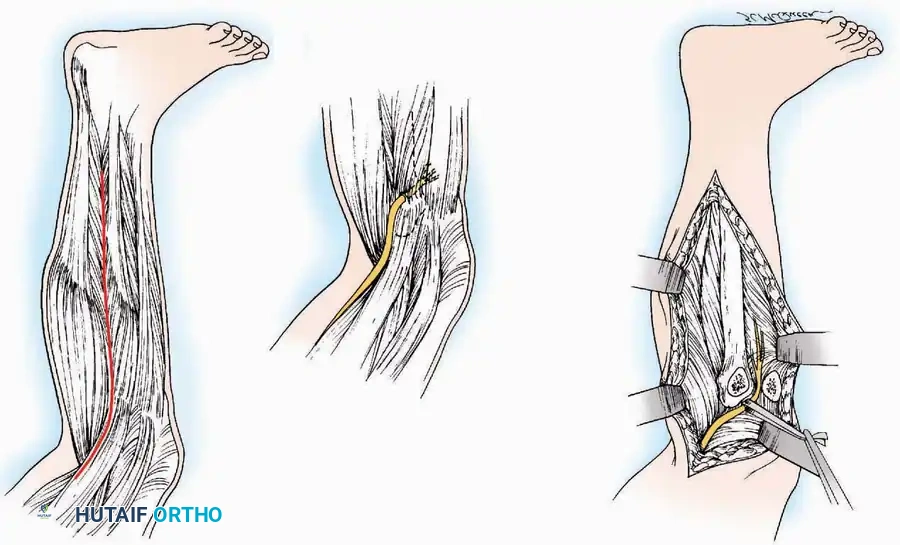
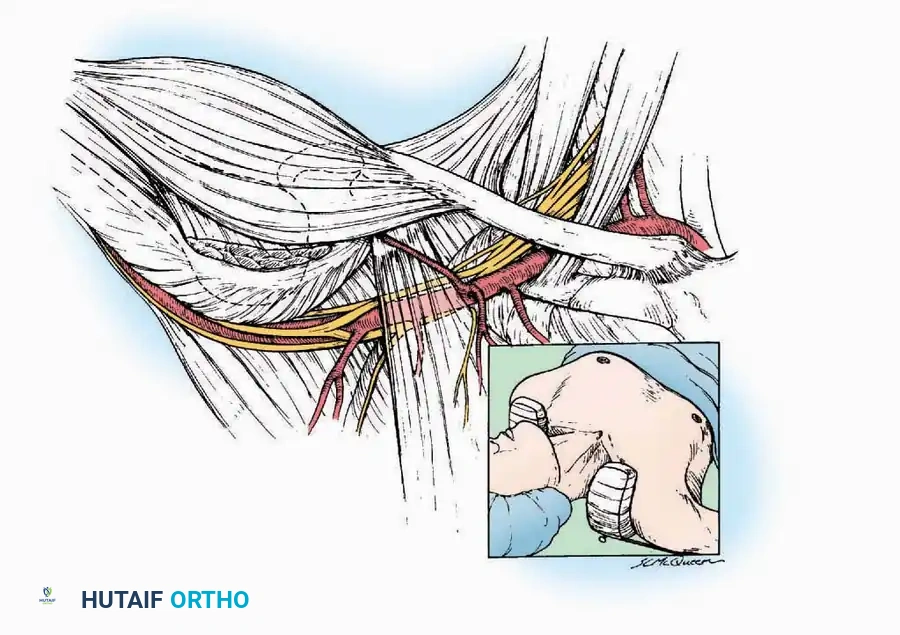
Handling of Neurovascular Structures
During deep dissection, neurovascular bundles must be identified, mobilized, and protected.
Vessel loops should be used to gently retract nerves. Excessive traction must be avoided, as peripheral nerves are highly sensitive to ischemic stretch injuries. The vasa nervorum (the microvascular supply to the nerve) can be disrupted by as little as 8% elongation, leading to transient or permanent neurapraxia.
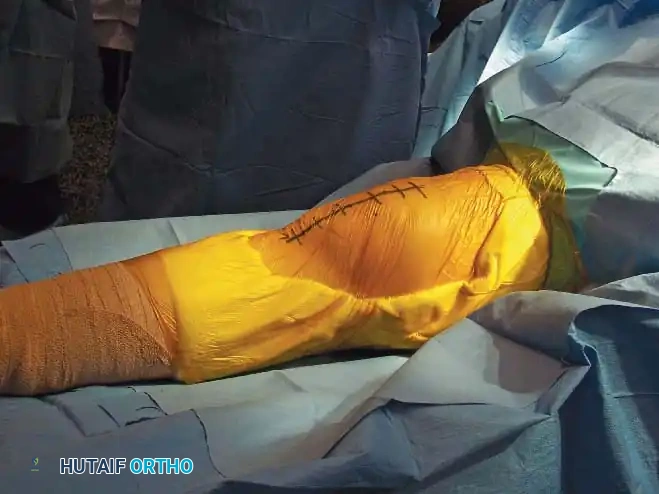
Hemostasis and Closure
Meticulous hemostasis is paramount before closure to prevent postoperative hematoma formation, which serves as a nidus for infection and increases tension on the incision. The deep fascial layers must be closed securely to prevent muscle herniation, while the subcutaneous tissues are approximated to eliminate dead space. Skin closure should be performed with minimal tension, utilizing techniques that respect the local angiosomes to ensure optimal wound healing.
By rigorously applying these foundational surgical techniques—from the precise calibration of a tourniquet to the strategic exploitation of internervous planes—the orthopaedic surgeon establishes an environment where complex reconstructions can be performed safely, efficiently, and with the highest probability of clinical success.
You Might Also Like