Operative Management of Tarsal Tunnel Syndrome: A Comprehensive Guide to Surgical Release
Key Takeaway
Tarsal tunnel release is a precise surgical intervention indicated for recalcitrant posterior tibial nerve entrapment. This procedure involves the systematic decompression of the tibial nerve and its terminal branches beneath the flexor retinaculum and the abductor hallucis fascia. Mastery of the medial ankle neurovascular anatomy, particularly the variable branching of the medial calcaneal nerve, is paramount to achieving optimal outcomes and avoiding iatrogenic neuromas.
INTRODUCTION TO TARSAL TUNNEL SYNDROME
Tarsal tunnel syndrome (TTS) is an entrapment neuropathy of the posterior tibial nerve or its branches within the fibro-osseous confines of the medial ankle. First described independently by Keck and Lam in 1962, this condition is the lower extremity analogue to carpal tunnel syndrome, though it presents with significantly more anatomical variability and a higher incidence of space-occupying lesions.
When conservative modalities—such as nonsteroidal anti-inflammatory drugs (NSAIDs), orthotics, immobilization, and targeted corticosteroid injections—fail to provide durable relief, surgical decompression via a tarsal tunnel release is indicated. The primary objective of the operation is the complete release of the flexor retinaculum (laciniate ligament) and the deep investing fascia of the abductor hallucis muscle, thereby eliminating extrinsic compression on the neurovascular bundle.
This comprehensive guide details the surgical technique for tarsal tunnel release, expanding upon foundational principles to provide a masterclass in medial ankle neurovascular decompression.
SURGICAL ANATOMY AND BIOMECHANICS
A profound understanding of the medial ankle anatomy is non-negotiable for the operating surgeon. The tarsal tunnel is a dynamic fibro-osseous space.
The Fibro-Osseous Tunnel
The boundaries of the tarsal tunnel are defined as follows:
* Roof: The flexor retinaculum (laciniate ligament), a thickening of the deep aponeurosis of the lower leg.
* Floor: The medial walls of the distal tibia, talus, and calcaneus.
* Anterior Border: The medial malleolus.
* Posterior Border: The posterior tubercle of the calcaneus.
Contents of the Tarsal Tunnel
From anteromedial to posterolateral, the structures passing through the tunnel can be remembered by the classic mnemonic "Tom, Dick, And Very Nervous Harry":
1. Tibialis posterior tendon
2. Dexor digitorum longus (FDL) tendon
3. Artery (Posterior tibial artery)
4. Vein (Posterior tibial veins)
5. Nerve (Posterior tibial nerve)
6. Hallucis longus (Flexor hallucis longus tendon)
Neurovascular Variations
The posterior tibial nerve typically divides into three terminal branches: the medial plantar nerve, the lateral plantar nerve, and the medial calcaneal nerve.
CLINICAL PEARL:
An anatomical study by Havel et al. demonstrated that the tibial nerve bifurcates into its medial and lateral plantar components beneath the laciniate ligament in 93% of foot dissections. This high prevalence dictates that the bifurcation will almost always be encountered during the standard release.
The medial calcaneal branch exhibits immense variability. It may arise from the main tibial nerve proximal to the retinaculum, directly from the bifurcation, or from the lateral plantar nerve. Furthermore, it may penetrate directly through the flexor retinaculum. Failure to recognize and protect these penetrating branches is the leading cause of painful postoperative neuromas.
Biomechanics of Nerve Compression
The volume of the tarsal tunnel is highly dependent on foot positioning. Dorsiflexion and eversion of the ankle significantly increase tension on the flexor retinaculum, thereby decreasing the cross-sectional area of the tunnel and increasing interstitial pressure. Conversely, plantarflexion and inversion (equinovarus) maximize tunnel volume, which forms the biomechanical rationale for postoperative splinting positions.
INDICATIONS AND PREOPERATIVE PLANNING
Indications for Surgery
- Failure of a comprehensive non-operative regimen (typically 3 to 6 months).
- Presence of a space-occupying lesion identified on advanced imaging (e.g., ganglion cyst, lipoma, neurofibroma, severe varicosities).
- Progressive motor weakness or intrinsic muscle atrophy (e.g., abductor hallucis wasting).
- Positive electrodiagnostic studies (EMG/NCS) correlating with clinical symptoms, though surgery may still be indicated in symptomatic patients with negative studies if clinical suspicion is high.
Preoperative Assessment
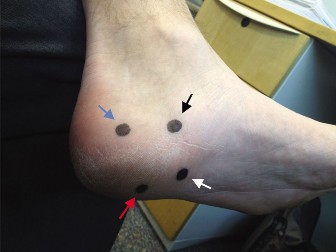
- Clinical Examination: Tinel's sign over the tarsal tunnel, the dorsiflexion-eversion test (holding the foot in maximum dorsiflexion and eversion for 60 seconds to provoke symptoms), and assessment of two-point discrimination.
- Imaging: Weight-bearing radiographs to assess for hindfoot valgus or tarsal coalition. Magnetic Resonance Imaging (MRI) is highly recommended to rule out space-occupying lesions and assess the integrity of the posterior tibial tendon.
- Electrodiagnostics: Useful for confirming the diagnosis and ruling out proximal compression (e.g., L5/S1 radiculopathy) or peripheral neuropathy (double crush syndrome).
PATIENT POSITIONING AND PREPARATION
- Anesthesia: The procedure can be performed under general anesthesia, spinal anesthesia, or a regional popliteal block. If a regional block is used, ensure it does not interfere with intraoperative nerve stimulation if planned.
- Positioning: The patient is placed in the supine position. A bump (sandbag or gel pad) is placed under the contralateral hip to allow the operative leg to externally rotate naturally, providing excellent exposure to the medial ankle.
- Tourniquet: A well-padded pneumatic thigh tourniquet is applied. Exsanguination with an Esmarch bandage is performed prior to inflation to ensure a bloodless field, which is critical for identifying delicate nerve branches.
- Magnification: The use of surgical loupes (2.5x to 3.5x magnification) is strongly recommended to aid in the identification of the medial calcaneal branches and epineural microvasculature.
SURGICAL TECHNIQUE: STEP-BY-STEP
1. The Incision and Superficial Dissection
The incision must be meticulously planned to provide adequate exposure while respecting the vascular supply of the skin flaps.
- Incision Placement: Extend the incision from 1 cm plantar to the navicular tuberosity in a proximal direction. The incision should bisect the area between the medial malleolus and the medial aspect of the tuberosity of the calcaneus, curving gently to end approximately 1 cm anterior to the Achilles tendon.
- Gravity Equinus: With the foot resting in gravity equinus, this planned trajectory forms almost a straight line.
SURGICAL WARNING:
Do not undermine the skin incision. The vascular supply to the skin in the medial ankle is tenuous. Aggressive undermining of the skin flaps significantly increases the risk of marginal skin necrosis, delayed wound healing, and subsequent deep infection.
- Superficial Veins: Carefully dissect through the subcutaneous tissues. Coagulate or ligate the superficial veins connecting the plantar and saphenous systems. Meticulous hemostasis at this stage prevents postoperative hematoma.
- Fascial Incision: Deepen the incision through the investing fascia of the calf proximally and the medial side of the foot distally. This exposes the proximal and distal (posterior and anterior) borders of the flexor retinaculum.
2. Identification and Release of the Flexor Retinaculum
Before dividing the retinaculum, clearly identify the neurovascular bundle proximally, before it disappears beneath the fascial roof.
- Proximal Identification: Locate the posterior tibial nerve proximal to the flexor retinaculum. Occasionally, the nerve will appear visibly enlarged or hyperemic at the upper border of the retinaculum due to chronic proximal swelling (the "pseudoneuroma" effect of compression).
- Retinacular Release: Using a blunt-tipped dissecting scissor or a grooved director, release the flexor retinaculum from a proximal to a distal direction.
- Protecting the Medial Calcaneal Nerve: As you divide the retinaculum, remain hyper-vigilant. Sometimes a medial calcaneal branch penetrates directly through the retinaculum. Care must be taken to avoid severing or stretching one or more branches of this nerve. Iatrogenic injury to the medial calcaneal nerve will result in a painful, recalcitrant neuroma that is notoriously difficult to treat.
3. Distal Decompression and the Porta Pedis
The release is not complete until the terminal branches are traced into the foot. The tibial nerve divides beneath the flexor retinaculum into the medial and lateral plantar branches. When these nerves reach the medial border of the abductor hallucis, they turn plantarward and lateral, diving deep to the muscle belly through the porta pedis.
- Tracing the Branches: Trace each nerve (medial and lateral plantar) well distal to the inferior edge of the flexor retinaculum.
- Abductor Hallucis Release: It is imperative to ensure that no tethering by the fascial origin of the abductor hallucis exists. This is made easier by releasing the deep investing fascia and part of the tendinous origin of the abductor hallucis muscle. Retract the muscle belly inferiorly to visualize the nerves entering the plantar aspect of the foot.
- Septal Excision: If there are distinct fibrous septa separating the neurovascular bundles from the tendons, these should be carefully excised to fully decompress the compartments.
4. Epineural Assessment and Retinacular Excision
Once the extrinsic compression has been completely removed, the nerve itself must be evaluated.
- Epineurotomy: Inspect the epineurium of the posterior tibial nerve and its branches. If the epineurium appears unequally thickened, fibrotic, or constrictive, a longitudinal epineurotomy should be performed. Using a micro-scalpel (e.g., #15 or #69 blade) under loupe magnification, carefully incise the thickened epineurium to decompress the individual nerve fascicles. Internal neurolysis is generally not recommended unless a specific intraneural lesion is identified, as it can cause excessive scarring.
- Retinacular Excision: To prevent postoperative scarring and reconstitution of the retinaculum (which can lead to recurrent TTS), remove a 2 to 3 mm section (a strip) of the flexor retinaculum directly over the neurovascular bundle.
5. Hemostasis and Closure
Meticulous hemostasis is critical in tarsal tunnel surgery to prevent hematoma formation, which can cause acute postoperative nerve compression.
- Tourniquet Deflation: Remove the tourniquet and apply pressure with warm saline-soaked sponges for several minutes.
- Hemostasis: Systematically identify and electrocoagulate all bleeding vessels. Pay special attention to the venae comitantes accompanying the posterior tibial artery, as these are prone to bleeding once venous pressure normalizes.
- Wound Closure: Close the wound in layers, but do not close the flexor retinaculum. Close the subcutaneous tissue with interrupted absorbable sutures (e.g., 3-0 or 4-0 Vicryl) to eliminate dead space. Close the skin with non-absorbable sutures (e.g., 3-0 or 4-0 Nylon) using a vertical mattress technique to ensure eversion of the skin edges, or a subcuticular closure based on surgeon preference.
POSTOPERATIVE CARE AND REHABILITATION
The postoperative protocol is designed to protect the wound, minimize tension on the healing nerve, and prevent contractures.
Phase I: Initial Healing (Days 0 to 10-14)
- Dressing and Splinting: Immediately postoperatively, apply a sterile, bulky compression dressing.
- Immobilization: Apply a short-leg posterior plaster splint with the foot in mild equinovarus.
- Biomechanical Rationale: The equinovarus position maximizes the volume of the tarsal tunnel and minimizes tension on the posterior tibial nerve and the healing skin edges.
- Weight-Bearing: The patient is strictly non-weight-bearing on the operative extremity. Elevation of the limb above heart level is critical to minimize edema.
- Follow-up: The patient is seen in the clinic at 7 to 10 days. The splint and bulky dressing are removed. Sutures are removed if the wound is adequately healed, and adhesive strips (Steri-Strips) are applied.
Phase II: Maturation and Transition (Weeks 2 to 4)
- Cast-Brace Application: Once the sutures are removed, the foot is brought out of equinovarus and placed into a neutral position (0 degrees of dorsiflexion/plantarflexion).
- Immobilization: A fiberglass prefabricated short-leg cast-brace (controlled ankle motion or CAM boot) is applied.
- Biomechanical Rationale: Transitioning to a neutral position prevents the development of an Achilles tendon contracture, which can occur if the foot is left in equinus for prolonged periods.
- Weight-Bearing: The patient may begin protected, partial weight-bearing in the CAM boot, progressing to full weight-bearing as tolerated over the next 10 to 14 days while the wound matures.
Phase III: Rehabilitation (Weeks 4 and Beyond)
- Physical Therapy: At 4 weeks, the CAM boot is discontinued. The patient transitions to supportive athletic footwear.
- Exercises: Formal physical therapy is initiated, focusing on:
- Active and passive ankle range of motion.
- Posterior tibial nerve gliding exercises to prevent perineural adhesions.
- Strengthening of the intrinsic foot musculature and the posterior tibialis.
- Proprioceptive training.
- Return to Activity: Patients can typically return to low-impact activities by 6 weeks, with a gradual return to high-impact sports or heavy labor by 10 to 12 weeks, depending on the resolution of preoperative symptoms.
COMPLICATIONS AND PITFALLS
While tarsal tunnel release is highly successful when properly indicated, complications can arise, primarily from technical errors or anatomical variations.
- Incomplete Release: The most common cause of failed tarsal tunnel surgery is the failure to adequately release the deep fascia of the abductor hallucis muscle. The nerves must be traced well into the porta pedis to ensure complete decompression.
- Iatrogenic Neuroma: Injury to the medial calcaneal nerve branches during the initial incision or retinacular release can lead to a devastating neuroma. Meticulous dissection and loupe magnification are essential.
- Wound Dehiscence and Infection: The medial ankle has a fragile blood supply. Undermining the skin flaps, excessive retraction, or premature removal of sutures can lead to marginal necrosis and dehiscence.
- Complex Regional Pain Syndrome (CRPS): A known complication of any foot and ankle nerve surgery. Early recognition and aggressive multimodal treatment (gabapentinoids, sympathetic blocks, aggressive physical therapy) are required if CRPS is suspected.
- Recurrence: Recurrence of symptoms can occur due to excessive scar tissue formation. Excision of a strip of the flexor retinaculum, meticulous hemostasis, and early nerve gliding exercises mitigate this risk.
CONCLUSION
Tarsal tunnel release is a highly effective procedure for alleviating the debilitating symptoms of posterior tibial nerve entrapment. Success hinges on a rigorous preoperative diagnostic workup, a profound respect for the variable neurovascular anatomy of the medial ankle, and a meticulous surgical technique that ensures complete proximal and distal decompression. By adhering to the principles of careful tissue handling, precise retinacular release, and structured postoperative rehabilitation, the orthopedic surgeon can achieve excellent, reproducible outcomes for patients suffering from tarsal tunnel syndrome.
📚 Medical References
You Might Also Like