ACL Reconstruction: Bone-Patellar Tendon-Bone Graft Guide
Key Takeaway
The bone-patellar tendon-bone (BTB) autograft remains a gold standard in anterior cruciate ligament (ACL) reconstruction, particularly for high-demand athletes. This comprehensive surgical guide details the modified Clancy technique, emphasizing precise graft harvesting, anatomical tunnel placement using a rear-entry guide system, and rigorous isometry testing. Mastery of these steps ensures optimal biomechanical stability, minimizes postoperative complications, and facilitates accelerated rehabilitation protocols.
Introduction to Bone-Patellar Tendon-Bone ACL Reconstruction
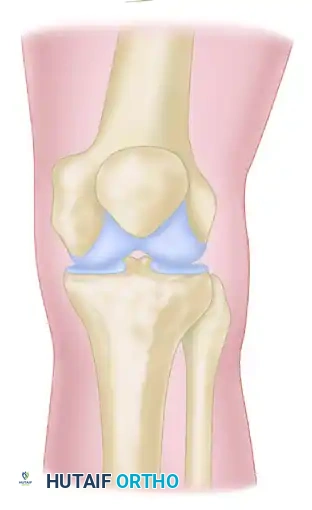
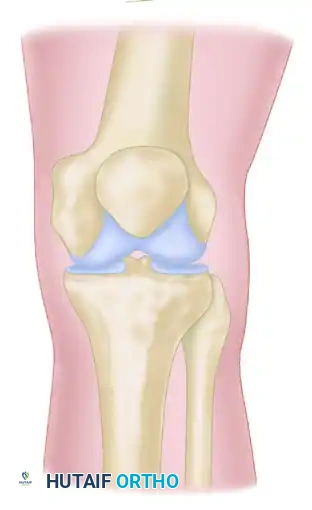
The anterior cruciate ligament (ACL) is the primary restraint to anterior tibial translation and a critical stabilizer against rotatory loads. Reconstruction of the ACL using a bone-patellar tendon-bone (BTB) autograft remains the gold standard, particularly for high-demand, pivoting athletes. The BTB graft offers superior biomechanical advantages, primarily due to its high ultimate tensile load and the capacity for rigid bone-to-bone healing within the osseous tunnels, which allows for accelerated rehabilitation.
This guide details the Modified Clancy Technique for ACL reconstruction. This approach utilizes a rear-entry commercial drill guide system (e.g., Acufex, Smith & Nephew) for precise femoral tunnel placement. The bone plugs of the free patellar tendon graft are secured within the tunnels using interference screws. While this technique can be executed via entirely open or arthroscopically aided approaches, a thorough diagnostic arthroscopy is mandatory in all cases to address concurrent intraarticular pathology.
Clinical Pearl: Bone-to-bone healing typically occurs within 6 weeks, significantly faster than the 8 to 12 weeks required for soft-tissue graft incorporation (Sharpey's fibers). This rapid integration is the primary rationale for selecting BTB grafts in elite athletes.
Preoperative Preparation and Diagnostic Arthroscopy
Patient Positioning and Setup
The patient is placed supine on the operating table. A tourniquet is applied to the proximal thigh. The non-operative leg is placed in a well-padded leg holder or allowed to rest flat, while the operative leg is positioned to allow full, unencumbered flexion to at least 120 degrees. A lateral post or a dedicated knee holder is utilized to maintain the knee in a stable position during arthroscopy and tunnel drilling.
Diagnostic Arthroscopy
Even if an entirely open surgical technique is planned for the reconstruction, a comprehensive diagnostic arthroscopy is the critical first step.
- Establish standard anterolateral and anteromedial portals.
- Systematically examine the suprapatellar pouch, patellofemoral joint, medial and lateral gutters, and both tibiofemoral compartments.
- Any intraarticular pathological condition must be corrected prior to proceeding with the reconstruction. This includes performing chondroplasty for articular cartilage defects, meniscal repair for peripheral tears, or partial meniscectomy for irreparable meniscal lesions.
- Examine the contents of the intercondylar notch to confirm the ACL rupture and assess the integrity of the posterior cruciate ligament (PCL).
Surgical Approach and Incision Options
Harvesting of the BTB graft and the subsequent reconstruction can be performed through either a single-incision or a two-incision technique. The choice depends on the necessity of additional posteromedial or posterolateral incisions (e.g., for concurrent inside-out meniscal repair), the presence of previous incisional scars, and the surgeon's preference.
Single Incision Technique
The single skin incision begins 8 cm superolateral to the patella and courses distally, crossing the tibial tuberosity to end at the anteromedial tibia.
Two Separate Incisions Technique
This approach utilizes two distinct incisions to access the harvest site and the lateral femur:
1. Anteromedial Incision: Begins just medial to the superomedial border of the patella and parallels the patellar tendon, extending to 2 cm distal to the tibial tuberosity.
2. Lateral Incision: An 8 to 10 cm long incision beginning at the lateral epicondyle of the femur and extending proximally over the midlateral aspect of the iliotibial band.
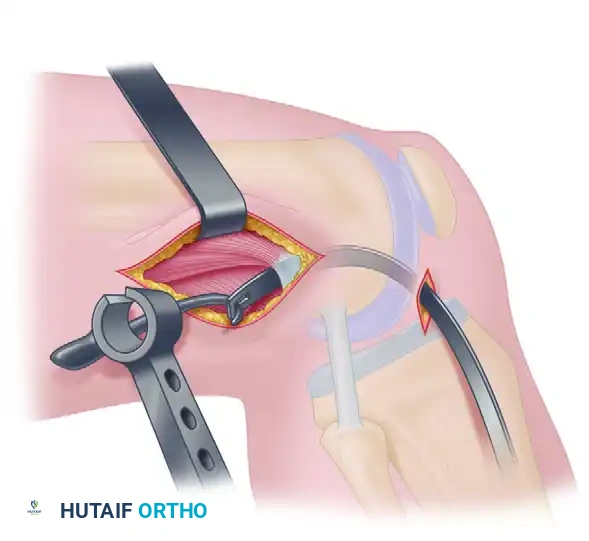
Graft Harvesting: Step-by-Step
Meticulous graft harvesting is paramount to prevent catastrophic complications such as patellar fracture or patellar tendon rupture.
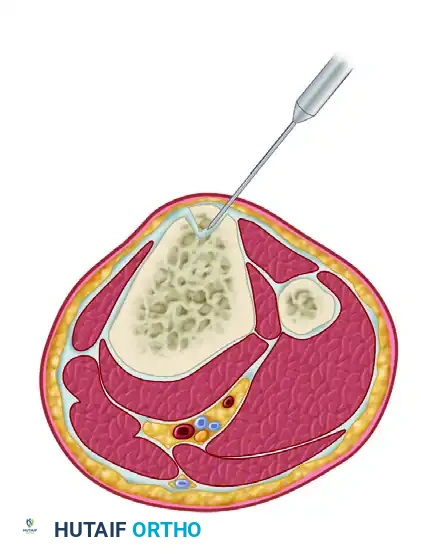
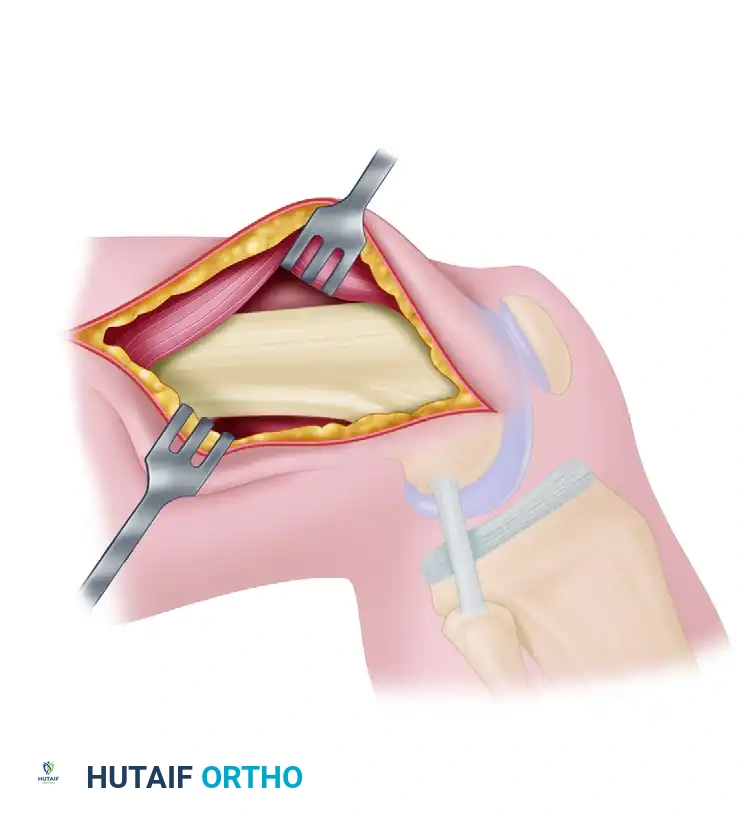
Exposure and Tendon Incision
- Expose the patella and patellar tendon through the plane of the prepatellar bursa. Maintain thick skin flaps to preserve vascularity and prevent skin necrosis.
- Measure the total width of the patellar tendon.
- If the tendon is at least 30 mm wide, make two parallel incisions through the full thickness of the tendon, exactly 10 mm apart, extending from the inferior pole of the patella to the attachment at the tibial tuberosity. If the tendon is narrower, harvest only the central third to ensure adequate remaining tendon for extensor mechanism integrity.
Marking the Bone Plugs
Continue the parallel incisions proximally through the aponeurosis over the anterior surface of the patella (from the inferior pole to the quadriceps tendon insertion). Distally, extend the incisions through the periosteum over the tibial tuberosity, extending 2 to 3 cm inferior to the tendon insertion. These incisions mark the precise lines for releasing the graft with its bony attachments.

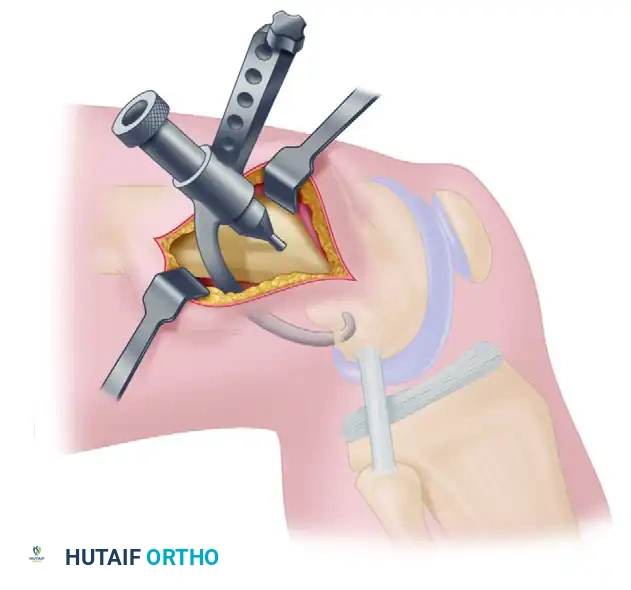
Harvesting the Tibial Bone Plug
- Using an oscillating saw, remove a 2 to 3 cm long segment of tibial tuberosity bone.
- Direct the saw blade from each side of the bone at a 45-degree angle, aiming toward the center to create a trapezoidal or triangular plug. This shape prevents the saw blade from inadvertently penetrating too deeply into the tibia.
- After both sides are sawed, release the proximal and distal bony extents with a 1-cm osteotome. Gently "pop up" and free the tibial end of the graft.

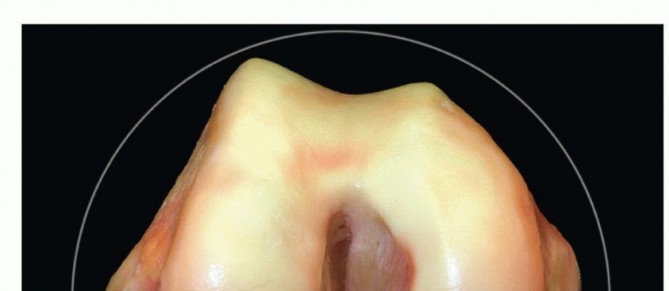
Harvesting the Patellar Bone Plug
Attention is now directed to the patellar end of the graft. This step requires extreme precision.
- Using the oscillating saw along the previously made parallel incisions, make parallel cuts through the outer cortex of the patella from the inferior pole, extending proximally 20 to 25 mm.
- Depth Control: The depth of these cuts is crucial. Too deep a cut risks an immediate osteotomy or a subsequent stress fracture of the patella. Too shallow a cut risks fashioning a graft that is too thin for satisfactory interference screw fixation in the femoral tunnel.
- Extend the knee fully. Have an assistant pull the distally released graft superiorly while depressing the superior pole of the patella to elevate and expose the inferior pole.
- With a 1-cm osteotome, release the full thickness of the outer cortex of the patella from inferior to superior, guided by the depth of the saw cuts.
Surgical Warning: Take extreme care not to damage or weaken the patellar tendon graft insertion on the bone at the inferior pole of the patella. Levering the osteotome too aggressively can detach the tendon from the bone plug.
- Smooth any sharp edges or corners of the bony defect in the patella with a rongeur or rasp. This eliminates stress risers, significantly reducing the risk of postoperative patellar fracture.
Graft Preparation
Once harvested, the free, nonvascularized bone-tendon-bone graft must be meticulously prepared on the back table.
- Ideal Dimensions: The final graft should consist of a patellar bone plug (5 mm thick, 10 mm wide, 2-3 cm long), a central full-thickness patellar tendon (10 mm wide), and a tibial tuberosity bone plug (8 mm thick, 10 mm wide, 2-3 cm long).
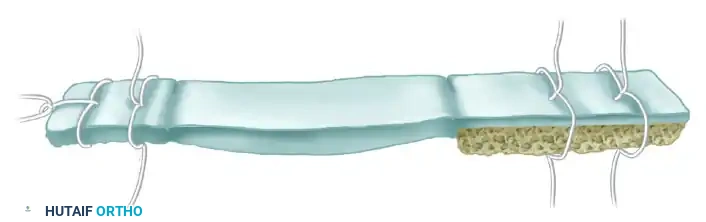
- Sizing: Pass the bone-tendon-bone graft through a 10-mm cylindrical sizer. It should pass snugly but easily. Trim any excess bone with a rongeur to prevent tunnel jamming during insertion.
- Drilling and Suturing: Drill two 2.0-mm holes through the patellar bone fragment and two through the tibial tuberosity bone. Place No. 5 Tevdek (or similar high-strength non-absorbable) sutures through these holes (labeled A, B, C, and D) to facilitate graft passage and tensioning.
- Place the prepared graft in a basin of lactated Ringer's solution mixed with antibiotics (e.g., vancomycin) to prevent desiccation and reduce infection risk.
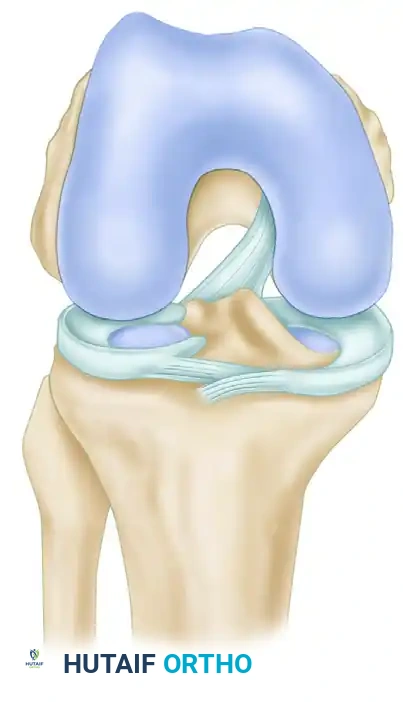
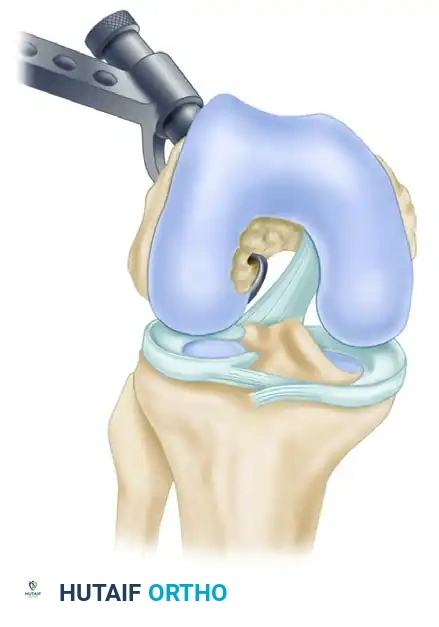
Intercondylar Notch Preparation
Proper preparation of the intercondylar notch is essential to prevent graft impingement in full extension and to identify the correct anatomical landmarks for tunnel placement.
- Explore the intercondylar notch. In an open or mini-open technique, this can be done through an anteromedial arthrotomy or directly through the defect in the patellar tendon created by the graft harvest.
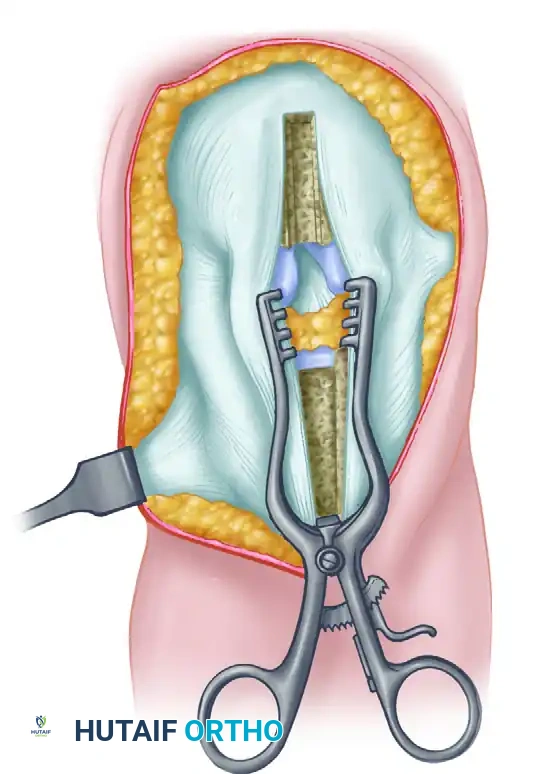
- Excise the femoral and tibial stump remnants of the torn ACL using a shaver or curet. Carefully protect the intact PCL.
- Remove all soft tissue from the lateral wall of the intercondylar notch, extending all the way posteriorly to the posterolateral capsule and the "over-the-top" site. Placing the knee in a figure-four position (hip flexed and externally rotated, knee flexed, foot on the opposite knee) greatly enhances visualization of the lateral wall.
- Notchplasty: Perform a notchplasty if the notch is narrow or if osteophytes are present, using osteotomes, curets, or arthroscopic motorized burrs. The goal is to create a 1- to 2-mm clearance around the graft when the knee is in full extension.
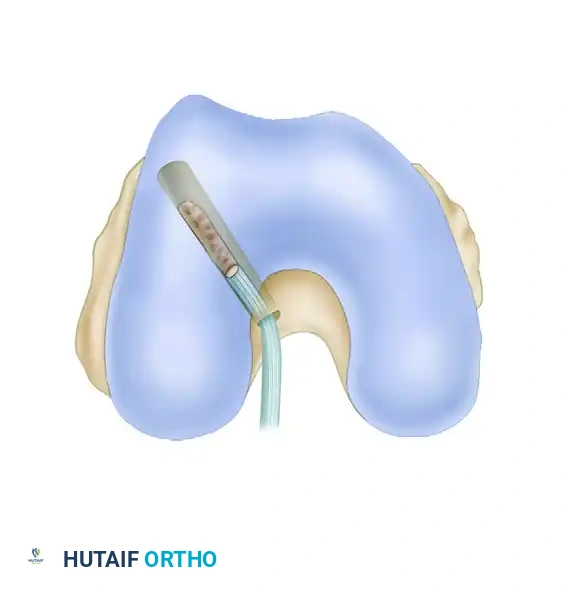
Identifying the Femoral Attachment Site
A critical anatomical pitfall is the "resident’s ridge" (lateral intercondylar ridge)—a bony prominence anterior to the true over-the-top site. If this ridge is mistakenly used as the posterior reference, the femoral tunnel will be placed too far anteriorly, resulting in a graft that is tight in flexion and loose in extension.
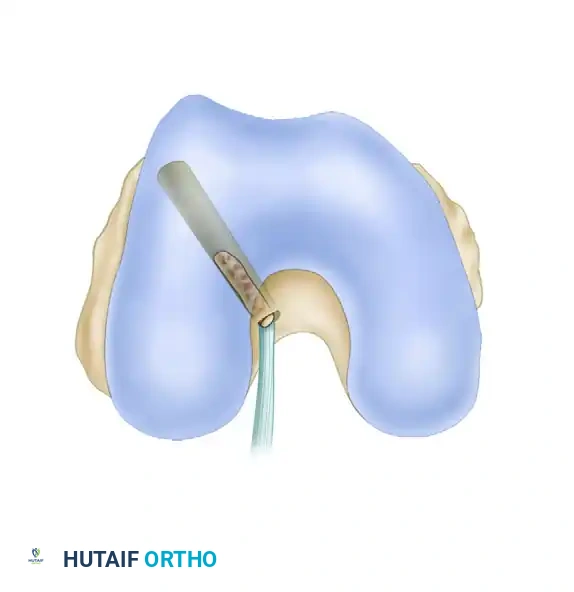
- With a probe or angled curet, explore the posterior limits of the intercondylar notch to precisely determine the drop-off point where the instrument goes "over the top" of the posterolateral femoral condyle. Repeat this probing to confirm the exact posterior location.
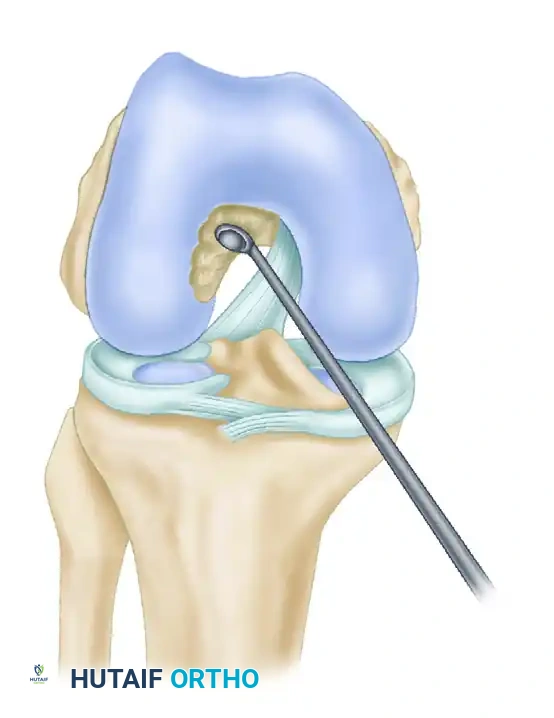
- Bring the tip of the curved curet back into the posterior intercondylar notch and create a pilot hole for the tip of the rear-entry guide. This hole should be 5 to 6 mm anterior to the drop-off point.
- Clock-Face Orientation: With the posterosuperior apex of the intercondylar notch representing the 12-o’clock position, the pilot hole should be at the 11-o’clock position in a right knee, and at the 1-o’clock position in a left knee.
Femoral Tunnel Preparation: Rear-Entry Technique
The modified Clancy technique utilizes an outside-in (rear-entry) approach for the femoral tunnel, allowing for highly accurate anatomical placement independent of the tibial tunnel trajectory.
Lateral Approach
- Make a longitudinal midlateral incision, beginning 4 to 5 cm proximal to the patella and ending at the lateral femoral epicondyle.
- Incise the iliotibial (IT) band longitudinally at the junction of its anterior two-thirds and posterior one-third, extending proximally for 4 to 5 cm from the epicondylar level.
- Retract the vastus lateralis anteriorly to expose the lateral femoral epicondyle and the metaphyseal cortex of the distal femur.
- Incise the periosteum and strip it off the posterior femur into the posterior intercondylar notch.
Surgical Warning: Take extreme care not to detach the lateral intermuscular septum or the posterior third of the IT band from their critical stabilizing attachments to the lateral femoral epicondyle.
Guide Placement
- The target exit site for the femoral tunnel on the lateral cortex is 3 to 4 cm proximal to the lateral femoral epicondyle.
- Pass a blunt-end, curved passer through the intercondylar notch, piercing the posterolateral capsule at the over-the-top location, just posterior to the previously fashioned pilot hole. Keep the knee flexed past 90 degrees during this maneuver to allow the popliteal vessels to fall posteriorly, minimizing injury risk.
- Insert a double-gloved fingertip through the lateral epicondylar incision to palpate the tip of the curved passer. Keep the tip against the bone at all times. Bring the passer through the lateral intermuscular septum into view.
- Affix the appropriate rear-entry guide (right or left specific) into the eye of the passer.
- Pull the tip of the rear-entry guide into the posterior intercondylar notch. Maintain gentle tension to prevent disengagement. Remove the curved passer.
- View the tip of the rear-entry guide in the notch and engage it securely into the 11-o'clock or 1-o'clock pilot hole.
- Insert the bullet-shaped attachment to the rear-entry guide. Slide it down to engage the midlateral femoral metaphysis (3 to 4 cm proximal to the epicondyle).
- Secure the tip of the bullet guide into the femoral cortex, tighten the screw, and lock the guide system.
- Drill a Kirschner wire (K-wire) through the bullet guide from outside-in, entering the intercondylar notch exactly at the tip of the rear-entry guide. Over-drill with a 10-mm cannulated reamer to create the femoral tunnel.
Tibial Tunnel Preparation
- Fashion the tibial tunnel by drilling a guide pin through the anteromedial tibia. The entry point is just medial to the tibial tuberosity and 25 to 30 mm below the joint surface.
- Direct the guide pin at an approximately 30-degree angle to the tibial shaft. The pin should enter the joint at the posterior half of the native ACL tibial footprint.
- Advance the K-wire 2 to 3 mm into the intercondylar notch. Visually confirm that it clears the PCL and does not encroach on the lateral edge of the notch.
- Advancing the wire further should bring its tip near the tip of the femoral guide pin, ensuring a straight-line trajectory for the graft.
- Extend the knee fully to observe the tibial guide pin. Ensure there is adequate clearance between the pin (representing the future graft) and the roof of the intercondylar notch (Blumensaat's line) to prevent extension impingement. Redirect the pin if necessary before over-drilling with a 10-mm reamer.
Isometry Testing
Isometry testing is a mandatory biomechanical check to ensure the selected tunnel sites will not subject the graft to excessive stretching or laxity during knee range of motion.
- Remove the femoral and tibial guide pins.
- Pass a heavy wire or strong suture through both drill holes across the joint.
- Attach an isometer or tensiometer to the suture on the tibial side, securing the femoral side.
- Carry the knee through a full, passive range of motion (0 to 120 degrees).
- Interpretation: An excursion (length change) of 2 mm or less indicates highly acceptable, isometric tunnel placement.
- If the suture lengthens significantly in flexion, the femoral tunnel is too anterior.
- If the suture lengthens significantly in extension, the femoral tunnel is too posterior.
- If the length changes by more than 2 mm, adjust the tunnel sites by drilling new guide pins and retesting before passing the graft.
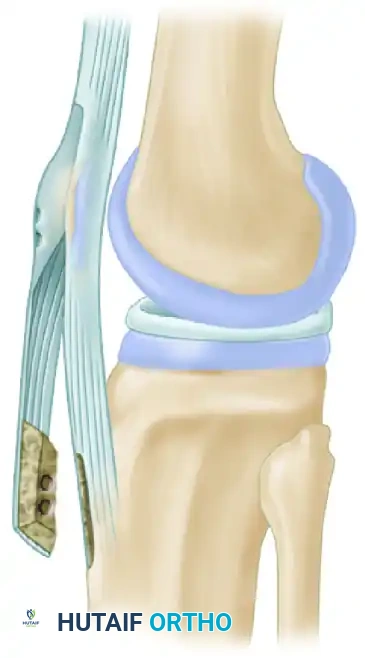
Graft Passage and Fixation
Once isometry is confirmed, the graft is passed and secured.
- Pass a suture loop (beath pin or passing wire) through the tibial tunnel, across the joint, and out the femoral tunnel.
- Shuttle the traction sutures of the BTB graft through the joint. Pull the graft superiorly until the patellar bone plug is fully seated within the femoral tunnel and the tibial plug is flush within the tibial tunnel.
- Ensure the cancellous surface of the bone plugs faces anteriorly to optimize healing and screw placement.
- Femoral Fixation: Insert a guide wire anterior to the femoral bone plug. Advance a 7-mm or 9-mm titanium or bioabsorbable interference screw over the wire to achieve rigid aperture fixation.
- Tibial Fixation: Tension the graft distally with the knee at 20 to 30 degrees of flexion (the position of maximum ACL laxity). Apply a posterior drawer force to reduce the tibia. Insert a second interference screw into the tibial tunnel to secure the distal bone plug.
- Cycle the knee and perform a Lachman test to confirm immediate structural stability and absence of impingement.
Postoperative Protocol
The rigid bone-to-bone fixation of the BTB graft allows for an accelerated rehabilitation protocol.
- Phase 1 (0-2 Weeks): Focus on immediate full passive extension (to prevent arthrofibrosis and cyclops lesions) and progressive weight-bearing as tolerated with crutches. A hinged knee brace locked in extension is often used during ambulation.
- Phase 2 (2-6 Weeks): Emphasize restoring full range of motion, particularly flexion. Initiate closed kinetic chain exercises (e.g., mini-squats, leg presses) to protect the graft from excessive anterior shear forces.
- Phase 3 (6-12 Weeks): Advance strengthening, proprioception, and balance training. Jogging may commence around 12 weeks if strength criteria are met.
- Phase 4 (3-6 Months): Sport-specific agility and plyometric training.
- Return to Play: Typically permitted between 6 to 9 months postoperatively, contingent upon achieving >90% limb symmetry index on functional hop testing and isokinetic strength evaluations.
You Might Also Like