Comprehensive Management of Extensor Tendon Injuries: Anatomy, Biomechanics, and Surgical Techniques
Key Takeaway
Extensor tendon injuries require precise anatomical knowledge and meticulous surgical technique for optimal functional recovery. The extensor mechanism is divided into nine distinct zones, dictating specific management strategies. Treatment ranges from conservative splinting for closed Zone I mallet fingers to complex surgical reconstruction for multi-zone lacerations. This guide details the biomechanics, clinical examination, and step-by-step operative protocols for extensor tendon repairs, ensuring evidence-based care for orthopedic surgeons and hand specialists.
Introduction to Extensor Tendons
The extensor mechanism of the hand is a highly sophisticated, intricately balanced biomechanical system. Unlike the flexor tendons, which are enclosed within a robust synovial sheath system, the extensor tendons are relatively superficial, flat, and thin, particularly over the phalanges. This superficial location renders them highly susceptible to lacerations, crush injuries, and closed avulsions. Successful extensor tendon repair requires a profound understanding of dorsal hand anatomy, the delicate balance of the intrinsic and extrinsic musculature, and strict adherence to zone-specific surgical principles.
Surgical Anatomy and Biomechanics
The Six Dorsal Compartments
As classically described, the extrinsic extensor tendons pass from the forearm onto the dorsum of the hand through six distinct fibro-osseous compartments beneath the extensor retinaculum. From the radial (lateral) side to the ulnar (medial) side, the compartments contain a specific number of tendons, traditionally memorized by the sequence: two, two, one, five, one, and one.
- First Compartment: Contains the extensor pollicis brevis (EPB) and the abductor pollicis longus (APL).
- Second Compartment: Contains the extensor carpi radialis longus (ECRL) and extensor carpi radialis brevis (ECRB).
- Third Compartment: Contains the extensor pollicis longus (EPL), which routes around Lister's tubercle.
- Fourth Compartment: Contains the four tendons of the extensor digitorum communis (EDC) plus the extensor indicis proprius (EIP).
- Fifth Compartment: Contains the extensor digiti minimi (EDQ/EDM).
- Sixth Compartment: Contains the extensor carpi ulnaris (ECU).
In a landmark cadaveric study, von Schroeder and Botte (1995) further defined the anatomical patterns of the extensors to the fingers. The most common pattern includes a single EIP inserting to the ulnar side of the index EDC, a single EDC to the index, a single EDC to the long finger, a double EDC to the ring finger, an absent EDC to the small finger, and a double EDQ with double insertions.
Clinical Pearl: Anatomical variations in the extensor tendons are the rule rather than the exception. In the first dorsal compartment, septation occurs in 20% to 60% of specimens, and the APL may have multiple slips in up to 98% of dissections. Failure to recognize these variations is a primary cause of failed De Quervain's release.
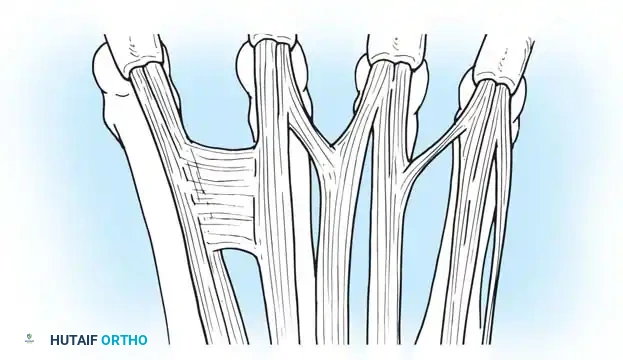
Juncturae Tendinum
The juncturae tendinum are intertendinous connections located over the dorsum of the hand, proximal to the metacarpophalangeal (MCP) joints. They play a critical role in force transmission and can mask a proximal tendon laceration during clinical examination. von Schroeder et al. classified these variations into distinct types:
- Type 1: Thin, filamentous connections, typically between the EDC of the long and index fingers.
- Type 2: Thicker connections, usually between the EDC of the ring and long fingers.
- Type 3y: Y-shaped tendons appearing as a split tendon inserting into two adjacent digits.
- Type 3r: Oblique R-shaped juncturae, most frequently between the EDC to the ring finger and the EDQ.
Biomechanics of the Extensor Apparatus
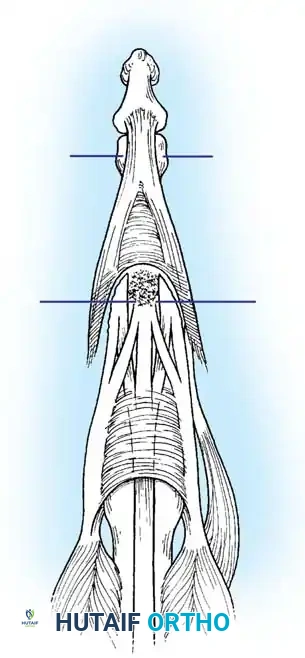
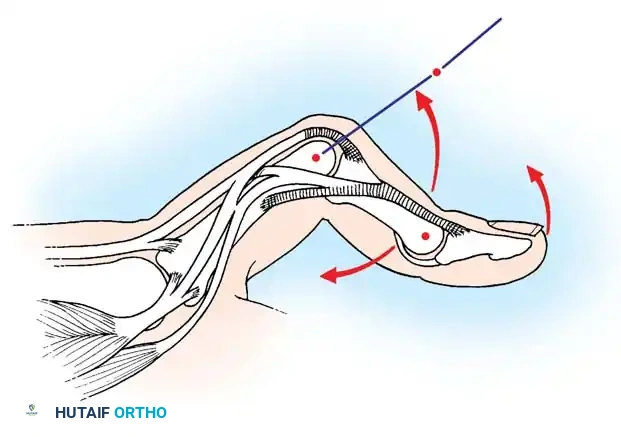
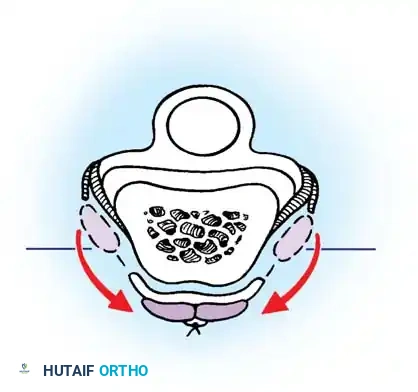
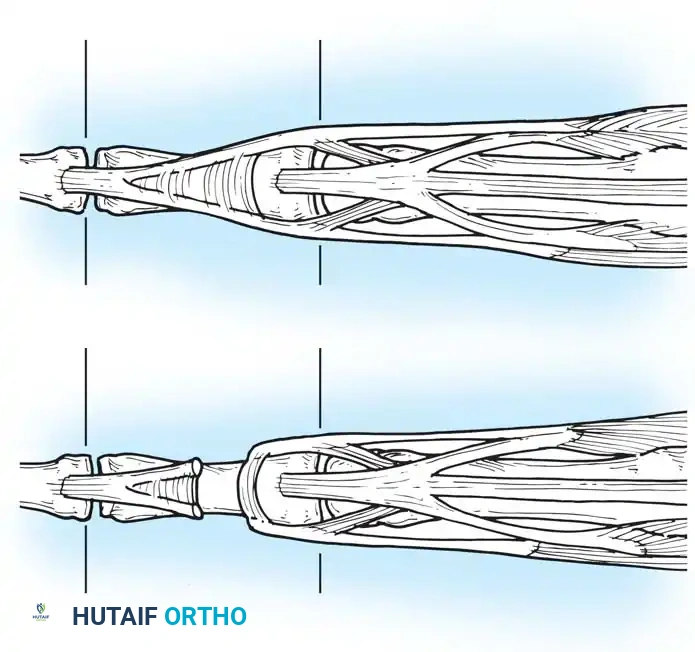
Distal to the MCP joint, the extensor tendon flattens to form the extensor hood or expansion. This complex structure integrates the extrinsic extensors with the intrinsic muscles (lumbricals and interossei).
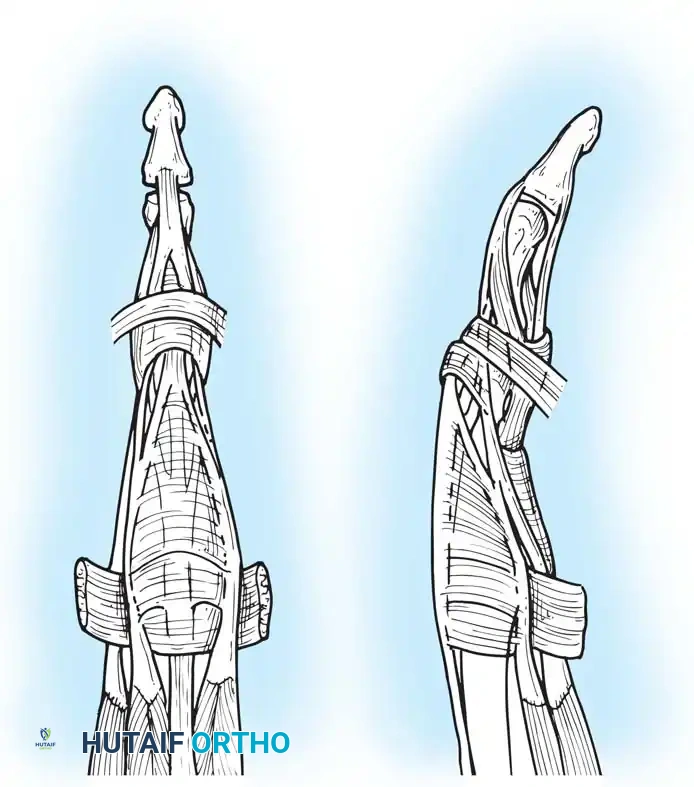
The central slip inserts into the base of the middle phalanx, extending the proximal interphalangeal (PIP) joint. The lateral bands diverge, receive contributions from the intrinsics, and reunite distally to form the terminal tendon, which inserts into the base of the distal phalanx to extend the distal interphalangeal (DIP) joint. The delicate balance between the central slip and lateral bands is maintained by the triangular ligament dorsally and the transverse retinacular ligaments volarly.
Clinical Examination of the Extensor System
Accurate diagnosis of extensor tendon injuries requires meticulous, joint-specific testing.
- DIP Joint (Zone I/II): An extensor tendon is presumed divided between the PIP and DIP joints when active extension of the DIP joint is lost, resulting in a mallet finger. Initially, a gross mallet deformity may be absent because the surrounding capsule and soft tissues have not yet been stretched by the powerful flexor digitorum profundus (FDP).
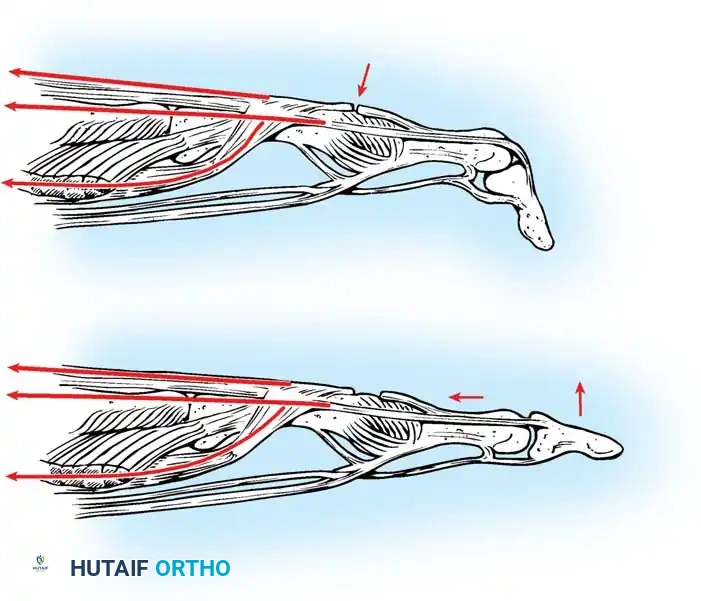
- PIP Joint (Zone III/IV): Division of the central slip results in a boutonnière deformity. However, acute loss of PIP extension may be masked if the lateral bands have not yet subluxated volarly. The Elson test is critical here: with the PIP joint flexed 90 degrees over the edge of a table, the patient is asked to extend the PIP against resistance. If the central slip is intact, the DIP remains flaccid. If ruptured, the lateral bands bypass the PIP and rigidly extend the DIP joint.
- MCP Joint (Zone V/VI): Partial or complete extension of the finger may still be possible even when a single extensor tendon is divided at the wrist due to the force transmission through the intact juncturae tendinum.
- Thumb Extension: When checking the EPL, the examiner must stabilize the MCP joint and test carefully for active retropulsion of the thumb toward the dorsum of the hand. Division of the EPL is often overlooked because the EPB and intrinsic muscles can partially extend the thumb as a unit.
Topographical Classification: Extensor Tendon Zones
To standardize treatment protocols, Kleinert and Verdan divided the extensor surface of the hand and wrist into eight distinct zones. Doyle later added a ninth zone for the muscle bellies in the proximal forearm.
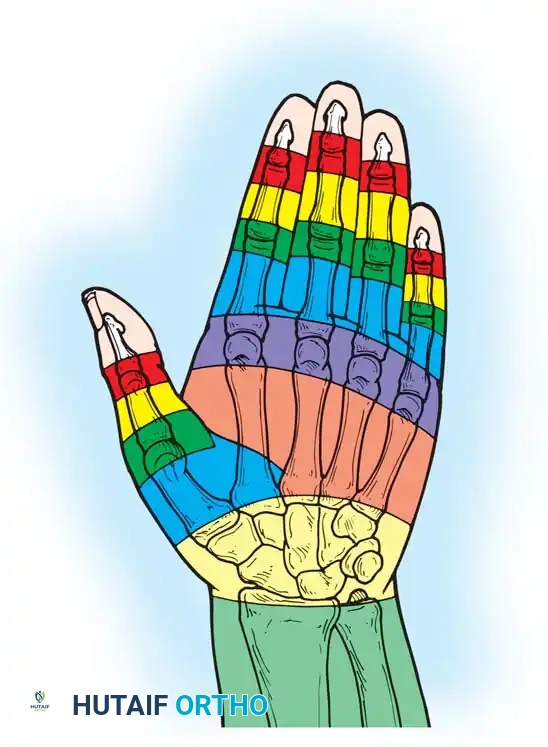
Surgical Memory Aid: Odd-numbered zones (I, III, V, VII) are located over the joints (DIP, PIP, MCP, Wrist), while even-numbered zones (II, IV, VI, VIII) are located over the intervening diaphyseal bones.
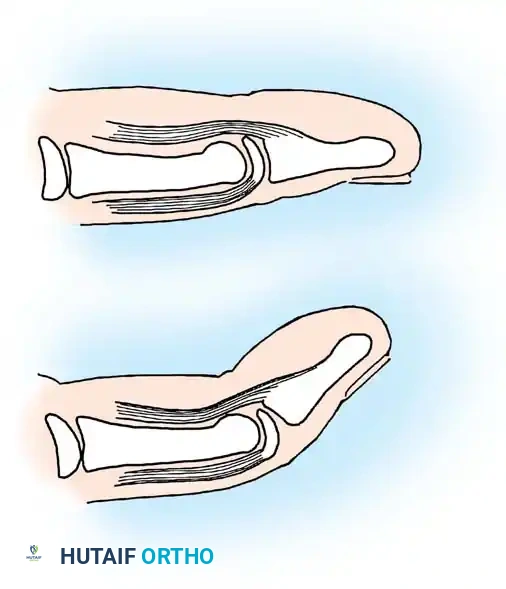
Zone I Injuries: The Mallet Finger
Zone I injuries occur at the level of the DIP joint. Mallet finger deformities usually result from a closed avulsion of the terminal tendon insertion, occasionally accompanied by a bony avulsion fracture from the dorsal base of the distal phalanx.
Pediatric Considerations
In the pediatric population, a mallet finger posture is frequently caused by a traumatic separation of the distal phalangeal epiphysis (Salter-Harris I or II fracture) rather than a true tendon rupture.
These deformities are readily recognized on lateral radiographs. Early detection allows for straightforward closed reduction via hyperextension of the DIP joint. The finger is splinted for 3 to 4 weeks. Healing is rapid compared to tendinous injuries, and growth disturbances are exceedingly rare.
Conservative Management of Closed Ruptures
For a closed extensor tendon rupture from its insertion, non-operative management is the gold standard. The DIP joint must be continuously immobilized in slight hyperextension using a Stack splint or custom thermoplastic orthosis.
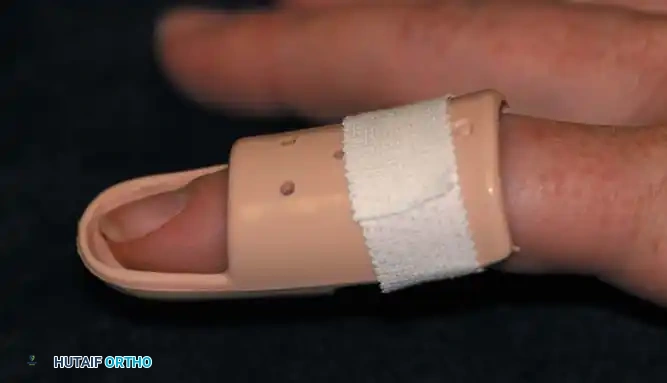
- Protocol: Continuous splinting for 6 to 8 weeks, followed by night splinting for an additional 1 to 2 weeks.
- Patient Compliance: The patient must be explicitly warned that if the splint is removed and the DIP joint is allowed to flex even once, the healing tissue will stretch, and the 6-week clock must restart.
- Delayed Presentation: Garberman et al. demonstrated that splinting is equally effective in patients presenting more than 4 weeks post-injury compared to those treated acutely. Splinting can be successful even up to 3 months post-injury.
Acute Open Transection of the Extensor Tendon
Open lacerations in Zone I require meticulous surgical repair.
- Exposure: Extension of the skin laceration proximally may be required to grasp the retracted tendon and mobilize it to its insertion.
- Repair: A roll suture or dermotenodermal suture is usually sufficient to hold the insertion for healing.
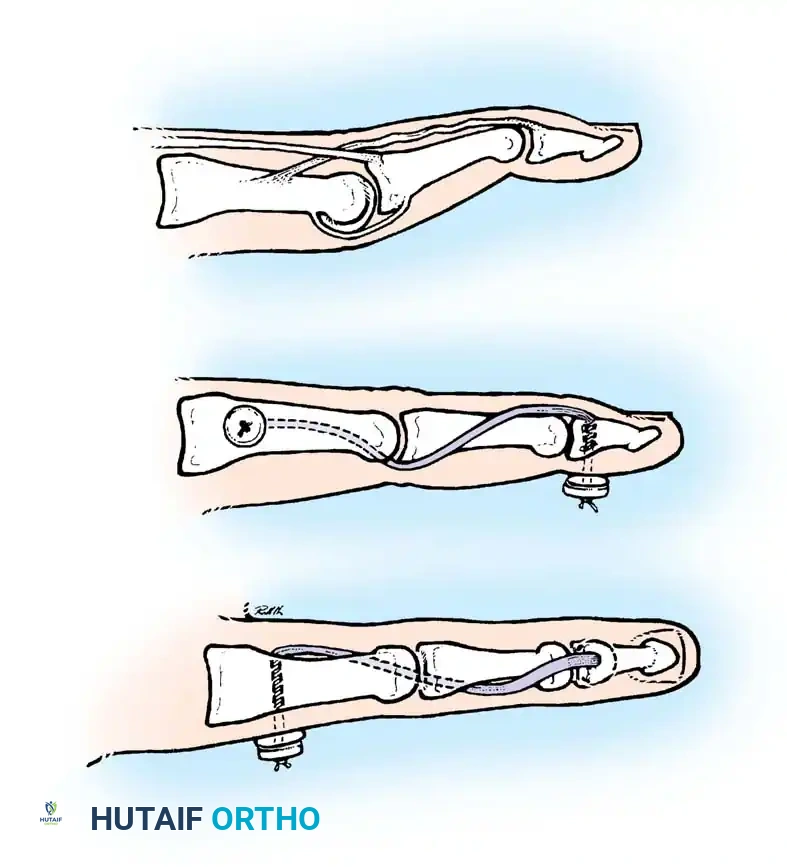
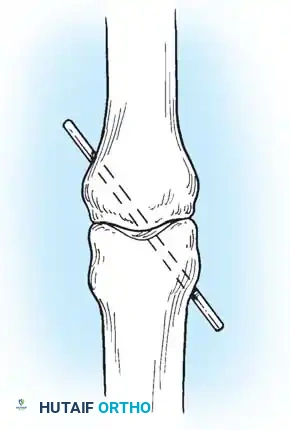
- Fixation: The repair is routinely protected with a transarticular 0.045-inch Kirschner wire (K-wire) driven across the DIP joint to eliminate tension on the repair site.
Postoperative Protocol: The skin sutures are removed at approximately 2 to 3 weeks. The transarticular K-wire is removed at 4 to 6 weeks, and the finger is splinted for an additional 2 to 4 weeks to protect the repair during the initiation of progressive motion exercises.
Surgical Techniques for Extensor Tendon Reconstruction
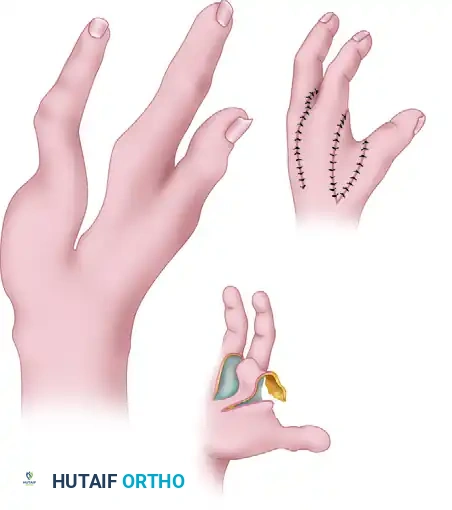
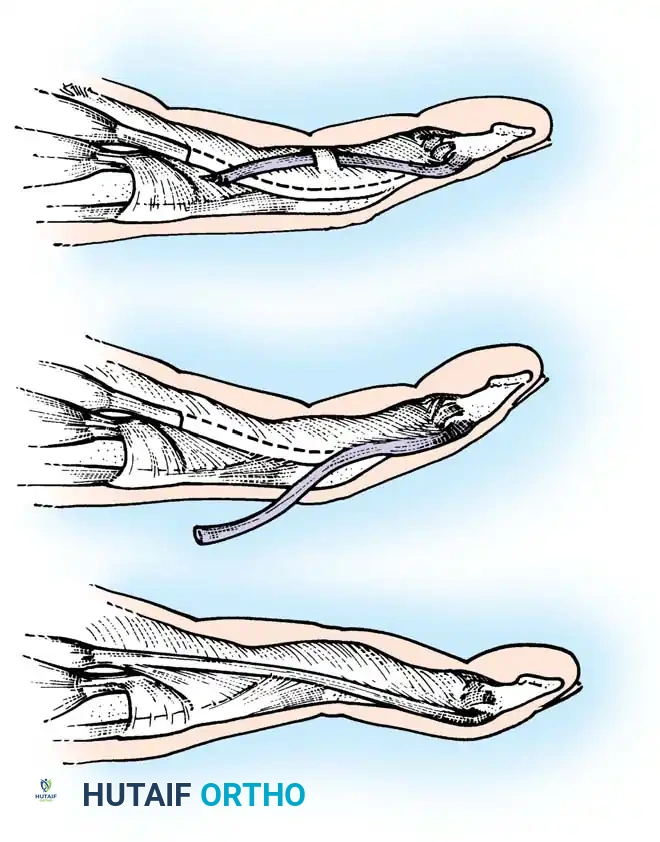
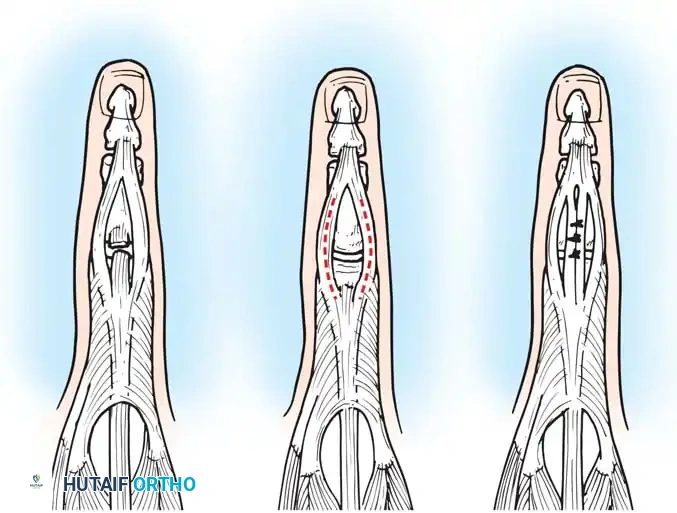
Surgical Technique 63-22: Chronic Mallet Finger (Secondary Repair)
A mallet finger caused by avulsion of the extensor tendon can often be treated by splinting up to 12 weeks after injury. However, if the distal phalanx droops severely after this period, and passive extension of the DIP joint remains preserved, surgical intervention is indicated.
Step-by-Step Procedure:
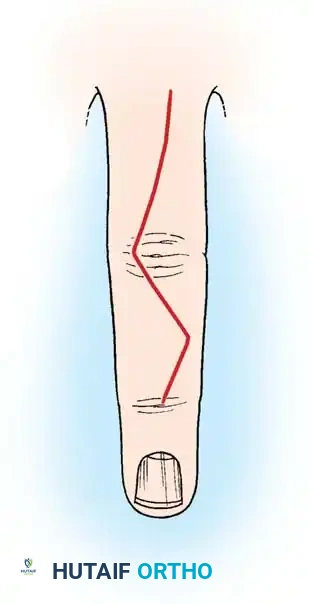
* Incision: Make a small V-shaped or U-shaped incision, convex distally, with the apex no closer than 5 mm proximal to the nail base on the dorsum of the finger. Strict care must be taken to avoid injury to the germinal matrix of the nail.
* Flap Elevation: Develop the flap gently in the plane between the tendon and the subcutaneous fat. Elevate the flap proximally to expose the extensor tendon and the intervening scar tissue.
* Scar Resection: Identify the junction of the normal tendon with the scar. Sever the tendon transversely proximal to the joint, leaving the distal insertion of the tendon into the bone intact. Resect sufficient scar or attenuated tendon to allow closure of the gap with the finger in maximum extension.
- Joint Immobilization: To support and protect the repair, immobilize the DIP joint with a transarticular 0.045-inch K-wire.
- Tendon Repair: Repair the extensor tendon using a 4-0 monofilament nylon or 4-0 monofilament wire as a pull-out roll stitch. No additional core sutures are required due to the thin nature of the tendon at this level.
- Closure: Close the skin with interrupted 5-0 nylon. Alternatively, a 4-0 nylon dermotenodermal suture can be utilized to simultaneously approximate the skin and tendon.
Aftertreatment: Sutures are removed at 10 to 14 days. The DIP joint is maintained in extension, with the K-wire protected by a small metal splint for 4 weeks. The K-wire is extracted at 4 to 6 weeks, and the repair is protected with a splint for an additional 4 to 8 weeks while normal activities are progressively resumed.
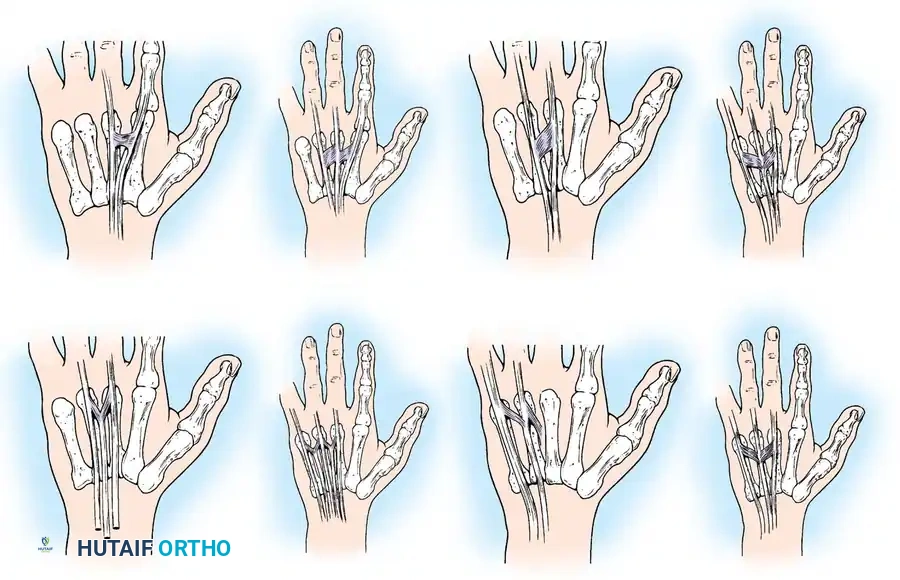
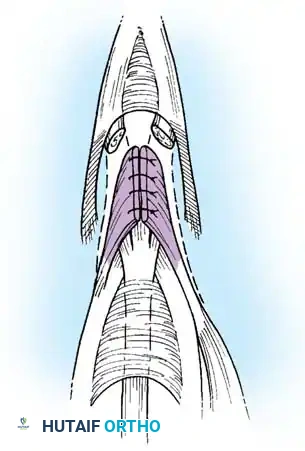
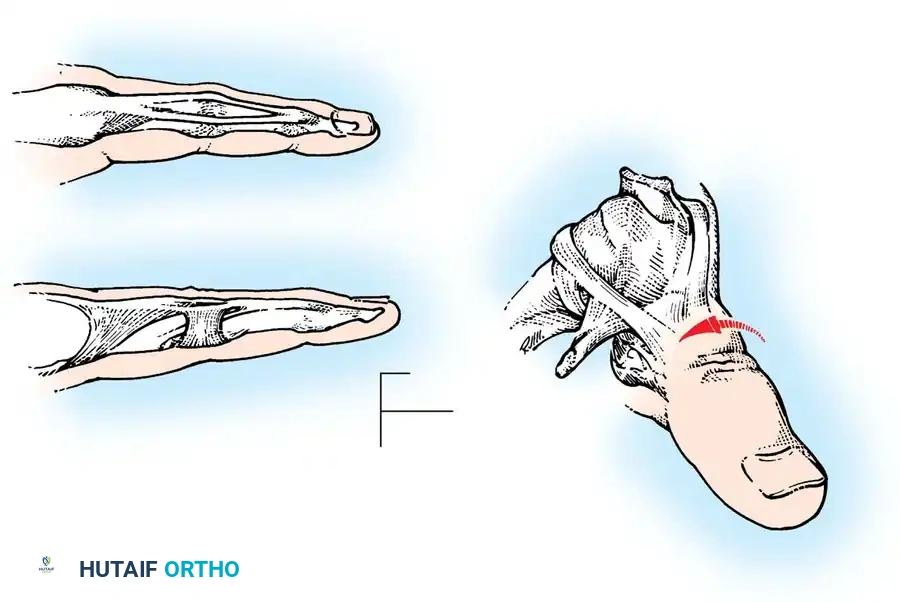
Surgical Technique 63-23: Fowler Central Slip Release
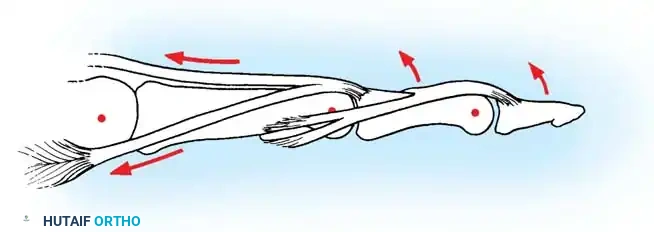
The Fowler tenotomy is indicated for chronic mallet finger deformities where there is a secondary swan-neck deformity (PIP hyperextension with DIP flexion). By releasing the central slip, the extensor force is redirected to the lateral bands, restoring DIP extension.
Step-by-Step Procedure:
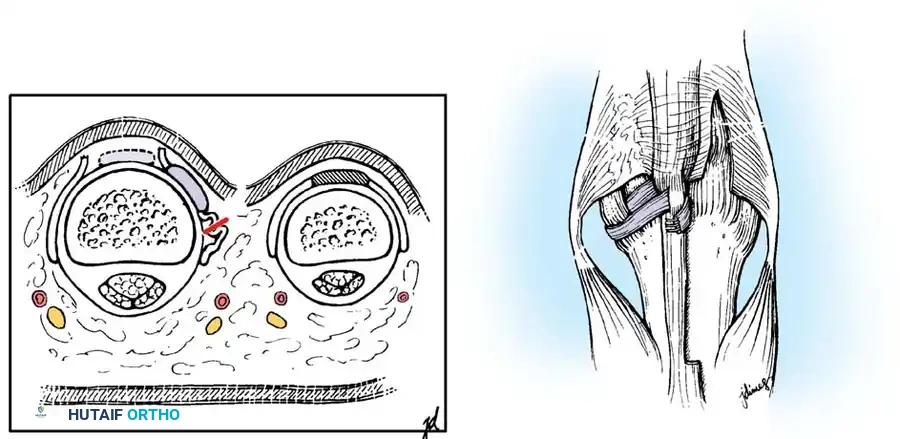
* Incision: Make a midlateral finger incision from just distal to the PIP joint to a point level with the middle of the proximal phalanx.
* Exposure: Open the deep tissues until the dorsal edge of the lateral band of the extensor hood is located.
* Elevation: Elevate this edge with a small hook. With the finger held in extension, continue elevating the expansion until the deep surface of the central slip is exposed at the PIP joint. Elevate the entire extensor hood from the proximal phalanx.
- Tenotomy: Using the point of a No. 11 blade, begin on the deep surface of the central slip and free the central slip from its insertion on the base of the middle phalanx. Ensure the lateral bands remain completely intact.
- Biomechanics of Release: Releasing the central slip allows the entire extensor apparatus to shift proximally. This proximal shift increases the resting tension on the lateral bands and the terminal tendon, thereby correcting the extensor lag at the DIP joint while simultaneously eliminating the hyperextension force at the PIP joint.
Surgical Warning: Do not resect any portion of the central slip; simply divide it. Over-resection can lead to a severe iatrogenic boutonnière deformity. The PIP joint must have at least 60 degrees of passive flexion before considering this procedure.
Advanced Tendon Mobilization and Repair Techniques
In cases of delayed primary repair or secondary reconstruction where tendon retraction has occurred, mobilization techniques are required to achieve a tension-free repair.
When direct end-to-end repair is not possible due to substance loss, local tendon transfers or turn-down flaps may be utilized.
For complex multi-zone injuries, particularly those involving the extensor retinaculum (Zone VII), the retinaculum must be partially excised or step-cut to prevent postoperative tendon bowstringing while allowing sufficient space for the bulky tendon repair to glide without impingement.
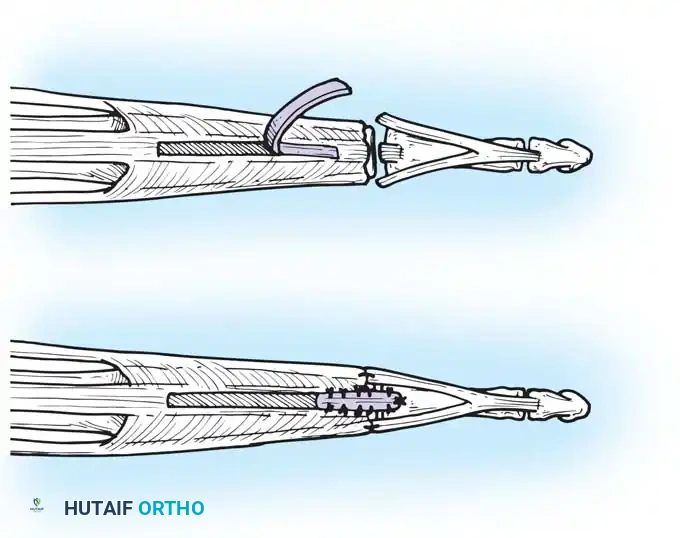
In severe crush injuries with segmental tendon loss, a staged reconstruction using a silicone tendon rod followed by a free tendon graft (e.g., palmaris longus or plantaris) may be necessary.
During the repair of the central slip (Zone III), it is imperative to reapproximate the lateral bands dorsally to prevent their volar subluxation, which would inevitably lead to a boutonnière deformity.
The use of a modified Kessler or Krackow core suture technique, supplemented by a running epitendinous suture, provides the biomechanical strength necessary for early active motion protocols.
Postoperative Rehabilitation Protocols
The success of extensor tendon surgery is inextricably linked to the postoperative rehabilitation protocol. The delicate balance between protecting the repair and preventing peritendinous adhesions dictates the therapy choice.
- Static Immobilization: Traditionally used for non-compliant patients, pediatric patients, or complex multi-tissue injuries. The wrist is splinted in 30-40 degrees of extension, and the MCP joints in 0-20 degrees of flexion for 3-4 weeks.
- Early Passive Motion (EPM): Utilizes dynamic extension splinting. The patient actively flexes the digits against rubber band traction, and the bands passively extend the digits. This reduces adhesions but carries a risk of extensor lag.
- Early Active Motion (EAM): The current gold standard for compliant patients with robust (4-strand) repairs. EAM protocols (e.g., Relative Motion Extension splinting or ICAM) allow controlled active extension within a safe arc of motion, significantly improving final total active motion (TAM) and reducing the need for secondary tenolysis.
Meticulous surgical execution combined with a tailored, evidence-based rehabilitation program ensures the highest probability of restoring full, painless function to the complex extensor mechanism of the hand.
You Might Also Like