The Rigid Reamer: Precision Engineering in Orthopedic Surgery for Hip and Shoulder Replacements
Comprehensive Introduction & Overview
In the intricate world of orthopedic surgery, particularly joint replacement procedures, precision is paramount. Every component, every cut, and every preparation step must be meticulously executed to ensure the long-term success of the implant and optimal patient outcomes. Among the critical instruments facilitating this precision is the Rigid Reamer, a specialized tool used for shaping and preparing bone surfaces, primarily in total hip arthroplasty (THA) and total shoulder arthroplasty (TSA).
The rigid reamer plays a pivotal role in creating a perfectly spherical or anatomically congruent socket for prosthetic components. For the hip, it precisely shapes the acetabulum (the socket of the hip joint) to receive the artificial acetabular cup. In shoulder surgery, while the term "humeral head" is sometimes used broadly, the rigid reamer is more commonly employed to prepare the glenoid (the socket of the shoulder blade) to receive its prosthetic component, or in specific cases, to prepare the humeral head surface for resurfacing or the medullary canal for stem insertion. Its design ensures controlled and accurate bone removal, which is fundamental for achieving stable, well-aligned, and durable joint replacements. This guide will delve deep into the mechanics, applications, and significance of the rigid reamer, providing patients with a comprehensive understanding of this vital orthopedic instrument.
Deep-Dive into Technical Specifications & Mechanisms
The rigid reamer is a marvel of biomechanical engineering, designed for both efficacy and safety. Its construction and operational principles are key to its function.
Design and Materials
Rigid reamers are typically characterized by their:
* Spherical or Anatomical Shape: Acetabular reamers are distinctly spherical, matching the geometry of the hip socket. Glenoid reamers can be spherical or anatomically contoured to fit the shoulder socket.
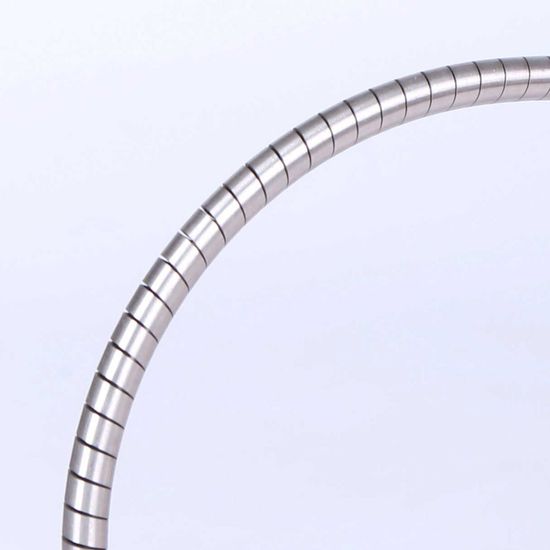
* Cutting Flutes/Blades: The outer surface of the reamer is equipped with sharp, precisely angled cutting flutes or blades. These are designed to efficiently remove bone tissue while minimizing trauma to surrounding structures. The number and configuration of these flutes vary by design and manufacturer, influencing cutting efficiency and bone debris clearance.
* Central Shaft Connection: A robust central shaft allows the reamer head to be securely attached to a power drill or a manual reaming handle. This connection is often a quick-connect mechanism, ensuring secure attachment and easy interchangeability during surgery.
* Sequential Sizing: Reamers come in a wide range of incremental sizes (e.g., 2mm increments), allowing surgeons to gradually enlarge and shape the bone cavity until the optimal size for the implant is achieved.
The materials used for rigid reamers are chosen for their strength, hardness, wear resistance, and biocompatibility, as they are exposed to bone tissue and subjected to rigorous sterilization processes. Common materials include:
* High-Grade Stainless Steel: Often used for the reamer body and shaft, providing excellent strength and corrosion resistance.
* Cobalt-Chrome Alloys: These advanced alloys offer superior hardness and wear resistance, particularly for the cutting edges, ensuring prolonged sharpness and durability.
* Ceramic Coatings: Some reamers may feature specialized ceramic or diamond-like carbon (DLC) coatings on their cutting surfaces. These coatings enhance hardness, reduce friction, and can prolong the instrument's lifespan while improving cutting performance.
Mechanism of Action
The rigid reamer operates on a simple yet highly effective principle:
1. Rotary Motion: The reamer is attached to a surgical power drill, which provides high-speed rotary motion, or to a manual handle for controlled, slower rotation.
2. Controlled Bone Removal: As the reamer rotates, its sharp flutes engage with the bone surface. The surgeon applies controlled pressure and guides the reamer to gradually abrade and remove layers of bone.
3. Sequential Progression: The process typically begins with a smaller reamer, progressively increasing in size. This sequential reaming ensures that bone is removed in a controlled manner, preventing excessive or uneven resection.
4. Creating a Precise Fit: The goal is to create a perfectly hemispherical (for hip) or anatomically shaped (for shoulder) socket that precisely matches the contours of the prosthetic implant, ensuring a stable "press-fit" or an ideal surface for cementation.
Extensive Clinical Indications & Usage
The rigid reamer is indispensable in several orthopedic procedures, primarily total joint arthroplasty.
Total Hip Arthroplasty (THA) - Acetabular Reaming
- Primary Indication: Preparing the acetabulum for the implantation of an artificial acetabular cup. This is crucial in cases of osteoarthritis, rheumatoid arthritis, avascular necrosis, and other conditions leading to hip joint degeneration.
- Process:
- After exposing the hip joint, the surgeon identifies the true acetabular floor and rim.
- A pilot hole may be drilled, or a small starter reamer is used.
- Sequentially larger acetabular reamers are then used, typically starting several millimeters smaller than the planned cup size.
- The reaming continues until bleeding cancellous bone is exposed uniformly, indicating a healthy bed for bone ingrowth (for uncemented cups) or cement adhesion (for cemented cups).
- The reaming process meticulously removes diseased cartilage and subchondral bone, creating a perfectly hemispherical cavity with the correct depth, inclination, and anteversion for optimal hip mechanics.
- Goals: Achieve a concentric, hemispherical cavity; expose viable bleeding bone; optimize implant fit and stability; restore native hip center of rotation.
Total Shoulder Arthroplasty (TSA) - Glenoid Reaming
- Primary Indication: Preparing the glenoid cavity (the socket of the shoulder blade) for the implantation of a glenoid component, particularly in cases of severe glenohumeral arthritis. While the item name mentions "humeral head," the rigid reamer's principle application in shoulder arthroplasty for socket preparation is for the glenoid. In some resurfacing procedures, a reamer might be used to shape the humeral head itself, but this is less common for "rigid reamer" in the context of creating a socket.
- Process (for Glenoid):
- After exposing the glenohumeral joint, the surgeon assesses glenoid wear and deformity.
- Similar to acetabular reaming, sequential reamers are used to remove osteophytes and diseased cartilage.
- The goal is to create a flat or anatomically contoured surface for the glenoid component, correcting any existing glenoid erosion or retroversion.
- The reaming ensures proper seating and stability of the prosthetic glenoid.
- Goals: Correct glenoid deformity, achieve a stable base for the glenoid component, restore joint line and kinematics.
Fitting/Usage Instructions (General Principles for Surgeons)
While specific instructions are for surgical teams, patients can understand the meticulousness involved:
1. Pre-operative Planning: Detailed imaging (X-rays, CT scans) and templating are used to determine the optimal implant size and position.
2. Appropriate Sizing: Surgeons select a series of reamers, starting smaller and progressing incrementally, typically 1-2mm at a time, until the desired cavity size and bone bed are achieved.
3. Controlled Speed and Pressure: The reamer is used with a controlled, steady rotation and gentle, even pressure. This prevents skiving, excessive bone removal, and heat generation.
4. Correct Trajectory and Alignment: Maintaining the correct angle (inclination and anteversion for the hip, retroversion for the shoulder) is crucial for joint stability and function. Fluoroscopy or navigation systems may be used to guide this.
5. Irrigation and Debridement: Continuous irrigation with saline helps to clear bone debris and cool the bone, while periodic debridement ensures a clear surgical field.
6. Bone Bed Assessment: The surgeon visually inspects the reamed surface for uniform bleeding cancellous bone, indicating a healthy bed for implant fixation.
Maintenance & Sterilization Protocols
Maintaining the integrity and sterility of rigid reamers is crucial for patient safety and instrument longevity.
- Immediate Post-Operative Care:
- Reamers should be immediately cleaned of gross contaminants (blood, tissue) after use.
- This prevents drying of biological material, which can make subsequent cleaning more difficult.
- Cleaning:
- Manual Cleaning: Thorough scrubbing with specialized brushes and enzymatic detergents to remove all visible debris.
- Automated Cleaning: Ultrasonic cleaners and automated washer-disinfectors are commonly used, following manufacturer's instructions for specific cycles and detergents.
- Disassembly: If the reamer head is detachable from the shaft, it should be disassembled for thorough cleaning of all components.
- Inspection:
- After cleaning, each reamer is meticulously inspected under magnification for any signs of wear, dullness of cutting edges, corrosion, cracks, or damage.
- Damaged or dull reamers must be removed from service to prevent suboptimal bone preparation or instrument failure during surgery.
- Sterilization:
- Steam Sterilization (Autoclaving): This is the most common and effective method. Instruments are placed in sterile wraps or containers and subjected to high-pressure steam at specific temperatures and durations (e.g., 132°C for 4 minutes for pre-vacuum steam sterilization).
- Other Methods: Less common for reamers but may include low-temperature sterilization methods (e.g., ethylene oxide, hydrogen peroxide gas plasma) for heat-sensitive instruments, though reamers are typically heat-tolerant.
- Storage: Sterilized reamers are stored in sterile trays or cabinets, protected from contamination, until their next use. Proper organization ensures easy access and traceability.
Biomechanics and Patient Outcome Improvements
The precise bone preparation facilitated by the rigid reamer has profound biomechanical implications and directly translates to improved patient outcomes.
Biomechanical Impact
- Optimal Implant Fit and Stability: A perfectly reamed socket ensures intimate contact between the bone and the implant. For uncemented implants, this maximizes the surface area for bone ingrowth, leading to biological fixation and long-term stability. For cemented implants, it creates an ideal interface for cement adhesion.
- Load Transfer: Correct reaming ensures that stresses are evenly distributed across the bone-implant interface. This minimizes stress shielding (where the implant carries too much load, leading to bone resorption) and reduces the risk of implant loosening or failure.
- Restoration of Joint Kinematics: By restoring the anatomical center of rotation and proper joint alignment, reaming contributes to natural joint movement, muscle efficiency, and reduced wear on the implant components.
- Reduced Micromotion: A stable, well-seated implant experiences minimal micromotion, which is critical for successful bone ingrowth and preventing fibrous tissue formation, a precursor to aseptic loosening.
Patient Outcome Improvements
- Reduced Pain: A stable and well-functioning joint replacement significantly reduces the chronic pain associated with arthritis or injury.
- Improved Mobility and Function: Patients experience a dramatic improvement in their range of motion, allowing them to resume daily activities and participate in light recreational sports.
- Enhanced Implant Longevity: The precision achieved with rigid reamers directly contributes to the long-term survival of the joint replacement, potentially delaying or preventing the need for revision surgery.
- Faster Rehabilitation: A stable implant provides a solid foundation for early mobilization and rehabilitation, leading to a quicker recovery period and return to functional independence.
- Reduced Complication Rates: Proper reaming minimizes risks such as dislocation, aseptic loosening, and periprosthetic fracture, thus improving overall patient safety and satisfaction.
Risks, Side Effects, or Contraindications
While the rigid reamer is a safe and effective tool, its use, like any surgical intervention, carries inherent risks and considerations.
Risks During Surgery
- Perforation of the Acetabulum/Glenoid: If not used with extreme care and proper guidance, the reamer can perforate the thin bone of the acetabulum into the pelvis or the glenoid into the chest cavity. This is a serious complication that can lead to hemorrhage, nerve injury, or infection.
- Excessive Bone Removal: Over-reaming can weaken the bone stock, making it difficult to achieve stable implant fixation and increasing the risk of periprosthetic fracture.
- Nerve or Vascular Injury: Though rare, aggressive reaming or misdirection can potentially injure nearby nerves or blood vessels.
- Infection: As with any surgical instrument, there is a risk of infection if sterilization protocols are not strictly followed.
- Instrument Breakage: Although rare due to robust materials, instrument fatigue or misuse can lead to breakage, requiring retrieval of fragments.
Post-Operative Risks (Related to Reaming Quality)
- Aseptic Loosening: Inadequate bone preparation (e.g., uneven reaming, poor bone bed) can lead to insufficient bone ingrowth or cement adhesion, resulting in implant loosening over time.
- Implant Malposition: Incorrect reaming angles can lead to malposition of the implant, increasing the risk of dislocation, impingement, and accelerated wear.
- Periprosthetic Fracture: Weakened bone stock from over-reaming or stress risers can increase the risk of fracture around the implant.
Contraindications (Relative to the Procedure)
The use of a rigid reamer itself doesn't have absolute contraindications, but the underlying joint replacement surgery might be contraindicated in certain patient conditions:
* Active Infection: Joint replacement surgery is generally contraindicated in the presence of an active infection in or around the joint, as it significantly increases the risk of prosthetic joint infection.
* Severe Osteoporosis/Poor Bone Quality: Extremely poor bone quality might make it challenging to achieve stable implant fixation, and careful consideration is needed. Alternative fixation methods or bone grafting might be required.
* Severe Neuromuscular Disorders: Conditions that severely impair muscle control or stability can compromise the success of the joint replacement.
* Unrealistic Patient Expectations: Patients must have a clear understanding of the surgical outcomes, recovery process, and potential limitations.
Expert Tips from Dr. Mohammed Hutaif
"As an orthopedic surgeon, I cannot overstate the importance of meticulous bone preparation in joint replacement surgery. The rigid reamer is more than just a tool; it's an extension of our commitment to precision and patient well-being. Here are a few insights I emphasize:
- Pre-operative Planning is Non-Negotiable: Advanced imaging and templating allow us to anticipate the bone anatomy and plan the exact size and position of the implant. This blueprint guides every reaming stroke.
- Gradual and Controlled Reaming: I always advocate for a 'slow and steady' approach. Incrementally increasing reamer sizes, with controlled speed and pressure, prevents aggressive bone removal and minimizes the risk of complications like perforation. It’s about sculpting, not simply drilling.
- Understanding Bone Quality: Every patient's bone is unique. We adapt our reaming technique based on bone density and quality, ensuring we achieve a healthy, bleeding bone bed without compromising structural integrity.
- Maintaining the Correct Trajectory: The angle at which we ream the acetabulum or glenoid is critical for preventing dislocation and optimizing the longevity of the implant. Intraoperative fluoroscopy or navigation systems are invaluable aids in confirming correct alignment.
- Patient Education: I believe it's essential for patients to understand the steps involved in their surgery, including how instruments like the rigid reamer contribute to their successful outcome. Knowledge empowers patients in their recovery journey."
Massive FAQ Section
Q1: What is a Rigid Reamer and why is it used in surgery?
A1: A rigid reamer is a specialized orthopedic surgical instrument, typically spherical or anatomically shaped, with sharp cutting flutes. It's used to precisely shape and prepare the bone socket (like the acetabulum in the hip or the glenoid in the shoulder) during joint replacement surgery. Its purpose is to create a perfectly fitting cavity for the artificial joint component, ensuring stability and long-term success.
Q2: Is the Rigid Reamer used for both hip and shoulder replacements?
A2: Yes, absolutely. It is primarily known for its use in Total Hip Arthroplasty (THA) to prepare the acetabulum (hip socket). In shoulder surgery, while the terminology can be specific, the same principle applies for preparing the glenoid (shoulder socket) to receive the prosthetic component.
Q3: How does the surgeon choose the right size of reamer?
A3: Surgeons determine the optimal implant size through extensive pre-operative planning, using X-rays and CT scans. During surgery, they use a series of reamers, starting with smaller sizes and gradually increasing, typically in 1-2mm increments. This allows for controlled bone removal until the perfect size and a healthy, bleeding bone bed are achieved, matching the chosen implant.
Q4: What materials are Rigid Reamers made from?
A4: Rigid reamers are crafted from high-grade, durable, and biocompatible materials. Common materials include stainless steel for the body and shaft, and harder alloys like cobalt-chrome for the cutting edges. Some advanced reamers may also feature specialized ceramic coatings to enhance sharpness and lifespan.
Q5: Does the reamer leave any part of itself inside my body?
A5: No, the rigid reamer is a surgical tool used during the procedure. It is completely removed from your body once the bone preparation is complete. It does not become a permanent part of your implant or remain inside you.
Q6: How does precise reaming improve my surgical outcome?
A6: Precise reaming is fundamental for a successful outcome. It ensures a perfect, stable fit between your bone and the artificial implant. This leads to better biological fixation (bone growing into the implant), even distribution of weight, restoration of natural joint movement, reduced pain, improved mobility, and significantly increases the chances of your joint replacement lasting for many years.
Q7: Are there risks associated with using a rigid reamer?
A7: While used by highly skilled surgeons, any surgical instrument carries potential risks. For the rigid reamer, these include, rarely, perforation of the bone, excessive bone removal, or injury to nearby structures. However, surgeons employ advanced techniques, imaging, and meticulous care to minimize these risks.
Q8: How are these instruments kept sterile and safe for each patient?
A8: Strict sterilization protocols are followed. After each use, reamers are immediately cleaned of all biological material, meticulously inspected for wear or damage, and then sterilized using high-temperature steam sterilization (autoclaving). This process kills all microorganisms, ensuring the instrument is completely sterile and safe for the next patient.
Q9: Can the rigid reamer be used for revision surgeries (re-do operations)?
A9: Yes, rigid reamers are also vital in revision joint replacement surgeries. In these cases, they might be used to remove old bone cement, reshape the existing bone cavity, or prepare new bone surfaces for a new implant, often requiring even greater precision due to altered anatomy.
Q10: Is the process of reaming painful?
A10: No, you will not feel any pain during the reaming process. All joint replacement surgeries are performed under anesthesia (either general anesthesia, spinal anesthesia, or a combination), ensuring you are completely comfortable and unaware of the surgical steps.
Q11: How does the rigid reamer help in bone ingrowth for uncemented implants?
A11: For uncemented implants, the goal is for your natural bone to grow directly onto and into the surface of the prosthetic component (biological fixation). The rigid reamer creates a precisely sized and shaped cavity with a healthy, bleeding bone bed, maximizing the surface contact area. This tight "press-fit" and viable bone surface are essential for encouraging and facilitating successful bone ingrowth.
Q12: What happens if the reaming is not precise enough?
A12: If reaming is not precise, it can lead to several complications. These include poor implant fit, which can result in micromotion and aseptic loosening (the implant becoming unstable over time), increased risk of dislocation, abnormal joint mechanics, and potentially faster wear of the implant components, possibly leading to the need for early revision surgery.