The Freer Elevator: An Indispensable Tool in Orthopedic Surgery
The Freer Elevator is a cornerstone instrument in the orthopedic surgeon's toolkit, revered for its precision and versatility in periosteal elevation. Essential across a vast spectrum of surgical procedures, this seemingly simple device plays a critical role in facilitating optimal access, minimizing tissue trauma, and ultimately contributing to superior patient outcomes. This comprehensive guide delves into every facet of the Freer Elevator, from its intricate design and biomechanical principles to its extensive clinical applications, rigorous maintenance protocols, and profound impact on surgical efficacy.
Introduction to the Freer Elevator
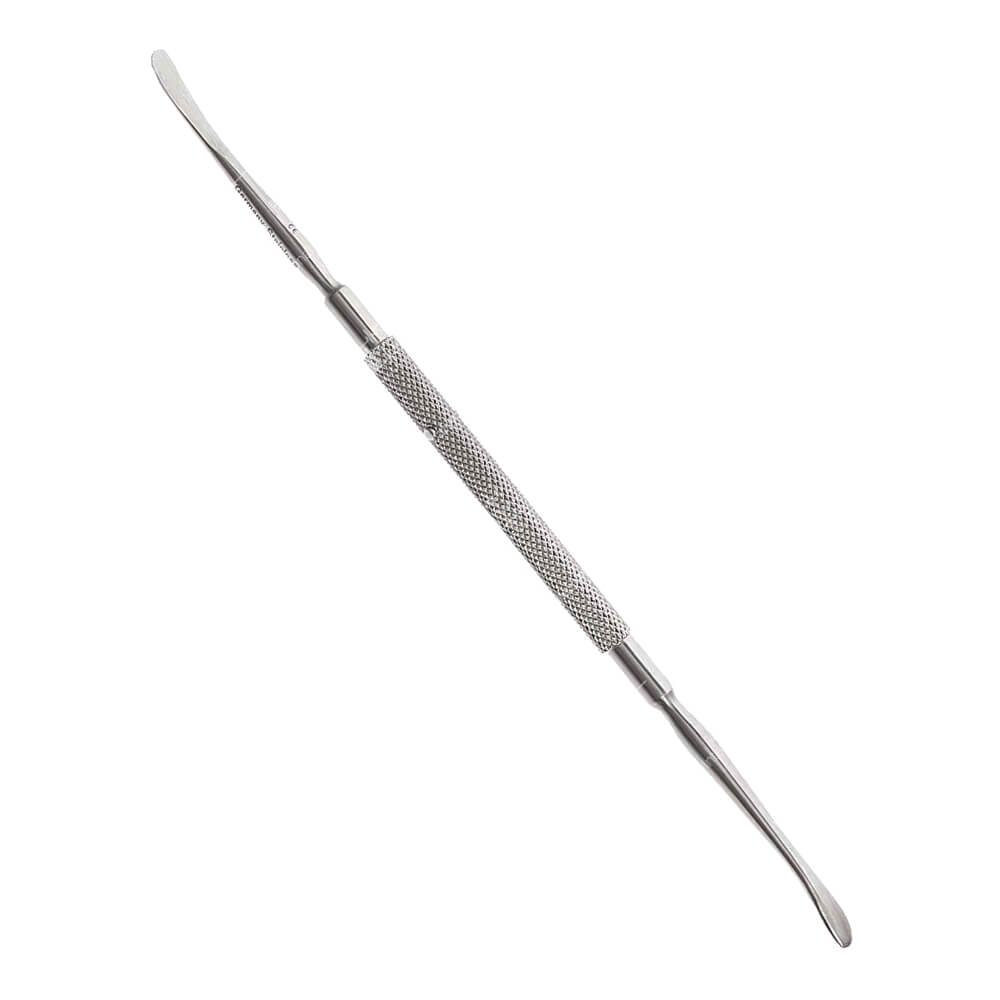
The Freer Elevator is a specialized surgical instrument predominantly used to separate the periosteum (the membrane covering the surface of bones) from the underlying bone. This process, known as periosteal elevation, is crucial for exposing bone surfaces during various orthopedic procedures, allowing surgeons clear access for fracture reduction, implant placement, tumor resection, and joint reconstruction. Its distinctive double-ended design, featuring both a sharp and a blunt, spatulated tip, provides surgeons with the necessary versatility to navigate different tissue densities and anatomical complexities with meticulous control. The instrument's enduring presence in operating rooms worldwide is a testament to its fundamental importance and effectiveness in modern surgical practice.
Deep-Dive into Technical Specifications and Mechanisms
Understanding the technical attributes and biomechanical principles behind the Freer Elevator is key to appreciating its effectiveness and safety profile.
Design and Materials
The Freer Elevator is characterized by its thoughtful design, engineered for precision and durability.
Key Design Features:
- Double-Ended: Most commonly, one end features a sharp, slightly curved tip, while the other presents a blunt, spatulated, and similarly curved tip. This dual functionality allows for initial delicate separation with the sharp end and broader, safer elevation with the blunt end.
- Curvature: The tips often have a gentle curve, designed to conform to the natural contours of bone surfaces, facilitating smooth and atraumatic elevation.
- Shaft: A sturdy, typically round or flattened shaft connects the working ends to the handle, providing stability and transmitting force effectively.
- Handle: The handle is designed for ergonomic grip, often featuring knurling, a ribbed pattern, or a flattened profile to enhance control and prevent slippage during delicate maneuvers.
Materials of Construction:
The choice of material is paramount for surgical instruments, dictating their longevity, sterilizability, and performance.
* Surgical Stainless Steel:
* Composition: Typically high-grade austenitic (e.g., 300 series) or martensitic (e.g., 400 series) stainless steel. Martensitic stainless steels (e.g., 420, 440A) are often favored for their hardness and ability to hold a sharp edge, crucial for the cutting tip.
* Properties: Excellent corrosion resistance, high tensile strength, biocompatibility, and ability to withstand repeated sterilization cycles without degradation.
* Titanium:
* Composition: Medical-grade titanium alloys (e.g., Ti-6Al-4V).
* Properties: Significantly lighter than stainless steel, non-magnetic, superior corrosion resistance, and often preferred for specialized applications where weight or magnetic interference is a concern (e.g., MRI environments, although a Freer is generally removed before MRI). Titanium instruments also produce less glare under surgical lights.
Common Dimensions:
Freer Elevators come in various lengths and tip widths to accommodate different anatomical sites and surgical needs.
| Feature | Typical Range (approx.) | Notes |
| :----------- | :---------------------- | :-------------------------------------------------------- |
| Total Length | 15 cm – 25 cm (6" – 10") | Shorter for delicate hand/foot surgery, longer for deep access. |
| Tip Width | 3 mm – 10 mm | Narrower for precise dissection, wider for broad elevation. |
Biomechanics of Periosteal Elevation
The design of the Freer Elevator is intrinsically linked to the biomechanical principles of separating soft tissue from bone.
- Leverage and Force Distribution: The instrument acts as a lever, with the bone surface serving as a fulcrum. The spatulated tips are designed to distribute force evenly over a wider area, preventing point-loading that could damage the periosteum or the bone itself.
- Tissue Preservation: The primary goal is to elevate the periosteum cleanly without tearing or excessively traumatizing it. The periosteum is critical for bone healing and regeneration due to its osteogenic potential and rich vascular supply. A clean separation minimizes damage to these vital elements.
- Controlled Angulation: The curved tips allow surgeons to maintain an optimal angle of attack, enabling the instrument to glide smoothly along the bone contour. This prevents "digging in" or "skiving off," which could cause inadvertent damage.
- Precision and Stability: The ergonomic handle and balanced weight provide the surgeon with fine motor control, essential for delicate dissection in close proximity to neurovascular structures.
Extensive Clinical Indications & Usage
The Freer Elevator is a workhorse in numerous surgical specialties, particularly within orthopedics. Its versatility makes it indispensable for a wide array of procedures.
General Principles of Usage
Effective and safe use of the Freer Elevator adheres to several core principles:
* Grip: Typically held with a modified pen grip for fine control or a palm grip for greater force application, depending on the tissue resistance and desired maneuver.
* Technique: Movements should be controlled, deliberate, and always away from vital structures (nerves, vessels). The instrument is usually advanced with a pushing or sweeping motion rather than pulling.
* Visualization: Maintaining a clear surgical field is paramount. Adequate lighting and suction are essential to observe the tissue plane being elevated.
* Sharp vs. Blunt End:
* The sharp end is used for initial incision of tough periosteum, defining tissue planes, or carefully separating very adherent tissue.
* The blunt, spatulated end is used for broader, sweeping elevation, especially once a plane has been established, minimizing the risk of perforation or significant trauma to the periosteum and surrounding soft tissues.
Detailed Surgical Applications
The applications of the Freer Elevator span nearly every major orthopedic subspecialty.
1. Fracture Fixation (Open Reduction Internal Fixation - ORIF)
- Exposure: Elevating muscle and periosteum from fracture fragments to expose the bone for reduction and internal fixation.
- Debridement: Clearing hematoma and debris from the fracture site.
- Plate Application: Creating a clean bone surface for optimal seating of orthopedic plates, ensuring direct bone-to-plate contact.
2. Joint Arthroplasty (Hip, Knee, Shoulder, Ankle)
- Capsular Release: Elevating the joint capsule from surrounding bone for improved access and mobility.
- Osteophyte Removal: Carefully detaching bone spurs (osteophytes) from joint margins.
- Implant Bed Preparation: Exposing the femoral canal, acetabulum, or glenoid for reaming and implant cementation or press-fit.
3. Spinal Surgery
- Laminotomy/Laminectomy: Elevating paraspinal muscles and ligaments from the lamina and spinous processes to expose the spinal canal.
- Discectomy: Clearing soft tissue around intervertebral discs.
- Fusion Procedures: Preparing vertebral surfaces for bone graft placement.
4. Hand and Foot Surgery
- Bunionectomy/Osteotomies: Elevating periosteum prior to bone cuts and re-alignments.
- Tendon Repairs: Exposing bone attachments for re-insertion of tendons.
- Small Joint Arthrodesis: Preparing joint surfaces for fusion.
5. Tumor Resection
- Margin Definition: Carefully elevating periosteum around bone tumors to achieve clear surgical margins during en bloc resections.
- Exposure: Providing wide exposure of the bone for biopsy or complete tumor removal.
6. Sports Medicine
- ACL Reconstruction: Exposing tibial and femoral tunnels for graft placement.
- Rotator Cuff Repair: Elevating deltoid muscle or capsule for access to the rotator cuff footprint on the humerus.
7. Dental and Oral Maxillofacial Surgery (Cross-Disciplinary Application)
- Sinus Lifts: Elevating the Schneiderian membrane from the sinus floor.
- Dental Implant Placement: Preparing the bone crest for implant insertion.
- Tooth Extractions: Elevating mucoperiosteal flaps.
Fitting/Usage Instructions
Proper handling and usage are critical for both surgical efficacy and instrument longevity.
- Pre-operative Inspection: Before sterilization and use, thoroughly inspect the Freer Elevator for any signs of damage:
- Bends or Deformities: Ensure the shaft and tips are straight and intact.
- Tip Integrity: Check for dullness, nicks, or burrs on both sharp and blunt ends.
- Corrosion/Pitting: Examine for any rust spots or pitting, which indicate material degradation.
- Cleanliness: Confirm the instrument is free of any residual biological material or sterilization residues.
- Ergonomics: The surgeon should adopt a comfortable, stable posture to minimize fatigue and maximize control. The instrument should feel balanced in hand.
- Patient Positioning: Ensure optimal patient positioning to provide direct and unobstructed access to the surgical site.
- Controlled Application:
- Begin with gentle, exploratory movements to identify the correct tissue plane.
- Use the sharp end judiciously for initial separation of tough, adherent tissue.
- Transition to the blunt end for broader elevation, using sweeping motions parallel to the bone surface.
- Apply consistent, controlled pressure, avoiding sudden jerks or excessive force that could damage soft tissues or bone.
- Always maintain direct visualization of the tip's interaction with tissue.
- Collaboration: The surgical assistant plays a vital role in providing retraction, maintaining hemostasis, and ensuring a clear field of view, allowing the surgeon to focus on precise elevation.
Maintenance and Sterilization Protocols
Rigorous adherence to maintenance and sterilization protocols is non-negotiable for all surgical instruments, including the Freer Elevator, to ensure patient safety and instrument longevity.
1. Immediate Post-Use Care:
- Rinse: Immediately after use, rinse the instrument under cool distilled water to remove gross contaminants (blood, tissue). Avoid saline, which can cause corrosion.
- Disassemble (if applicable): Although Freer Elevators are typically solid, any multi-part instruments should be disassembled.
2. Cleaning:
- Manual Cleaning: If automated cleaning is not immediately available, manually scrub the instrument using a soft brush and an enzymatic detergent solution. Pay close attention to the tips and knurled handle.
- Ultrasonic Cleaning: Place the instrument in an ultrasonic cleaner with an appropriate enzymatic solution. Ultrasonic waves create cavitation bubbles that dislodge microscopic debris from intricate surfaces.
- Washer-Disinfector: Many facilities use automated washer-disinfectors that combine cleaning, rinsing, and thermal disinfection cycles. Ensure instruments are loaded correctly according to manufacturer guidelines.
3. Inspection:
After cleaning, thoroughly inspect the Freer Elevator under magnification for:
* Residual soil.
* Damage: bends, cracks, dullness, burrs, pitting, or corrosion.
* Functionality: Ensure the tips are intact and suitable for use.
4. Lubrication:
While solid instruments like the Freer Elevator don't have hinges requiring lubrication, general instrument care dictates that any instrument with moving parts would be lubricated with a surgical-grade, water-soluble lubricant.
5. Packaging:
- Instruments must be properly packaged in sterilization pouches, wraps, or rigid containers, ensuring the packaging is appropriate for the chosen sterilization method and allows for proper sterilant penetration.
- Protect sharp tips to prevent damage to the packaging or injury to staff.
6. Sterilization Methods:
- Steam Sterilization (Autoclaving): The most common and preferred method for heat- and moisture-stable instruments like stainless steel Freer Elevators.
- Gravity Displacement: Steam displaces air by gravity.
- Pre-vacuum: Air is actively removed before steam injection, ensuring more rapid and thorough penetration.
- Dry Heat Sterilization: Used for instruments that cannot tolerate moisture, less common for steel instruments.
- Ethylene Oxide (EtO) Gas Sterilization: For heat- and moisture-sensitive items. Requires aeration time. Less common for routine steel instruments.
- Hydrogen Peroxide Gas Plasma Sterilization: A low-temperature method suitable for heat-sensitive instruments, often used for delicate or complex devices.
7. Storage:
Store sterilized instruments in a clean, dry, and protected environment to maintain sterility until use.
8. Traceability:
Maintain meticulous records of sterilization cycles, including date, time, sterilizer used, and load contents, to ensure full traceability in case of an adverse event.
Patient Outcome Improvements
The meticulous design and proper utilization of the Freer Elevator directly contribute to significant patient outcome improvements.
- Reduced Tissue Trauma: By providing precise and controlled periosteal elevation, the Freer Elevator minimizes tearing, crushing, or excessive stripping of the periosteum. This preserves the vital blood supply and osteogenic cells, leading to:
- Faster and stronger bone healing.
- Reduced incidence of non-union or delayed union.
- Improved Surgical Field and Precision: A clean and wide exposure of the bone allows the surgeon to perform procedures with greater accuracy, leading to:
- Optimal fracture reduction and alignment.
- Accurate implant placement, minimizing loosening or malposition.
- Reduced operative time due to clearer visibility.
- Minimized Post-operative Pain and Swelling: Less intraoperative tissue damage typically translates to less inflammation, pain, and swelling in the post-operative period.
- Lower Risk of Complications: Precise dissection around neurovascular structures reduces the risk of iatrogenic injury. Proper technique also minimizes the risk of hematoma formation.
- Enhanced Functional Recovery: Quicker and more robust healing, coupled with reduced pain, facilitates earlier mobilization and rehabilitation, leading to a faster return to function and improved long-term quality of life for the patient.
Risks, Side Effects, or Contraindications
While the Freer Elevator is a safe and effective instrument when used correctly, improper application carries potential risks.
Risks Associated with Improper Use:
- Periosteal Devitalization or Excessive Stripping: Aggressive or uncontrolled elevation can strip the periosteum too widely or damage its deeper layers, impairing its ability to contribute to bone healing. This can lead to delayed union or non-union of fractures.
- Bone Damage: Applying excessive force or using an incorrect angle can cause:
- Gouging or Scratching: Superficial damage to the bone cortex.
- Perforation: Inadvertently penetrating thin cortical bone, especially in areas like the orbital floor or sinus walls.
- Fracture Propagation: Extending an existing fracture or creating a new one.
- Soft Tissue Injury: Due to the proximity of nerves, vessels, ligaments, and tendons to bone, improper technique can lead to:
- Nerve Damage: Paresthesia, paralysis.
- Vascular Injury: Hemorrhage, hematoma, or ischemia.
- Tendon/Ligament Laceration: Impairing joint stability or muscle function.
- Incomplete Dissection: Leaving remnants of soft tissue or periosteum on the bone surface can impede proper seating of implants or reduction of fracture fragments, potentially leading to surgical failure.
- Instrument Breakage: Although rare with high-quality instruments, extreme force or material fatigue can lead to tip breakage, necessitating careful retrieval of fragments.
Contraindications:
There are generally no absolute contraindications for the Freer Elevator itself, as its use is dictated by the surgical procedure. However, its use should be approached with caution or avoided in specific scenarios:
* Damaged or Non-Sterile Instrument: Never use an instrument that shows signs of damage (bends, cracks, dullness, corrosion) or has not undergone proper sterilization.
* Infected Surgical Field: While sometimes used to debride infected bone, extreme caution is needed to avoid spreading infection to healthy tissues.
* Proximity to Critical Structures: In areas where vital neurovascular structures are extremely superficial or intimately adherent to the bone, alternative blunt dissection methods or microscopic techniques may be preferred to minimize risk.
* Excessive Tissue Adhesion: In cases of severe scarring or fibrosis where tissue planes are obliterated, attempting aggressive elevation with a Freer Elevator could cause more harm than good.
Frequently Asked Questions (FAQ)
1. What is a Freer Elevator primarily used for in surgery?
A Freer Elevator is primarily used to separate the periosteum (the membrane covering bone) from the underlying bone. This process, called periosteal elevation, is crucial for exposing bone surfaces during orthopedic and other surgical procedures, facilitating access for fracture repair, implant placement, and tissue dissection.
2. What materials are Freer Elevators typically made from?
Freer Elevators are most commonly made from high-grade surgical stainless steel, known for its durability, corrosion resistance, and ability to withstand repeated sterilization. Some specialized versions may also be made from titanium, which is lighter, non-magnetic, and offers superior corrosion resistance.
3. How does the design of the Freer Elevator contribute to its effectiveness?
Its distinctive double-ended design, featuring both a sharp, curved tip and a blunt, spatulated, curved tip, allows for versatile and controlled dissection. The sharp end initiates separation, while the blunt end provides broader, atraumatic elevation, minimizing damage to the periosteum and surrounding tissues. Ergonomic handles ensure a secure grip and precise control.
4. Can a Freer Elevator be used in non-orthopedic surgeries?
Yes, while it's a staple in orthopedics, the Freer Elevator is also widely used in other surgical specialties such as oral and maxillofacial surgery (e.g., sinus lifts, dental implant placement), neurosurgery (e.g., spinal procedures), and general surgery when bone exposure is required.
5. What are the key differences between the sharp and blunt ends of a Freer Elevator?
The sharp end is used for initial incision into tough periosteum or fibrous tissue, defining tissue planes, and carefully separating very adherent areas. The blunt, spatulated end is designed for broader, sweeping elevation once a plane has been established, distributing force over a larger area to minimize trauma to the periosteum and bone.
6. How should a Freer Elevator be properly sterilized?
After immediate rinsing and thorough cleaning (manual, ultrasonic, or washer-disinfector), the Freer Elevator is typically packaged and sterilized using steam sterilization (autoclaving). This is the most common and effective method for heat- and moisture-stable instruments like those made of stainless steel or titanium.
7. What are the potential risks of using a Freer Elevator improperly?
Improper use can lead to several risks, including excessive periosteal stripping (damaging bone healing), gouging or perforating bone, injury to adjacent soft tissues (nerves, vessels, tendons), incomplete dissection, and in rare cases, instrument breakage.
8. How does the Freer Elevator improve patient outcomes?
By enabling precise and atraumatic periosteal elevation, the Freer Elevator helps preserve the vital periosteum, promoting faster and stronger bone healing. It also facilitates a clearer surgical field for accurate procedures, leading to reduced operative time, less post-operative pain, lower complication rates, and ultimately, enhanced functional recovery for the patient.
9. Are there different sizes or variations of the Freer Elevator?
Yes, Freer Elevators come in various lengths and tip widths (e.g., 3mm to 10mm wide tips) to suit different anatomical sites and surgical requirements. Shorter versions with narrower tips are used for delicate procedures (e.g., hand surgery), while longer versions with wider tips are for broader exposure (e.g., large joint arthroplasty).
10. What is the expected lifespan of a Freer Elevator?
With proper care, cleaning, and sterilization, a high-quality Freer Elevator can last for many years, even decades, of surgical use. Regular inspection is crucial to identify any signs of wear, damage, or corrosion that might necessitate replacement.
11. How do I maintain the sharpness of the instrument (if applicable for the sharp end)?
The sharp tip of a Freer Elevator is designed to retain its edge through many uses. However, if it becomes dull over time, it should be professionally resharpened by a qualified instrument repair service. Improper, manual sharpening can damage the instrument and its intended function.
12. Is titanium a better material than stainless steel for a Freer Elevator?
Titanium offers advantages such as being lighter, non-magnetic, and more corrosion-resistant, and it produces less glare. However, surgical stainless steel remains an excellent and highly durable choice. The "better" material often depends on specific surgical preferences, cost considerations, and the requirements of the operating environment (e.g., MRI compatibility).