Introduction to Shoulder and Elbow Arthroplasty
Lesions around the shoulder and elbow requiring arthroplasty are historically less common than the painful destructive processes of weight-bearing joints such as the hip and knee. Consequently, the evolution of upper extremity arthroplasty has followed a unique trajectory. Most painful shoulder syndromes are caused by soft-tissue lesions requiring interventions such as acromioplasty, rotator cuff repair, or biceps tenodesis. However, when painful incongruities of the glenohumeral or ulnohumeral joints arise—whether from primary osteoarthritis, rheumatoid arthritis, post-traumatic arthritis, or rotator cuff tear arthropathy—joint replacement becomes the definitive surgical solution.
This masterclass provides an exhaustive, postgraduate-level review of shoulder and elbow arthroplasty, focusing on biomechanics, prosthesis design, step-by-step surgical techniques, and complication management.
Shoulder Arthroplasty
Historical Evolution and Prosthesis Design
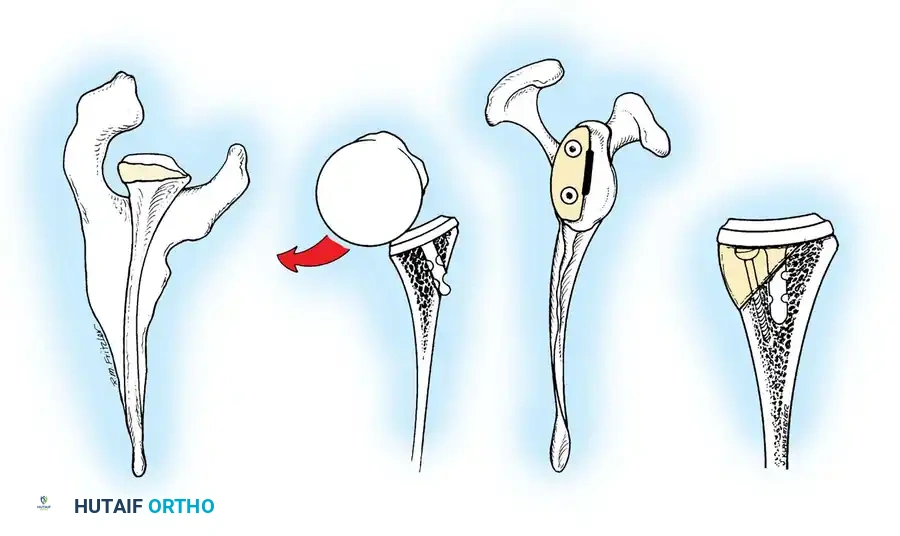
The genesis of shoulder arthroplasty dates back to 1893 when French surgeon J.E. Péan implanted a platinum and rubber prosthesis for a glenohumeral joint destroyed by tuberculosis. Modern shoulder arthroplasty, however, was pioneered in the early 1950s by Charles S. Neer II, who introduced an unconstrained cobalt-chromium alloy (Vitallium) humeral head prosthesis for complex proximal humerus fractures.
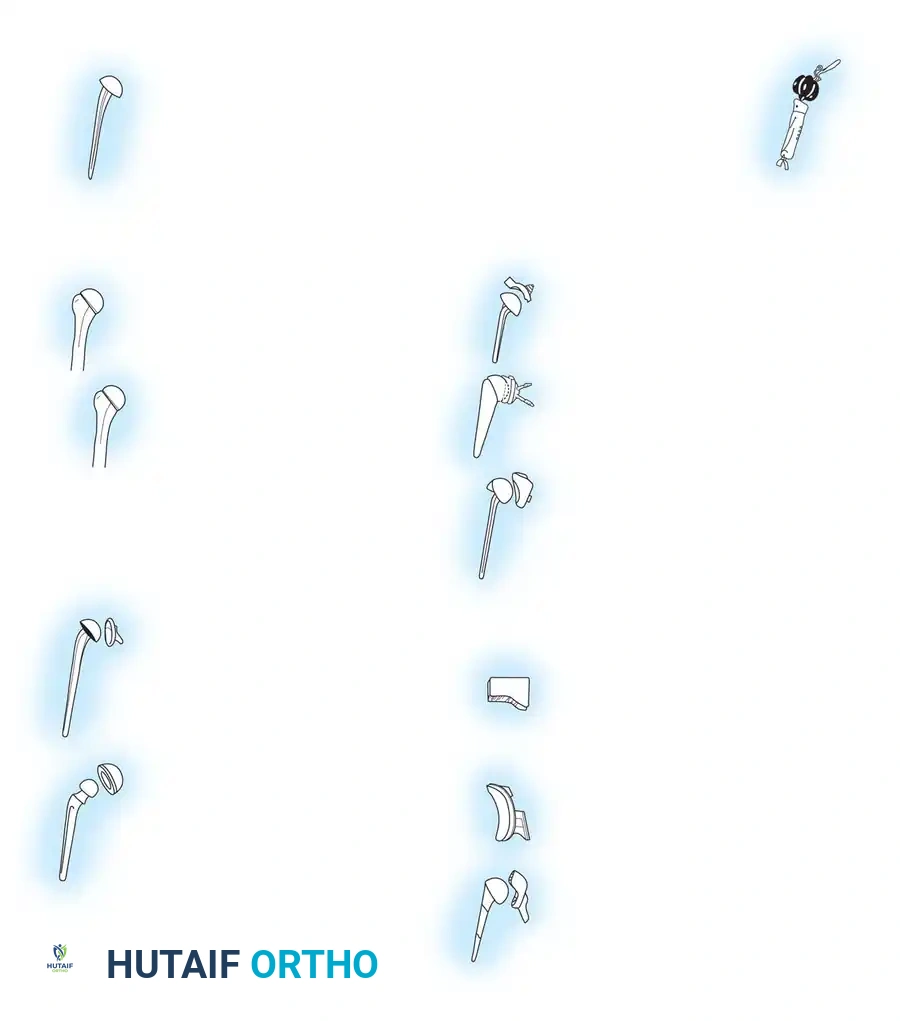
By 1974, Neer developed the Neer II humeral prosthesis, modifying it to conform to a high-density polyethylene glenoid component, thereby birthing the modern Total Shoulder Arthroplasty (TSA).
Clinical Pearl: The development and subsequent failure of early constrained TSA systems stemmed from two false assumptions: (1) that most arthritic patients had deficient rotator cuffs, and (2) that rotator cuff function could be effectively replaced by a fixed fulcrum. This led to catastrophic glenoid loosening, paving the way for unconstrained anatomical designs and, eventually, the reverse ball-and-socket concept.
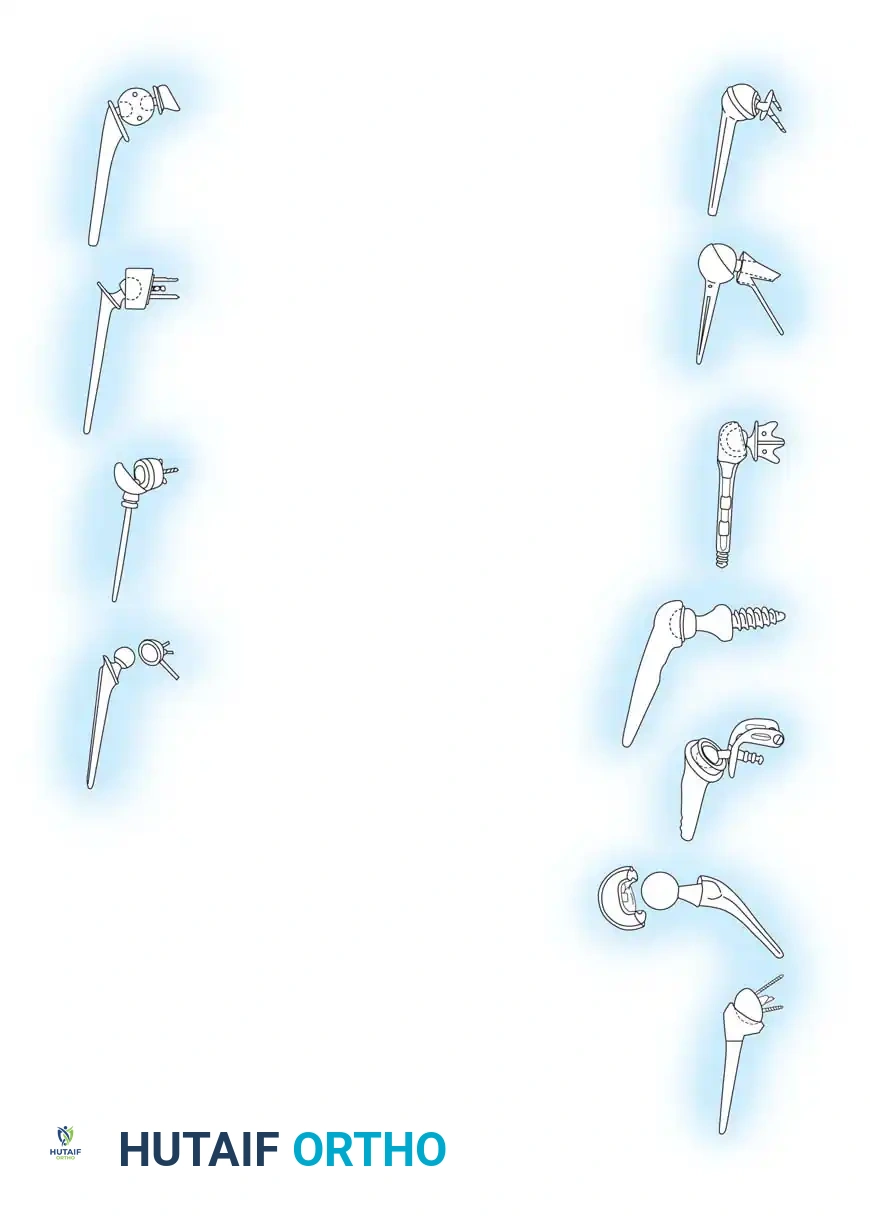
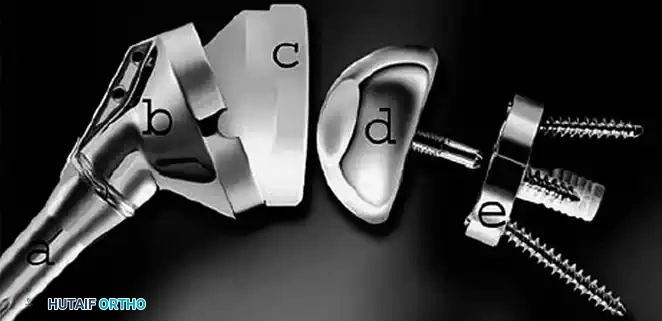
In the 1990s, emphasis shifted toward restoring normal kinematics through modular humeral components, allowing surgeons to replicate individual patient anatomy. Today, the Reverse Total Shoulder Arthroplasty (rTSA), based on the biomechanical principles of Paul Grammont, dominates the landscape for patients with rotator cuff deficiency.
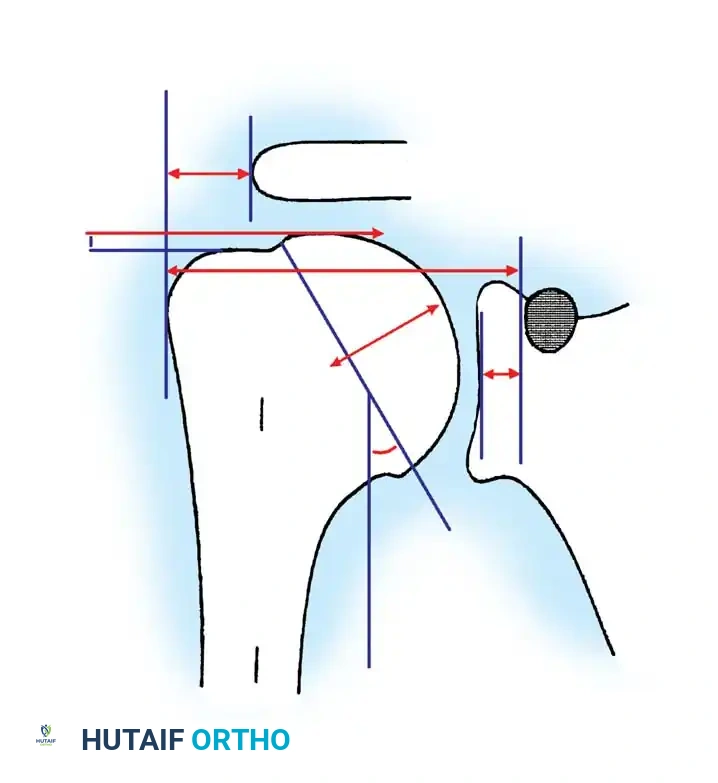
Anatomy and Biomechanics of the Glenohumeral Joint
A profound understanding of glenohumeral geometry is paramount for successful arthroplasty. The articular surface of the humeral head is essentially spherical, encompassing an arc of approximately 160 degrees.
Key Anatomical Parameters (Table 8-1):
* Radius of Curvature: The humeral head radius is approximately 25 mm. The glenoid articular surface radius is intentionally mismatched, being 2 to 3 mm larger than the humeral head to allow for translation and reduce edge loading.
* Neck-Shaft Angle (Inclination): Averages 45 degrees (± 5 degrees) relative to the diaphysis, though arthritic shoulders often present with a flatter angle closer to 50 degrees.
* Retroversion: Highly variable among individuals, ranging from 0 to 55 degrees depending on the measurement axis (e.g., epicondylar axis vs. forearm). Average glenoid version is 1.5 degrees of retroversion.
* Humeral Offset: The medial offset ranges from 4 to 14 mm, and the anteroposterior offset ranges from -2 to 10 mm.
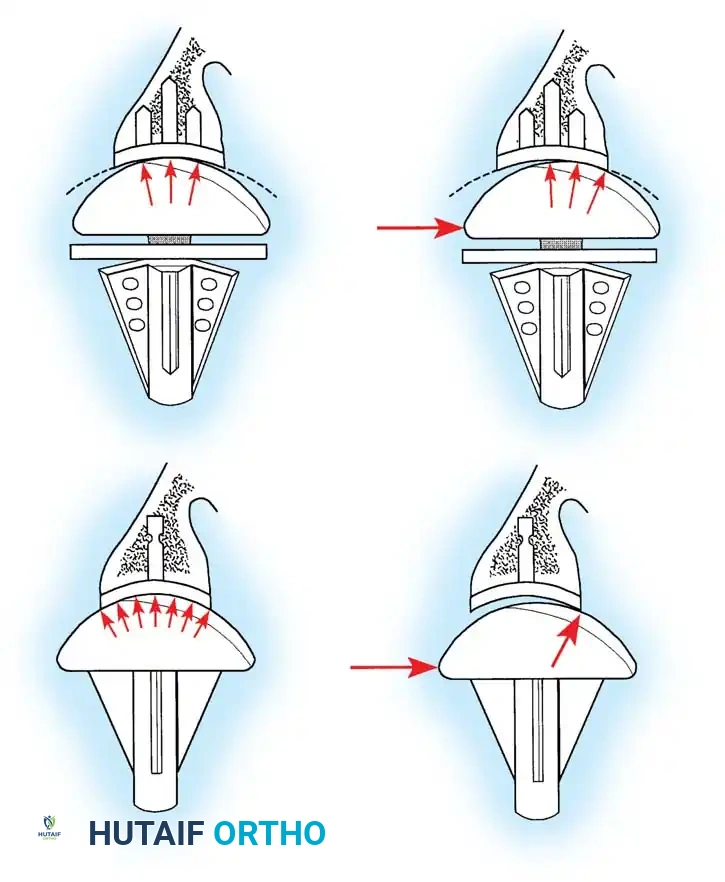
Surgical Warning: Biomechanical studies demonstrate that shoulder kinematics are severely compromised if the prosthetic head is too thick, too thin, or shifted from the anatomical neck plane. Increasing humeral head thickness by just 5 mm can reduce glenohumeral range of motion by 20 to 30 degrees due to overstuffing the joint. The prosthetic head must be within 4 mm of the original head thickness.
Indications and Preoperative Evaluation
Indications for Anatomical TSA:
* Primary osteoarthritis with an intact rotator cuff.
* Rheumatoid arthritis (without massive cuff tearing).
* Post-traumatic arthritis.
* Avascular necrosis (AVN) of the humeral head with glenoid involvement.
Indications for Reverse TSA (rTSA):
* Rotator cuff tear arthropathy (CTA).
* Massive, irreparable rotator cuff tears with pseudoparalysis.
* Complex 3- and 4-part proximal humerus fractures in the elderly.
* Revision of failed anatomical TSA.
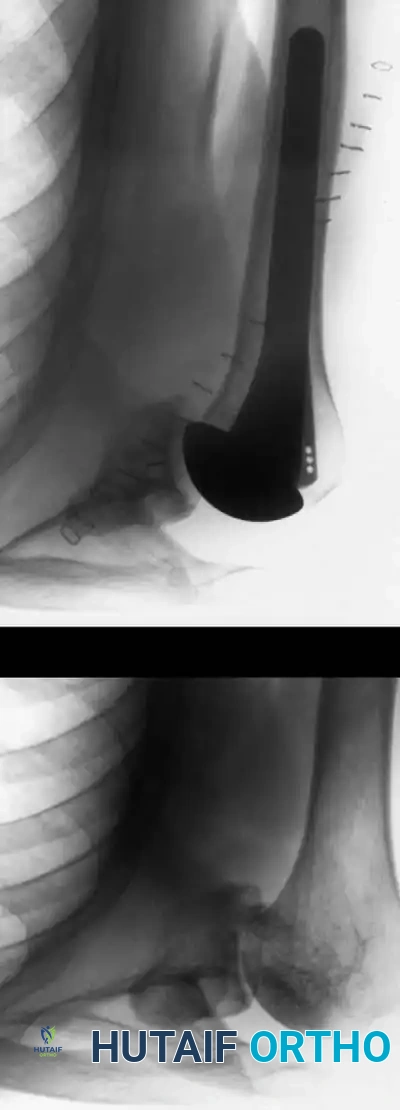
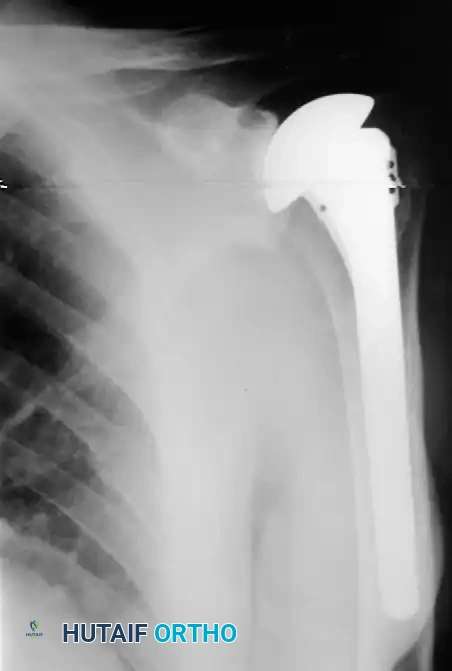
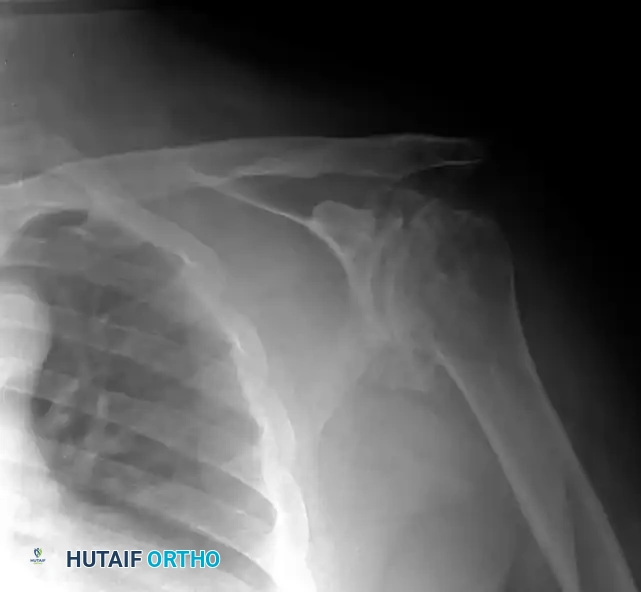
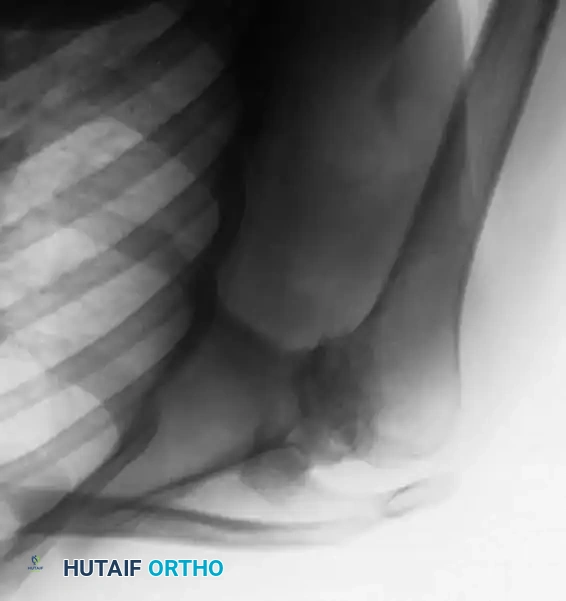
Preoperative Imaging:
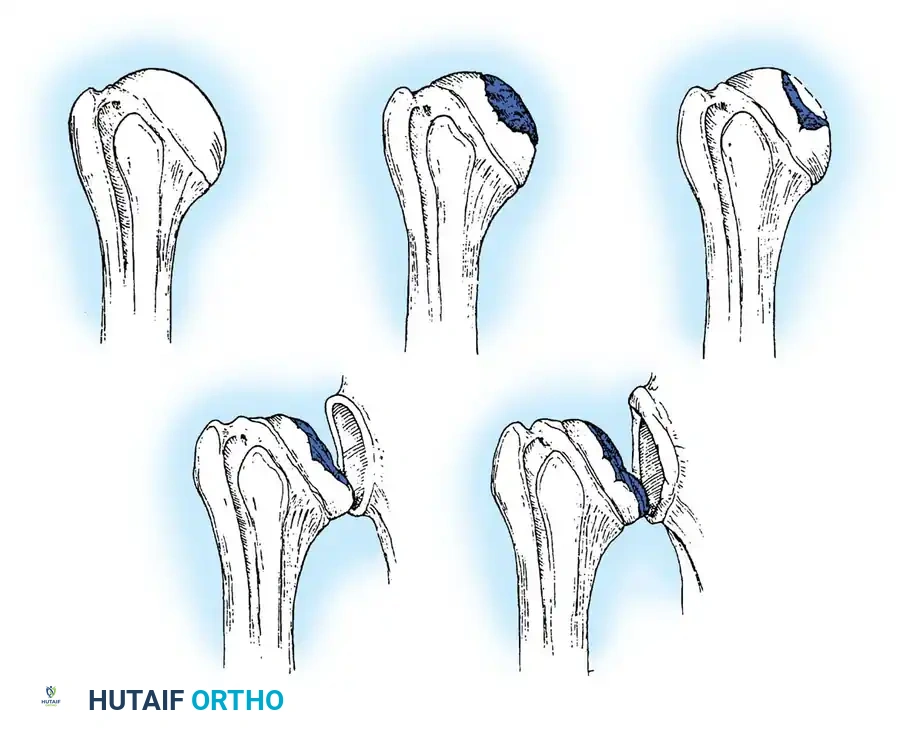
Standard radiographs must include a true anteroposterior (Grashey), axillary lateral, and scapular Y view. A non-contrast CT scan is mandatory for evaluating glenoid bone stock, version, and morphology (utilizing the Walch classification for posterior wear).
Surgical Technique: Anatomical Total Shoulder Arthroplasty
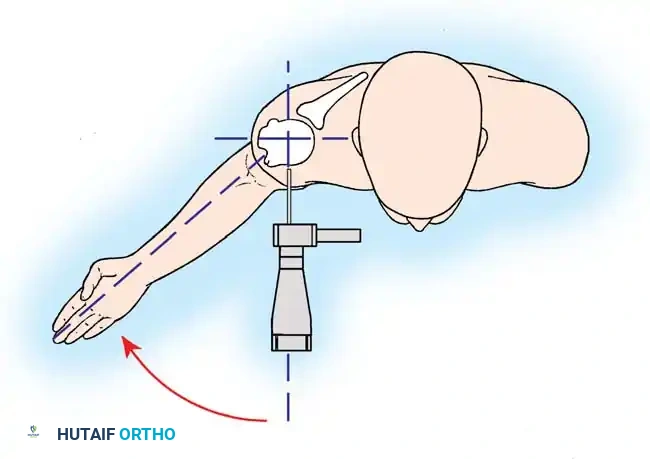
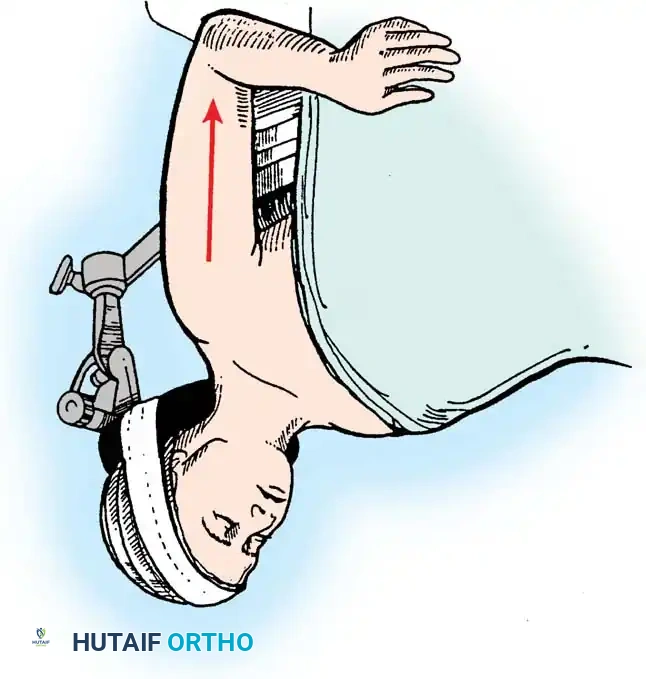
1. Positioning and Exposure
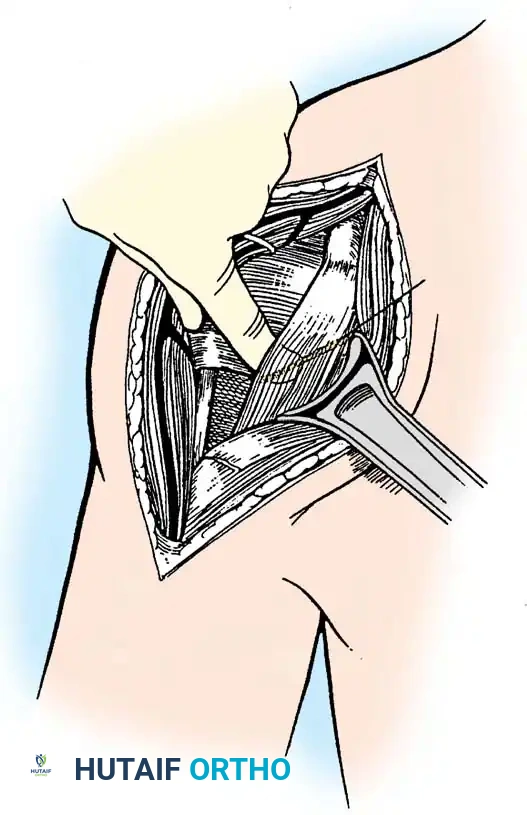
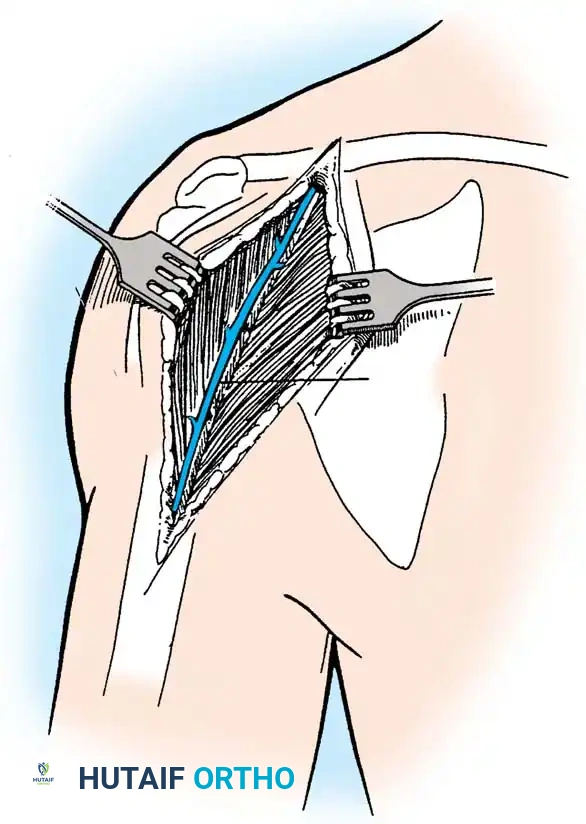
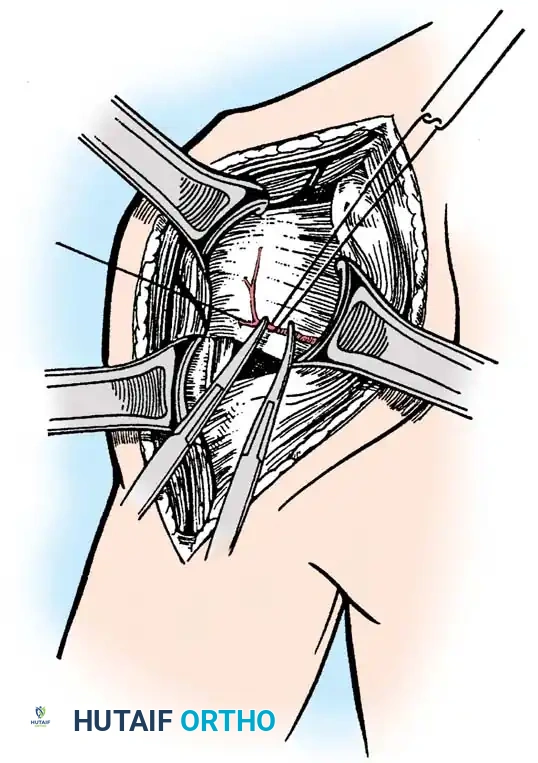
The patient is placed in a modified beach-chair position with the operative arm completely free for manipulation. A standard deltopectoral approach is utilized.
- Identify the cephalic vein and retract it laterally with the deltoid to preserve its venous drainage, or medially with the pectoralis major depending on surgeon preference and vein anatomy.
- Develop the clavipectoral fascia to expose the conjoined tendon and the subscapularis.
- Release the coracoacromial ligament if necessary, though preservation is preferred in cases of superior instability.
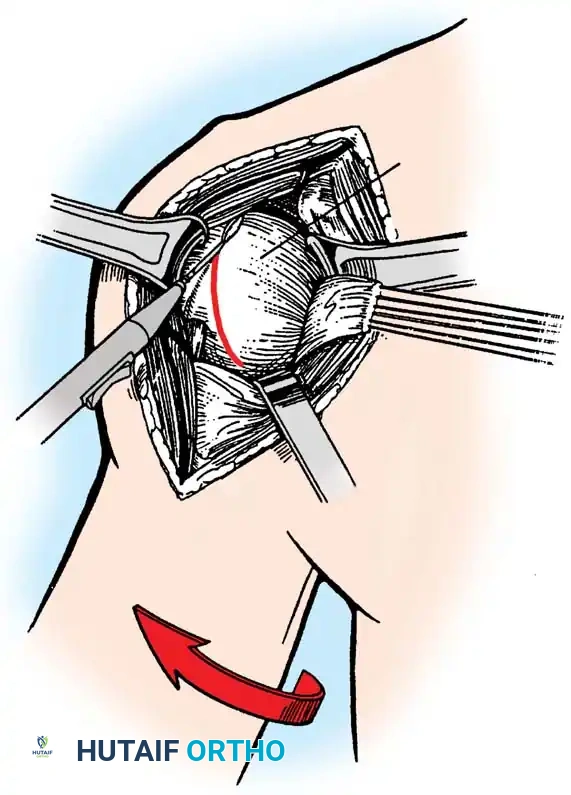
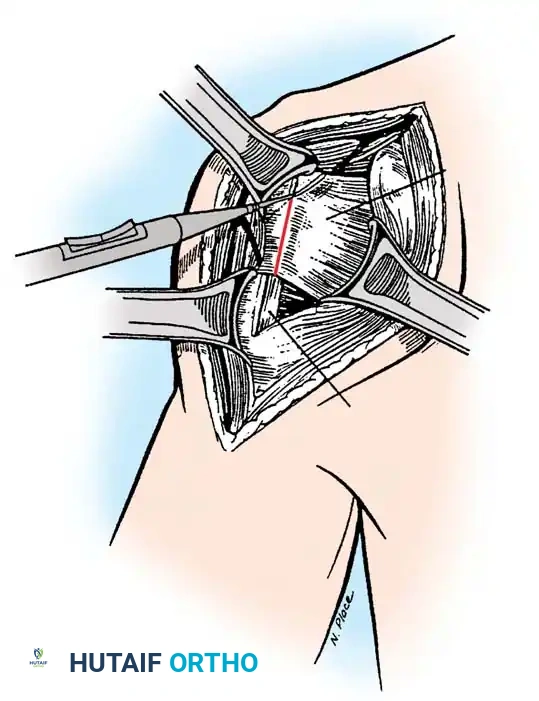
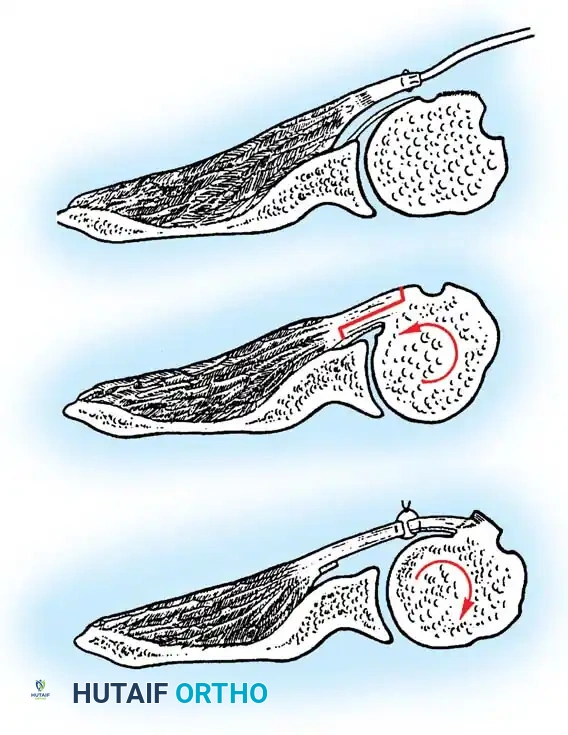
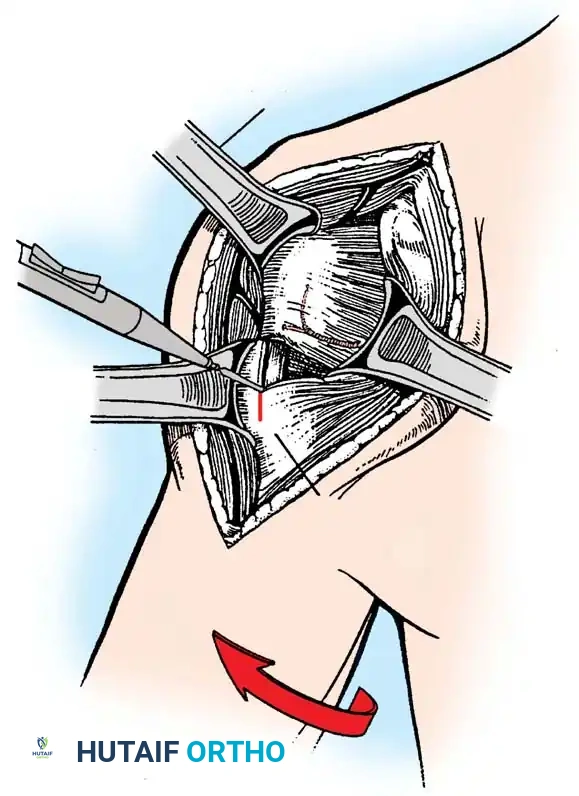
2. Subscapularis Management
The subscapularis is the gatekeeper to the joint. It can be managed via a tenotomy (1 cm medial to the lesser tuberosity), a lesser tuberosity osteotomy (LTO), or a subscapularis peel. LTO provides superior bone-to-bone healing and is increasingly favored.
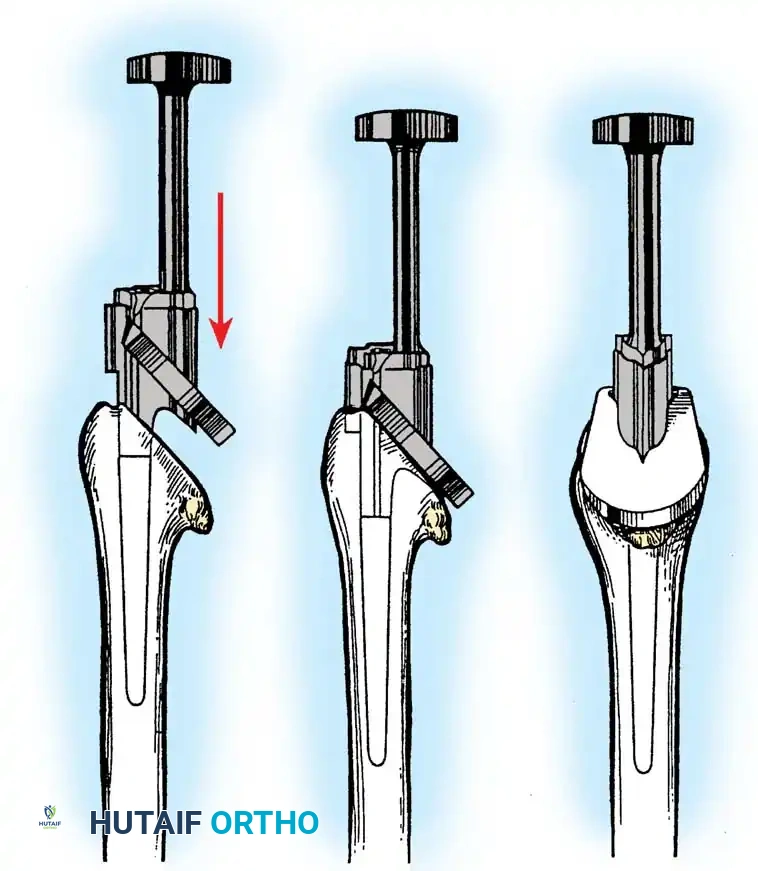
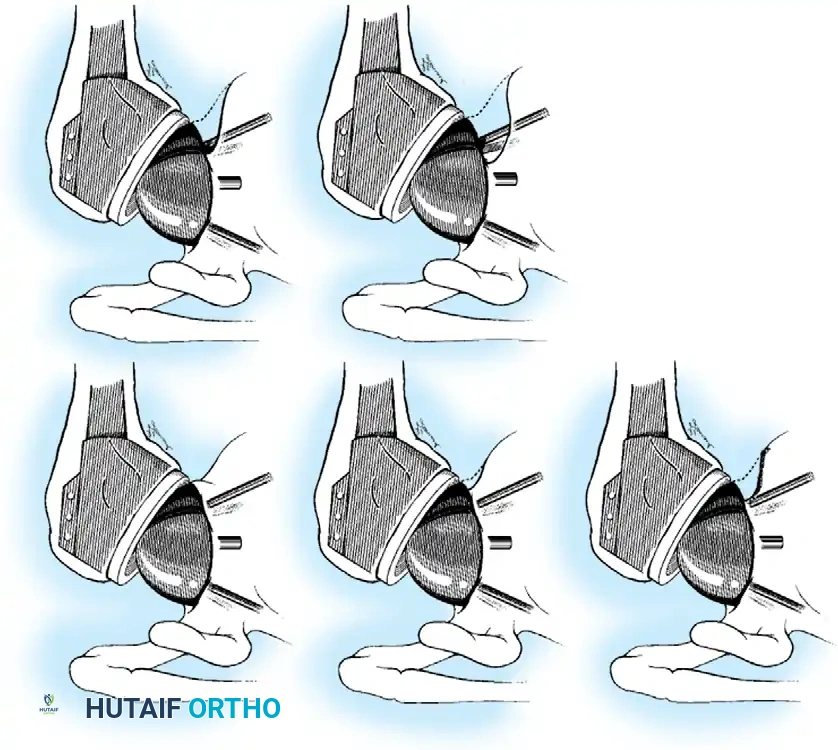
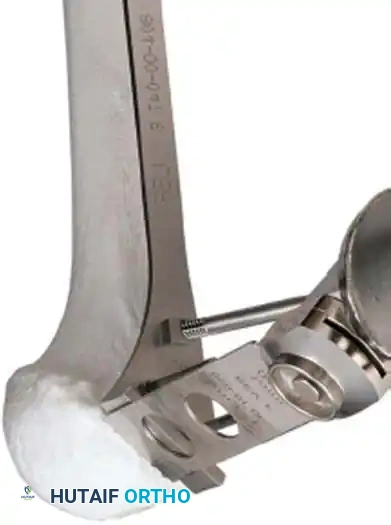
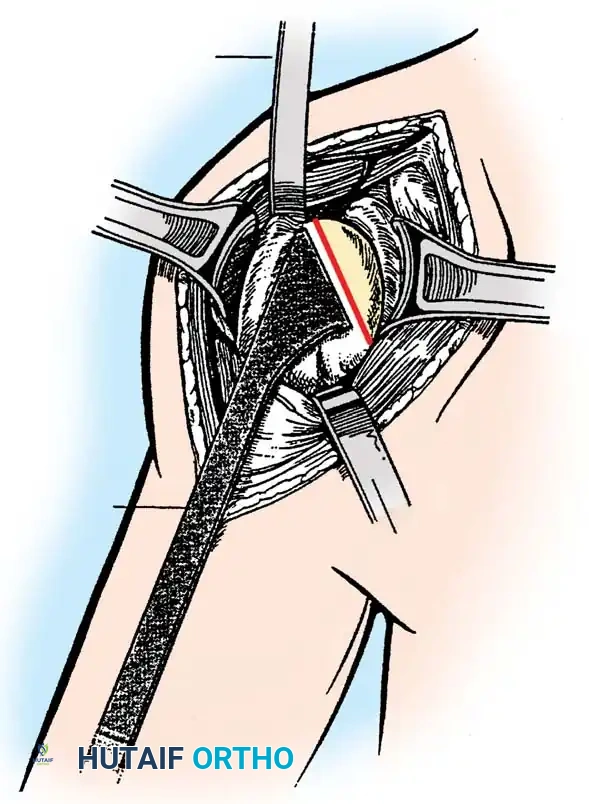
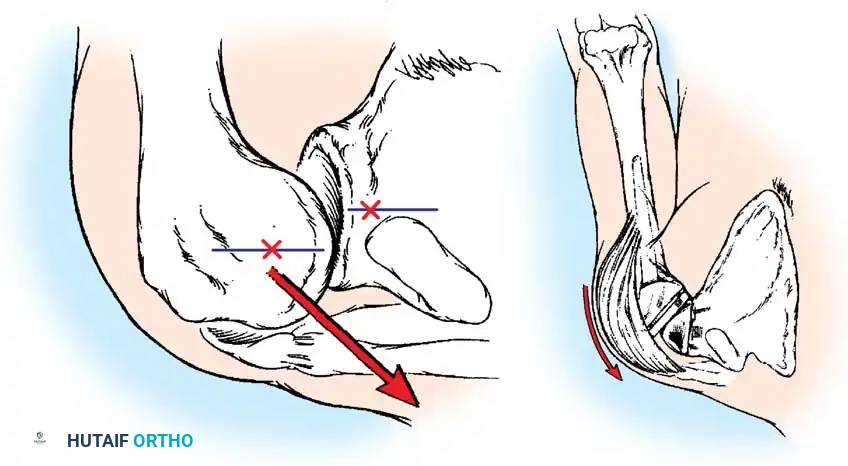
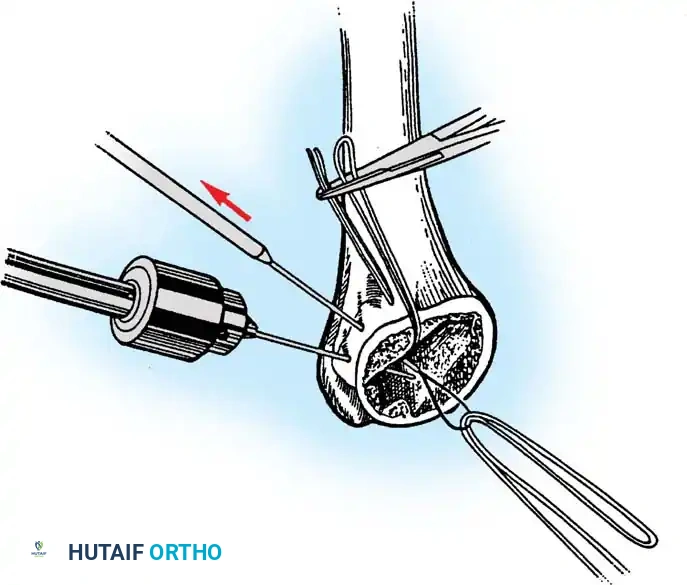
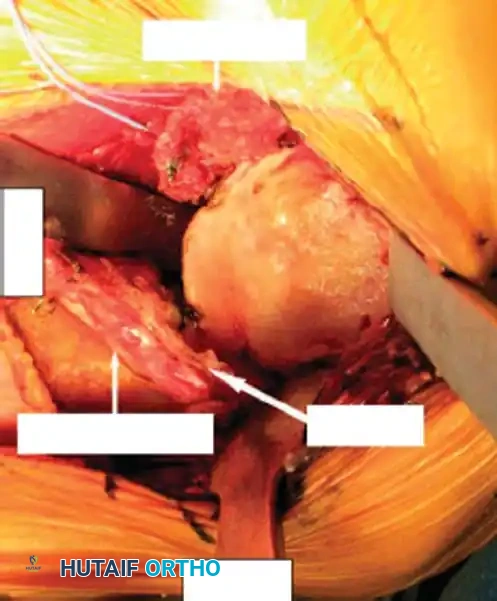
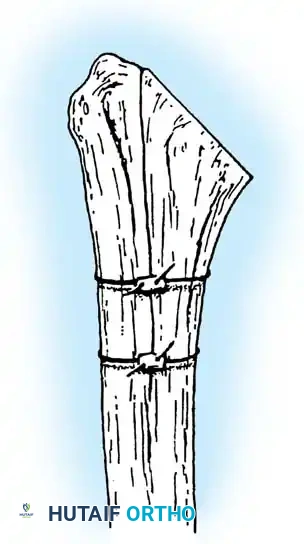
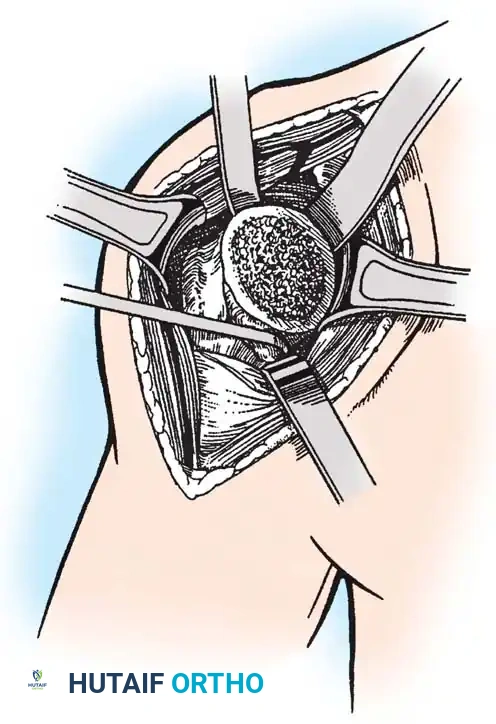
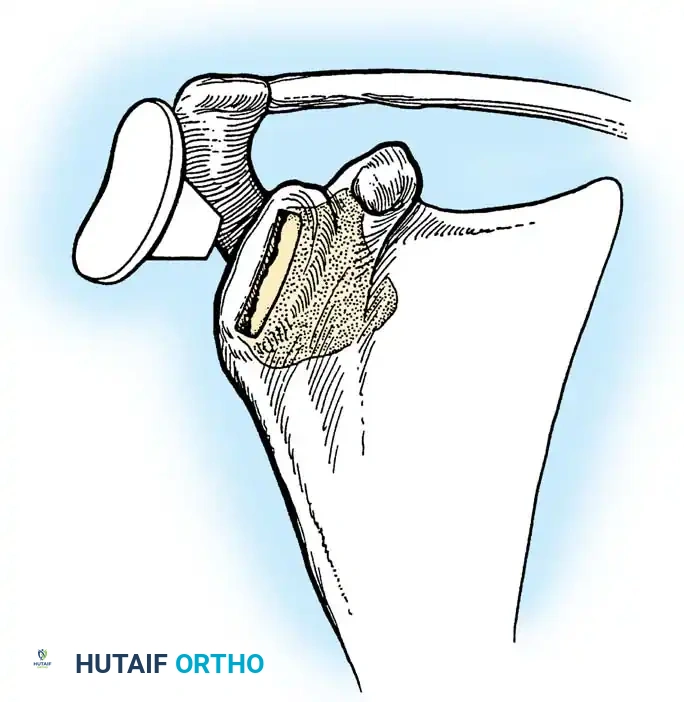
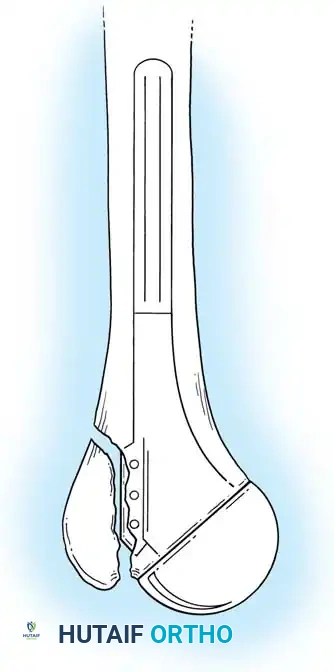
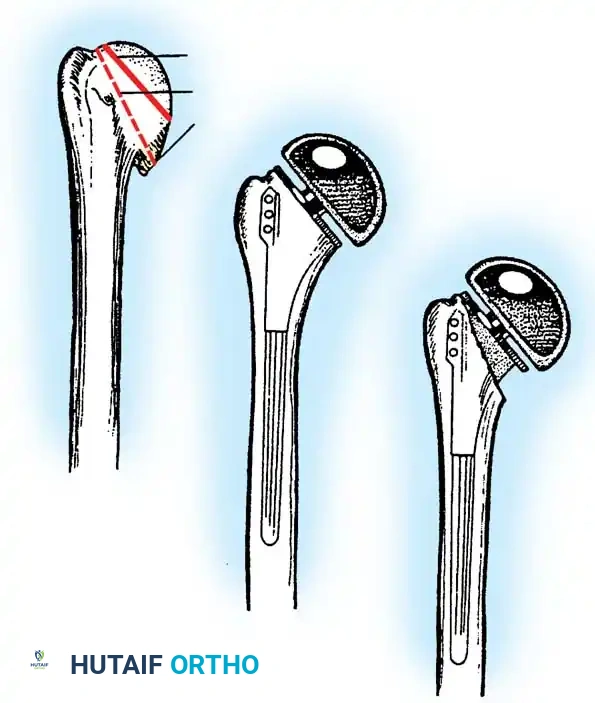
3. Humeral Head Resection
Dislocate the humeral head anteriorly through external rotation and extension. Remove peripheral osteophytes to identify the true anatomical neck. The humeral cut is made along the anatomical neck, typically at 30 degrees of retroversion and 45 degrees of inclination.
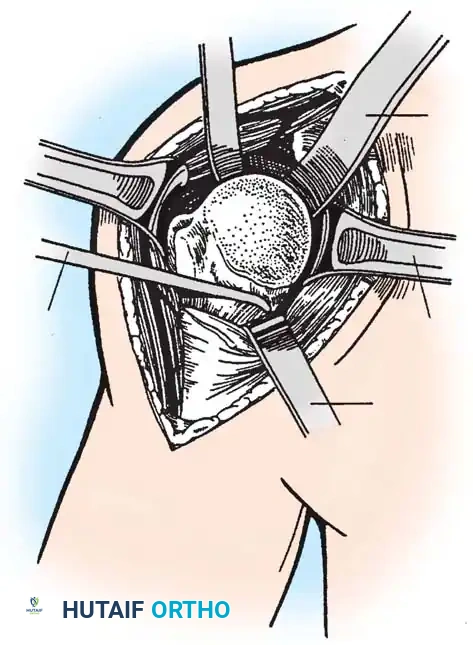
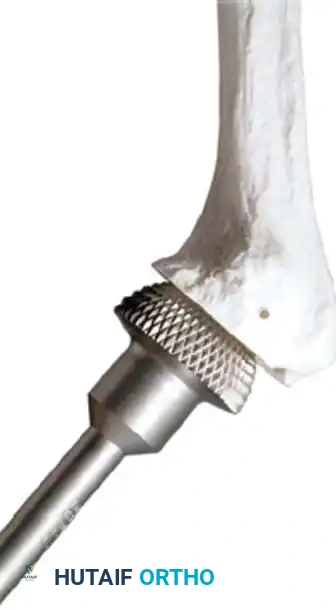
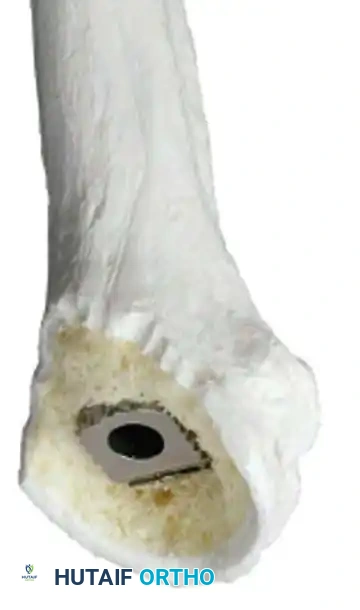
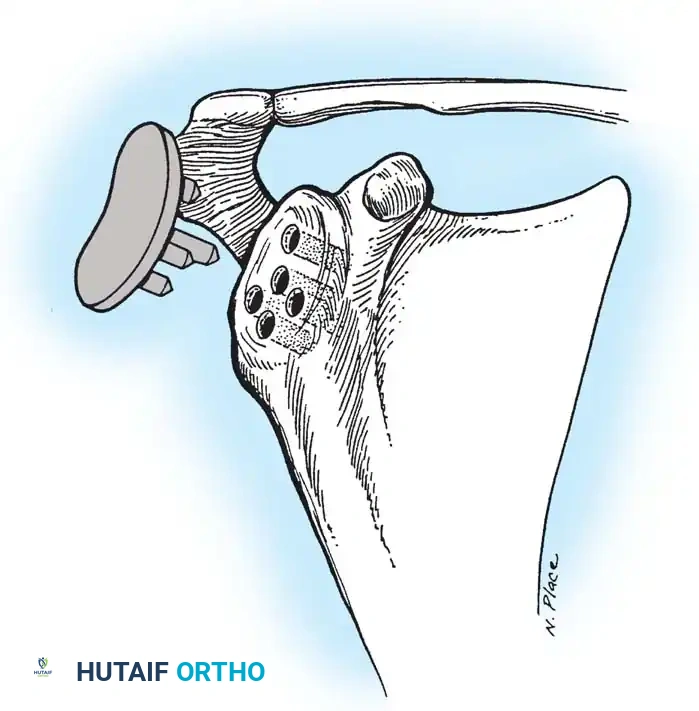
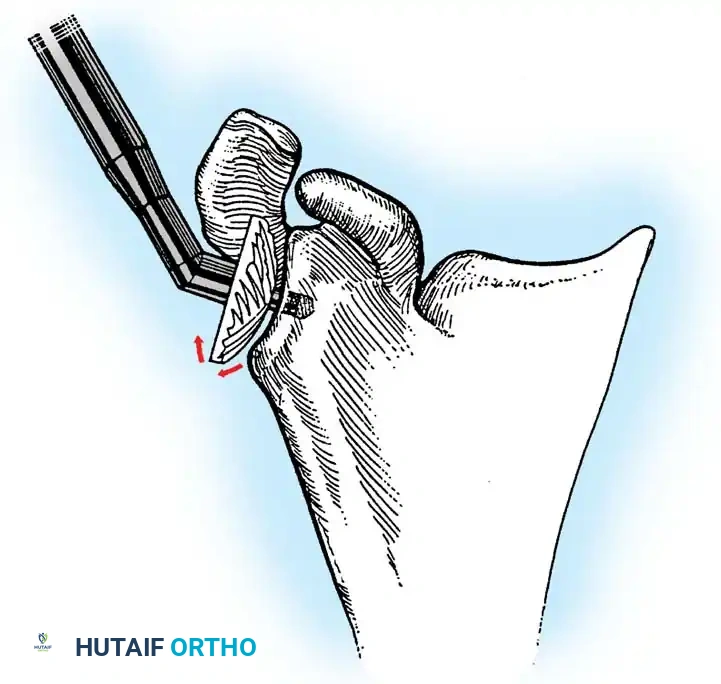
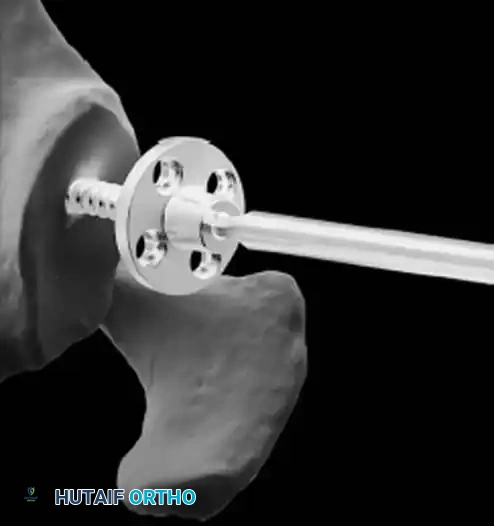
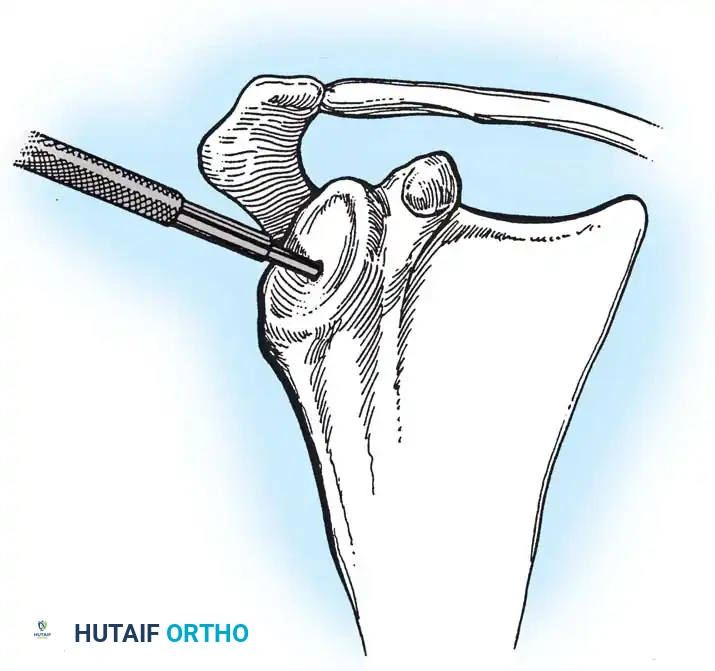
4. Glenoid Preparation
Excellent exposure is critical. Release the inferior capsule completely from the glenoid rim.
* Identify the center point of the glenoid.
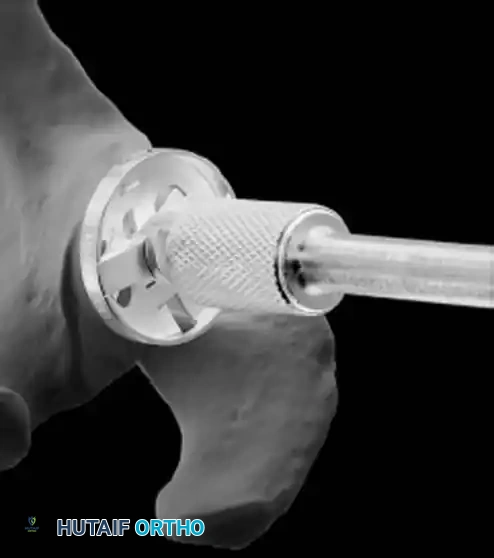
* Perform concentric reaming to correct version and create a bleeding bone bed.
* Pitfall: Avoid excessive reaming, which penetrates the dense subchondral bone plate and enters the weaker cancellous vault, leading to catastrophic early subsidence.
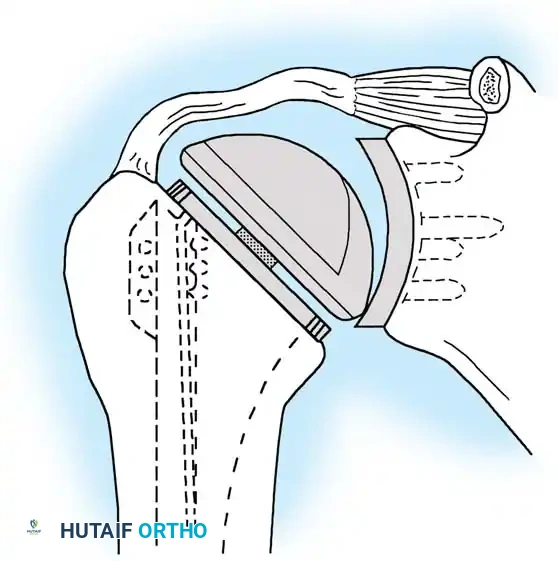
Cement the all-polyethylene glenoid component using pulsatile lavage, meticulous drying, and pressurization techniques.
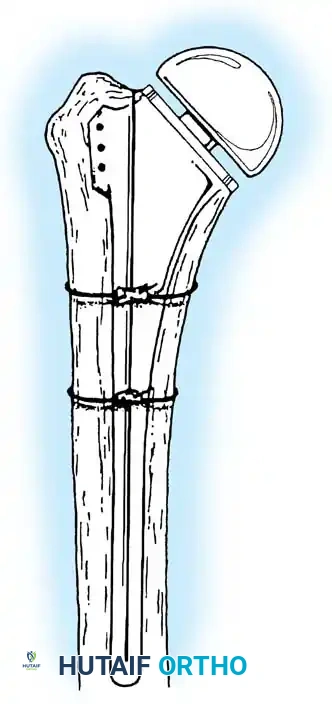
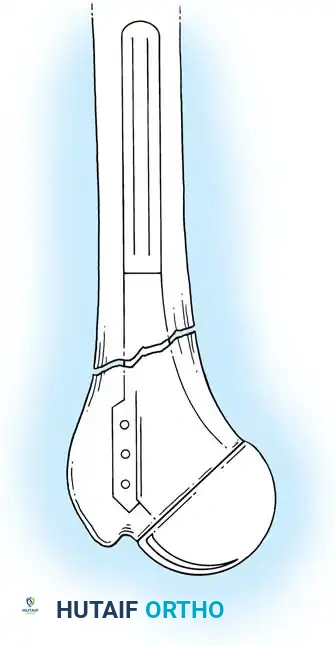
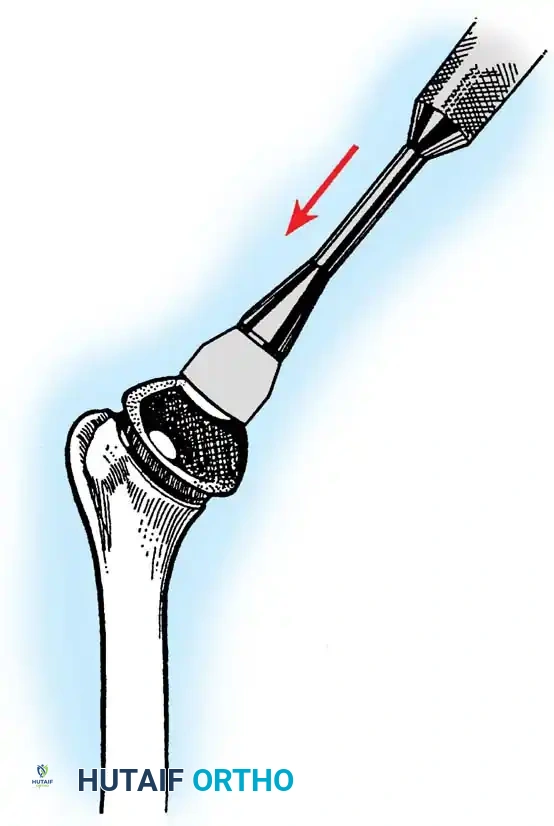
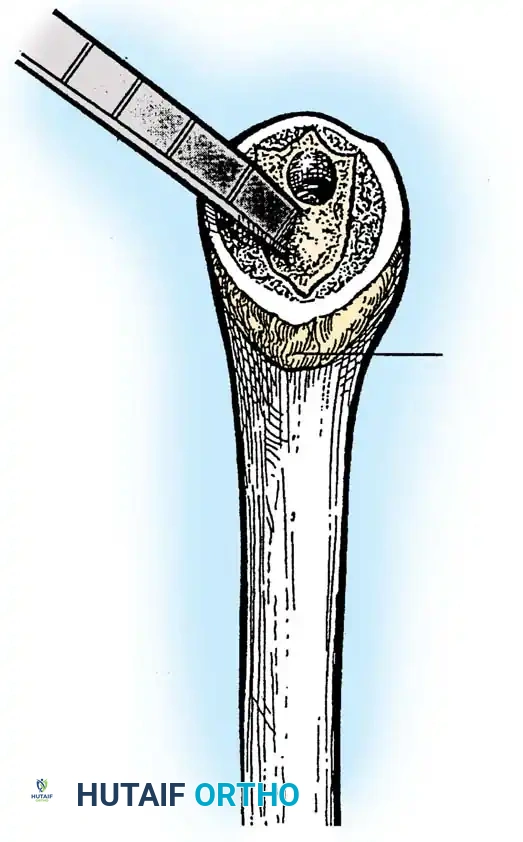
5. Humeral Preparation and Implantation
Broach the humeral canal sequentially. Assess the trial components for stability, ensuring 50% posterior translation on the "drawer test" and no superior escape. Implant the final prosthesis (press-fit or cemented based on bone quality).
Securely repair the subscapularis using heavy non-absorbable sutures through transosseous tunnels.
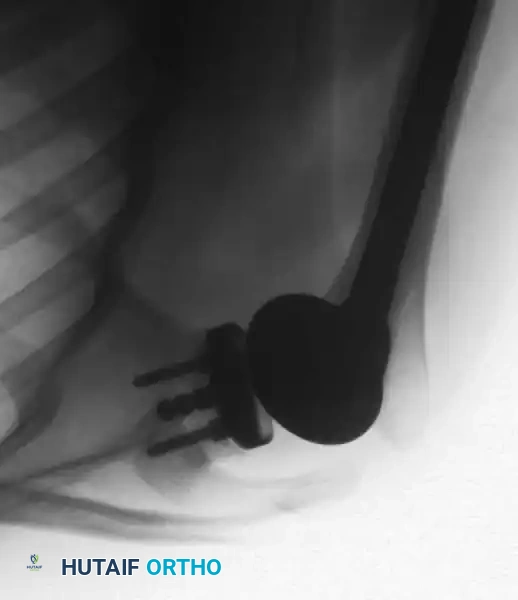
Reverse Total Shoulder Arthroplasty (rTSA)
The rTSA fundamentally alters shoulder biomechanics. By medializing and distalizing the center of rotation, it increases the deltoid moment arm and recruits more anterior and posterior deltoid fibers for elevation, bypassing the need for a functional rotator cuff.
Surgical Nuances for rTSA:
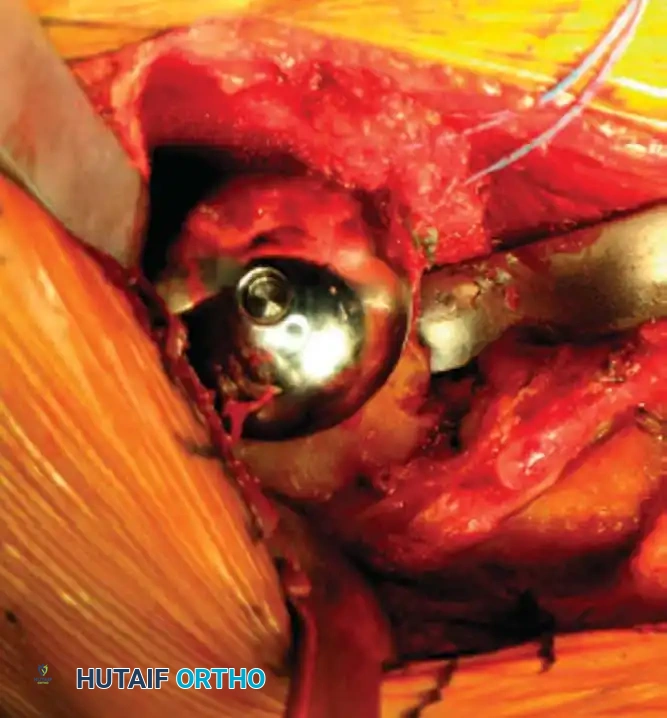
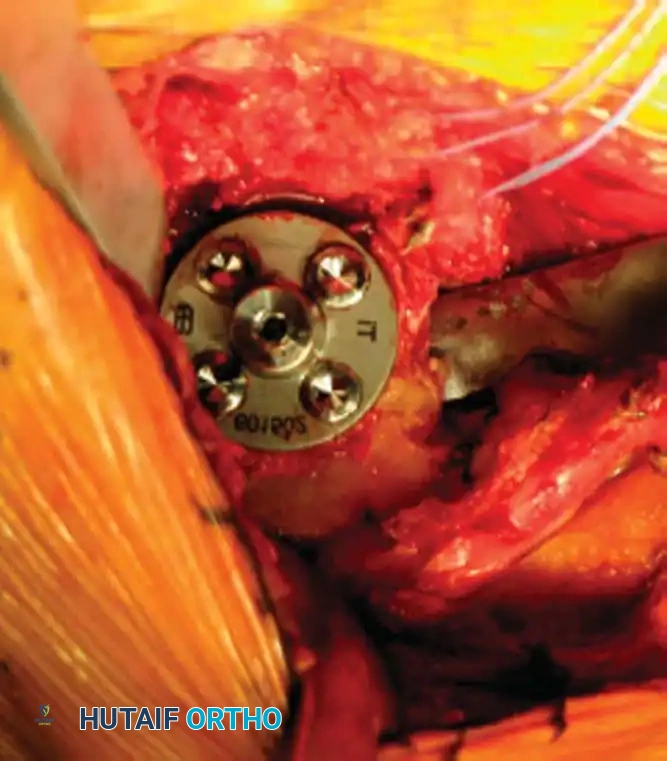
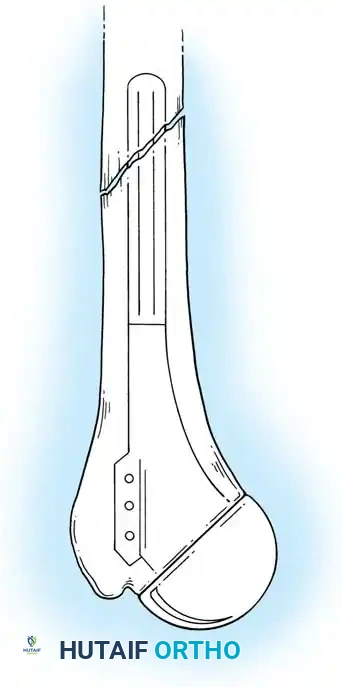
* Glenoid Baseplate: Must be positioned inferiorly on the glenoid to avoid scapular notching. A slight inferior tilt (10 degrees) is often utilized.
* Glenosphere: Typically 36 mm or 42 mm. Larger spheres increase stability and range of motion but may increase the risk of notching.
* Humeral Stem: Often placed in 0 to 20 degrees of retroversion.
Clinical Pearl: Tensioning is the most critical step in rTSA. The joint should be stable in all planes. If the joint dislocates easily, a thicker polyethylene insert or a larger glenosphere is required. However, over-tensioning can lead to acromial stress fractures or brachial plexopathy.
Elbow Arthroplasty
Anatomy and Biomechanics of the Elbow
The elbow is a highly constrained, complex hinge joint comprising the ulnohumeral, radiohumeral, and proximal radioulnar articulations. The distal humerus projects anteriorly at an angle of 30 degrees relative to the shaft, and the trochlea is externally rotated 3 to 8 degrees. The normal carrying angle is 10 to 15 degrees of valgus.

Types of Elbow Arthroplasty
- Linked (Semiconstrained): The humeral and ulnar components are physically connected via a locking pin. This is the workhorse for most Total Elbow Arthroplasties (TEA), especially in cases of ligamentous insufficiency or severe bone loss.
- Unlinked: Relies entirely on the patient's native collateral ligaments and soft tissue envelope for stability. Rarely used today due to high rates of instability.
Indications for Total Elbow Arthroplasty
- Advanced Rheumatoid Arthritis (historically the most common indication).
- Post-traumatic osteoarthritis.
- Acute, comminuted distal humerus fractures in elderly patients (osteoporotic bone where ORIF is likely to fail).
- Nonunions of the distal humerus.
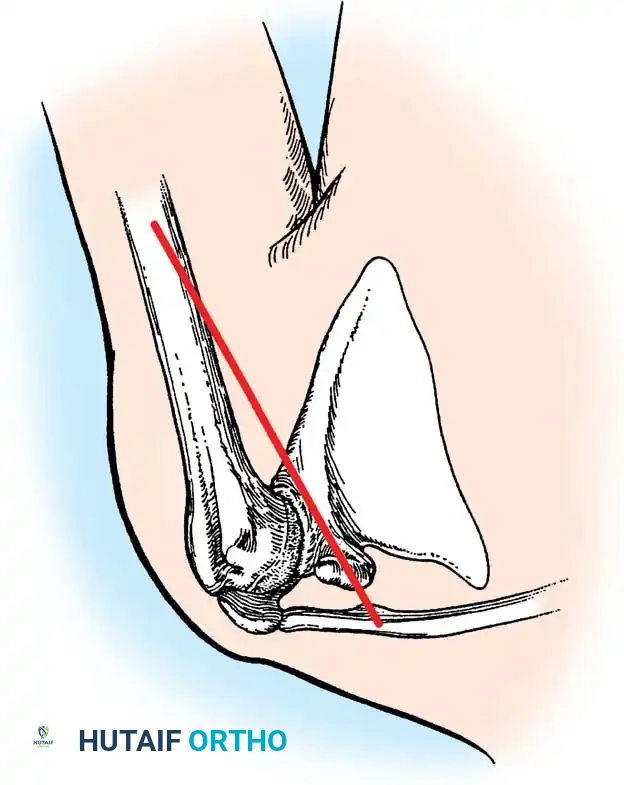
Surgical Technique: Total Elbow Arthroplasty
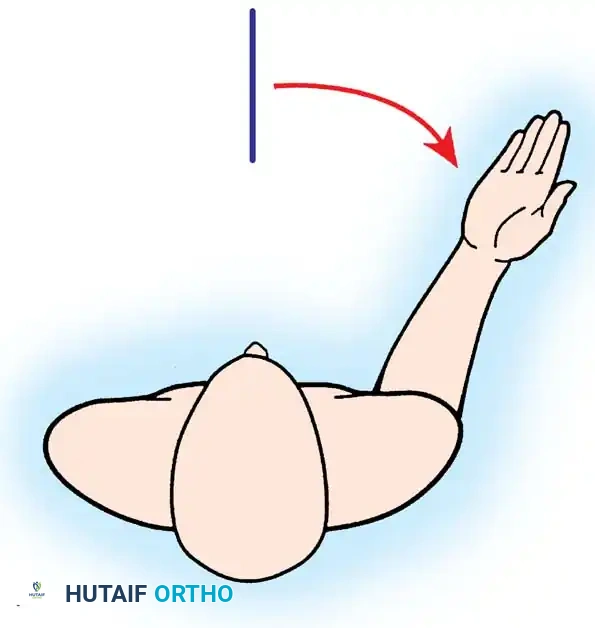
1. Positioning and Approach
The patient is placed in the lateral decubitus position with the arm draped over a bolster. A universal posterior approach is utilized.
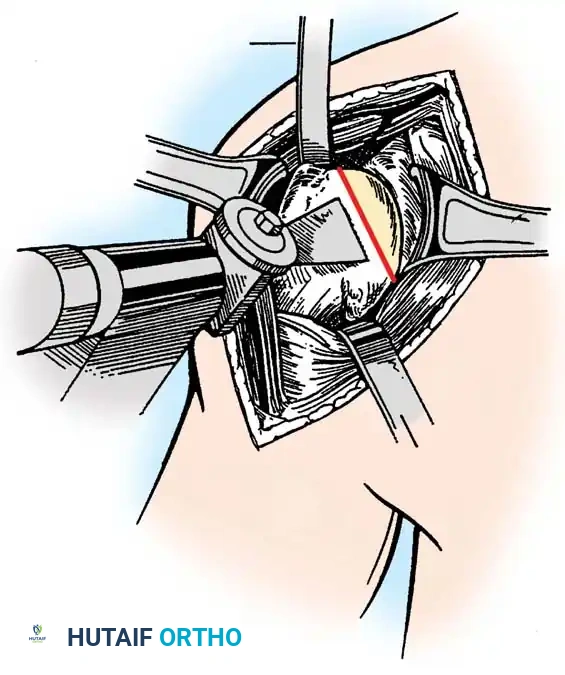
- Ulnar Nerve Management: The ulnar nerve must be identified, mobilized, and protected throughout the procedure. Routine anterior transposition is performed at the conclusion of the case.
- Triceps Management: Several options exist, including a triceps-reflecting approach (Bryan-Morrey), a triceps-splitting approach, or a triceps-sparing approach. The Bryan-Morrey approach involves reflecting the triceps from medial to lateral in continuity with the anconeus and forearm fascia.
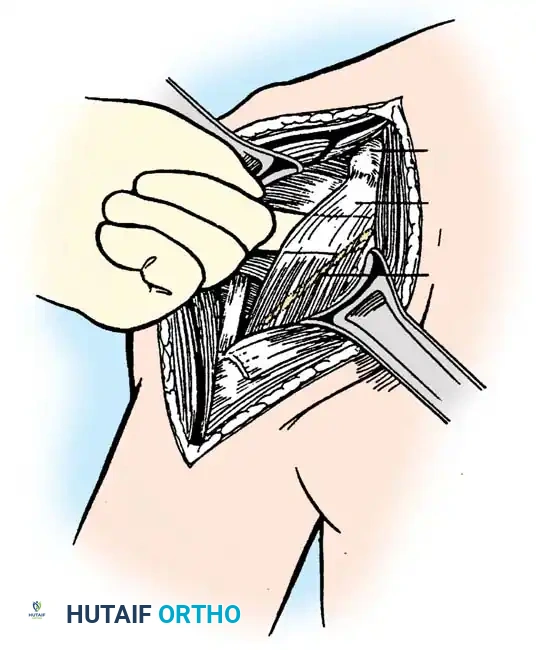
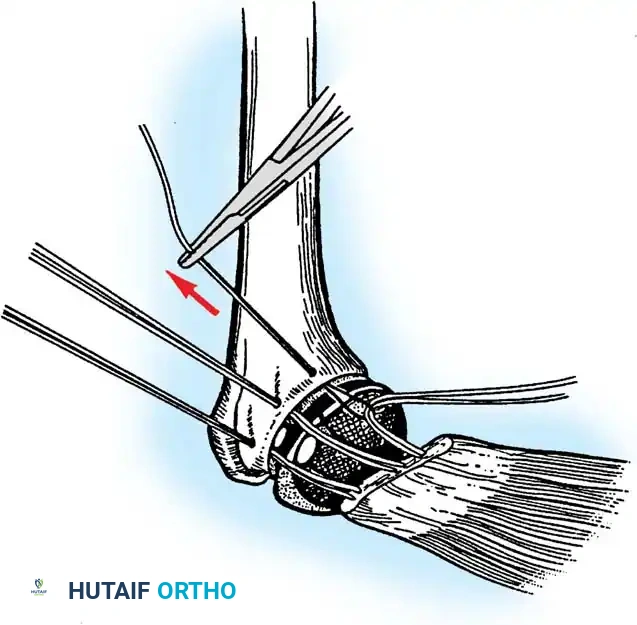
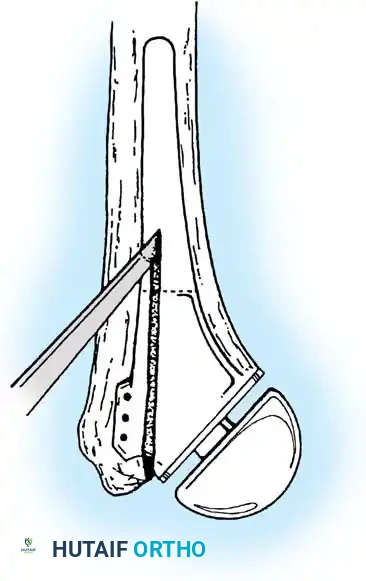
2. Joint Preparation
The tip of the olecranon is excised to facilitate access to the medullary canal. The distal humerus is prepared by resecting the trochlea and capitellum, preserving the epicondyles if possible to maintain collateral ligament attachments (though less critical in linked designs).
3. Canal Preparation and Implantation
The humeral and ulnar canals are sequentially broached.
- A cement restrictor is placed in both canals.
- Antibiotic-loaded polymethylmethacrylate (PMMA) bone cement is injected in a retrograde fashion.
- The components are inserted, and the articulation is linked using the manufacturer-specific locking pin mechanism.
Surgical Warning: The ulnar component must be inserted with precise rotational alignment. Malrotation will lead to eccentric wear of the polyethylene bushings and early catastrophic failure of the linkage mechanism.
4. Closure
The triceps mechanism is meticulously repaired using heavy non-absorbable sutures through drill holes in the proximal ulna. The ulnar nerve is secured in a subcutaneous anterior transposed position, ensuring no fascial bands compress it.
Complications in Upper Extremity Arthroplasty
Shoulder Arthroplasty Complications
- Instability: Anterior instability is most commonly due to subscapularis failure. Superior instability occurs in anatomical TSA if the rotator cuff fails postoperatively (the "rocking horse" phenomenon), leading to eccentric superior glenoid wear and loosening.
- Glenoid Loosening: The most common cause of late failure in anatomical TSA.
- Infection: Cutibacterium acnes (formerly Propionibacterium acnes) is an indolent, slow-growing anaerobic gram-positive bacillus native to the axillary flora. It is the leading cause of periprosthetic joint infection in the shoulder. Diagnosis requires holding cultures for up to 14 days.
- Scapular Notching (rTSA): Mechanical impingement of the humeral component against the inferior scapular neck during adduction. Minimized by inferior placement and tilt of the glenosphere.
Elbow Arthroplasty Complications
- Aseptic Loosening: The most frequent long-term complication due to the high lever-arm forces across the constrained hinge.
- Ulnar Neuropathy: Occurs in up to 10% of cases despite meticulous handling.
- Triceps Avulsion: A devastating complication resulting in loss of active extension. Requires complex revision with Achilles tendon allograft reconstruction.
- Periprosthetic Fracture: Particularly common at the tip of the humeral or ulnar stems due to stress shielding and osteoporotic bone.
Postoperative Rehabilitation Protocols
Shoulder Arthroplasty Rehabilitation
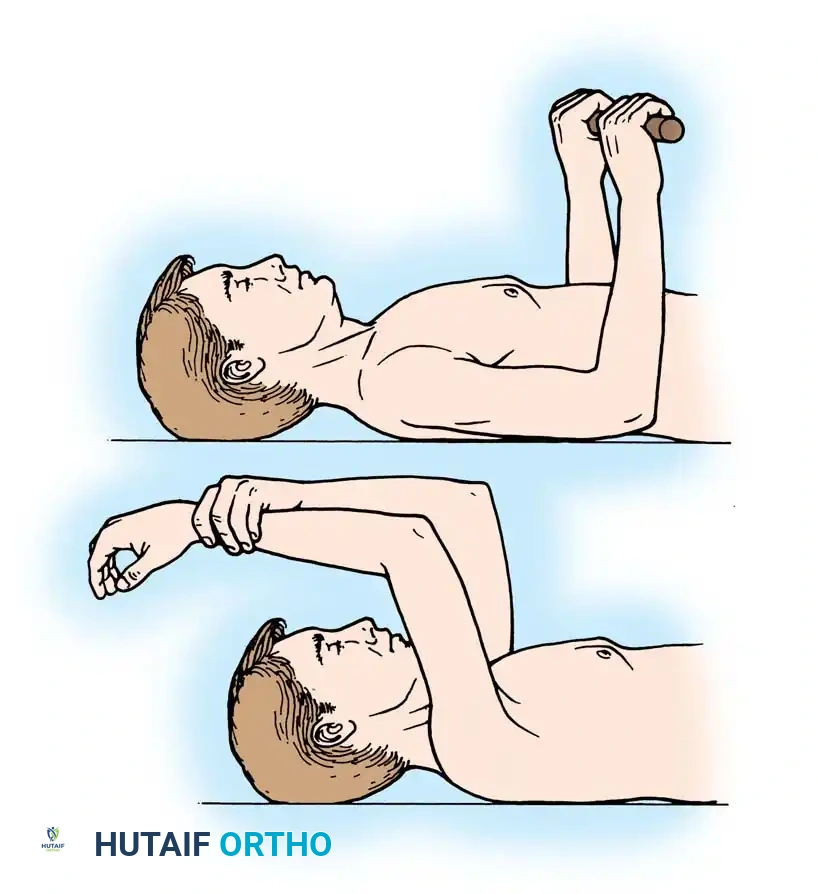
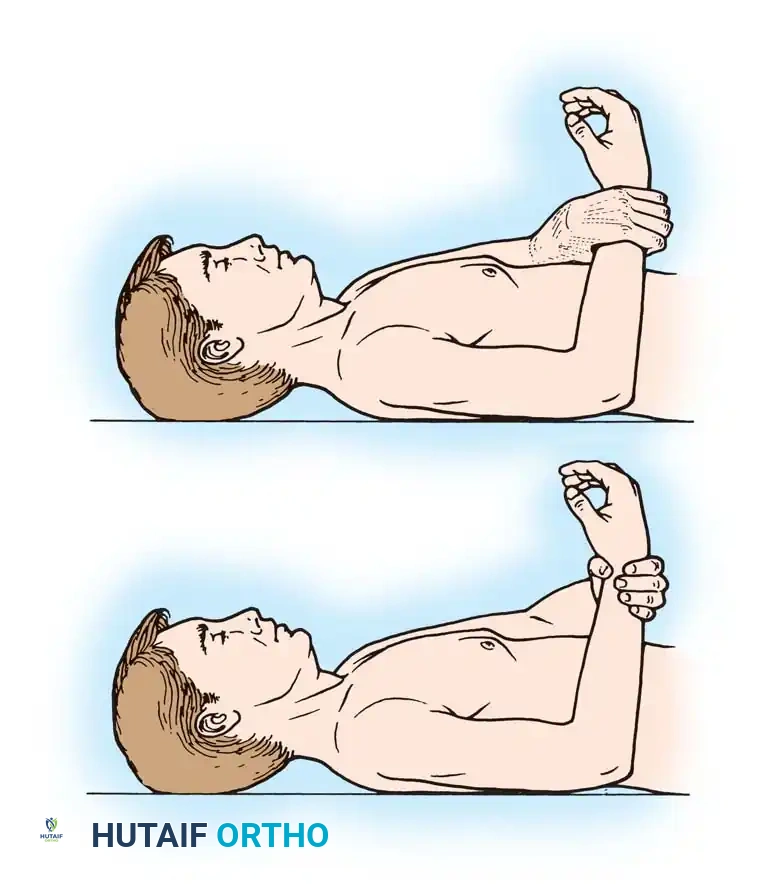
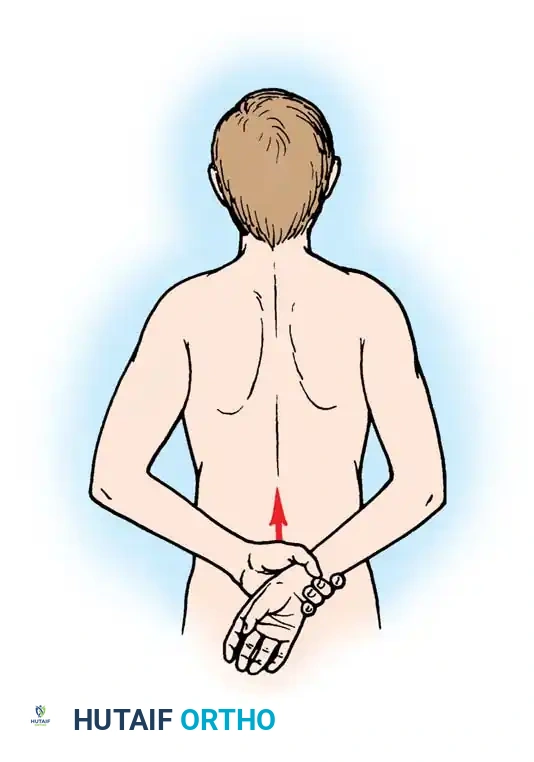
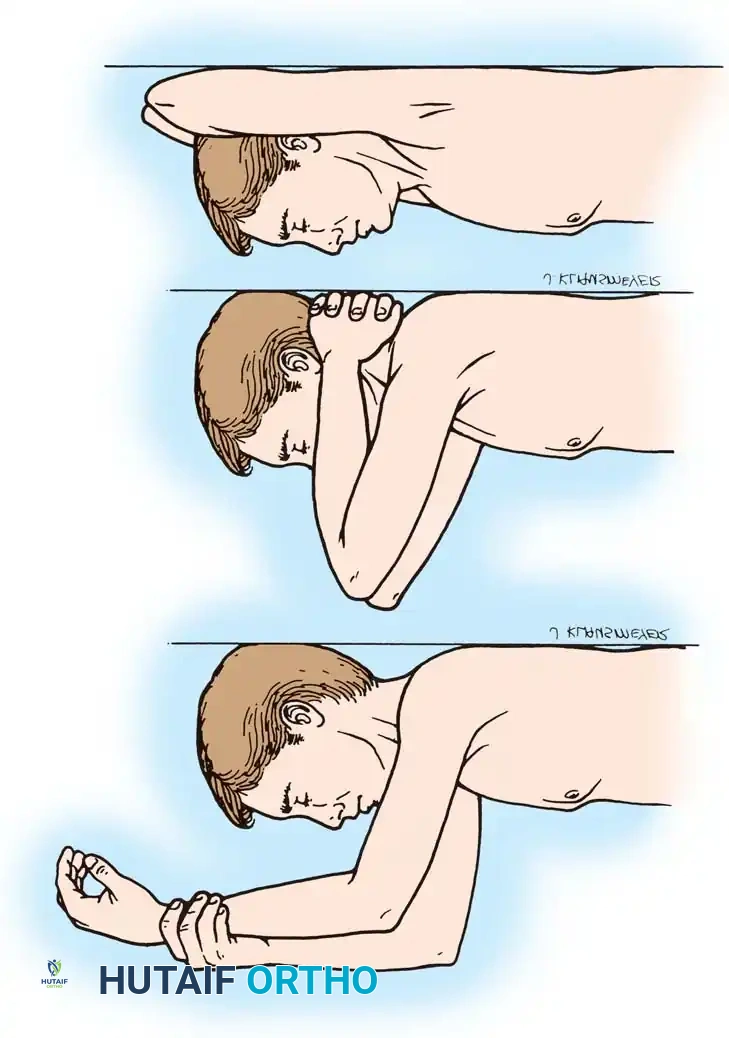
- Phase I (0-4 weeks): Sling immobilization. Passive range of motion (PROM) only. Strict avoidance of active internal rotation and passive external rotation beyond 30 degrees to protect the subscapularis repair.
- Phase II (4-8 weeks): Discontinue sling. Begin active-assisted range of motion (AAROM). Initiate isometric deltoid exercises.
- Phase III (8-12 weeks): Progress to active range of motion (AROM) and light resistance training.
- Phase IV (3+ months): Advanced strengthening. Return to light recreational activities (e.g., golf, swimming) is typically permitted at 4 to 6 months. Weight-lifting restrictions (usually < 25 lbs) are permanent to prevent glenoid loosening.
Elbow Arthroplasty Rehabilitation
- Days 1-3: The arm is immobilized in extension in a bulky Jones dressing to minimize swelling and protect the wound.
- Weeks 1-6: The dressing is removed, and a hinged elbow brace is applied. Active and active-assisted ROM is initiated. Triceps strengthening is strictly avoided for 6 weeks to protect the extensor mechanism repair.
- Long-term: Patients are placed on a permanent lifting restriction of 5 to 10 pounds for repetitive activities and a maximum of 15 pounds for a single lift to prevent aseptic loosening of the implants.
Conclusion
Arthroplasty of the shoulder and elbow requires a profound understanding of complex joint kinematics, meticulous soft-tissue handling, and precise osseous preparation. While the evolution of implant design—from Péan's early platinum spacer to Neer's anatomical designs and Grammont's reverse biomechanics—has drastically improved survivorship, the surgeon's adherence to strict biomechanical principles remains the ultimate determinant of clinical success. Mastery of these techniques ensures durable pain relief and functional restoration for patients suffering from debilitating upper extremity arthropathies.
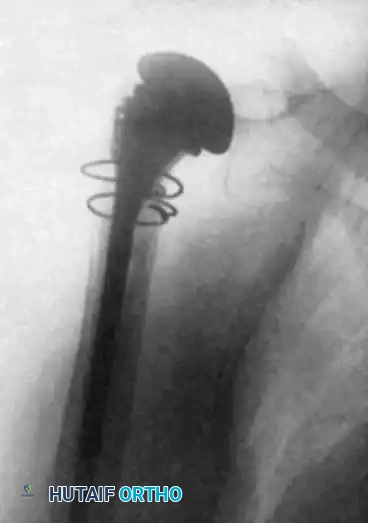
Associated Surgical & Radiographic Imaging