Surgical Approach to the Brachial Plexus: Techniques & Outcomes

Key Takeaway
The surgical approach to the brachial plexus requires meticulous dissection through the supraclavicular and infraclavicular regions. This comprehensive exposure facilitates the management of severe traction injuries, root avulsions, and sharp lacerations. Key steps include identifying the phrenic nerve, mobilizing the scalenus anterior, and executing precise nerve transfers or interfascicular grafting. Mastery of this complex regional anatomy is essential for optimizing functional recovery in devastating upper extremity nerve injuries.
INTRODUCTION TO BRACHIAL PLEXUS SURGERY
The surgical management of brachial plexus injuries represents one of the most formidable challenges in peripheral nerve reconstruction. Typically resulting from high-energy trauma—such as motorcycle collisions causing forced lateral cervical flexion combined with shoulder depression—these injuries range from neuropraxia to complete nerve root avulsions.
A mastery of the extensile approach to the brachial plexus is mandatory for the reconstructive orthopedic surgeon. This approach must provide unhindered access to the supraclavicular roots and trunks, the retroclavicular divisions, and the infraclavicular cords and terminal branches. The primary goals of surgical intervention include accurate diagnosis of the lesion type (rupture versus avulsion), excision of non-conductive neuromas, and restoration of neural continuity via direct neurorrhaphy, interfascicular nerve grafting, or targeted neurotization (nerve transfers).
Clinical Pearl: Sharp lacerations of the brachial plexus should be explored and repaired primarily. Conversely, closed traction injuries are typically observed for 3 to 6 months to allow for spontaneous recovery or the demarcation of neuromas in continuity before surgical exploration is undertaken.
PREOPERATIVE PLANNING AND PATIENT POSITIONING
Meticulous preoperative planning, including advanced neuroimaging (MRI neurography, CT myelography) and electrodiagnostic studies (EMG/NCS), is essential to localize the injury level and determine the availability of donor nerves.
Positioning and Preparation
- Patient Orientation: Position the patient supine on the operating table.
- Thoracic Elevation: Place a sandbag or a rolled towel longitudinally under the posterior chest and interscapular region. This allows the shoulder to fall posteriorly, opening the anterior neck and deltopectoral interval.
- Head Positioning: Turn the patient’s head to the contralateral side to place the anterolateral neck structures under gentle tension.
- Draping: Prepare and drape the neck, hemithorax, and the entire upper extremity free to allow for intraoperative manipulation and assessment of motor responses.
- Donor Site Preparation: Crucially, prepare and drape both lower extremities. This provides immediate access for the harvest of the sural nerves, which serve as the gold standard autografts for bridging extensive neural defects.
SURGICAL ANATOMY AND THE EXTENSILE APPROACH
The extensile approach to the brachial plexus is a continuous exposure that can be tailored to the specific zone of injury. It bridges the cervical region and the axilla, requiring navigation through complex fascial planes and critical neurovascular structures.
The Incision
The incision is designed to cross flexion creases obliquely to prevent postoperative scar contracture.
FIGURE 62-20 Incision for approach to brachial plexus.
- Cervical Limb: Begin the incision along the posterior border of the sternocleidomastoid (SCM) muscle, approximately 5 cm superior to the clavicle.
- Clavicular Limb: Extend the incision inferiorly to meet the clavicle, then carry it laterally along the superior border of the clavicle until reaching the superior aspect of the deltopectoral groove.
- Infraclavicular Limb: Continue distally along the deltopectoral interval.
- Axillary Extension: As the incision crosses the anterior axillary fold, transition into a zigzag fashion (Z-plasty principles) to enter the axilla. Curve it posteriorly along the natural skin folds, then distally along the medial aspect of the arm, parallel to the neurovascular bundle.
Supraclavicular Dissection: Exposing the Roots and Trunks
The supraclavicular dissection exposes the C5, C6, C7, C8, and T1 nerve roots, along with the upper, middle, and lower trunks.
- Superficial Dissection: Deepen the cervical incision through the subcutaneous tissue and the platysma muscle.
- Vascular Control: Identify, ligate, and divide the external jugular vein.
- Omohyoid Mobilization: Identify the omohyoid muscle traversing the operative field. Retract it or divide its central tendon to expose the deep cervical fascia.
- Sternocleidomastoid Retraction: Retract the clavicular head of the SCM medially. If extensive medial exposure is required, the clavicular head may be divided, leaving a fascial cuff for later repair.
- Scalenus Anterior and Phrenic Nerve: Clear the areolar tissue to expose the scalenus anterior muscle. The transverse cervical artery typically crosses the scalenus anterior superficial to the phrenic nerve; it usually requires division and ligation.
- Protecting the Phrenic Nerve: The phrenic nerve courses from lateral to medial across the anterior surface of the scalenus anterior. Identify it meticulously, mobilize it, and retract it medially.
- Visualizing the Plexus: The rami (roots) of the brachial plexus will now be visible emerging from deep to the lateral border of the scalenus anterior, coursing between the anterior and middle scalene muscles.
- Scalenotomy (Optional): If a more proximal view of the roots is required (especially for C8 and T1), the scalenus anterior can be divided transversely. Ensure the subclavian artery (inferior) and the plexus rami (superior) are protected during this maneuver.
Surgical Warning: The subclavian vein is rarely encountered in the supraclavicular dissection as it lies several centimeters inferior and anterior to the scalene triangle, separated from the artery by the scalenus anterior muscle.
Clavicular Osteotomy and Infraclavicular Exposure
To expose the divisions and cords lying retroclavicularly and infraclavicularly, the dissection must proceed distally.
- Deltopectoral Interval: Deepen the incision crossing the junction of the lateral and middle thirds of the clavicle. Identify the cephalic vein within the deltopectoral cleft and divide the fascia distally.
- Pectoralis Major: Sever the tendon of the pectoralis major approximately 1 cm proximal to its humeral insertion. Retract the muscle belly medially to expose the clavipectoral fascia.
- Clavipectoral Fascia and Pectoralis Minor: Incise the clavipectoral fascia longitudinally. Identify the pectoralis minor tendon, tag it with a heavy suture, divide it, and retract it medially.
- Clavicular Osteotomy: The clavicle is osteotomized only if absolutely necessary for exposure, and only after both supraclavicular and infraclavicular dissections are maximized.
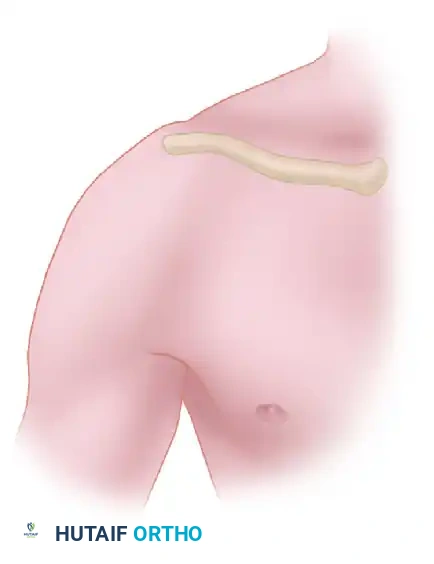
FIGURE 62-21 Exposure of brachial plexus with section of clavicle.
Orthopedic Pearl: The Pre-Plating Technique. Before performing the osteotomy with a Gigli saw, contour a dynamic compression plate (or pre-contoured locking plate) to the superior surface of the clavicle. Drill the screw holes and remove the plate. This "pre-drilling" ensures perfect anatomical reduction and rapid, rigid osteosynthesis at the conclusion of a lengthy nerve reconstruction.
- Subclavius and Cephalic Vein: Sever the subclavius muscle. The cephalic vein may need to be ligated and divided as it dives to join the axillary vein.
Axillary Dissection: The Cords and Terminal Branches
- Fascial Incision: Incise the deep fascia of the arm and the sheath encasing the neurovascular bundle longitudinally.
- Medial Antebrachial Cutaneous Nerve: Proceeding distally, the first nerve encountered crossing the large axillary vein is usually the medial antebrachial cutaneous nerve. Do not mistake this for the ulnar nerve.
- Ulnar Nerve: Mobilize and retract the axillary vein laterally to expose the ulnar nerve.
- Median Nerve and Axillary Artery: Retract the axillary vein medially to expose the axillary artery. Retracting the artery medially reveals the median nerve on the lateral aspect of the bundle.
- Radial Nerve: Retract the axillary artery, axillary vein, and ulnar nerve laterally to identify the radial nerve, which lies posterior to all other structures in the neurovascular bundle.
- Cord Relationships: Proximal to the formation of the median nerve, the axillary artery separates the medial and lateral cords and lies directly anterior to the posterior cord.
- Musculocutaneous and Axillary Nerves: The musculocutaneous nerve emerges from the lateral cord (its origin can be variable, sometimes presenting as multiple branches). The axillary nerve emerges from the posterior cord, slightly proximal to the musculocutaneous origin, and winds posteriorly through the quadrangular space.
STRATEGIES FOR NERVE RECONSTRUCTION
The reconstructive strategy depends entirely on the intraoperative findings, specifically the presence of root avulsions (preganglionic lesions) versus ruptures (postganglionic lesions).
Neurolysis and Neurorrhaphy
- Neurolysis: Indicated for periplexus scarring where the neural elements are macroscopically intact and demonstrate conduction upon direct intraoperative electrical stimulation. While outcomes vary, it is highly beneficial for releasing external compression.
- Neurorrhaphy (Direct Repair): Best reserved for sharp lacerations. Lesions of the C5/C6 roots, upper trunk, and lateral cord (proximal to the musculocutaneous nerve) respond reasonably well to direct end-to-end repair. Conversely, direct repair of C8/T1 roots rarely results in the return of intrinsic hand function in adults, though it may be attempted in young children or very early injuries.
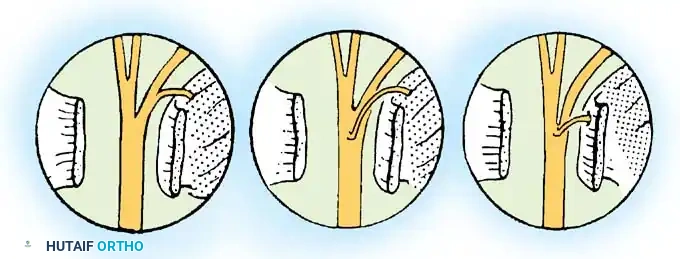
Interfascicular Nerve Grafting
Extensive defects, particularly in the proximal elements (roots, trunks, divisions), cannot be closed primarily due to the tethering effect of branching nerves (suprascapular, anterior thoracic, subscapular, axillary).
* Technique: Interfascicular nerve grafting using the autogenous sural nerve (harvested from one or both legs) is the gold standard. This technique bridges the gap without tension, which is paramount for axonal regeneration.
* Prognosis: Grafting yields good to fair results (44% to 75%) for upper and middle trunk lesions. However, incomplete return of function remains common, particularly in lower plexus injuries.
Neurotization (Nerve Transfers)
When proximal nerve roots are avulsed from the spinal cord, no proximal stump is available for grafting. In these devastating scenarios, neurotization—transferring a redundant or less critical functional nerve to a denervated distal target—is required.
- Donor Nerves: Options include the spinal accessory nerve (CN XI), phrenic nerve, intercostal nerves, deep cervical motor branches, hypoglossal nerve (CN XII), and the contralateral C7 nerve root.
- Restoring Shoulder Function: Transfer of the spinal accessory nerve to the suprascapular nerve is highly effective. Songcharoen reported 80% motor recovery of M3 or greater (60° abduction, 45° flexion) in a massive cohort of 577 patients. Furthermore, Leechavengvongs demonstrated excellent results transferring motor fascicles of the triceps to the axillary nerve to restore deltoid function.
- Restoring Elbow Flexion (The Oberlin Transfer): Described by Oberlin in 1994, this involves transferring redundant motor fascicles from the ulnar nerve (specifically those innervating the flexor carpi ulnaris) directly to the motor branch of the biceps (musculocutaneous nerve).
- Double Fascicular Transfer: Mackinnon advanced this concept by utilizing ulnar motor fascicles for the biceps and median nerve motor fascicles (innervating the flexor carpi radialis) for the brachialis muscle. This double transfer provides robust, reliable elbow flexion (MRC grade 4 or higher) in C5-C6 avulsion injuries, with evidence of reinnervation occurring at a mean of 5.5 months.
- Triceps Restoration: Mackinnon also recommends transferring redundant radial nerve branches to the medial head of the triceps, as these branches offer sufficient length without requiring extensive intramuscular dissection.
Clinical Pearl: In root avulsion injuries, prioritizing functional restoration is critical. The hierarchy of reconstruction is: 1) Elbow flexion, 2) Shoulder stabilization/abduction, 3) Brachioradialis/wrist extension, and rarely, 4) Hand intrinsic function.
POSTOPERATIVE PROTOCOL AND REHABILITATION
The postoperative management following brachial plexus reconstruction is a multi-year commitment requiring rigorous patient compliance and specialized physical therapy.
- Immediate Postoperative Phase: If interfascicular grafting or tension-free nerve transfers are performed, the upper extremity is immobilized in a Velpeau bandage or a custom shoulder immobilizer.
- Wound Care: Closed suction drains placed during surgery are typically removed at 36 to 48 hours. Skin sutures are removed at 10 to 14 days.
- Immobilization Timeline: The Velpeau dressing is maintained for 3 to 4 weeks to protect the microvascular nerve repairs from traction.
- Early Rehabilitation (4-6 Weeks): Active pendulum exercises for the shoulder are initiated at 4 weeks. Gentle, progressive abduction exercises commence at 6 weeks.
- Long-Term Rehabilitation: Axonal regeneration occurs at a rate of approximately 1 mm per day (1 inch per month). Significant return of function may require 3 to 5 years. During this prolonged denervation period, aggressive physical therapy is mandatory to prevent irreversible joint contractures and maintain muscle suppleness.
- Adjunctive Therapies: The efficacy of electrical stimulation for denervated muscles remains controversial, but vocational rehabilitation and psychological support are universally recognized as critical components of holistic patient care.
CLINICAL OUTCOMES AND PROGNOSIS
The prognosis following brachial plexus surgery is multifactorial, heavily influenced by the patient's age, the mechanism and energy of the injury, the time to surgery, and the specific neural elements involved.
- Upper vs. Lower Plexus: Upper plexus injuries (C5, C6, upper trunk) consistently demonstrate superior outcomes following repair compared to lower plexus injuries (C8, T1, lower trunk).
- Infraclavicular vs. Supraclavicular: Infraclavicular plexus injuries generally carry a better prognosis (79% to 98% good or fair results) than supraclavicular traction injuries.
- Pain Management: Neuropathic pain, particularly following root avulsions, is notoriously difficult to treat. While surgical reconstruction can sometimes alleviate pain by restoring neural continuity, procedures such as the Dorsal Root Entry Zone (DREZ) lesioning (described by Nashold) may be required for refractory, debilitating pain syndromes.
Ultimately, the surgical approach to the brachial plexus is a demanding but highly rewarding endeavor. Through meticulous anatomical dissection, strategic nerve transfers, and dedicated postoperative rehabilitation, the orthopedic surgeon can restore meaningful upper extremity function to patients who have suffered catastrophic neurological trauma.
You Might Also Like