Shoulder and Elbow Injuries: Anatomical Foundations and Biomechanics
The diagnosis and operative management of shoulder and elbow pathology demand a rigorous understanding of pathoanatomy, advanced physical examination methodologies, and high-resolution radiographic imaging. Knowledge of the normal anatomy and biomechanics of the upper extremity provides the essential foundation for the evaluation and surgical treatment of these complex joint disorders.
Articular Anatomy and the Stability-Mobility Paradox
The shoulder joint complex is composed of four distinct articulations—the sternoclavicular, acromioclavicular, glenohumeral, and scapulothoracic joints—that function synergistically to allow smooth, coordinated upper extremity kinematics. Together, they afford the shoulder the greatest range of motion of any joint in the human body. Normal function relies on a delicate, dynamic balance between mobility and stability.
Mobility is facilitated by the “large ball–small socket” osseous architecture and the voluminous, redundant glenohumeral joint capsule, which remains lax until the extremes of motion are reached. The bony anatomy contributes minimally to intrinsic stability, often compared biomechanically to a "golf ball on a tee."
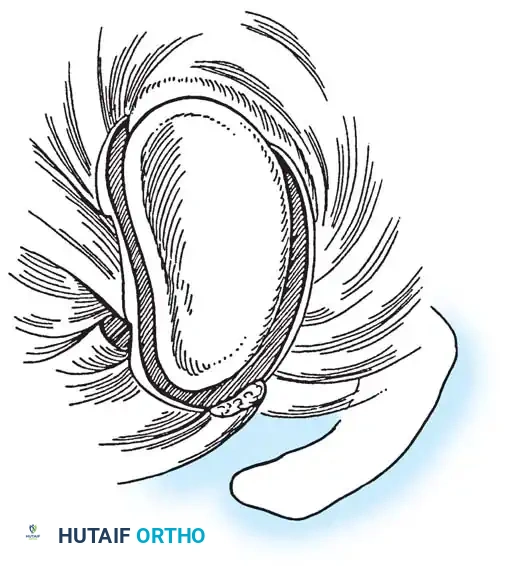
The glenoid is circumferentially augmented by the labrum, a dense fibrocartilaginous ring that increases the depth of the socket by 50% around the humeral head, significantly enhancing stability. The glenoid articular surface and the labrum combine to create a concavity that is approximately 9 mm deep in the superoinferior plane and 5 mm deep in the anteroposterior plane. Saha demonstrated that the addition of the glenoid labrum increases the effective glenoid articular surface to 75% of the humeral head vertically and 57% horizontally. Furthermore, biomechanical testing by Karzel et al. on cadaveric specimens revealed that the labrum critically dictates the distribution of contact stresses when a compressive load is applied at 90 degrees of abduction.
Ligamentous Constraints
Because osseous constraint is minimal, stability is primarily conferred by the surrounding capsuloligamentous structures and dynamic musculature. The ligamentous constraints act as the primary stabilizers at the extremes of motion:
* Superior Glenohumeral Ligament (SGHL): The primary restraint to inferior humeral subluxation at 0 degrees of abduction. According to O’Brien et al., it is also the primary stabilizer against anterior and posterior stress at 0 degrees.
* Middle Glenohumeral Ligament (MGHL): Limits external rotation when the arm is in the lower and middle ranges of abduction but provides negligible restraint at 90 degrees of abduction.
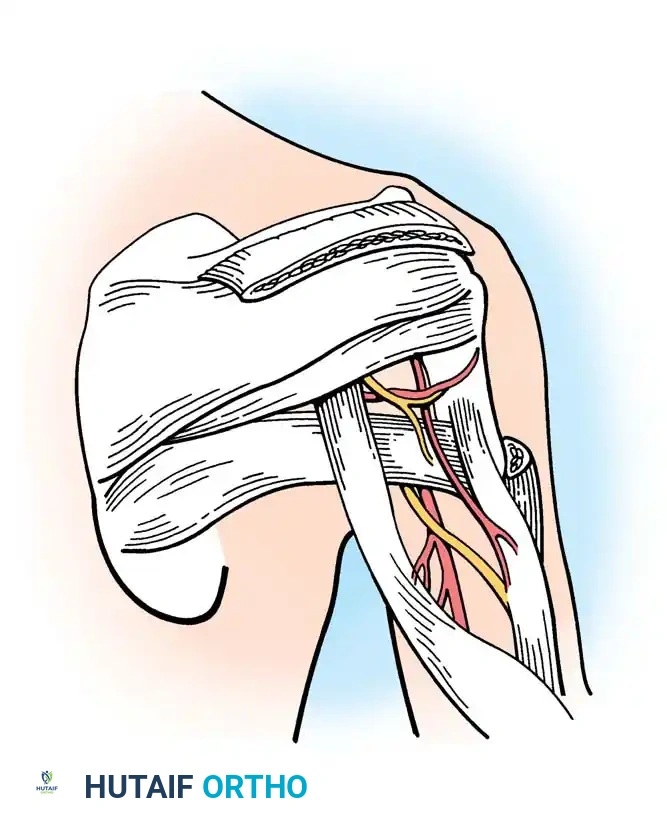
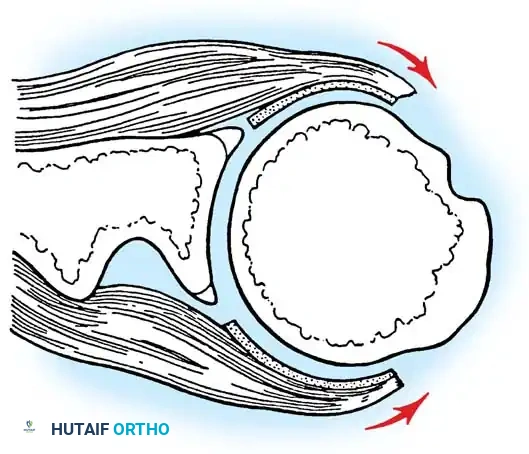
* Inferior Glenohumeral Ligament (IGHL) Complex: O’Brien et al. described this as a "hammock-type" structure composed of a thick anterior band, a distinct posterior band, and a thinner intervening axillary pouch. During external rotation, the hammock slides anteriorly and superiorly, tightening the anterior band while the posterior band fans out. The IGHL is the primary stabilizer against anterior and posterior translation when the shoulder is abducted to 45 degrees or more.

Dynamic Muscular Stabilizers and Force Couples
The musculature of the shoulder is divided into intrinsic and extrinsic groups. Extrinsic muscles (rhomboids, levator scapulae, trapezius, serratus anterior) primarily control scapular kinematics. Intrinsic muscles (rotator cuff, deltoid, pectoralis major, teres major, latissimus dorsi, biceps brachii) control the glenohumeral joint.
These muscular constraints provide stability through three primary mechanisms:
1. Dynamic Scapular Positioning: They position the scapula to maintain the glenoid directly opposite the humeral head during motion. Rowe likened this to a “ball on a seal’s nose”—as the humerus moves, the scapula adjusts to maintain equilibrium.
2. Capsular Tensioning: Concomitant muscle contraction increases the stiffness and torsional rigidity of the ligaments. Rotator cuff and biceps activation actively stiffen the capsule, decreasing glenohumeral translation.
3. Force Couples: As described by Inman, Saunders, and Abbott, intrinsic and extrinsic muscles act as "force couples," directing compressive joint reaction forces concentrically into the glenoid to maintain dynamic stability.
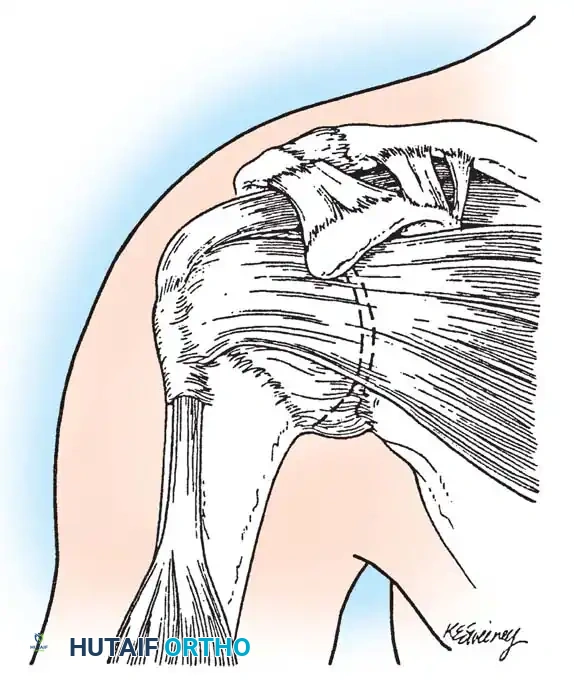
Histological Anatomy of the Rotator Cuff
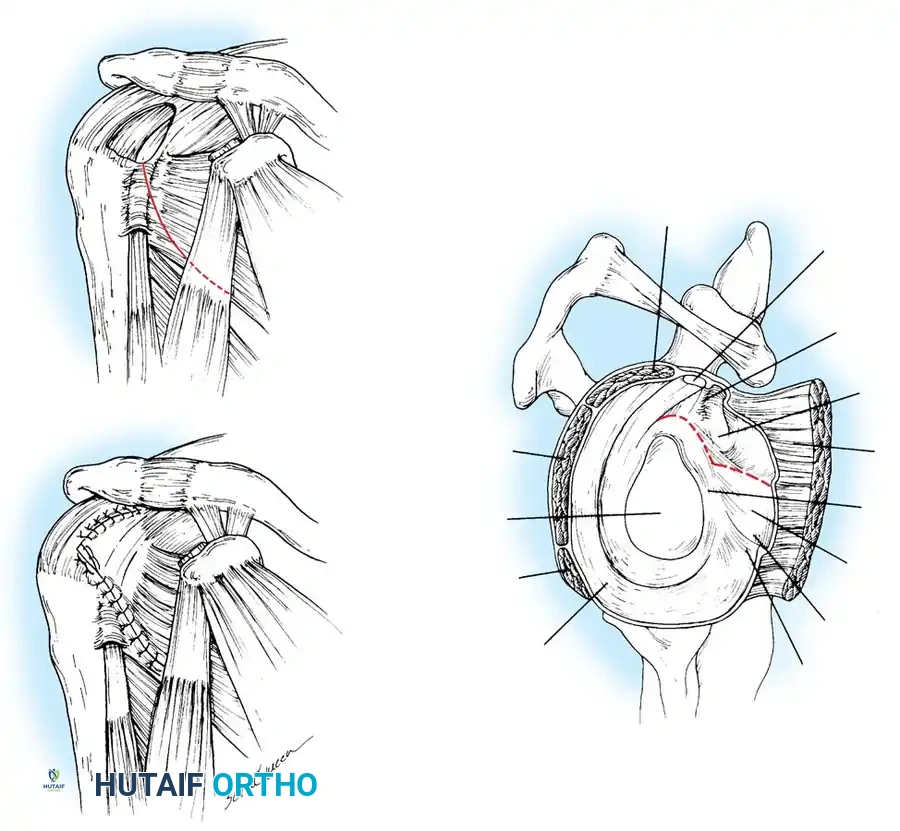
Clark and Harryman detailed the gross and histological anatomy of the rotator cuff, identifying a confluent sheet of tendinous insertions, articular capsule, and ligaments. The supraspinatus and infraspinatus tendons fuse 15 mm proximal to their insertion.
Histologically, the supraspinatus and infraspinatus tendons consist of five distinct layers:
* Layer 1 (1 mm thick): Superficial layer containing large arterioles and fibers from the coracohumeral ligament, oriented obliquely.
* Layer 2 (3–5 mm thick): The direct tendinous insertion into the tuberosities, composed of densely packed, parallel collagen bundles.
* Layer 3 (3 mm thick): Smaller collagen bundles forming an interdigitating meshwork at 45-degree angles, contributing to the fusion of the cuff insertion.
* Layer 4: Loose connective tissue and thick collagen bands merging with the coracohumeral ligament.
* Layer 5 (2 mm thick): The true shoulder capsule, an interwoven collagen sheet extending from the labrum to the humerus.
The Rotator Cuff Footprint
The insertion site at the greater tuberosity is termed the "footprint." Dugas et al. mapped this footprint, noting mean medial-to-lateral insertion widths of 12.7 mm (supraspinatus), 13.4 mm (infraspinatus), 11.4 mm (teres minor), and 17.9 mm (subscapularis). The articular surface-to-tendon insertion distance is less than 1 mm along the anterior 2.1 cm of the supraspinatus-infraspinatus insertion, making this zone highly susceptible to articular-sided partial tears.
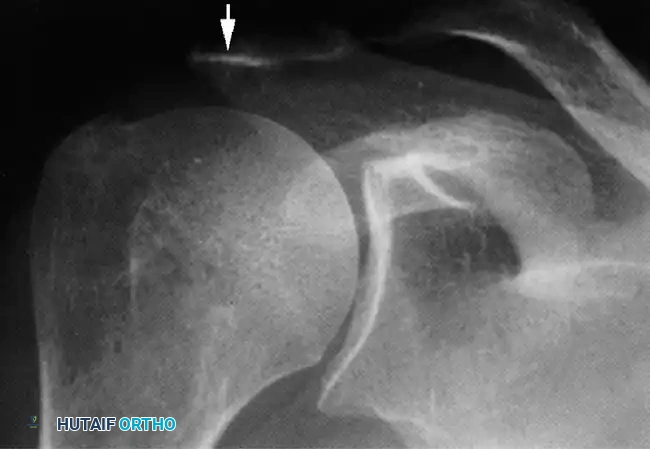
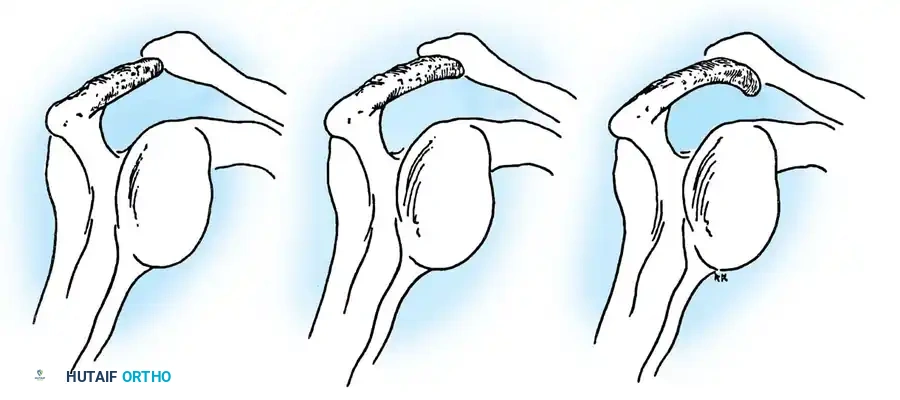
Clinical Pearl: The coracoacromial arch (coracoid, anterior acromion, coracoacromial ligament, and distal clavicle) forms the rigid roof over the subacromial space. Any morphological variant (e.g., Type III hooked acromion) or acquired osteophytosis here critically narrows the space, precipitating mechanical impingement of the underlying bursa and rotator cuff.
Clinical Presentation and Physical Examination
Evaluating the painful shoulder is notoriously challenging due to overlapping clinical presentations among impingement syndromes, rotator cuff tears, calcific tendinitis, adhesive capsulitis, and nerve entrapments. Pain is typically exacerbated by overhead activities, is worse with active rather than passive motion, and frequently causes nocturnal awakening.
Because palpation is often non-specific, a battery of provocative tests is required to isolate the pathology.
Provocative Testing for Impingement and Cuff Pathology
Neer Impingement Sign and Test:
With the patient seated, the examiner stabilizes the scapula to prevent rotation and passively elevates the patient's internally rotated arm in the scapular plane. This maneuver forcibly jams the greater tuberosity against the anteroinferior acromion. Pain indicates a positive sign. The Neer Test involves injecting 10 mL of 1% lidocaine into the subacromial space; if the pain is abolished upon repeating the maneuver, the diagnosis of subacromial impingement is confirmed.
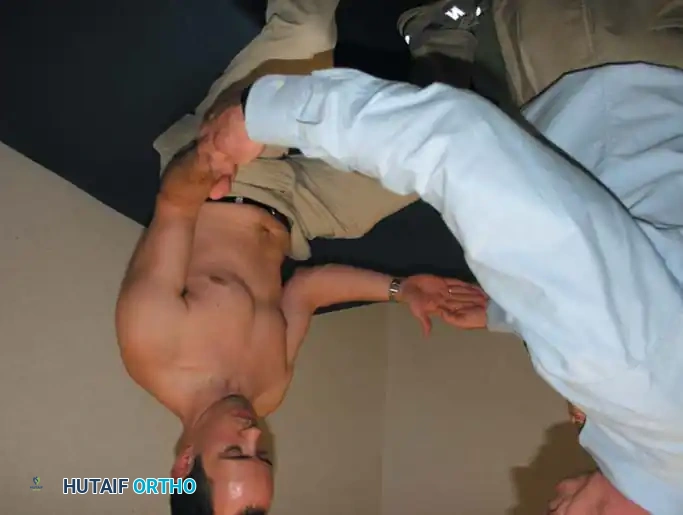
Hawkins-Kennedy Test:
The patient's arm is forward flexed to 90 degrees, and the elbow is flexed to 90 degrees. The examiner forcibly internally rotates the shoulder. This drives the supraspinatus tendon against the coracoacromial ligament and coracoid process.
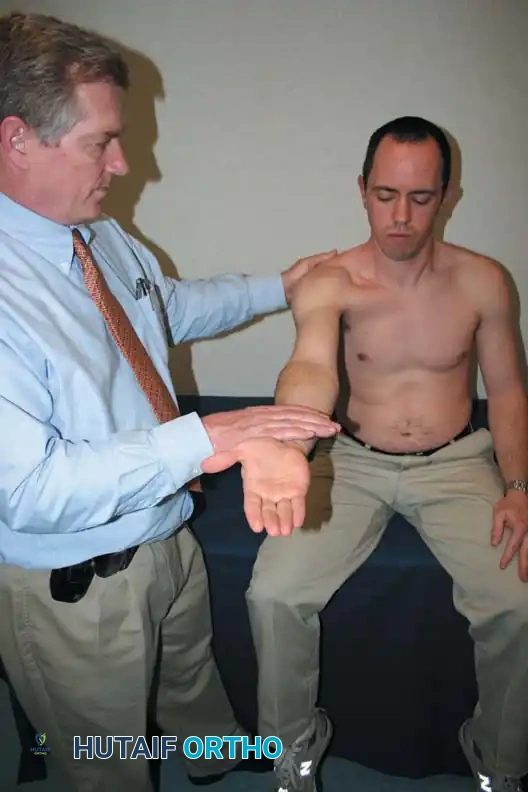
Jobe (Empty Can) Test:
The arm is elevated to 90 degrees in the scapular plane and fully internally rotated (thumb pointing down). The patient resists downward pressure applied by the examiner. Weakness or pain indicates supraspinatus pathology.
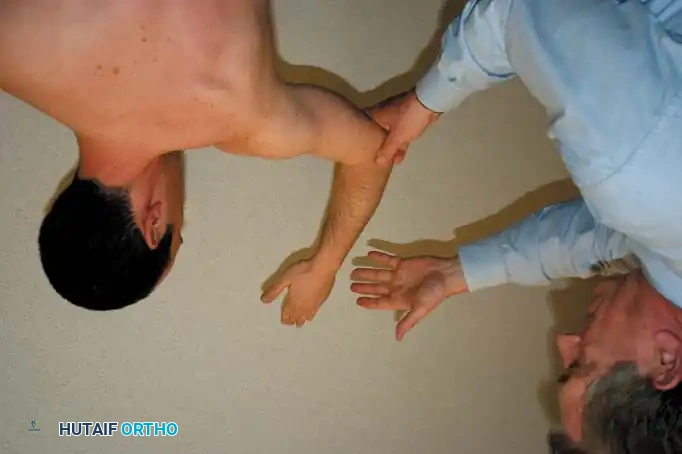
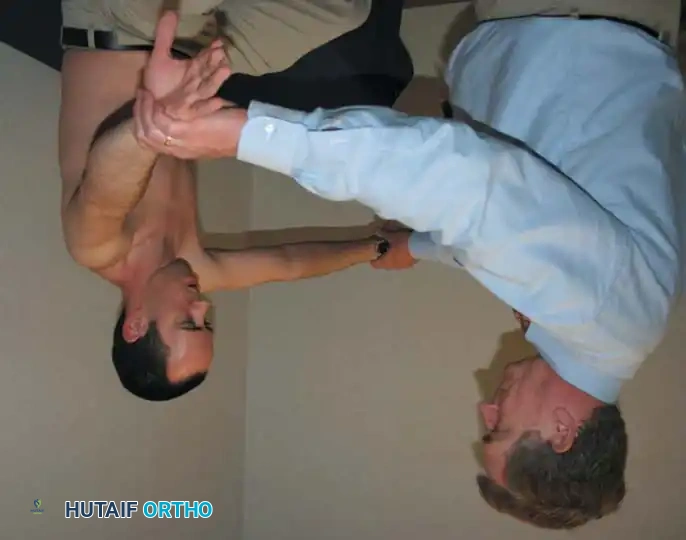
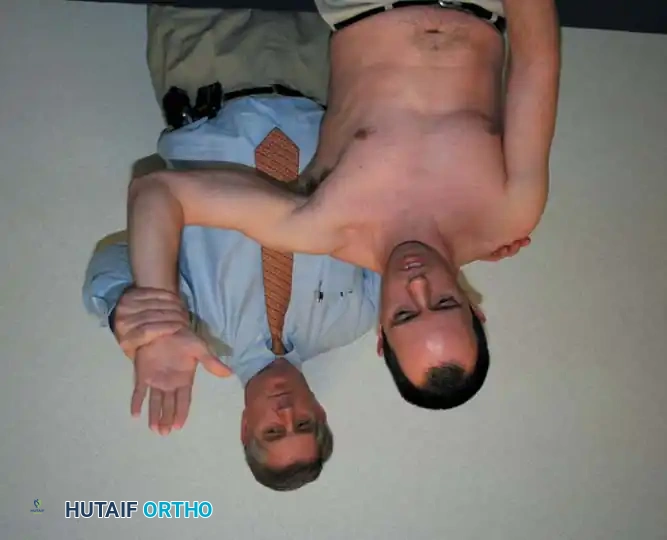
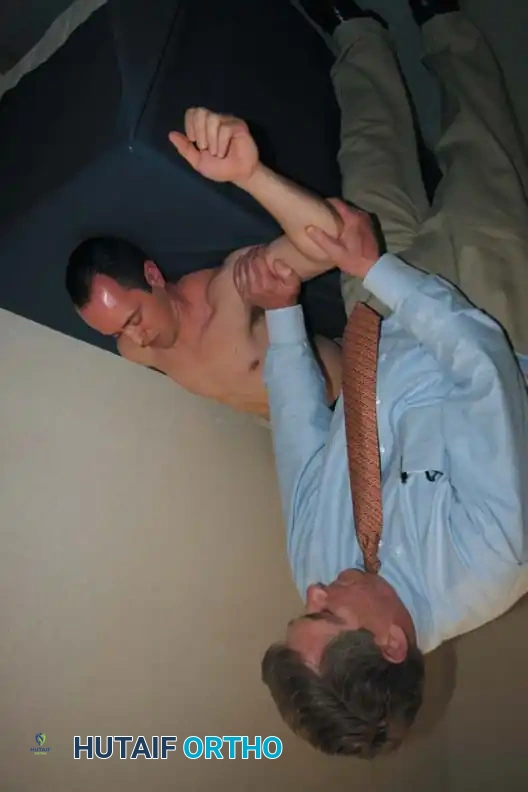
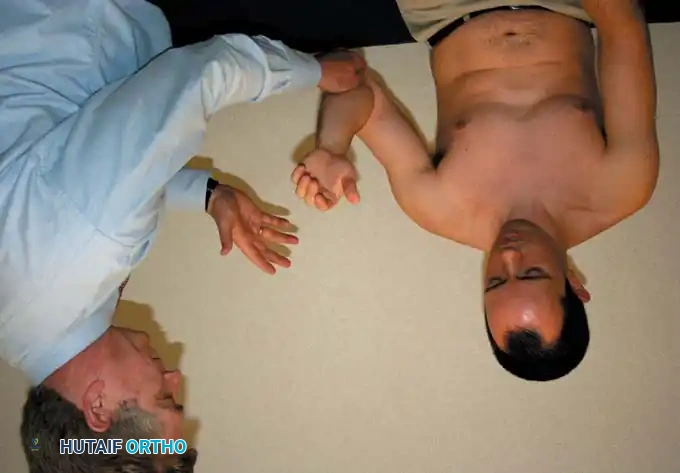
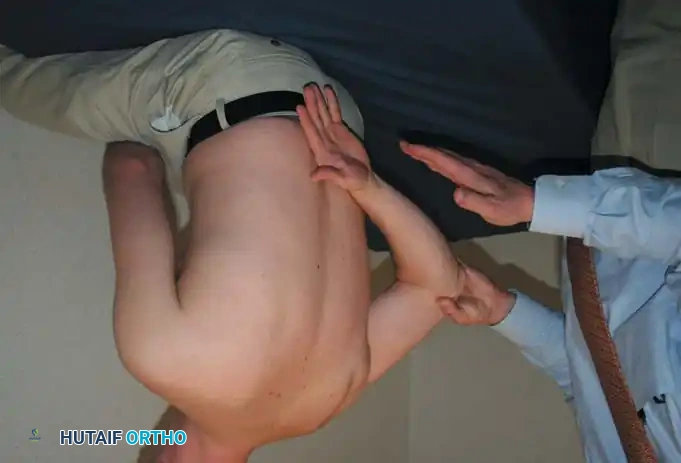
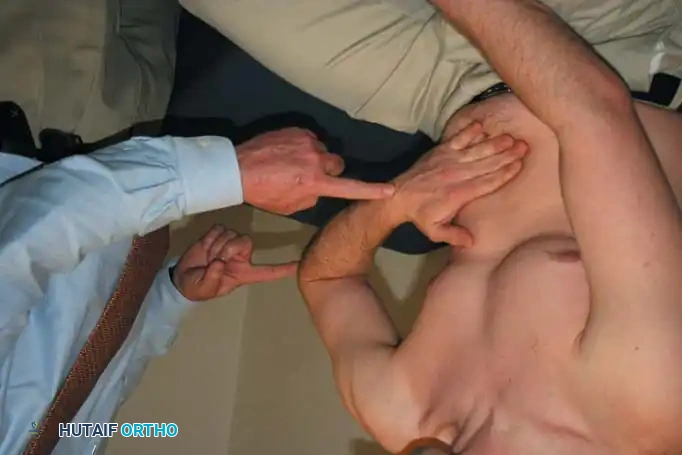
Gerber Lift-Off and Belly Press Tests:
Designed to isolate the subscapularis. In the Lift-Off test, the dorsum of the hand is placed against the mid-lumbar spine, and the patient attempts to lift the hand away from the back against resistance. If pain limits this, the Belly Press test is utilized: the patient presses the palm against the abdomen while attempting to bring the elbow anteriorly.
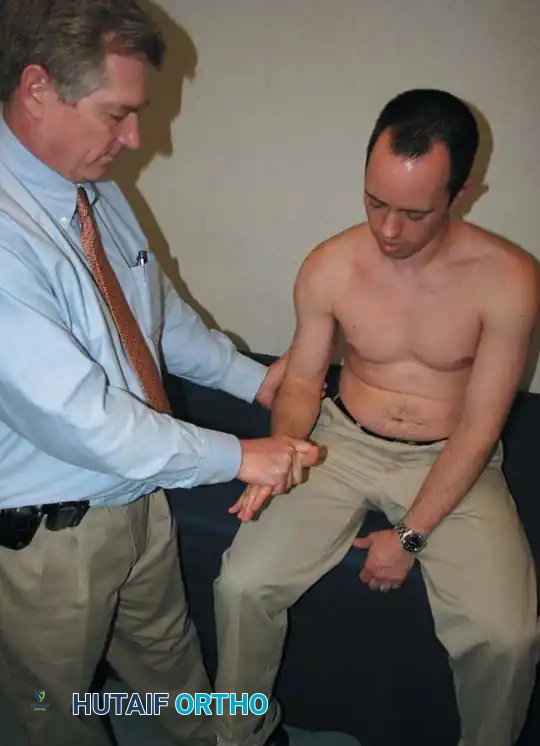
Speed and Yergason Tests:
These evaluate the long head of the biceps tendon. Speed's test involves resisting forward flexion of the supinated arm at 90 degrees. Yergason's test involves resisting active supination and external rotation of the forearm with the elbow flexed at 90 degrees.
Specific Disorders and Operative Management
Impingement Syndrome and Rotator Cuff Tears
Rotator cuff disease represents a continuum from edema and hemorrhage (Stage I), to fibrosis and tendinitis (Stage II), to partial or full-thickness tearing (Stage III).
Surgical Indications
Operative intervention is indicated for:
* Failure of 3 to 6 months of comprehensive conservative management (NSAIDs, physical therapy, subacromial corticosteroid injections).
* Acute, traumatic full-thickness tears in active individuals.
* Massive tears (>5 cm) with profound weakness, provided irreversible fatty infiltration (Goutallier stage 3 or 4) has not occurred.
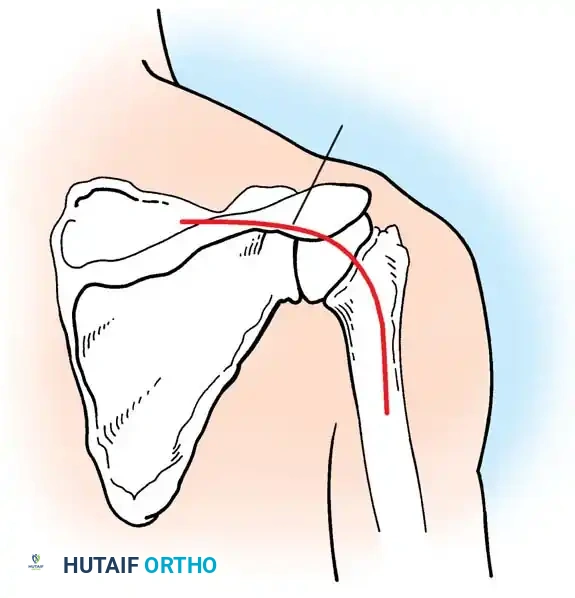
Patient Positioning and Setup
Surgery may be performed in either the Beach Chair or Lateral Decubitus position.
* Beach Chair: Offers anatomical orientation, ease of converting to an open procedure, and allows unrestricted manipulation of the arm. Care must be taken to manage cerebral perfusion pressure.
* Lateral Decubitus: Provides excellent visualization of the glenohumeral joint and subacromial space via longitudinal traction, but carries a risk of traction neurapraxia.
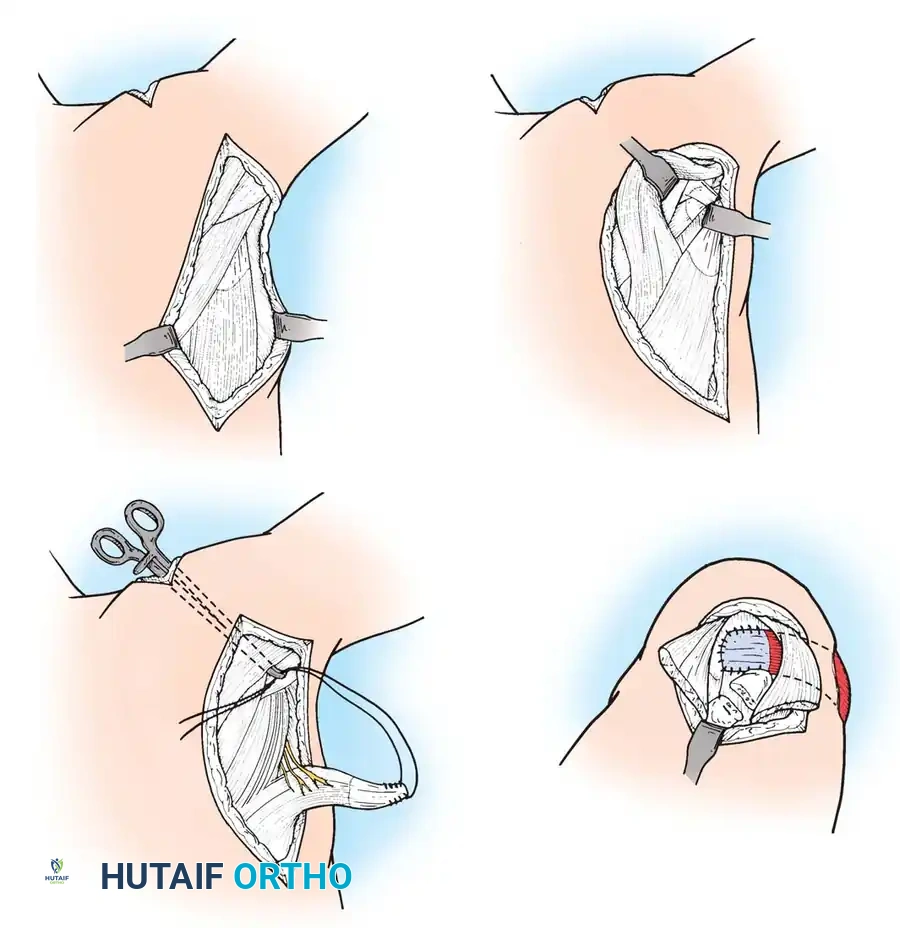
Arthroscopic Rotator Cuff Repair: Step-by-Step
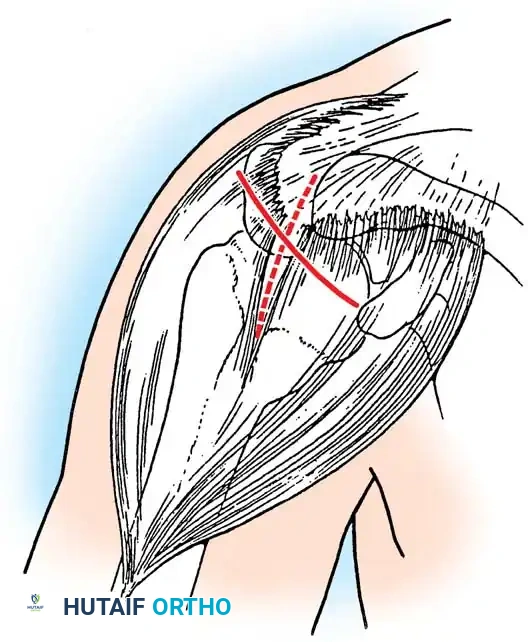
- Diagnostic Arthroscopy: A standard posterior portal is established. The glenohumeral joint is inspected for labral pathology, biceps fraying, and articular-sided cuff tears.
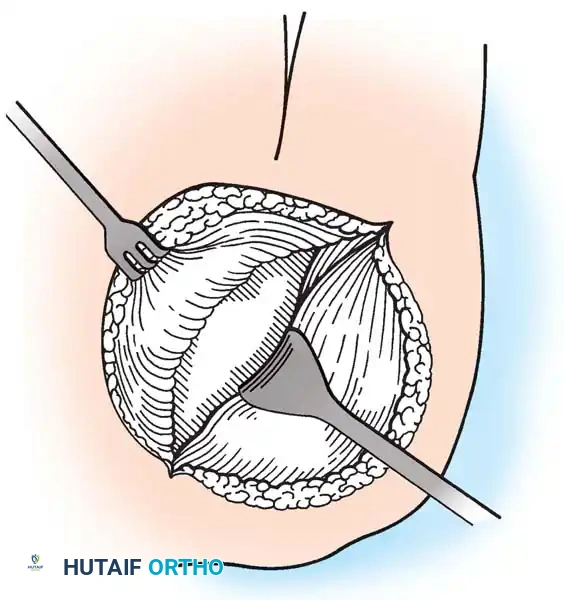
- Subacromial Decompression: The arthroscope is redirected into the subacromial space. A lateral portal is established. A motorized shaver and radiofrequency wand are used to perform a bursectomy. An acromioplasty is performed using a barrel burr to resect the anteroinferior acromial spur, creating a flat (Type I) acromion.
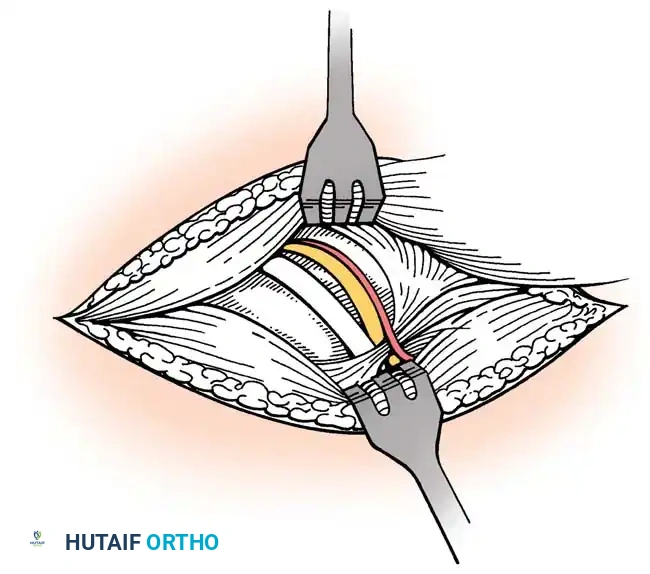
- Footprint Preparation: The greater tuberosity footprint is debrided of soft tissue to a bleeding cortical bed to optimize tendon-to-bone healing.
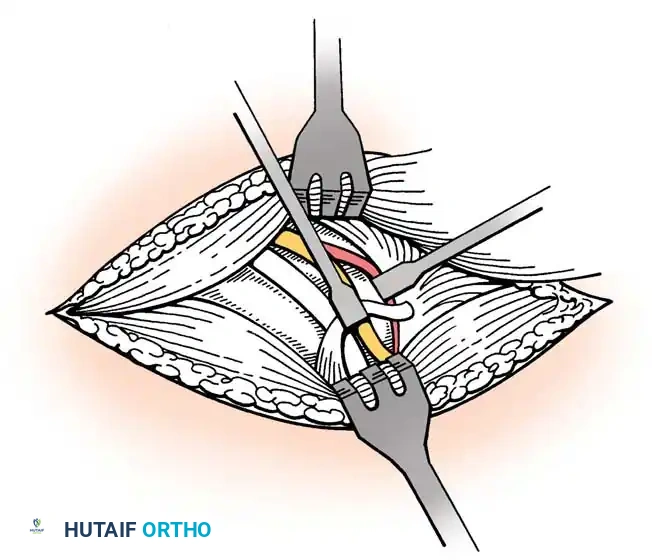
- Tendon Mobilization: Adhesions are released. If the tear is retracted, interval slides (anterior between supraspinatus and subscapularis; posterior between supraspinatus and infraspinatus) may be required.
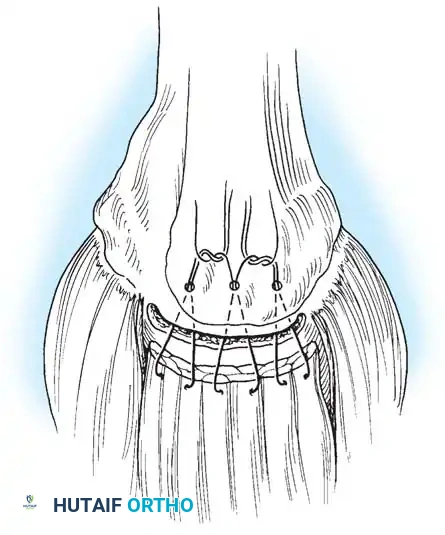
- Anchor Placement and Suture Passing: Biocomposite or PEEK suture anchors are placed at the articular margin (for a double-row repair). Sutures are passed through the tendon using a retrograde suture passer.
- **Knot
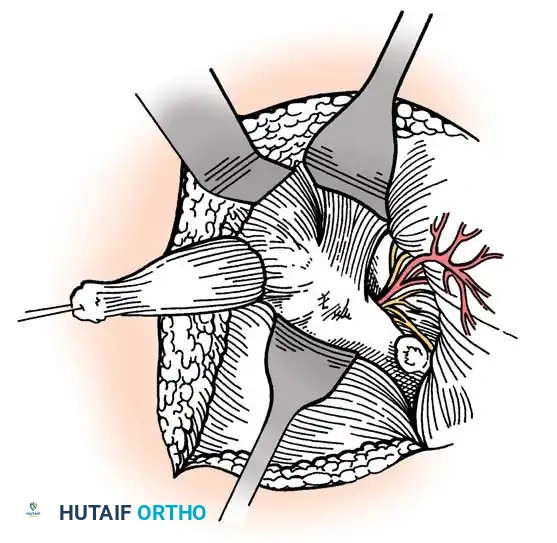
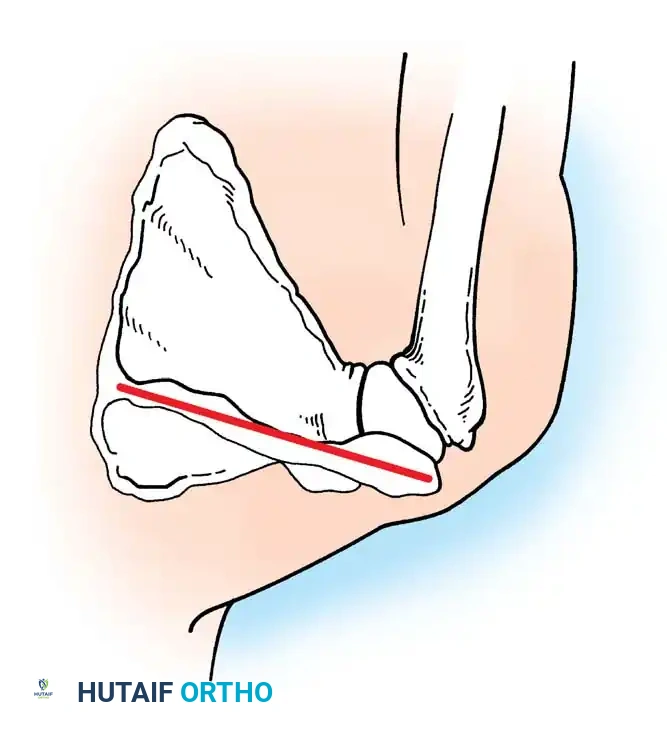
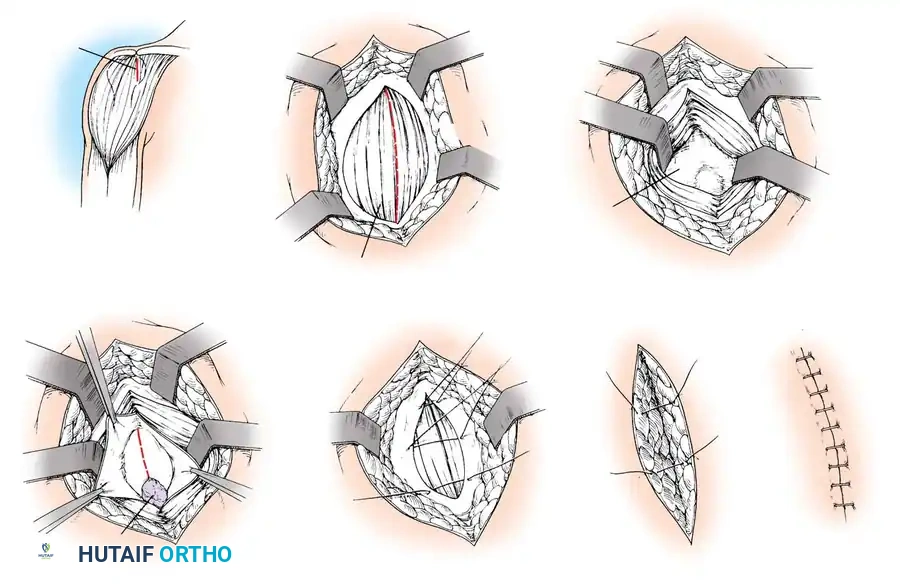
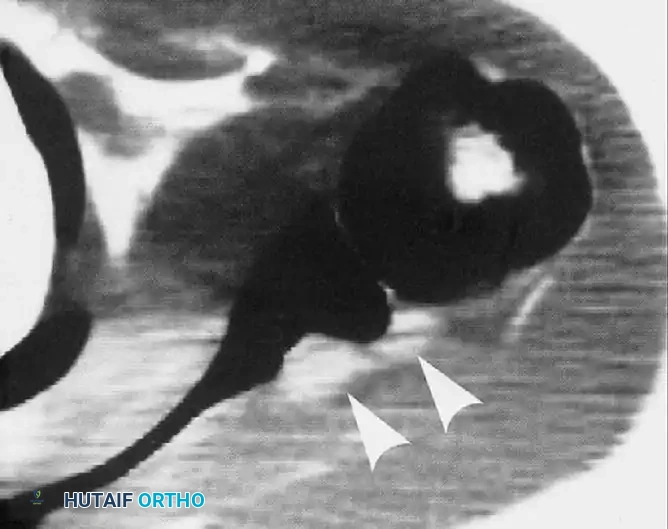
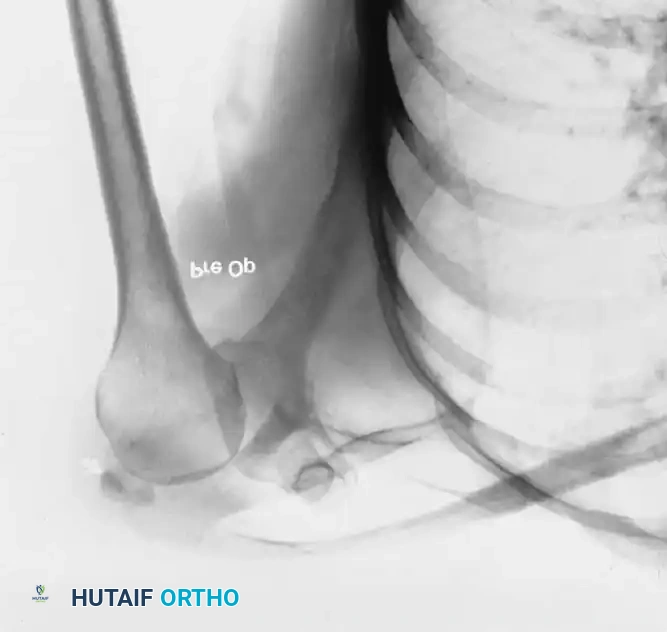
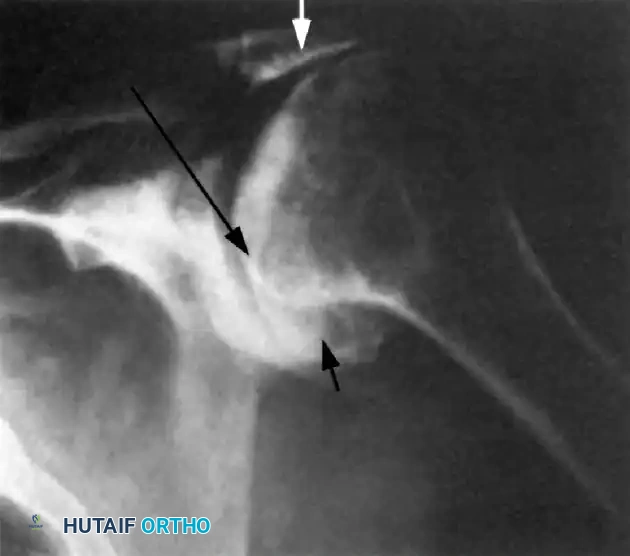
Associated Surgical & Radiographic Imaging