INTRODUCTION TO HINDFOOT AND ANKLE AMPUTATIONS
Amputations around the ankle joint represent a critical intersection of orthopedic biomechanics, vascular surgery, and advanced prosthetics. To be successful, these procedures must fulfill two non-negotiable requirements: they must provide a durable, end-bearing stump capable of withstanding the compressive forces of human locomotion, and they must leave sufficient clearance between the distal end of the stump and the ground to accommodate the construction of a functional prosthetic ankle joint mechanism.
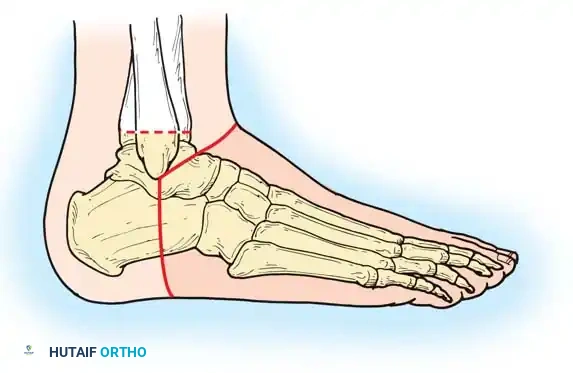
Historically, amputations at this level were plagued by poor wound healing and prosthetic fitting challenges. However, in 1843, James Syme described an ankle disarticulation technique that elegantly met these requirements better than any other procedure in this anatomical region. The classic Syme amputation involves a bone section through the distal tibia and fibula approximately 0.6 cm proximal to the periphery of the ankle joint, passing centrally through the dome of the tibial plafond. The tough, highly specialized, and durable skin of the heel flap is preserved to provide a normal weight-bearing surface.
Clinical Pearl: There is no "middle ground" for the Syme amputation. When executed perfectly, it yields the most satisfactory functional amputation level in the lower extremity. When executed poorly, it is functionally valueless, inevitably necessitating revision to a more proximal level (e.g., transtibial amputation).
THE SYME AMPUTATION
Biomechanics and Prosthetic Considerations
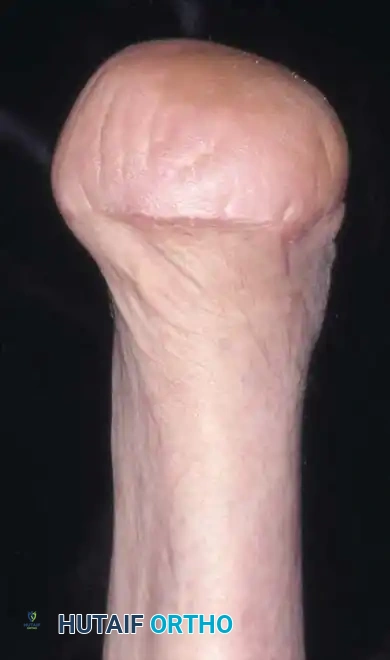
The chief objection to the classic Syme amputation is cosmetic. Because the distal tibial metaphysis flares outward and is covered by thick, heavy plantar skin, the resulting stump is inherently large and bulbous. Consequently, the prosthesis required to accommodate this stump is often bulky, which is why this amputation has historically been less recommended for female patients seeking a highly cosmetic result.
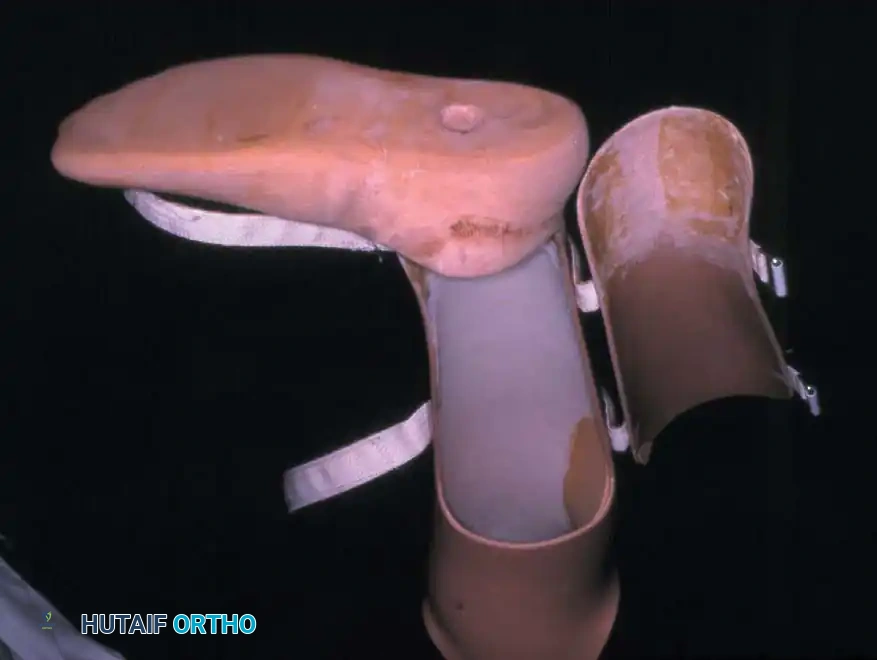
The traditional prosthesis for a classic Syme amputation consists of a molded plastic socket featuring a removable medial window. This window allows the bulbous end of the stump to pass through the narrow shank of the prosthesis. The construct is typically completed with a solid-ankle, cushioned-heel (SACH) foot prosthesis.
The Sarmiento Modification:
To address the cosmetic shortcomings of the classic technique, Sarmiento described a modification that produces a less bulbous, more cylindrical stump.
* Technique: The tibia and fibula are transected approximately 1.3 cm proximal to the ankle joint, and the medial and lateral malleoli are completely excised.
* Advantage: This produces a stump only slightly larger in circumference than the diaphyseal portion of the leg. It allows the patient to be fitted with a prosthesis incorporating an expandable socket rather than a bulky removable window, vastly improving cosmesis.
Vascular Evaluation and Patient Selection
In the past, the Syme amputation was contraindicated in ischemic limbs due to unacceptably high rates of wound necrosis and failure. Today, the preoperative determination of local tissue perfusion has revolutionized patient selection.
Surgical Warning: Never proceed with a Syme amputation in a vasculopathic patient without objective non-invasive vascular testing. Clinical palpation of pulses is insufficient.
Success rates have dramatically increased by utilizing:
* Doppler Ultrasound: Measurement of segmental blood pressures and Ankle-Brachial Indices (ABI). An ABI > 0.45 is generally required for predictable healing.
* Transcutaneous Oxygen Measurements (TcPO2): A TcPO2 > 30 mm Hg at the proposed level of amputation is a strong predictor of successful wound healing.
* Radioactive Xenon Clearance Tests: Used in specialized centers to map precise skin blood flow.
Complications and Pitfalls
The two most common causes of an unsatisfactory Syme stump are:
1. Posterior Migration of the Heel Pad: If the heel pad is not securely anchored to the distal tibia, the shear forces of walking will drive the pad posteriorly, exposing the distal tibia to non-weight-bearing, fragile anterior skin, leading to ulceration.
2. Skin Slough: Often resulting from the overly vigorous surgical trimming of the medial and lateral "dog ears." These dog ears contain critical vascular anastomoses; trimming them compromises the blood supply to the entire heel flap.
SURGICAL TECHNIQUE: THE CLASSIC SYME AMPUTATION
Meticulous soft tissue handling and precise osteotomies are required to construct a durable Syme stump.
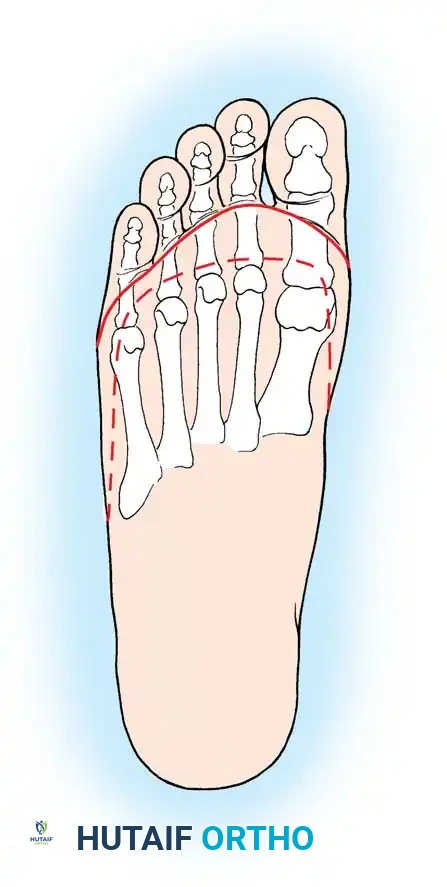
Step 1: Incision and Exposure
- Place the patient supine. A single, long posterior heel flap is utilized.
- Begin the incision at the distal tip of the lateral malleolus. Pass it across the anterior aspect of the ankle joint at the level of the distal tibia to a point exactly one fingerbreadth inferior to the tip of the medial malleolus.
- Extend the incision directly plantarward, across the sole of the foot to the lateral aspect, ending at the starting point.
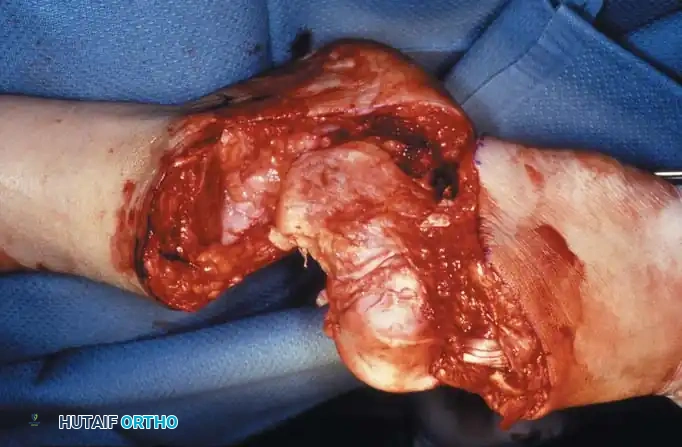
Step 2: Joint Disarticulation
- Divide all anterior structures straight down to the bone. Ligate the anterior tibial artery as it lies in the anterior flap.
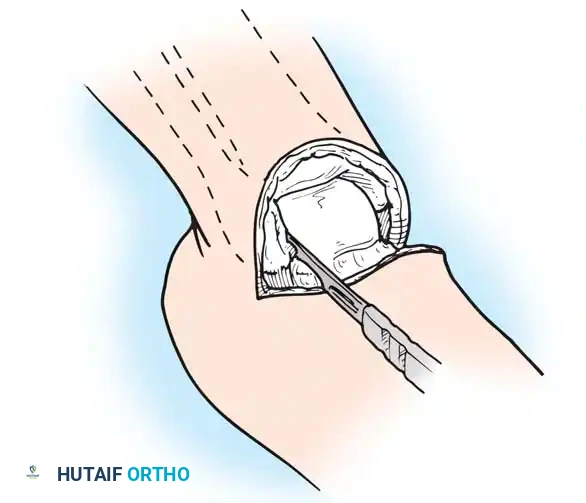
- Place the foot in marked equinus and divide the anterior capsule of the ankle joint to expose the talar dome.
- Insert a scalpel into the joint space between the medial malleolus and the talus. Draw it inferiorly to section the deltoid ligament. Crucial: Protect the posterior tibial artery lying immediately posterior to the medial malleolus.
- Repeat this maneuver on the lateral side to section the calcaneofibular ligament.
Step 3: Posterior Dissection and Calcanectomy
- Place a bone hook into the posterior aspect of the talus to provide forceful equinus traction. Proceed with posterior dissection, dividing the posterior capsule of the ankle joint.
- Identify the Achilles tendon. Divide it directly at its insertion on the calcaneus.
Pitfall: Do not damage the overlying posterior skin during Achilles tenotomy. Buttonholing the skin here will lead to necrosis of the entire heel flap.
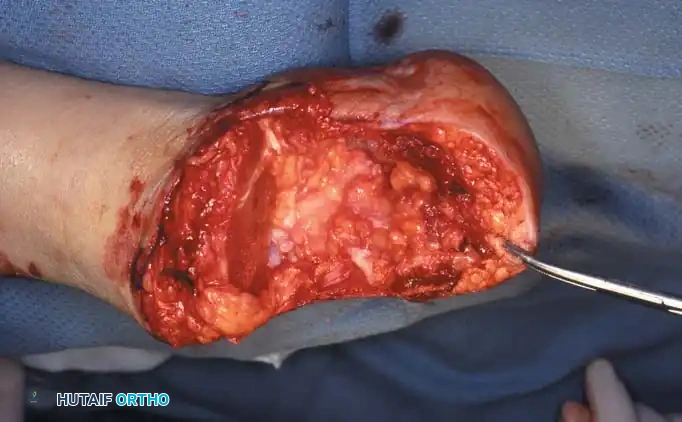
- Using a periosteal elevator, dissect the soft tissues from the lateral and medial surfaces of the calcaneus. Pull the bone into extreme equinus.

- Continue subperiosteal dissection on the inferior surface of the calcaneus until the distal end of the plantar skin flap is reached. Remove the entire foot, leaving only the heel flap.
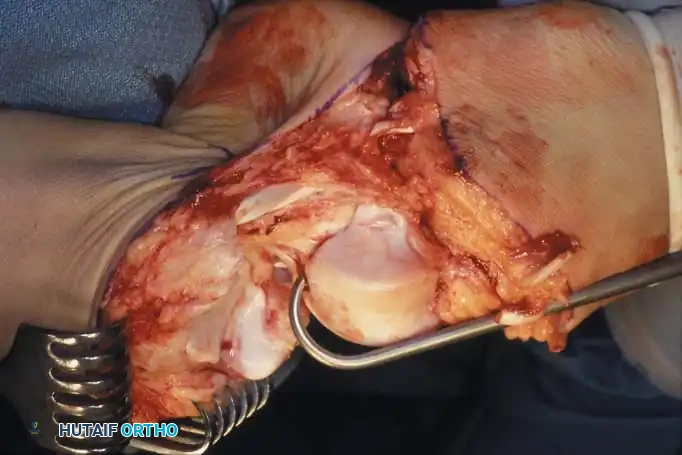
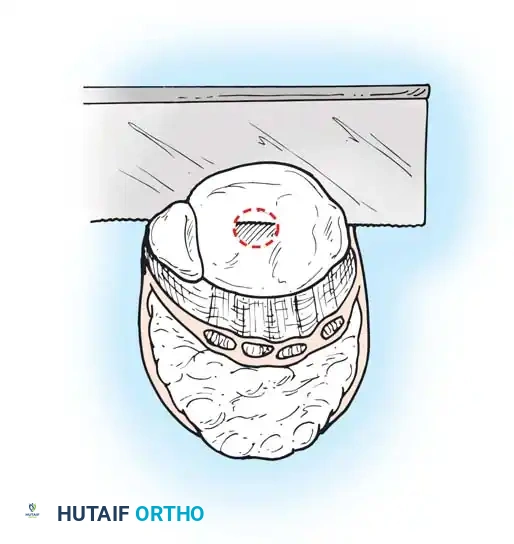
Step 4: Bone Transection
- Retract the heel flap posteriorly. Dissect the soft tissue from the tibia and malleoli.
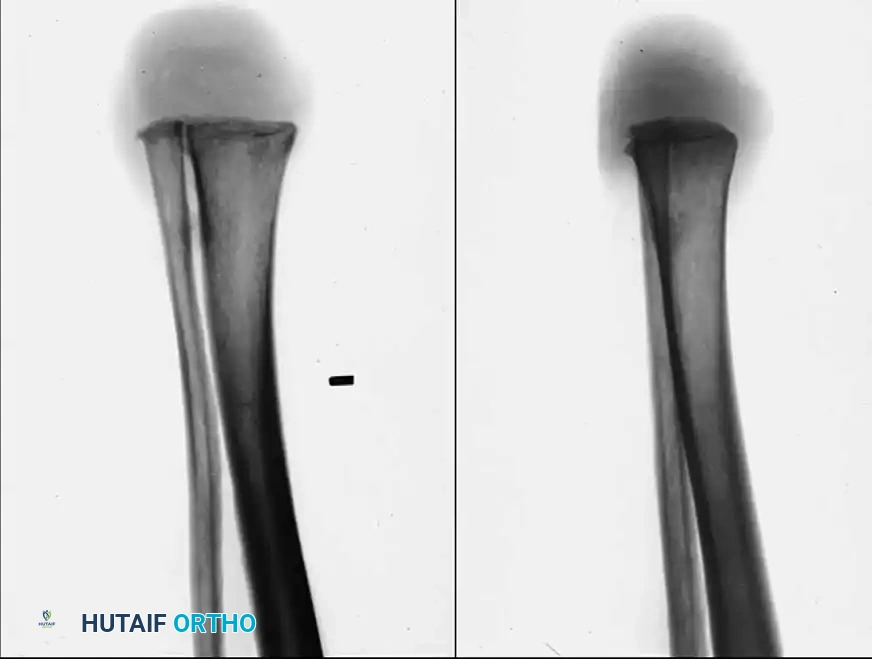
- Incise the periosteum circumferentially 0.6 cm proximal to the joint line.
- Using an oscillating saw, divide the tibia and fibula at this level. The line of transection must pass just through the dome of the ankle joint centrally.
- Alignment: The plane of the transection must be perfectly parallel to the ground when the patient is standing. Round and smooth all sharp cortical edges with a rasp.
Step 5: Soft Tissue and Nerve Management
- Identify the medial and lateral plantar nerves. Dissect them proximally and divide them sharply under tension so they retract well proximal to the bone end, preventing symptomatic neuroma formation.
- Pull all visible tendons inferiorly, section them, and allow them to retract proximally into the leg.
- Isolate the posterior tibial artery and vein. Ligate them just proximal to the cut distal edge of the heel flap.
- Perform minimal debridement of any soft-tissue tags of plantar muscle and fascia lining the inner surface of the heel flap.
Clinical Pearl: Preserve the subcutaneous fat and its fibrous septa entirely intact. This is highly specialized, pressure-tolerant tissue designed for weight-bearing. Stripping this fat destroys the hydraulic shock-absorbing capacity of the heel.
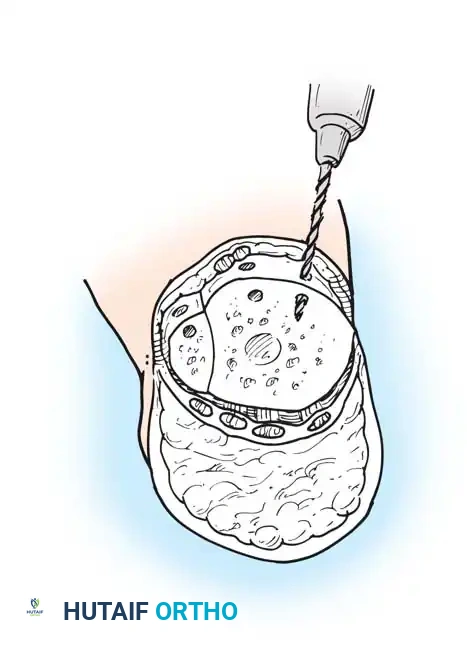
Step 6: Anchoring the Heel Pad (Wagner Technique)
To prevent the disastrous complication of posterior heel pad migration, the pad must be rigidly fixed to the distal tibia.
* Drill several small holes through the anterior edge of the distal tibia and fibula.
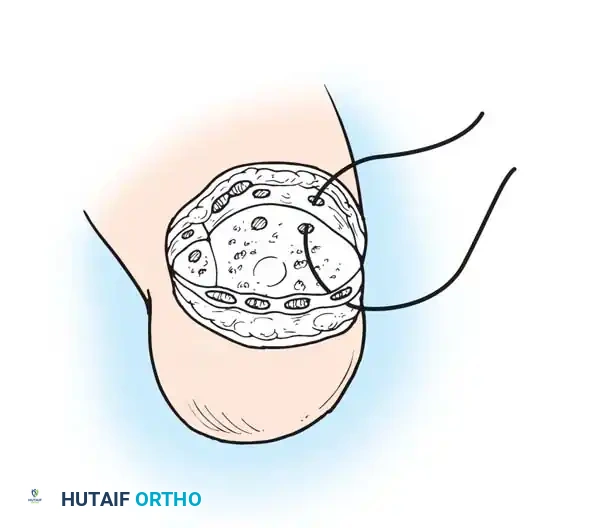
- Pass heavy, nonabsorbable sutures through these drill holes and anchor them securely to the robust deep fascia lining the heel flap.
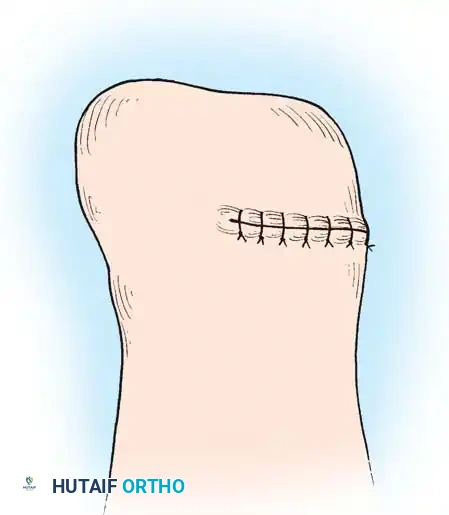
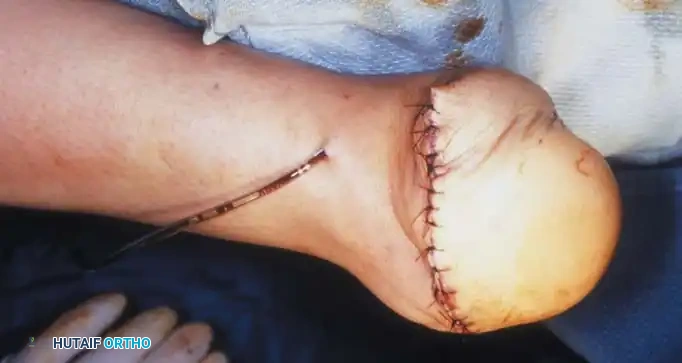
Step 7: Closure
- Approximate the skin edge of the heel flap to the anterior flap using interrupted nonabsorbable sutures. Ensure there is absolutely zero tension on the closure.
- Crucial Step: Large, protruding tags of skin ("dog ears") will form at the medial and lateral ends of the suture line. Never excise these. They carry the primary blood supply to the heel flap and will naturally remodel and shrink under postoperative bandaging.
- Place a closed suction drain and apply a rigid cast extending above the knee. Remove the drain at 24 to 48 hours.
POSTOPERATIVE PROTOCOL AND AFTERTREATMENT
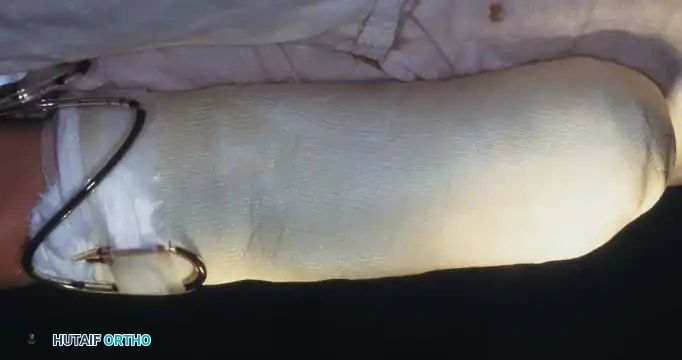
Optimal postoperative care dictates the application of a properly padded rigid dressing in the operating room immediately following closure.
- Immediate Postoperative Cast: Apply a light sterile dressing and a sterile stump sock. The prosthetist should fashion and skive sterile felt pads to relieve pressure over the tibial crest and the edges of the transected bones. These are glued to the stump sock.
- Plaster Application: Use elastic plaster of Paris for the initial wrap to control tension, reinforced with conventional plaster. Compression should be maximal over the distal end of the stump, decreasing proximally.
- Suspension and Weight Bearing: The cast does not need to extend above the knee if the intimate fit provides sufficient suspension. Flatten the end of the rigid dressing with a board while wet to simulate weight-bearing.
- Prosthetic Integration: Mold the proximal cast to create a patellar bar and popliteal bulge (similar to a PTB prosthesis) to allow partial weight-bearing. A Syme prosthetic foot or rubber walking heel can be attached for early mobilization.
THE TWO-STAGE SYME AMPUTATION
The two-stage Syme amputation was developed specifically to salvage limbs in diabetic patients presenting with gross infection or gangrene of the forefoot. Popularized by Wagner at Rancho Los Amigos Hospital, this technique boasts a 95% success rate in properly selected diabetic patients who fail conservative management but possess adequate local vascularity (confirmed via Doppler).
Stage 1: Debridement and Disarticulation
- Perform a standard ankle disarticulation.
- Key Difference: Preserve the tibial articular cartilage and the medial/lateral malleoli entirely. The cartilage acts as a barrier to proximal bacterial seeding.
- Perform a loose, Syme-type closure over a robust suction-irrigation system. This allows for the continuous instillation of targeted antibiotic solutions directly into the wound bed.
Stage 2: Definitive Closure
- Once the infection is eradicated (typically 4 to 6 weeks later), the patient returns to the operating room.
- The malleoli are excised, the tibial plafond is prepared, and the heel pad is definitively anchored and closed as described in the classic technique.
- Note: If the initial infection is strictly confined to the forefoot and well away from the heel pad, several authors advocate combining both stages into a single procedure.
ALTERNATIVE HINDFOOT AMPUTATIONS: BOYD AND PIROGOFF
While the Syme amputation is the gold standard, the Boyd and Pirogoff amputations offer alternative methods of achieving an end-bearing stump, primarily by retaining a portion of the calcaneus to prevent heel pad migration.
The Boyd Amputation
The Boyd amputation produces an excellent end-bearing stump and completely eliminates the risk of posterior heel pad migration because the heel pad remains naturally attached to the retained calcaneus.
- Technique: The procedure involves a complete talectomy. The calcaneus is then shifted forward into the mortise, and a formal calcaneotibial arthrodesis is performed.
- Disadvantages: The required arthrodesis makes this procedure technically much more demanding than a Syme amputation. Nonunion of the calcaneotibial fusion is a significant risk. Furthermore, it produces an even more bulbous stump than the Syme, though modern prosthetists have designed cosmetically acceptable, specialized prostheses to accommodate it.