P ITFALLS
- The reasons for a failed TKA should be clarified prior to a revision arthroplasty. If not, then there is a significant incidence of persistent problems/symptoms following the revision. A painful primary knee arthroplasty needs to be fully rehabilitated prior to any consideration for a revision operation.
Gap Balancing in Revision TKA
Indications
1. Instability, subsidence, or loosening of the knee prosthesis, fracture of the prosthesis, periprosthetic fracture, or prior resection arthroplasty.
2. Instability may occur in the extremes of flexion or extension. There may also be a problem with midflexion instability.
3. Other causes for a failed total knee arthroplasty (TKA) include polyethylene wear, osteolysis, pain, and stiffness.
Controversies
1. Revisions for painful TKAs without a clear-cut reason are fraught with poor outcomes.
4. The surgeon must have a clear understanding of why the primary TKA has failed.
5. The goals of revision knee arthroplasty should be to restore appropriate alignment parameters, balance the soft tissues, and use the least constraint possible.
Treatment Options
1. Both nonoperative and operative considerations should be evaluated prior to revision knee arthroplasty. In general, revision arthroplasty should not be performed soon after the primary knee arthroplasty, unless there are urgent indications such as infection or severe instability (dislocation).
Examination/Imaging
6. An adequate history is important to help clarify the reason for failure.
7. The physical exam must include evaluations of range of motion, as well as a varus/valgus stability exam throughout the range of motion. Careful attention should be paid to the evaluation for flexion and midflexion stability.
1. Occult hip pathology or spine pathology should be excluded by exam and imaging studies if necessary.
2. The quality of the soft tissues should be assessed, and the skin incisions should be noted.
3. Screening serologies (C-reactive protein, erythrocyte sedimentation rate) for occult infection should be obtained, and we prefer to routinely aspirate the knee for cell count and cultures preoperatively.
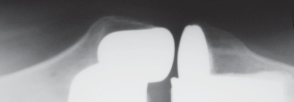
8. Anteroposterior, lateral, and patellar “sunrise” view radiographs are obtained to evaluate for prosthesis-cement or cement-bone lucencies, subsidence of components, bone loss, fracture of bone or prosthesis, and component positioning (varus/valgus, flexion/extension, rotation) (Fig. 1A and 1B).
9. Nuclear scan can demonstrate potentially loose components (but can be hot for up to 2 years following TKA) (Fig. 2).
Gap Balancing in Revision TKA


383
A
FIGURE 1
B
FIGURE 2
### Gap Balancing in Revision TKA
Surgical Anatomy
10. The surgical anatomy of the lower extremity is fairly straightforward and well understood.
Positioning
11. Patients are generally placed supine on a regular operating room table with a roller beneath the calf of the operative leg to rest the foot and hold the knee in 90° of flexion.
12. A well-padded tourniquet is routinely used.
13. The leg is prepped and draped according to the surgeon’s preference.
14. The knee should be reevaluated for medial (Fig. 3A), lateral (Fig. 3B), and flexion (Fig. 3C) laxity under anesthesia.


384
A B

C FIGURE 3 #### 385
P EARLS
- Incisions
- If transverse incisions are present, then they should be crossed with a longitudinal incision at 90°.
- If there is a question of healing potential of the skin, a sham incision can be performed to evaluate the skin’s ability to heal.
- Exposure
- In a tight knee, the exposure may be facilitated by a rectus snip into the quadriceps mechanism or, alternatively, a tibial tubercle osteotomy may be performed.
- In a knee with severe patella baja, an osteotomy may be preferred.
- In a very stiff knee with poor flexion, one may consider a V - Y quadricepsplasty or quadriceps turndown.
- Tenets
- Protect the extensor.
- Preserve the collateral ligaments.
- Preserve as much bone stock as possible.
Gap Balancing in Revision TKA
Portals/Exposures
Incisions
- Previous skin incisions should be used whenever possible (Fig. 4).
- If multiple previous incisions are present, the most lateral is preferred in order to decrease risk of skin necrosis.
- If a previous incision is very lateral, then a medial incision may be utilized as long as there is an adequate skin bridge.
- More medial incisions with large lateral flaps carry a greater risk of skin slough and subcutaneous hematoma.
P ITFALLS
- If there is poor skin turgidity, where there is no give or release of the skin from the subcutaneous tissues, then soft tissue expansion could be performed.
- Skin flaps should be full thickness (to fascia) if they are necessary. That technique preserves the perforating vascular complex between the subcutaneous fascia and dermal plexus.
-
The patellar tendon insertion on the tibial tubercle should be carefully protected to prevent inadvertent disruption. We advocate using a towel clip at the tubercle to prevent problems.

--- FIGURE 4
Gap Balancing in Revision TKA FIGURE 5 #### 386
Exposure
- A standard or extensile medial parapatellar approach is performed with exposure of the knee. Adhesions are released and an adequate medial release is performed, releasing the deep medial collateral ligament and capsule (Fig. 5).
P EARLS
- Sharp, thin, and curved osteotomes are useful.
- Stacking osteotomes may be helpful to break the cement-prothesis interface.
- Tibial rotation should be assessed in relationship to the tibial tubercle.
P ITFALLS
- If the cement-prosthesis interface is not disrupted before the bone-cement interface, substantial bone loss may result.
- The extensor mechanism should be mobilized in stages. Proximally, the extensor is released by clearing the suprapatellar pouch. Distally, the extensor is released by excising the tissue between the patellar tendon and the proximal tibia.
- Both the medial and lateral gutters are cleared of scar tissue.
-
An adequate synovectomy should be performed.
Procedure
Step 1: Tibial Tray Removal
- The proximal tibia should be adequately exposed and protected with retractors. Removing a modular tibial insert will aid in the exposure by creating a working space (Fig. 6).
-
Osteotomes and/or a small oscillating saw are used to disrupt the cement-prosthesis interface (Fig. 7A–7D).

Gap Balancing in Revision TKA


387 FIGURE 6 A
B
C
FIGURE 7
D
388
Gap Balancing in Revision TKA
- An extramedullary cutting guide is used to recut the tibia in order to create a fresh, flush surface (Fig. 8A and 8B).
- Cement is subsequently removed carefully from the proximal tibia (Fig. 9A and 9B).
- If the proximal tibial bone is insufficient, tibial stems, preferably press-fit, are used after appropriate reaming. Occasionally, offset tibial trays/stems may be useful to create appropriate coverage (Fig. 10).
-
If there are uncontained defects, augments or allograft can be used to fill them. Stems are often required in these cases.


A
FIGURE 8
B
Gap Balancing in Revision TKA


389
A
FIGURE 9
B
FIGURE 10


390
Gap Balancing in Revision TKA
A
P EARLS
- Use smaller osteotomes around posterior condyles and the lugs of the femur.
- A Gigli saw can be used to disrupt the cement-prosthesis interface (prosthesis-bone interface in uncemented prostheses) as an alternative or adjunct to osteotomes.
P ITFALLS
- It is important to not let the medullary canals dictate the position of the prosthesis when using stems. Using offset stems will help position the femoral component appropriately.
- If the lugs of the femoral component are not cleared, there can be significant bone loss. FIGURE 11 B
-
An appropriate tibial tray is then chosen and placed as a platform for the rest of the reconstruction
(Fig. 11A and 11B).
Step 2: Femoral Component Removal
- Adequate exposure of the distal femur must be obtained. The posterior capsule may need to be released to allow this exposure.
- A retractor is placed to elevate the distal femur.
- Again the interface between the prosthesis and cement is disrupted using osteotomes (Fig. 12).
-
Counterpressure should be administered on the opposite the side of the femur (Fig. 13A–13C).

--- FIGURE 12

Gap Balancing in Revision TKA


391
A
B
C
FIGURE 13

Gap Balancing in Revision TKA FIGURE 14 #### 392
- If cement remains, it should be carefully removed, preserving as much host bone as possible (Fig. 14).
- Bone stock should be assessed, and fresh cuts are made based on an appropriate femoral size.
- Fresh cuts are made on the femur, using at least one condyle as a stable platform while the other can be built up with augments or cement.
-
We prefer to perform this step with a free-hand technique based on an appropriately sized femoral trial component (Fig. 15).

--- FIGURE 15 #### 393
Gap Balancing in Revision TKA
-
The anterior-posterior axis of the trochlear line is often obliterated in revision TKA. Therefore, the epicondylar axis is the most reliable landmark for assessing femoral rotation in revisions (Fig. 16A and 16B).

A

B
FIGURE 16


394

Gap Balancing in Revision TKA
A
C
FIGURE 17
B
1. If there is inadequate distal femoral bone stock, stemmed trial prostheses must be used, often with augments (Fig. 17A–17C).
Step 3: Balancing
- Once an appropriately sized femoral trial component is placed, the knee is placed in 90° of flexion and the femur is distracted upward relative to the tibia to assess the flexion gap first. A trial polyethylene insert is placed that feels appropriate in flexion.
- Next the knee is brought into extension to examine the extension gap.
- The knee will either be (A) tight in extension, (B) well-balanced in extension, or (C) loose in flexion.
- If the case is A, either additional distal femur can be resected or distal femoral augmentation needs to be reduced.
395
P EARLS
- Addressing the flexion gap first reduces variables in flexion-extension balancing. The tibia provides a stable platform. Deficient areas of the proximal tibia must be augmented, and stems should be used if necessary, to create this stable platform.
-
An alternative approach to flexion-extension gap balancing is to use a soft tissue tensioner or blocks to evaluate the mismatch in flexion and extension gaps. This can be done following component removal or after
tibial trial preparation. - It is important not to resect too much distal femur when creating fresh cuts, as this will cause an elevation of the joint line and subsequent patella baja.
Gap Balancing in Revision TKA
- If scenario B is present, then the knee is appropriately balanced and the patella can now be assessed.
- If the case is C, distal femoral augmentation can be used.
- The knee should be tested with a trial polyethylene insert in flexion (Fig. 18A) and extension (Fig. 18B) with varus (Fig. 18C) and valgus (Fig. 18D) stress. The range of motion should also be noted.
- We prefer a stepwise approach to reconstructing flexion-extension gaps.
- Reconstruction of the proximal tibia is essentially a platform toward reconstructing the revision knee. It is important that this platform is well supported. Areas of bone loss must be augmented. Appropriate stem fixation must be utilized in order to create a stable platform.
-
If there is substantial proximal tibial bone loss, augments can be used to elevate the proximal


A B


C D FIGURE 18 #### 396
P EARLS — cont’d
- The flexion gap must be balanced to the degree of bone loss in extension.
- Appropriate external rotation of the femoral component must be performed to create symmetry of the flexion gap or a rectangular flexion gap.
P ITFALLS
- The flexion gap is established through the proper resection of the anterior and posterior aspects of the distal femur. This can be adjusted with the appropriate femoral component size.
- If a situation arises in which there is an excessively large flexion gap, a larger femoral component can be used.
- If persistant or marked flexion gap imbalances occur, the consideration of a hinged or linked component must be undertaken.
Gap Balancing in Revision TKA
tibia to minimize the polyethylene insert. In some situations, this may have to be performed as certain designs may have limited polyethylene insert sizes.
1. Various treatments exist to balance a flexion-extension gap (Dennis, 2007).
1. With adequate flexion:
1. If extension is adequate, no change is needed; move on to the patella.
2. If extension is loose, augment the distal femur.
3. If extension is tight, resect the distal femur, perform posterior capsule release, or reduce the distal augmentation.
2. If flexion is loose:
1. If extension is adequate, upsize the femoral insert or translate the femur posteriorly with an offset stem.
2. If extension is loose, increase the size of tibial insert or augment the proximal tibia.
3. If extension is tight, use a larger femoral insert, or resect the distal femur and then use a larger insert.
3. If flexion is tight:
1. If extension is adequate, downsize the femoral insert or use a more posterior slope.
2. If extension is loose, downsize the femoral insert with distal augmentation.
Controversies
1. Cementless revisions
3. If extension is tight, use a thinner tibial insert or resect more tibia.
Step 4: Assessment of Range of Motion with Trial Components
- Range of motion with the trial components should be assessed. This is an important step as, if full motion is not achieved during surgery, it is unlikely to be achieved postoperatively.
- In the case illustrated in Figure 19–21, a trial 12-mm tibial insert was used first and demonstrated laxity in flexion and extension (Fig. 19A and 19B).
- A trial 17-mm tibial insert was used next and was tight in both flexion and extension, and also lacked full extension (Fig. 20A and 20B).
Gap Balancing in Revision TKA


397
A
B
FIGURE 19
A
FIGURE 20
B

398

Gap Balancing in Revision TKA
A B

C FIGURE 21 • Finally, a trial 14-mm tibial insert showed full motion with excellent stability (Fig. 21A–21C). 1. If there is increased medial-lateral laxity, then a constrained insert may be used.
Step 5: Final Component Insertion
- Once the surgeon is satisfied with the trialing, then the final components (Fig. 22) may be cemented into place.
-
It is our preference to limit cement to the surface and metaphysis (Fig. 23A–23C) and to use press-fit

 FIGURE 22

Gap Balancing in Revision TKA


399
A
B
C
FIGURE 23


400
Gap Balancing in Revision TKA
A B


C D
FIGURE 24
stems (Fig. 24A–24D). Alternatively, fully cemented stems may be used. We also routinely add prophylactic heat-stable antibiotics to the cement in revisions.
1. Drains are utilized, followed by routine closure.
2. A final range-of-motion assessment is made once the cement has hardened (Fig. 25A–25C).

Gap Balancing in Revision TKA


401
A
B
FIGURE 25
C


402


Gap Balancing in Revision TKA
A B


D E
FIGURE 26
Controversies
1. DVT prophylaxis
2. Use of CPM machines
C
1. The tourniquet may be released before or after closure.
2. Postoperative radiographs are taken to assess the final outcome (Fig. 26A–26E).
Postoperative Care and Expected Outcomes
3. The postoperative care should be as is routine for the surgeon’s preference.
4. Most patients are weight bearing as tolerated.
403
Gap Balancing in Revision TKA
- Prophylactic antibiotics are administered for 24–48 hours, and deep venous thrombosis (DVT) prophylaxis with low-dose warfarin is instituted. Alternatively, aspirin in combination with mechanical foot pumps may be used.
- Drains are routinely removed at 24–48 hours.
- It is our preference to use continuous passive motion (CPM) machines during the hospitilization.
