Indications
1. The direct lateral approach can be used for primary total hip replacement in patients with advanced arthritis of the hip or femoral
 neck fracture requiring replacement.
2. This approach can also be used for revision total hip replacement surgery.
Examination/Imaging
3. Plain radiographs
1. 1. An anteroposterior (AP) pelvis radiograph and AP and lateral radiographs of the affected hip are
recommended (Fig. 1A–1C).
2. Template the radiographs to determine component size and component position in order to reproduce leg length and offset.
4. Occasionally a computed tomography scan or magnetic resonance imaging is indicated to assess bone loss, large subchondral cysts, and dysplasia in primary total hip replacement.
Direct Lateral Approach to the Hip


A B C FIGURE 1
1. Treatment Options
1. Alternate surgical approaches to the hip include the posterior, transtrochanteric, and anterolateral approaches.
2. There are also single-incision and two-incision techniques described for minimally invasive surgery for total hip replacement.
Direct Lateral Approach to the Hip
Surgical Anatomy
2. Limit the height of the split in the gluteus medius muscle in order to prevent damage to the superior gluteal nerve (Fig. 2A and 2B).
3. Split the gluteus medius muscle anteriorly over the trochanter at the tendinous junction so that there is good tendon on both sides of the split, which will allow a stronger repair with suture (Fig. 3A and 3B).
|


A


Gluteus medius muscle
5 cm safe zone
Greater trochanter
Incision site Femur
B
FIGURE 2


97
Direct Lateral Approach to the Hip
A
Gluteus medius
muscle
Split
B

Vastus lateralis muscle
FIGURE 3


Direct Lateral Approach to the Hip
A

Gluteus medius muscle (anterior 1/2)
98
Gluteus minimus muscle
FIGURE 4
Gluteus medius muscle (posterior 1/2)
B
Greater trochanter
1. Don’t divide the gluteus minimus tendon. Develop the anterior abductor flap, consisting of the gluteus medius and vastus lateralis, from inferior to superior and elevate the gluteus minimus off the capsule with cautery, leaving it attached to the flap above (Fig. 4A and 4B).
Positioning
2. Position the patient in the straight lateral decubitus position on the operating table.
P EARLS
- Make sure the contralateral leg is well padded to prevent damage to the common peroneal nerve.
- If the patient is to have a general anesthetic, use an axillary roll under the chest wall to prevent injury to the brachial plexus.
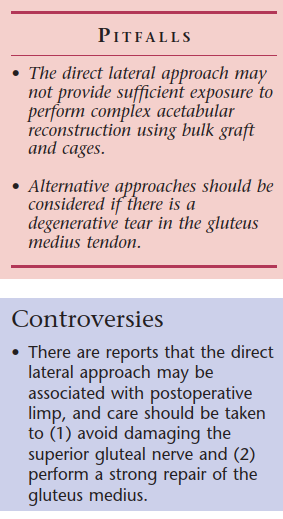
P ITFALLS
- The body can shift under the drapes during surgery if not securely positioned, resulting in component malposition.
- Preoperative examination should rule out fixed pelvic obliquity and fixed flexion/extension of the pelvis.
Direct Lateral Approach to the Hip
Portals/Exposures
1. The skin incision is made (Fig. 5A and 5B).
1. The longitudinal incision runs slightly oblique from anterodistal to posteroproximal.
2. It is centered over the tip of the greater trochanter.
3. The length of the incision measures 10–15 cm depending on the patient.
4. Carry the skin incision down through the subcutaneous tissue onto the fascia lata.

99
Equipment
1. The patient can be secured with a positioner attached to the operating room (OR) table with both a pubic and a sacral support, a deflatable bean bag–type device, or pegboard.
A
Controversies
1. Positioning the patient 30° or 45° back from the straight lateral position may improve acetabular visualization, but the visual cues available in the straight lateral position (OR table, floor, walls) may aid in component positioning.
Tip of greater trochanter
Skin incision

B
FIGURE 5
P EARLS
- Cut the fascia lata distally with Mayo scissors (curve pointing anterior); if you just push them through the fascia, the split will tend to follow the direction of the fibers and end up too posterior.
P ITFALLS
- If you get too far posterior with your division of the fascia lata superiorly, this will result in splitting the gluteus maximus muscle too far posteriorly, and retraction of the large anterior part is then difficult.
Direct Lateral Approach to the Hip
- Divide the fascia lata with a knife in the interval between the tensor fascia muscle and the gluteus maximus muscle (Fig. 6A and 6B).
- Extend the division in the fascia distally with curved Mayo scissors, pointing the curve of the scissors anteriorly.
- Extend the division of the fascia proximally with cutting cautery and then gently split the fibers of the underlying gluteus maximus muscle with your fingers, cauterizing bleeders as needed.
-
The trochanteric bursa can be incised longitudinally or can be left intact.


100
A


Split fibers of gluteus maximus
muscle
Gluteus medius muscle
Facia lata (iliotibial (IT) band split)
Vastus lateralis muscle
FIGURE 6 B
Fascia lata (iliotibial (IT) band split)
Greater trochanter
P EARLS
-
Don’t divide the gluteus minimus transversely, as it contributes to abduction power. Elevate it from inferior to superior off the neck and capsule, leaving it in continuity and attached to the gluteus medius and vastus lateralis.
Procedure
Step 1
- The gluteus medius muscle and vastus lateralis muscle are split longitudinally but remain in functional continuity.
-
Identify the anterior and posterior borders of the gluteus medius muscle and, at the midpoint
(50 : 50 split), push the curved Mayo scissors over the tip of the trochanter, down through the muscle, and divide the tendon 1 cm distally using cutting cautery (Fig. 7A and 7B).


101
Direct Lateral Approach to the Hip
A


Gluteus medius
muscle
Outline of proximal femur (trochanter)
Vastus lateralis muscle
FIGURE 7 B
Scissors at tip of greater trochanter through gluteus medius muscle
P ITFALLS
- Extending the split in the gluteus medius more than 5 cm above the trochanter may result in damage to the superior gluteal nerve with paralysis of part of the gluteus medius and tensor fascia muscles.
Direct Lateral Approach to the Hip
- Flex the hip approximately 15° and rotate externally as much as possible.
- Anterior to the trochanter, find the musculotendinous junction of the gluteus medius muscle and then incise with cutting cautery, making sure there is tendon on both sides of the split (Fig. 8A and 8B).
-
Using the cutting cautery, incise this tendon proximally up to the split at the tip of the trochanter and then distally down through the anterior portion of the vastus lateralis muscle onto bone, cauterizing bleeders as needed.


102
A
Cutting cautery
pencil
Gluteus medius tendon


Vastus lateralis muscle
FIGURE 8
Sponge placed in split of gluteus medius muscle
B
Planned incision tip to tip and down through anterior vastus lateralis muscle
103
Instrumentation/ Implantation
1. Placing a sharp curved Hohmann retractor anteriorly, a small sharp Hohmann retractor superiorly, and a large blunt Hohmann retractor inferiorly will provide exposure for excision of the hip capsule.
Direct Lateral Approach to the Hip
- The continuous anterior flap of gluteus medius muscle and vastus lateralis muscle is elevated, along with the insertion of the gluteus minimus tendon, off the neck of the femur and hip capsule.
-
Place a small sharp Hohmann retractor through the split in the vastus lateralis muscle directed medially and superiorly and, using cutting cautery, release the vastus insertion into the intertrochanteric line. Continue superiorly, releasing the gluteus minimus muscle off its insertion on the anterior hip capsule and neck of the femur (Fig. 9A and 9B) but leaving it attached to the anterior flap of gluteus medius (see Fig. 4A and 4B).


A
Gluteus medius
muscle
Small sharp Hohmann retractor elevating anterior portion of vastus lateralis muscle
FIGURE 9 B
Trochanter
Direct Lateral Approach to the Hip
-
Next place a sharp curved Hohmann retractor over the anterior brim of the pelvis in line with a line bisecting the long axis of the femoral neck, and a small sharp Hohmann retractor under the gluteus minimus muscle and over the superior lip of the acetabulum, exposing the anterior and superior hip capsule. Use a Cobb elevator and release adhesions off the inferior capsule, and place a large blunt Hohmann retractor inferiorly between the capsule and the iliopsoas tendon (Fig. 10A and 10B).


104
A


Small sharp Hohmann under gluteal minimus muscle and over superior acetabulum
Sharp curved Hohmann over anterior brim pelvis
FIGURE 10
Gluteus medius
muscle
Gluteus minimus
muscle
B
Anterior hip capsule
Anterior greater trochanter
Anterior vastus lateralis
Large blunt Hohmann between capsule and iliopsoas tendon


105

Direct Lateral Approach to the Hip
A
Gluteus medius
muscle
Apex of split gluteus medius muscle
B
FIGURE 11
Blunt Hohmann
Tip of greater trochanter
Piriformis fossa
Sharp curved Hohmann
Planned osteotomy of neck
1. Perform a capsulectomy, place a bone hook around the inferior femoral neck, and dislocate the head anteriorly. Then osteotomize the neck with a power saw (Fig. 11A and 11B).
P EARLS
- The abduction angle of the acetabulum is approximately 45°. Don’t place the posterior Hohmann retractor and anterior Cobra retractor vertically; placing them at a 45° angle will result in more secure retractors and better exposure.
Direct Lateral Approach to the Hip
Step 2
- Expose the acetabulum and ream for insertion of the acetabular component (Fig. 12A and 12B).
- Carefully place a sharp curved Hohmann retractor over the posterior lip of the acetabulum (8 o’clock postion for the right hip) and retract the femur posteriorly.
-
Use a blunt Cobra retractor over the anterior lip of the acetabulum (4 o’clock position for the right


106
A
in superior pelvis holding back gluteus minimus and medius muscles
Cobra retractor over anterior lip of acetabulum
Reamer preparing acetabulum


Pin
FIGURE 12 B
Sharp curved Hohmann over posterior lip of acetabulum
107
P ITFALLS
- Rotate the femur so that the posterior Hohmann retractor sits flat on the cut surface of the neck. This prevents the retractor from crushing soft bone in the anterior neck and improves visualization of the acetabulum.
Direct Lateral Approach to the Hip
hip) and retract the anterior flap of gluteus medius and vastus lateralis muscle anteriorly.
1. Place a sharp pin in the interval between the capsule and gluteus minimus superiorly (12 o’clock position), then use a mallet to secure the pin into the ilium.
2. Excise the capsule, remove osteophytes with a small osteotome, and ream the acetabulum to the appropriate size. Then insert the acetabular component.
1. Position the femur and prepare the femur with broaches and/or reamers and insert the femoral component (Fig. 13A and 13B).


A

Osteotomized neck of femur
Greater trochanter
FIGURE 13
Sharp curved Hohmann under medial neck
B
Blunt Hohmann under greater trochanter
108
Instrumentation/ Implantation
1. No special instruments are required. Placing a sharp curved Hohmann retractor posteriorly, a Cobra retractor anteriorly, and a pin in the pelvis superiorly gives excellent acetabular exposure.
Direct Lateral Approach to the Hip
- Place a blunt Hohmann retractor under the posterior greater trochanter and externally rotate and flex the femur so that the patella points to the ceiling.
- Place a sharp curved Hohmann retractor under the posteromedial neck and, using both retractors, deliver the femur up, out of the wound.
P EARLS
- You do not have to repair the gluteus minimus tendon; it is attached to the gluteus medius and vastus lateralis layer.
P ITFALLS
- A poor repair of the gluteus medius and vastus lateralis may pull apart, resulting in severe limp and possible instability. Gently externally rotate the femur to visually check that the repair remains intact.
- In large patients, use of a leg bag over the side of the OR table anteriorly will allow further flexion and adduction, improving exposure without contaminating the leg.
- Prepare the femur for insertion of the femoral component.
- Do a trial reduction and visually inspect the components in extension/external rotation and flexion/internal rotation/adduction to rule out impingement or instability.
- Insert the femoral component.
Step 3
- Close the wound in layers.
- Repair the gluteus medius tendon and vastus lateralis muscle with interrupted sutures, making sure there is a strong tendon-to-tendon repair (Fig. 14A and 14B).
P EARLS
-
If there is concern regarding the strength of the tendinous repair of the gluteus medius, then allow weight bearing as tolerated but avoid active abduction and have the patient use crutches for 6 weeks.
Controversies -
The hip precautions normally recommended to avoid dislocation for the posterior approach are probably not required following the direct lateral approach.


109

Direct Lateral Approach to the Hip
A
Repaired gluteus medius muscle
Fascia lata
Repaired vastus lateralis muscle
B
FIGURE 14
Fascia lata
Trochanter
2. Close the fascia lata and the subcutaneous layers with interrupted sutures (Fig. 15A and 15B).
3. Close the skin with staples or a subcuticular running stitch (Fig. 16A and 16B).


110
Direct Lateral Approach to the Hip
A
Repaired fascia lata

B
FIGURE 15


Direct Lateral Approach to the Hip
A
(15 cm)

Closed incision
111
B
FIGURE 16
Postoperative Care and Expected Outcomes
1. The patient is allowed weight bearing as tolerated.
2. Active abduction is allowed immediately.
Evidence
Demos HA, Rorabeck CH, Bourne RB, MacDonald SJ, McCalden RW. Instability in primary total hip arthroplasty with the direct lateral approach. Clin Orthop Relat Res. 2001;(393):168–80.
This is a retrospective review of 1515 hips done via a direct lateral approach. Only six hips (0.4%) had a dislocation or episode of instability. (Level 4 evidence [case series])
Foster DE, Hunter JR. The direct lateral approach: advantages and complications. Orthopedics. 1987;10:274–80.
This is a retrospective review of 83 total hip arthroplasties done using the direct lateral approach. The dislocation rate was low (2.5%), but the incidence of heterotopic bone was high (61%). (Level 4 evidence [case series])
112
Direct Lateral Approach to the Hip
Hardinge K. The direct lateral approach to the hip. J Bone Joint Surg [Br]. 1982;74: 17–9.
This is a description by the author of the direct lateral approach to the hip for total hip replacement.
Harwin SF. Trochanteric heterotopic ossification after total hip arthroplasty performed using a direct lateral approach. J Arthroplasty. 2005;20:467–72.
This is a retrospective radiographic review of 1420 consecutive primary total hip arthroplasties performed using a direct lateral approach. Trochanteric heterotopic ossification occurred in 14.8% of cases and should be considered a possible cause for early postoperative pain. (Level 4 evidence [case series])
Jacobs LG, Buxton RA. The course of the superior gluteal nerve in the lateral approach to the hip. J Bone Joint Surg [Am]. 1989;71:1239–43.
The superior gluteal nerve and its branches were dissected bilaterally in ten cadavers. The so-called safe area of the gluteus medius muscle was found to be as much as
5 cm adjacent to the tip of the greater trochanter.
Kwon MS, Kuskowski M, Mulhall KJ, Macaulay W, Brown TE, Saleh KJ. Does surgical approach affect total hip arthroplasty dislocation rates? Clin Orthop Relat Res.
2006;(447):34–8.
A systematic review of 11 studies revealed comparable dislocation rates associated with the anterolateral, direct lateral, and posterior approaches with soft tissue repair (0.70%, 0.43%, and 1.01%, respectively).
Picado CH, Garcia FL, Marques W. Damage to the superior gluteal nerve after direct lateral approach to the hip. Clin Orthop Relat Res. 2007;(455):209–11.
This is a prospective study of 40 patients who had total hip arthroplasty using the Hardinge approach. There were frequent (42.5%) electromyographic signs of damage to the superior gluteal nerve using the direct lateral approach to the hip.
Ritter MA, Harty LD, Keating ME, Faris PM, Meding John B. A clini
