The Wissinger Rod (Switching Stick): A Cornerstone of Orthopedic Precision
In the complex and intricate world of orthopedic surgery, precision is paramount. Every millimeter can impact a patient's recovery, function, and long-term well-being. Among the specialized instruments that empower surgeons to achieve this unparalleled accuracy is the Wissinger Rod, often referred to as a "Switching Stick." This comprehensive guide will delve into the essential role of this unassuming yet critical tool, explaining its design, applications, and how it contributes to superior patient outcomes.
1. Comprehensive Introduction & Overview
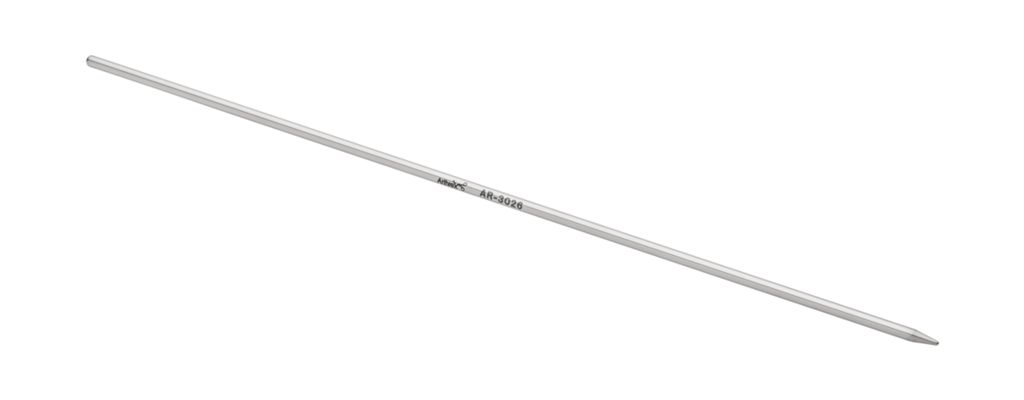
The Wissinger Rod is a slender, specialized surgical instrument primarily used in orthopedic procedures to facilitate the safe and accurate exchange of guide wires, drill bits, or other instruments while maintaining a precisely established anatomical path. Imagine a delicate pathway created within bone to guide a screw or implant. The Wissinger Rod acts as a temporary, stable placeholder, ensuring that this crucial pathway is not lost or compromised when one instrument needs to be swapped for another.
Why is it called a "Switching Stick"?
The name "switching stick" perfectly describes its function: it allows the surgeon to "switch" out a smaller guide wire for a larger drill, or a drill for a cannulated screw, all without losing the exact trajectory initially established. This eliminates the need for repeated attempts to find the correct path, significantly reducing surgical time, minimizing tissue trauma, and enhancing the overall safety and accuracy of the procedure.
Key Benefits for Patients:
* Enhanced Accuracy: Ensures implants are placed exactly where intended, leading to better biomechanical stability.
* Reduced Trauma: Minimizes the need for multiple penetrations or re-drilling, protecting surrounding tissues.
* Faster Recovery: More precise surgery often translates to less post-operative pain and a quicker return to function.
* Improved Long-Term Outcomes: Accurate fixation reduces the risk of complications like malunion or nonunion, potentially preventing future revision surgeries.
2. Deep-dive into Technical Specifications / Mechanisms
The effectiveness of the Wissinger Rod lies in its thoughtful design and the advanced materials used in its construction.
2.1 Design and Materials
Wissinger Rods are engineered for both strength and flexibility, allowing them to navigate complex anatomical structures while providing a stable guide.
-
Design Characteristics:
- Slender Profile: Typically ranges in diameter from 1.0 mm to 3.0 mm, allowing it to fit over standard guide wires (e.g., 0.8 mm to 2.0 mm).
- Varying Lengths: Available in multiple lengths (e.g., 150 mm to 300 mm or more) to accommodate different surgical sites and bone depths.
- Distal Tip: Often features a slightly tapered or rounded tip to facilitate smooth advancement over a guide wire and prevent tissue damage. Some designs may have a subtle thread or textured surface at the very end to enhance grip on the initial guide wire.
- Proximal End: Designed for secure gripping by the surgeon, often with a knurled or flattened section for better tactile control.
- Cannulation: Crucially, the rod is cannulated (hollow) along its entire length, allowing it to be threaded over a previously placed guide wire.
-
Materials:
- Medical-Grade Stainless Steel: Primarily constructed from high-quality, biocompatible stainless steel (e.g., 316L or 17-4 PH stainless steel). This material offers:
- Exceptional Strength: Resists bending or breaking under surgical forces.
- Corrosion Resistance: Withstands repeated sterilization cycles and exposure to bodily fluids without degradation.
- Biocompatibility: Safe for temporary contact with human tissues.
- Titanium Alloys: Less common for standard Wissinger rods, but specialized versions might incorporate titanium for specific applications where MRI compatibility or enhanced strength-to-weight ratio is critical.
- Medical-Grade Stainless Steel: Primarily constructed from high-quality, biocompatible stainless steel (e.g., 316L or 17-4 PH stainless steel). This material offers:
2.2 Mechanism of Action (Biomechanics)
The biomechanical advantage of the Wissinger Rod is its ability to maintain the exact three-dimensional spatial orientation established by an initial guide wire.
- Initial Guide Wire Placement: A thin K-wire (Kirschner wire) or guide wire is precisely placed into the bone, often under fluoroscopic (X-ray) guidance, to establish the desired trajectory for a screw or implant. This is the most critical step, as it dictates the final position of the implant.
- Wissinger Rod Insertion: The cannulated Wissinger Rod is then threaded over the initially placed guide wire, acting as a sleeve. It is advanced until its tip firmly engages the bone, stabilizing the established path.
- Guide Wire Removal: Once the Wissinger Rod is securely in place, the original, smaller guide wire can be safely withdrawn. The Wissinger Rod now acts as the sole, stable conduit.
- Subsequent Instrument Advancement: A larger cannulated drill bit or the cannulated screw itself is then advanced over the Wissinger Rod. The rod ensures that the drill or screw follows the exact path previously defined by the initial guide wire.
- Rod Removal: After the larger instrument or implant is securely positioned, the Wissinger Rod is carefully removed, leaving the implant in its precise, intended location.
This "switching" mechanism prevents any deviation from the optimal path, which is vital for:
* Maintaining Reduction: In fracture fixation, it ensures that bone fragments remain perfectly aligned.
* Avoiding Malposition: Guarantees that screws or implants are placed in the strongest part of the bone, avoiding critical neurovascular structures.
* Optimizing Load Bearing: Correct implant placement ensures proper weight distribution and mechanical stability, crucial for healing and long-term function.
2.3 Maintenance and Sterilization Protocols
Given its critical role, strict protocols govern the maintenance and sterilization of Wissinger Rods to ensure patient safety and instrument longevity.
- Cleaning: Immediately after use, instruments are thoroughly cleaned to remove blood and tissue debris. Manual scrubbing, ultrasonic cleaning, and enzymatic detergents are often employed.
- Inspection: Each rod is meticulously inspected for any signs of bending, blunt tips, corrosion, or damage. Any compromised instrument is removed from service.
- Sterilization: Wissinger Rods are designed for repeated sterilization.
- Steam Sterilization (Autoclaving): This is the most common method, using high-pressure saturated steam at elevated temperatures (e.g., 121°C or 132°C) for specific durations.
- Ethylene Oxide (ETO) Sterilization: Used for heat-sensitive materials, though less common for stainless steel rods.
- Hydrogen Peroxide Gas Plasma: Another low-temperature sterilization method.
- Packaging: After sterilization, instruments are carefully packaged to maintain sterility until their next use.
3. Extensive Clinical Indications & Usage
The Wissinger Rod is an indispensable tool across a broad spectrum of orthopedic procedures, particularly those requiring precise cannulated techniques.
3.1 Primary Applications: Cannulated Screw Fixation
The most common application of the Wissinger Rod is in facilitating the placement of cannulated screws. These screws are hollow, allowing them to be threaded over a guide wire.
- Hip Fractures:
- Femoral Neck Fractures: Crucial for precise placement of cannulated screws to fix these challenging fractures, minimizing avascular necrosis risk.
- Intertrochanteric Fractures: Used in conjunction with sliding hip screws or intramedullary nails.
- Scaphoid Fractures: Small, often complex fractures in the wrist where precise screw placement is vital for healing and preventing nonunion.
- Ankle Fractures: Particularly malleolar fractures, where cannulated screws provide stable fixation.
- Foot Fractures: Metatarsal or calcaneal fractures requiring accurate screw placement.
- Hand Fractures: Phalangeal or metacarpal fractures where small, precise fixation is needed.
3.2 Other Key Clinical Applications
Beyond cannulated screw fixation, the Wissinger Rod extends its utility to various other intricate orthopedic surgeries.
- K-wire Exchange: Used to exchange a smaller diameter K-wire for a larger one, or for a cannulated drill bit, without losing the established path. This is common in pediatric orthopedics or complex trauma cases.
- Intramedullary Nailing: In some intramedullary nailing procedures, a Wissinger Rod can assist in guiding reamers or the nail itself, especially in challenging anatomical configurations or revision surgeries.
- Arthroscopic Procedures: Can be used to facilitate instrument exchange through arthroscopic portals, ensuring the portal is maintained and subsequent instruments enter the joint safely and accurately.
- Spinal Surgery: In certain spinal fusion techniques, particularly for pedicle screw placement or revision surgeries, a Wissinger Rod can help maintain the established trajectory for precise screw insertion, reducing the risk of neurological injury.
- Trauma Surgery: For complex fractures requiring multi-planar fixation, the Wissinger Rod ensures that multiple guide wires or screws are placed with maximal accuracy, enhancing construct stability.
3.3 Step-by-Step Usage (Simplified for Patients)
While the surgeon performs these steps with expert skill, understanding the process can be reassuring for patients.
- Initial Guide Wire Placement: Your surgeon will carefully insert a thin, flexible guide wire into your bone, using X-ray guidance (fluoroscopy) to ensure it's in the perfect position. This wire marks the exact path for your implant.
- Introducing the Wissinger Rod: The Wissinger Rod, which is hollow, is then gently slid over this initial guide wire. It acts like a sleeve, reinforcing and stabilizing the precise path.
- Removing the First Wire: Once the Wissinger Rod is securely in place, the original, thinner guide wire is carefully removed. The Wissinger Rod now holds the pathway open.
- Placing the Implant: A larger instrument, such as a special drill or the actual cannulated screw for your fracture, is then guided over the Wissinger Rod. This ensures it follows the exact, predetermined path.
- Final Removal: Once your implant is securely in its final position, the Wissinger Rod is smoothly withdrawn, leaving your bone perfectly fixed.
This meticulous process ensures that your implant is placed with the highest degree of accuracy, optimizing your healing and recovery.
4. Risks, Side Effects, or Contraindications
It is important to understand that the Wissinger Rod itself is a passive instrument, and any potential risks are generally associated with the surgical procedure or the surgeon's technique, rather than the rod itself.
4.1 Potential Risks (Indirectly Associated)
- Instrument Breakage (Extremely Rare): While made of strong materials, like any surgical instrument, extreme force or improper use could theoretically lead to bending or breakage. However, this is exceptionally rare with proper handling and instrument inspection.
- Infection: As with any invasive surgical instrument, there's an inherent risk of introducing infection if sterilization protocols are not strictly followed. This risk is minimized by rigorous hospital sterilization standards.
- Loss of Guide Wire Path: If the Wissinger Rod is not adequately secured or if excessive force is applied during subsequent steps, there's a minimal risk of losing the initially established guide wire path. This is mitigated by the surgeon's skill, fluoroscopic guidance, and careful technique.
- Soft Tissue / Neurovascular Injury: Any surgical instrument, if manipulated carelessly, could potentially cause damage to surrounding soft tissues, nerves, or blood vessels. The Wissinger Rod, by maintaining a precise path, actually helps reduce this risk compared to freehand techniques.
4.2 Side Effects
The Wissinger Rod is a temporary guiding instrument and is entirely removed from the body before the surgery concludes. Therefore, there are no direct "side effects" from the rod itself on the patient. Any post-operative symptoms or complications are related to the underlying surgical procedure, the patient's overall health, and the healing process.
4.3 Contraindications
There are no specific contraindications for the use of a Wissinger Rod itself. Its use is dictated by the surgical technique chosen by the surgeon. If a cannulated technique (which requires a guide wire and subsequent switching) is deemed inappropriate for a particular fracture or anatomical situation, then the Wissinger Rod would simply not be utilized. The decision to use it is always based on the surgical plan and the specific needs of the patient's condition.
5. Expert Tips from Dr. Mohammed Hutaif
"As an orthopedic surgeon, I view the Wissinger Rod, or 'Switching Stick,' as an indispensable ally in achieving surgical excellence. It embodies the principle that precision is not just a goal, but a prerequisite for optimal patient outcomes.
Here are my key insights regarding its use:
- Fluoroscopic Guidance is Non-Negotiable: Every step involving the guide wire and subsequently the Wissinger Rod must be performed under real-time fluoroscopic (X-ray) imaging. This visual confirmation is crucial to ensure perfect alignment and prevent any deviation from the desired trajectory.
- Select the Right Size: Choosing the appropriate diameter and length of the Wissinger Rod is vital. It must fit snugly over the initial guide wire while being long enough to provide stable guidance throughout the subsequent drilling and screw insertion.
- Gentle but Firm Manipulation: While the rod provides stability, its insertion and removal require a delicate yet firm touch. Excessive force can bend the rod or damage the bone/tissue. The goal is smooth, controlled movement.
- Maintain Absolute Sterility: As with all surgical instruments, strict adherence to sterilization protocols is paramount. Any breach can lead to devastating surgical site infections. Our team meticulously follows all guidelines to ensure patient safety.
- Understanding its Biomechanics: The true value of the Wissinger Rod lies in its ability to maintain the exact biomechanical axis established by the initial guide wire. This translates directly to more stable fracture fixation, reduced risk of implant failure, and ultimately, a more predictable and successful recovery for the patient.
- Contribution to Patient Outcome: For patients, this means less invasive surgery, shorter operative times, and a higher likelihood of achieving optimal anatomical reduction and stable fixation. This directly translates to less pain, faster rehabilitation, and a quicker return to their daily activities. It's a small instrument with a monumental impact on recovery and long-term functional success."
6. Massive FAQ Section
Q1: What exactly is a Wissinger Rod (Switching Stick)?
A1: The Wissinger Rod, also known as a Switching Stick, is a thin, hollow surgical instrument used in orthopedic surgery. Its primary purpose is to act as a stable guide, allowing surgeons to exchange a small initial guide wire for a larger drill bit or a cannulated screw, all while maintaining the exact pathway already established in the bone.
Q2: Why is it called a "switching stick"?
A2: It's called a "switching stick" because it allows the surgeon to "switch" out different instruments (like a small guide wire for a larger drill or screw) without losing the precise path that was initially created in the bone. It holds the path open and stable during this exchange.
Q3: What types of surgeries is the Wissinger Rod used in?
A3: It's most commonly used in surgeries involving cannulated screws, such as fixing fractures of the hip (femoral neck), wrist (scaphoid), ankle, and foot. It can also be used in some spinal surgeries, arthroscopic procedures, and for exchanging K-wires in complex trauma cases.
Q4: Is the Wissinger Rod left inside the body after surgery?
A4: No, absolutely not. The Wissinger Rod is a temporary guiding instrument. It is completely removed from the body once the permanent implant (like a screw or nail) has been accurately placed.
Q5: How does the Wissinger Rod make surgery safer and more accurate?
A5: By holding the precise path open, it eliminates the need for the surgeon to re-establish the trajectory when changing instruments. This reduces the risk of multiple attempts to drill, minimizes tissue damage, shortens surgical time, and ensures the implant is placed in the optimal position, leading to better stability and fewer complications.
Q6: What materials is the Wissinger Rod made from?
A6: Wissinger Rods are typically made from high-quality, medical-grade stainless steel. This material is chosen for its strength, resistance to corrosion, and biocompatibility, meaning it's safe for use within the human body.
Q7: How is the Wissinger Rod sterilized?
A7: Like all surgical instruments, Wissinger Rods undergo rigorous sterilization processes to prevent infection. The most common method is steam sterilization (autoclaving), which uses high-pressure steam at elevated temperatures to kill all microorganisms. They are meticulously cleaned and inspected before each sterilization cycle.
Q8: Does the use of a Wissinger Rod affect my recovery time?
A8: While the rod itself doesn't directly impact recovery, its use contributes to a more precise and potentially less invasive surgery. This can indirectly lead to less post-operative pain, reduced risk of complications, and a smoother, faster rehabilitation process, ultimately helping you return to your activities sooner.
Q9: Is the Wissinger Rod a new or experimental technology?
A9: No, the concept and use of guiding instruments like the Wissinger Rod have been standard practice in orthopedic surgery for many decades. It's a well-established and proven tool that has evolved with advancements in materials and surgical techniques.
Q10: Can the Wissinger Rod break during surgery?
A10: While extremely rare due to the robust materials and design, any surgical instrument can theoretically be damaged if subjected to excessive force or improper use. However, surgeons are highly trained in the careful handling of these instruments, and they are rigorously inspected before each procedure to ensure their integrity.
Q11: How does my surgeon ensure the safe and effective use of the Wissinger Rod?
A11: Your surgeon ensures safe and effective use through several critical steps:
* Expert Training: Extensive training and experience in orthopedic surgical techniques.
* Fluoroscopic Guidance: Real-time X-ray imaging (fluoroscopy) throughout the procedure to visualize the rod's placement.
* Careful Instrument Selection: Choosing the correct size and type of rod for the specific procedure.
* Adherence to Protocols: Strict adherence to sterile techniques and hospital safety protocols.
* Teamwork: Working with an experienced surgical team who are also adept at instrument handling and surgical assistance.
Q12: How does this tool contribute to better long-term outcomes for patients?
A12: By ensuring the precise placement of implants, the Wissinger Rod helps achieve optimal biomechanical stability of the bone fixation. This reduces the risk of implant loosening, malunion (bones healing in an incorrect position), or nonunion (bones failing to heal). Ultimately, this leads to a stronger, more functional outcome and minimizes the likelihood of needing revision surgery in the future.
Disclaimer: This information is for educational purposes only and is not medical advice. Always consult with a qualified healthcare professional for any health concerns or before making any decisions related to your health or treatment.