INTRODUCTION AND BIOMECHANICAL PRINCIPLES
Antegrade femoral nailing remains the undisputed gold standard for the operative management of diaphyseal femoral fractures. By acting as a load-sharing device, the intramedullary nail provides relative stability, promoting robust secondary bone healing via callus formation. The procedure demands a profound understanding of femoral anatomy, meticulous preoperative templating, and precise intraoperative execution to restore length, alignment, and rotation while minimizing iatrogenic soft-tissue trauma.
Preoperative templating is mandatory. Utilizing calibrated orthogonal radiographs of the uninjured contralateral femur, the surgeon must determine the anticipated nail diameter, length, and the optimal entry portal trajectory. The choice between a piriformis fossa entry and a greater trochanteric entry dictates the specific implant geometry required to prevent coronal plane malalignment (varus/valgus deformity).
PATIENT POSITIONING AND PREPARATION
The decision regarding patient positioning—supine versus lateral decubitus—should be based on the fracture pattern, concomitant injuries, patient body habitus, and surgeon preference. Both positions require a radiolucent flat-topped table or a dedicated fracture table.
The Supine Position
The supine position is universally favored, particularly in the polytraumatized patient. It affords the anesthesiologist unrestricted airway access and facilitates concurrent procedures by multidisciplinary teams. It is the position of choice for bilateral femoral fractures, distal third fractures, and cases involving contralateral acetabular or pelvic ring injuries.
To optimize the supine setup:
* Adduct the trunk and the affected extremity to clear the iliac crest for straight-line access to the proximal femur.
* Flex the affected hip 15 to 30 degrees to relax the deforming forces of the iliopsoas muscle.
* Apply longitudinal traction either via a skeletal traction pin (distal femur or proximal tibia) or a well-padded traction boot.
* Position a well-padded perineal post to provide counter-traction, ensuring the genitalia and pudendal nerves are meticulously protected.
* Place the uninjured extremity in a well-padded traction boot and position the legs in a "scissor configuration." This allows the C-arm image intensifier to swing freely for lateral projections without radiographic interference from the contralateral limb.
The Lateral Decubitus Position
The lateral decubitus position is highly advantageous for morbidly obese patients, as gravity assists in retracting the massive adiposity away from the proximal entry portal.
* Ensure the majority of the trunk weight is supported by the trochanteric rest on the unaffected hip.
* Place the fractured side in 15 to 30 degrees of hip flexion, while the normal side remains in neutral to slight extension.
* Verify that the image intensifier can visualize the entire femur in both anteroposterior (AP) and lateral projections from the hip to the knee before sterile draping.
Surgical Warning: Regardless of the position chosen, failure to obtain perfect orthogonal fluoroscopic views of the femoral neck and the distal femur prior to incision is a critical error that frequently leads to malreduction and rotational deformity.
ESTABLISHING ROTATIONAL ALIGNMENT
Restoring correct rotational alignment is one of the most challenging aspects of femoral nailing. Normal femoral anteversion ranges from 15 to 20 degrees.
- Contralateral Reference: Before prepping, take fluoroscopic views of the uninjured knee and hip at the exact same rotation of the C-arm. Save these images. The profile of the lesser trochanter on the AP view serves as a highly reliable proxy for rotation.
- True Lateral Technique: Rotate the foot and distal fragment of the injured femur to match the proximal fragment. Obtain a lateral view of the proximal femur where the femoral neck and shaft are parallel but offset by approximately 1 cm.
- Calculating Anteversion: The angle of the C-arm necessary to obtain this "true lateral" can be read directly off the machine. Factoring in the normal 15 to 20 degrees of anteversion allows the surgeon to determine the exact angle at which to position the foot. For instance, if the femoral neck and shaft are superimposed at a C-arm angle of 40 degrees from the horizontal, and assuming 20 degrees of anteversion, the foot must be externally rotated 20 degrees to perfectly match the proximal and distal fragments.
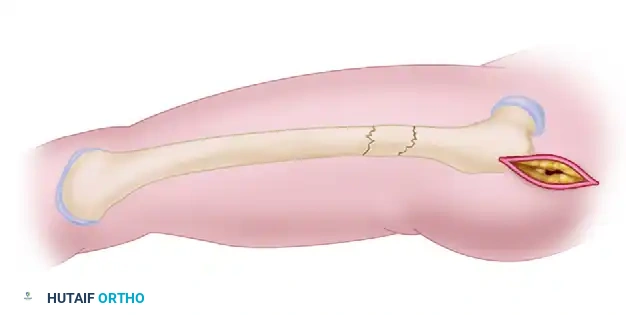
SURGICAL APPROACH AND PREPARATION OF THE FEMUR
Prepare and drape the patient in a standard sterile fashion, ensuring the exposed field extends from the iliac crest to the popliteal crease. Cover the C-arm with a sterile isolation drape.
Incision and Fascial Dissection
- Make a short oblique skin incision starting 2 to 3 cm proximal to the tip of the greater trochanter, extending proximally and medially. Obese patients will necessitate a proportionally longer incision to accommodate the soft tissue envelope.
- Incise the fascia of the gluteus maximus sharply in line with its fibers.
- Develop the subfascial plane bluntly to palpate the proximal femoral anatomy. Identify the piriformis fossa or the trochanteric starting portal, depending on the selected nail design.
Establishing the Entry Portal
Advance a threaded-tip guidewire to the chosen entry point. If utilizing a trochanteric antegrade technique, the entry point must be precisely on the medial slope of the greater trochanter to avoid iatrogenic varus malalignment.
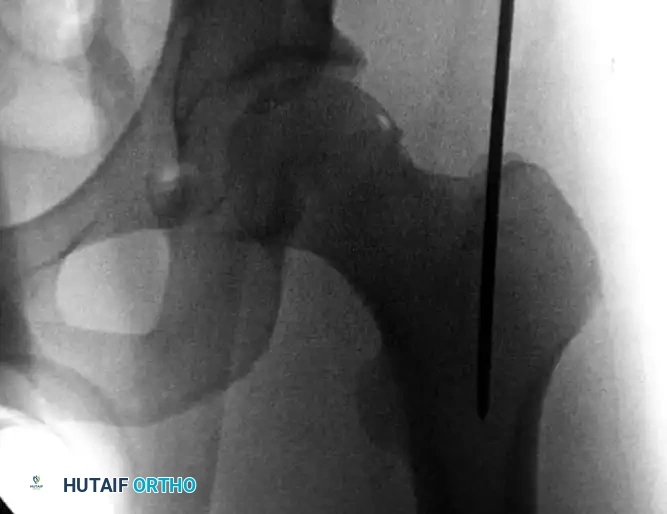
Trochanteric starting portal for antegrade intramedullary nailing procedures of the femur. Note the trajectory aligning with the anatomical axis of the medullary canal.
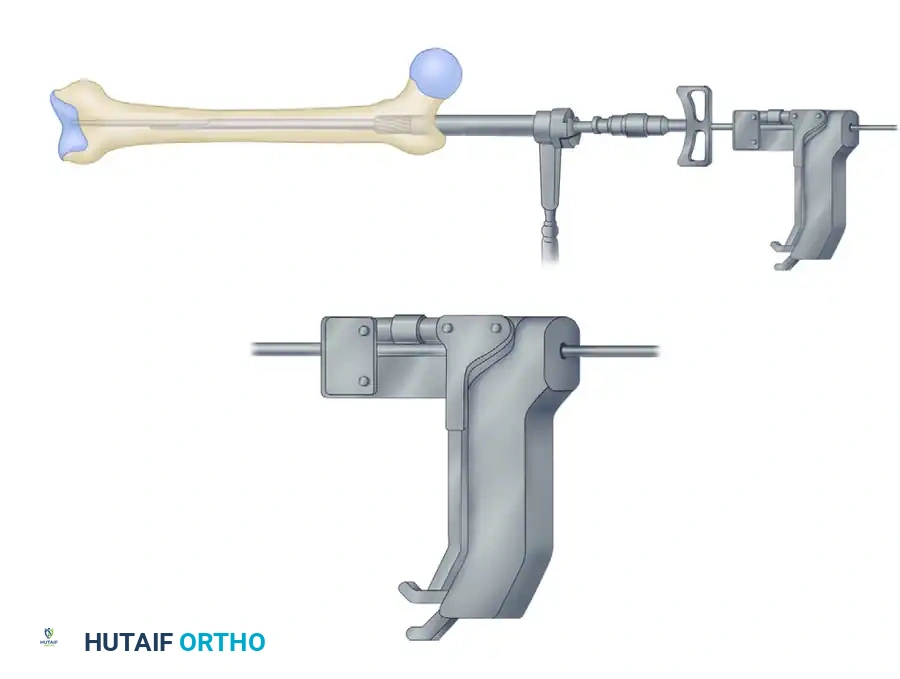
Image the trochanteric region in both AP and lateral planes. The guidewire trajectory must permit central placement into the medullary canal distally. If the pin is slightly eccentric, a soft-tissue guide with a multiple-pin "honeycomb" insert can be utilized. This allows the surgeon to place a second, perfectly positioned pin parallel to the first without losing the initial reference point. Once perfect positioning is confirmed, advance the guidewire distal to the lesser trochanter.
PROXIMAL ENTRY PORTAL PREPARATION
Remove the honeycomb insert, leaving the primary guidewire and the entry portal tool in place. To protect the delicate abductor musculature and its insertion, always utilize a soft-tissue protection sleeve.
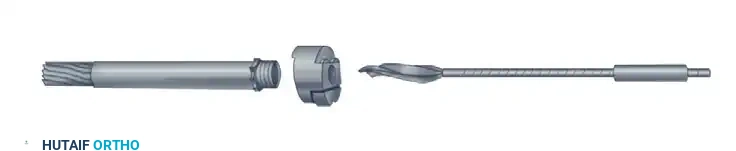
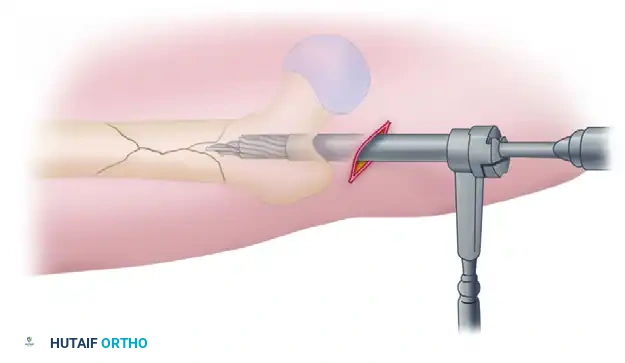
Assemble the entry reamer (typically a 14-mm channel reamer) and pass it over the guidewire through the protection sleeve.
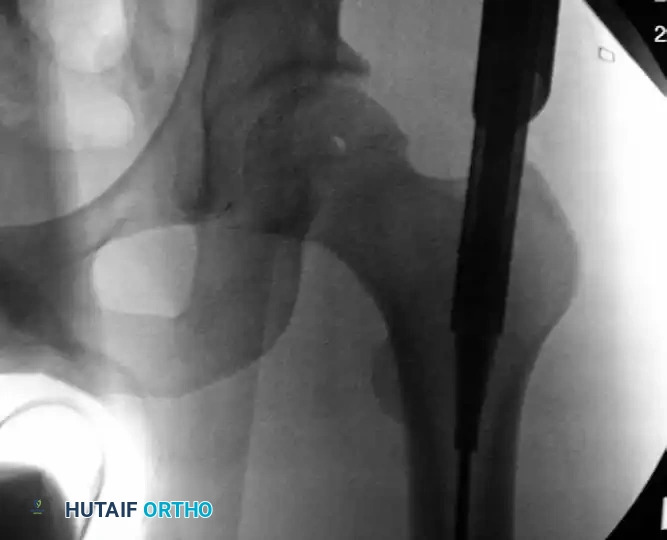
Insertion of the channel reamer into the proximal femoral metaphysis to create a robust starting portal for antegrade nailing.
Ream the proximal femur until the assembly bottoms out on the entry portal tool. Continuously verify the trajectory with AP and lateral fluoroscopy to prevent posterior cortical blowout. Once the proximal channel is established, remove the entry reamer and guidewire, leaving the entry portal tube in place.
Clinical Pearl: For simple diaphyseal fractures, a standard cannulated entry reamer may suffice. However, for subtrochanteric fractures, the channel reamer is invaluable for externally controlling the characteristic flexion, abduction, and external rotation deformity of the proximal fragment.
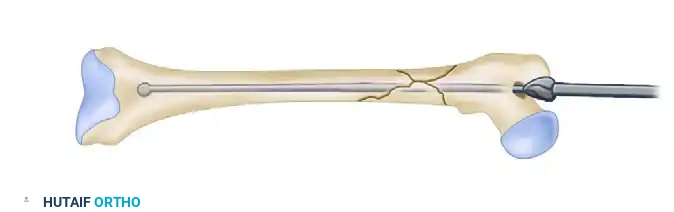
FRACTURE REDUCTION AND GUIDEWIRE INSERTION
Achieving concentric reduction prior to passing the ball-tipped guidewire is paramount.
- Insert the intramedullary reduction tool (reducer and T-handle) through the channel reamer connector into the proximal fragment.
- Advance the tool to the fracture site. Use the robust T-handle to manipulate the proximal fragment, overcoming the deforming muscular forces.
Initial insertion of the reducer into the proximal medullary canal.
The reducer is advanced to the fracture site to manipulate the proximal fragment and align it with the distal segment.
- Engage the distal fragment with the tip of the reduction tool. If closed intramedullary reduction proves impossible, do not hesitate to use percutaneous unicortical "joysticks" (Schanz pins) or external reduction clamps to facilitate alignment.
Once the distal fragment is captured, the 3.0-mm ball-tipped guidewire is introduced through the cannulated reducer.
- Once the distal fragment is engaged, advance the 3.0-mm ball-tipped guidewire across the fracture site. A vice grip or dedicated wire gripper is highly recommended to maintain tactile feedback and rotational control of the wire.
Advancing the ball-tipped guidewire across the reduced fracture site.
The guidewire is seated deeply into the distal femur, ensuring it remains central within the canal.
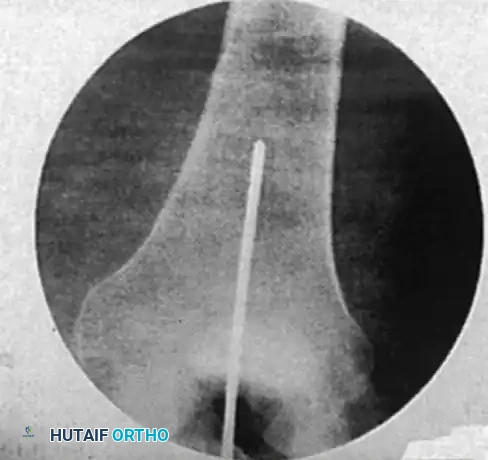
Confirm the reduction and the guidewire position with multiplanar fluoroscopy. The ultimate goal is concentric, central placement of the wire in the distal femur, terminating exactly at the level of the epiphyseal scar (or the midportion of the patella on an AP view).
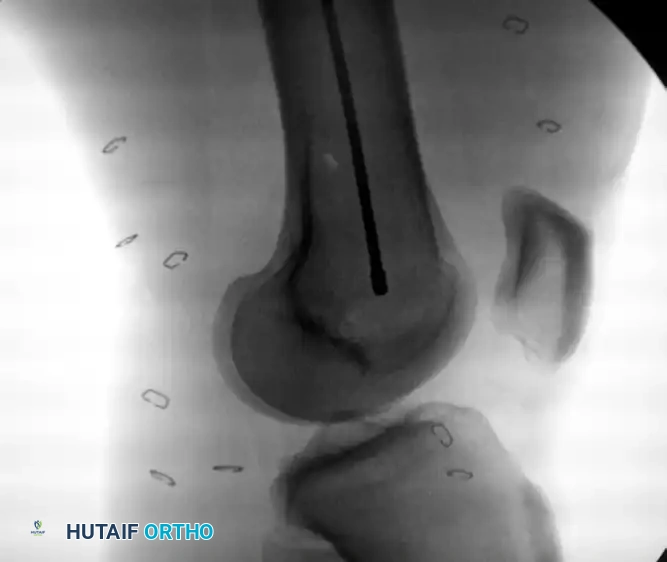
Intramedullary bead-tipped guidewire inserted concentrically to the distal femur at the level of the distal femoral physeal scar.
CANAL PREPARATION AND REAMING
Remove the reduction tool, leaving the ball-tipped guidewire securely in place. Sequential reaming of the medullary canal is now performed to prepare the bed for the implant, increase the surface area for endosteal healing, and generate autologous bone graft at the fracture site.
Sequential reaming of the femoral canal over the 3.2-mm guide rod.
- Ream sequentially at 0.5-mm intervals.
- Advance the reamer slowly with steady pressure to minimize the elevation of intramedullary pressure and reduce the risk of fat embolization.
- Continue reaming until moderate cortical "chatter" is felt at the isthmus, or until the canal is reamed 1.0 to 1.5 mm larger than the selected nail diameter.
- Crucial Step: Always use a plastic obturator or a dedicated wire-pusher during the withdrawal of the reamer. This prevents the inadvertent extraction of the ball-tipped guidewire. If the wire is accidentally withdrawn, it must be repositioned and confirmed fluoroscopically before any further reaming occurs.
DETERMINING NAIL LENGTH
Accurate nail length determination prevents knee pain from distal impingement or trochanteric pain from proximal prominence.
- Guidewire Overlap Method: With the distal end of the primary guide rod at the epiphyseal scar, take a second guide rod of identical length and overlap it on the portion of the primary rod extending from the proximal entry portal. The difference in length between the two wires equals the required nail length.
- Cannulated Depth Gauge Method (Preferred): Slide the manufacturer's cannulated depth gauge over the guidewire down to the level of the proximal femoral insertion cortex. Read the measurement directly off the calibrated device. Verify this reading with an AP fluoroscopic image to ensure the gauge is flush with the bone.
NAIL INSERTION
- Attach the selected nail to the drill guide assembly.
- Remove the entry portal tube and channel reamer, ensuring the ball-tipped guidewire remains undisturbed.
- Introduce the nail into the femur over the guidewire. Advance it manually with twisting motions.
- Gentle impaction with a mallet may be required as the nail passes the isthmus.
- Surgical Warning: If significant resistance is encountered, do not force the nail. Forcible impaction can cause iatrogenic comminution or catastrophic bursting of the femoral shaft. Remove the nail, re-insert the guidewire, and ream the canal an additional 0.5 mm.
- Seat the nail completely. The proximal aspect should be flush with or slightly countersunk beneath the greater trochanter to prevent postoperative abductor irritation. Confirm final seating with multiplanar fluoroscopy.
PROXIMAL INTERLOCKING
Proximal interlocking provides rotational stability and prevents axial telescoping. Most modern systems utilize 5-mm locking screws. Standard static locking is typically directed obliquely from the greater trochanter toward the lesser trochanter.
- Place the gold drill sleeve into the proximal targeting guide attached to the insertion handle. Dimple the skin to mark the incision site.
- Make a stab incision and spread the soft tissues bluntly down to the lateral cortex to protect the axillary nerve branches.
- Insert the gold drill sleeve with the silver inner liner. Use the calibrated pilot drill to penetrate the near cortex and advance to, but not through, the far (medial) cortex.
- Measure the required screw length directly off the calibrated drill bit at the top of the silver sleeve.
- Penetrate the far cortex. Remove the drill and the silver sleeve.
- Insert the appropriately sized locking screw manually until the head is fully seated against the lateral cortex.
- Confirm screw placement and length with an AP fluoroscopic image. Ensure the screw engages the medial cortex without excessive protrusion.
DISTAL INTERLOCKING: THE FREEHAND TECHNIQUE
Distal interlocking is performed via a freehand technique under fluoroscopic guidance. This requires patience, precise C-arm positioning, and an understanding of radiographic parallax.
- Obtaining Perfect Circles: Position the C-arm for a lateral view of the distal femur. Adjust the C-arm trajectory until the distal interlocking holes of the nail appear as perfect, crisp circles. If the holes appear oblong, elliptical, or exhibit a "double density" crescent, the C-arm is not perfectly orthogonal to the nail. Adjust the tilt and rotation until perfect circles are achieved.
- Incision: Center the tip of a scalpel or a radiopaque ring forceps over the chosen interlocking hole on the lateral aspect of the thigh. Make a longitudinal stab incision through the skin, subcutaneous tissue, and the dense iliotibial band.
- Awl/Drill Positioning: Place a trocar-tipped drill bit or a radiolucent awl into the incision, resting on the lateral cortex. Angle the handle approximately 45 degrees to the fluoroscopic beam. This angulation keeps the surgeon's hands out of the direct radiation field while allowing clear visualization of the tip.

Freehand technique: The awl is placed over the proximal screw hole with its handle angled 45 degrees to avoid radiation exposure to the hands.

The awl is meticulously adjusted under continuous image intensification until the point is perfectly centered within the screw hole.
- Drilling: Once the tip is perfectly centered in the hole, swing the drill perpendicular to the axis of the bone, bringing it parallel and directly in line with the fluoroscopic beam.

The awl is swung perpendicular to the axis of the bone, aligning perfectly with the trajectory of the interlocking hole.
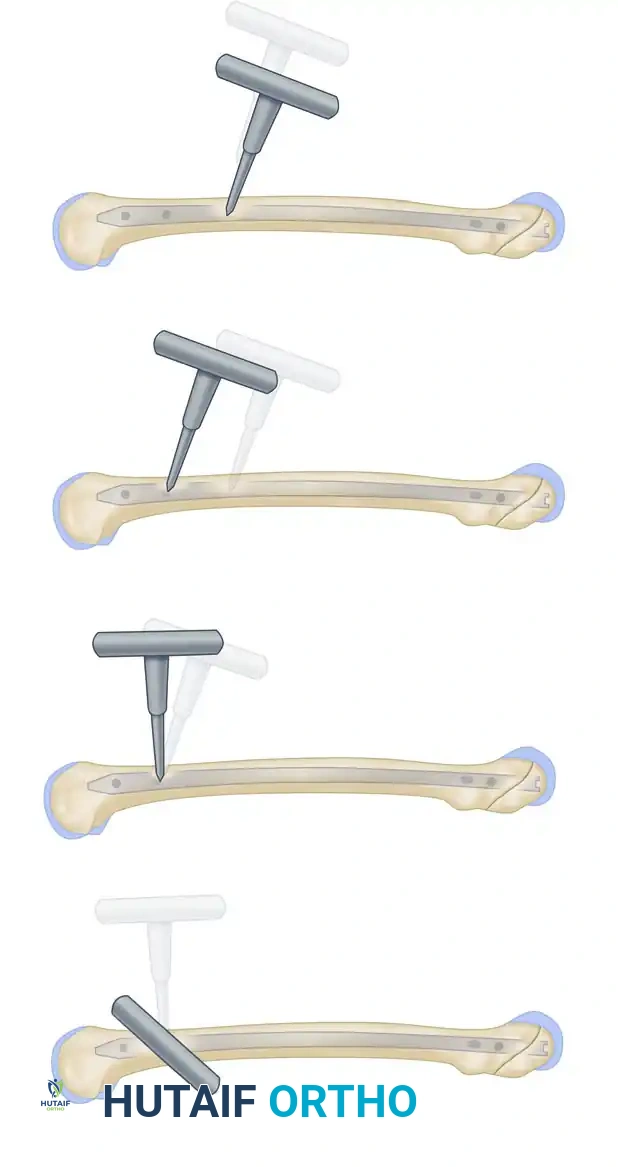
The awl is driven through the lateral cortex and into the nail.
- Maintain constant, firm pressure to prevent the drill tip from skiving off the hard diaphyseal bone. Penetrate the lateral cortex.
- Remove the drill bit from the power driver. Take a lateral fluoroscopic image to confirm that the drill bit is passing directly through the interlocking hole of the nail.
- Reattach the driver and drill through the medial cortex.
- Measurement and Insertion: Use a calibrated drill bit or a standard depth gauge to determine the required screw length. Insert the interlocking screw by hand, confirming satisfactory cortical purchase.
- Repeat the process for the second distal interlocking screw to ensure maximum rotational control.
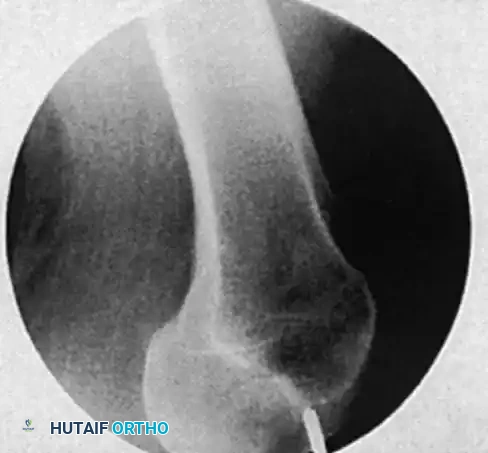
Fluoroscopic confirmation of distal interlocking screw placement, ensuring adequate length and bicortical purchase.
Final AP radiograph demonstrating excellent alignment, concentric reduction, and appropriate hardware positioning.
Final AP and lateral imaging of the entire femur must be obtained to confirm fracture reduction, hardware placement, and the absence of iatrogenic fractures.
POSTOPERATIVE PROTOCOL
Postoperative management is dictated by the fracture pattern and the stability of the fixation.
* Mobilization: Early mobilization is highly encouraged. Patients should be out of bed and working with physical therapy on postoperative day one.
* Weight-Bearing: For axially stable fracture patterns (e.g., transverse or short oblique midshaft fractures), immediate weight-bearing as tolerated is generally permissible. For highly comminuted, length-unstable fractures, partial weight-bearing (toe-touch or 20 kg) may be advised for the first 4 to 6 weeks until early callus formation is visible radiographically.
* Thromboprophylaxis: Standard deep vein thrombosis (DVT) prophylaxis should be instituted according to institutional trauma guidelines.
A NOTE ON RETROGRADE NAILING OF THE FEMUR
While antegrade nailing is the standard, retrograde femoral nailing is a highly valuable alternative that may be specifically beneficial in the following clinical scenarios:
1. Morbidly obese patients, in whom obtaining an antegrade entry portal is technically prohibitive due to soft tissue interposition.
2. Patients with ipsilateral femoral neck and shaft fractures, allowing the use of dedicated, separate fixation devices for the neck (e.g., sliding hip screw or cannulated screws) and the shaft without hardware interference.
3. Patients with ipsilateral tibial shaft fractures (the "floating knee"), allowing a single-incision, single-setup approach for both retrograde femoral and antegrade tibial nailing.
===
